


原文出处:http://blog.csdn.net/chentravelling/article/details/59540828
0.前言
将基于低版本OpenCV(比如2.3.1)的程序,在vs2015+opencv3.0的环境下编译会报错:
“未声明的标识符:SiftFeatureDetector ”
“未声明的标识符BruteForceMatcher”
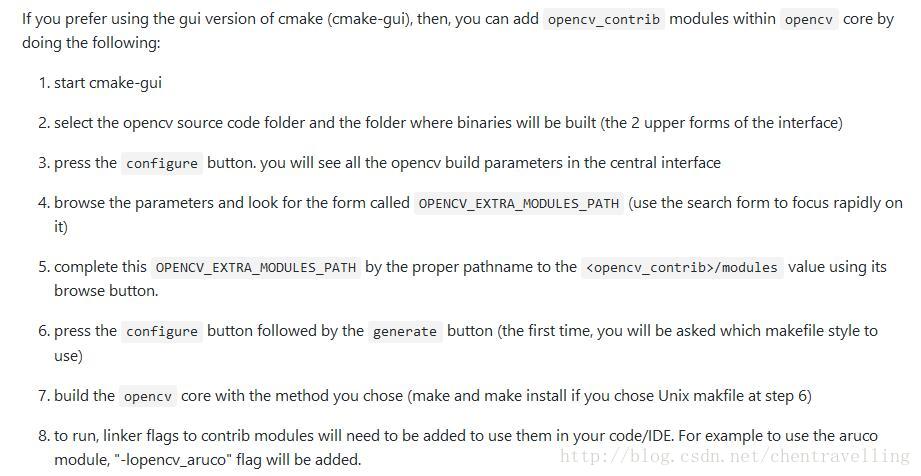
查阅才知,sift、surf等等已经被移到opencv_contrib模块,如果需要在高版本opencv中使用到opencv_contrib模块,则需要自己进行编译。其编译和配置流程,在github.com:opencv/opencv_contrib的README里写了:
那么现在开始自行编译和配置吧。根据本文内容,成功率应该是99.99%,中途可能会遇到很多问题,我也会再总结一篇。
通过不懈努力,最终成果如下:

一.准备:系统环境和工具
1)系统:win 10 64位
2)opencv:3.0.0
3)opencv_contrib:3.0.0
4)visual studio:2015
5)CMake:3.8.0
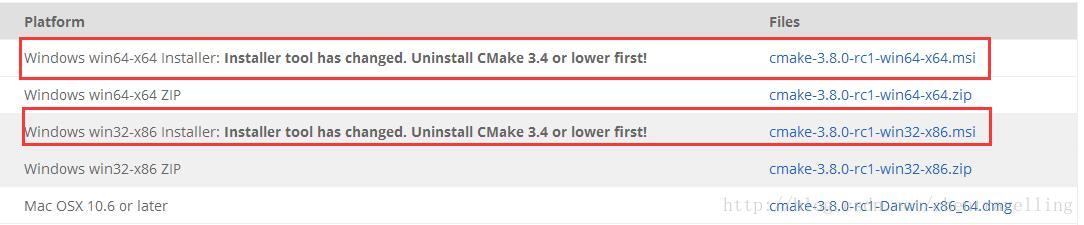
1.安装CMake3.8.0
根据使用的操作系统选择相应的版本进行下载和安装即可(点击下载):
2.下载opencv3.0.0
3.安装opencv3.0.0
将opencv安装到指定目录,比如:H:\opencv
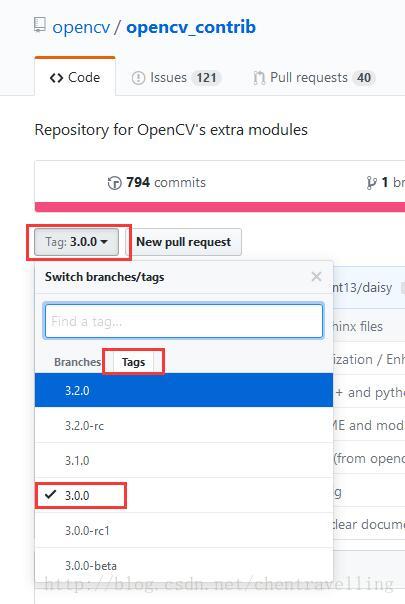
4.下载opencv_contrib3.0.0
附加模块opencv_contrib最好下载与opencv为同一版本的。
5.解压opencv_contrib 3.0.0
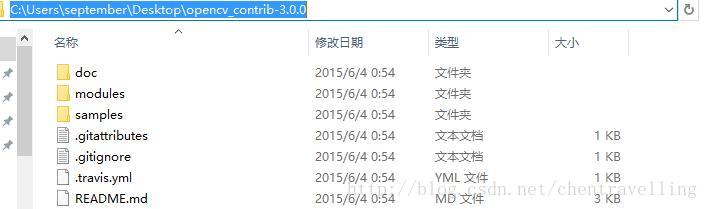
将下载好的附加模块 opencv_contrib-3.0.0.zip 解压到指定位置,比如:C:\Users\september\Desktop\opencv_contrib-3.0.0
解压后,opencv_contrib-3.0.0的结构目录如下:
二.编译
1.打开cmake
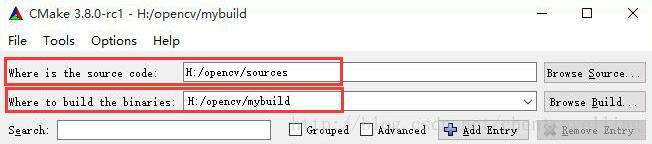
2.输入opencv源文件路径
在where is the source code输入opencv地址/sources地址, 比如:H:/opencv/sources
3.输入保存编译结果的路径
在where to build the libraries输入保存编译结果的地址, 比如:H:/opencv/mybuild
比如下图:
4.第一次编译
(1)点击configure,选择本机的编译器,最后四位数字才代表vs的版本,比如图中的2015,代表的是visual studio 2015。
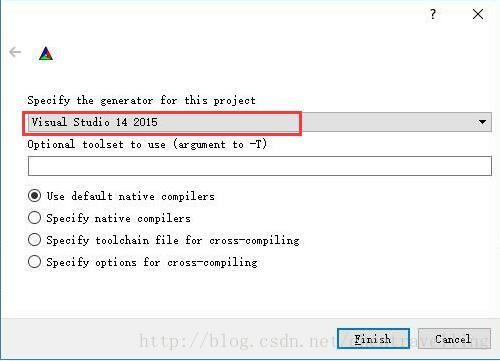
(2)点击finish,开始第一次编译。
如果编译器的版本选错,第一次编译时会出错:
no cmake_c_compiler could be found.
no cmake_cxx_compiler could be found.
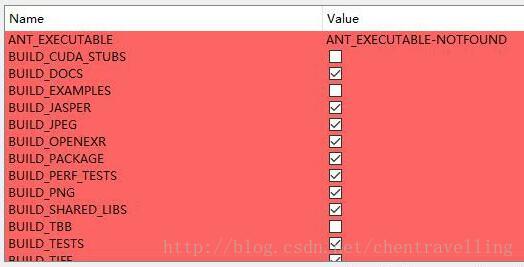
第一次编译完成后会显示编译opencv所需要的参数,如图:
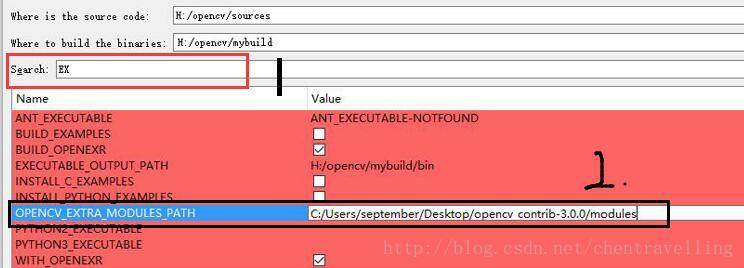
5.第二次编译
(1)在参数列表中,将Name为OPENCV_EXTRA_MODULES_PATH的Value设置为opencv_contrib-3.0.0的路径/modules,例如:C:/Users/september/Desktop/opencv_contrib-3.0.0/modules
可以在search栏中搜索OPENCV_EXTRA_MODULES_PATH变量,如下图。
(2)点击configure,直到configure done。
重点:configure done后,一定要检查一下参数列表,如果参数列表还有红色标记的条目,就再尝试几次configure,直到所有条目都是白色为止。
可能错误1:unknown cmake command "ocv_define_module"之类的,即存在未知的命令。
原因:可能是opencv版本和opencv_contrib版本不一致,换成一致的就行(本人遇到这个问题的时候,是这样解决的)

可能错误2:在ICV: Downloading ippicv_windows_20141027.zip...时报错
    CMake Error at 3rdparty/ippicv/downloader.cmake:97 (message):
    Call Stack (most recent call first):
    3rdparty/ippicv/downloader.cmake:108 (_icv_downloader)cmake/OpenCVFindIPP.cmake:212 (include)cmake/OpenCVFindLibsPerf.cmake:12 (include)
    CMakeLists.txt:454 (include)
    解决:手动下载ippicv_windows_20141027.zip,保存在opencv/sources/3rdparty/ippicv/downloads/windows-b59f865d1ba16e8c84124e19d78eec57
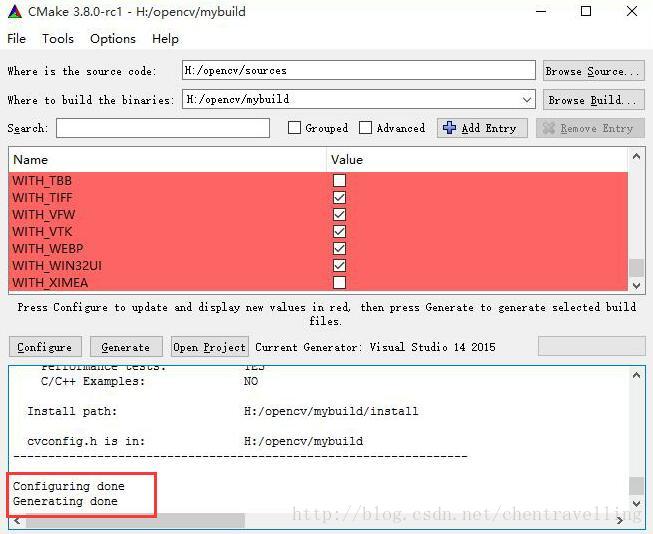
(3)点击generate,直到generate done
generate done后,会在where to build the binaries中设置的目录中生成编译结果。
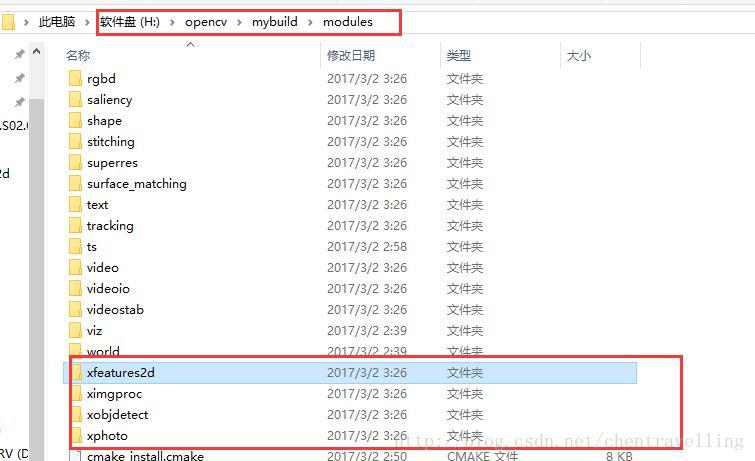
(4)【该步骤是个人建议】检查一下附加模版是否成功编译并加入到opencv中。如果附加模块opencv_contrib并未成功编译到opencv中,那后面再忙活都是白干。因为后面的步骤都比较费时,而且最终到了使用SIFT的时候才会发现附加模块增加失败,而且难以锁定原因,必须返回来逐步检查。所以个人建议不要跳过这一步,很简单。
如下图,进入where to build the binaries中设置的目录,然后进入modules,查看一下是否有xfeatures2d这类的文件。这类文件是属于附加模版opencv_contrib的,如果没有,请检查一下CMake中参数列表里,OPENCV_EXTRA_MODULES_PATH的Value是否为opencv_contrib-3.0.0的路径/modules,如果不是,请重新设置OPENCV_EXTRA_MODULES_PATH的Value为opencv_contrib-3.0.0的路径/modules,然后重新configure、generate。如果附加模块opencv_contrib并未成功编译到opencv中,那后面就够忙活的了,后面更费时,而且最终会配置失败,还难以想到
三.生成库文件
1.打开OpenCV.sln
方式1:在CMake界面点击open project
方式2:进入where to build the binaries中设置的路径下找到OpenCV.sln,并点击即可,此时本机的vs会打开OpenCV项目方案。
2.生成.dll和.lib文件
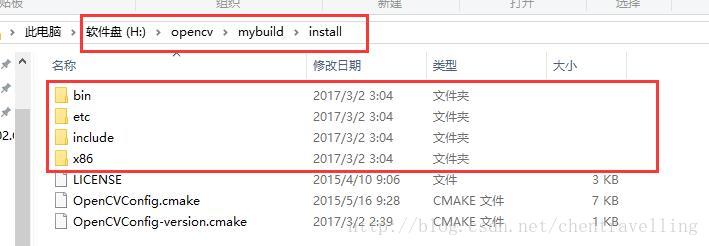
OpenCV.sln项目加载完后(项目个数应该在130~140左右),右键点击CMakeTargets,然后选择生成。这步完成后,在where to build the binaries中设置的路径下会多一个install文件,其中就是我们需要的配置文件了。
四.配置
接下来的配置,就和以往配置opencv的流程一样,只是现在是使用自己编译的包含了附加模块的opencv。
1.系统环境变量
在计算机-环境变量-path中增加:where to build the binaries中设置的路径\install\x86\vc14\bin

2.配置新建的工程
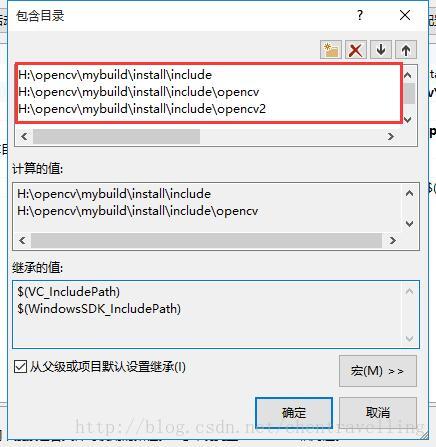
(1)VC++目录-包含目录:
- 1
- 2
- 3
- 1
- 2
- 3
如下图:
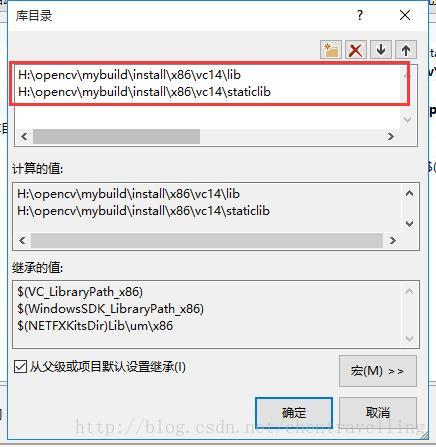
(2)VC++目录-库目录:
- 1
- 2
- 1
- 2
如下图:
(3)链接器-输入-附加依赖项:
可能因为不同的人编译时添加的附加模块不一样而造成最终的.lib不一样,所以附加依赖项里添加的.lib文件都需要出现在:< where to build the binaries中设置的路径>\install\x86\vc14\lib中,否则在编译程序的时候会出现XXX.lib加载失败、丢失、找不到之类的错误,因为这个.lib根本不存在,但是可能被添加在附加依赖项里了。比如我的:
opencv_bgsegm300d.lib
opencv_calib3d300d.lib
opencv_ccalib300d.lib
opencv_core300d.lib
opencv_datasets300d.lib
opencv_face300d.lib
opencv_features2d300d.lib
opencv_flann300d.lib
opencv_hal300d.lib
opencv_highgui300d.lib
opencv_imgcodecs300d.lib
opencv_imgproc300d.lib
opencv_line_descriptor300d.lib
opencv_ml300d.lib
opencv_objdetect300d.lib
opencv_optflow300d.lib
opencv_photo300d.lib
opencv_reg300d.lib
opencv_rgbd300d.lib
opencv_saliency300d.lib
opencv_shape300d.lib
opencv_stitching300d.lib
opencv_superres300d.lib
opencv_surface_matching300d.lib
opencv_text300d.lib
opencv_tracking300d.lib
opencv_ts300d.lib
opencv_video300d.lib
opencv_videoio300d.lib
opencv_videostab300d.lib
opencv_xfeatures2d300d.lib
opencv_ximgproc300d.lib
opencv_xobjdetect300d.lib
opencv_xphoto300d.lib
五.测试
前面的四大部分完成了opencv和opencv_contrib的编译和配置,也完成了项目的配置,现在就是检验的时候了。
1.添加源码
在项目源文件中新建main.cpp:
- 1
- 2
- 3
- 4
- 5
- 6
- 7
- 8
- 9
- 10
- 11
- 12
- 13
- 14
- 15
- 16
- 17
- 18
- 19
- 20
- 21
- 22
- 23
- 24
- 25
- 26
- 27
- 28
- 29
- 30
- 31
- 32
- 33
- 34
- 35
- 36
- 37
- 38
- 39
- 40
- 41
- 42
- 43
- 44
- 45
- 46
- 47
- 48
- 49
- 50
- 51
- 52
- 53
- 54
- 55
- 56
- 57
- 58
- 59
- 60
- 61
- 62
- 63
- 64
- 65
- 66
- 67
- 68
- 69
- 70
- 71
- 72
- 73
- 74
- 75
- 76
- 77
- 78
- 79
- 80
- 81
- 82
- 83
- 84
- 85
- 86
- 87
- 88
- 89
- 90
- 91
- 92
- 93
- 94
- 95
- 96
- 97
- 98
- 99
- 100
- 101
- 102
- 103
- 104
- 105
- 106
- 107
- 108
- 109
- 110
- 111
2.运行
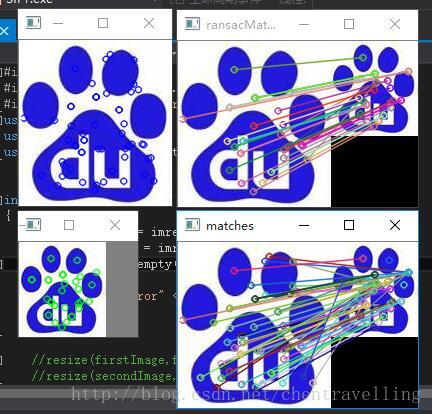
到此,windows 10 + vs2015+ opencv3.0.0 的环境下,使用opencv_contrib附加模块就完美解决了,SIFT、SURF也能正常使用了。整个编译、配置过程,会遇到各种各样的问题,总之,坚持不懈吧~谁让opencv不是咱自己写的呢~


 1万+
1万+

 被折叠的 条评论
为什么被折叠?
被折叠的 条评论
为什么被折叠?
 到【灌水乐园】发言


