


系列文章目录
QGraphicsItem图元的简单使用(一)
QGraphicsItem图元拖动绘制(二)
前言
接上一章,图元绘制出来了,但有时候需要对图元进行缩放或旋转处理,这章先讲解如何调用图元自带函数来对图元进行缩放、旋转等操作;
一、缩放和旋转
先讲解下如何使用图元自带的缩放和旋转函数,后面自己派生QGraphicsItem时就可以通过鼠标拖动选中图元来实现缩放和旋转了;
简单处理,通过重写场景类的鼠标滑轮事件来实现,具体代码如下:
void GraphicsScene::wheelEvent(QGraphicsSceneWheelEvent *event)
{
    // 获取当前选中的图元
    QList<QGraphicsItem *> listItem = this->selectedItems();
    foreach (QGraphicsItem *item, listItem)
    {
        // 返回转轮旋转的距离,以八分之一度(1/8秒)为单位。正值表示滚轮向前旋转,远离用户;负值表示滚轮向用户方向向后旋转
        int iDelta = event->delta();

        if (item->type() == QGraphicsEllipseItem::Type)     // 椭圆进行缩放处理
        {
            QGraphicsEllipseItem* pEllipse = qgraphicsitem_cast<QGraphicsEllipseItem*>(item);
            if(pEllipse != nullptr)
            {
                // 获取图元绘图区域的矩阵,也就是图元被选中时那个虚线框
                QRectF rect = pEllipse->boundingRect();
                // 因为图元默认的缩放原点为(0,0),放大时图元朝着右下脚偏移,缩小时图元朝着左上角偏移
                // 所以设置图元中心点为缩放原点
                pEllipse->setTransformOriginPoint(rect.center());
                if(iDelta > 0)  // 放大
                {
                    qreal dRate = 1.1;  // 每次放大10%
                    pEllipse->setScale(pEllipse->scale() * dRate);
                }
                else if(iDelta < 0) // 缩小
                {
                    qreal dRate = 0.9;  // 每次缩小10%
                    pEllipse->setScale(pEllipse->scale() * dRate);
                }
            }
        }
        else if(item->type() == QGraphicsLineItem::Type)    // 直线进行旋转处理
        {
            QGraphicsLineItem* pLine = qgraphicsitem_cast<QGraphicsLineItem*>(item);
            if(pLine != nullptr)
            {
                QRectF rect = pLine->boundingRect();
                // 因为图元默认的旋转原点为(0,0),所以设置图元中心点为缩放原点
                pLine->setTransformOriginPoint(rect.center());
                if(iDelta > 0)  // 逆时针
                {
                    // 鼠标滑轮每滑动一次,直线旋转10°
                    pLine->setRotation(pLine->rotation() + 10);
                }
                else if(iDelta < 0) // 顺时针
                {
                    pLine->setRotation(pLine->rotation() - 10);
                }
            }
        }
    }

    return QGraphicsScene::wheelEvent(event);
}
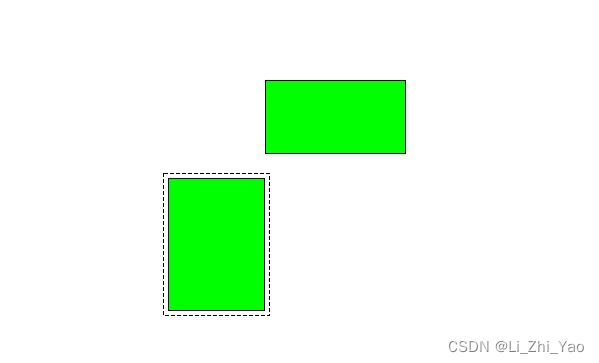
二、自定义图元
通过继承QGraphicsItem图元类,来实现一个矩形图元,演示图如下:
头文件示例代码如下:
// .h文件
#include <QObject>
#include <QGraphicsItem>

// 根据自己需要是否继承QObject,如果需要信号和槽则必须继承;另外,QObject必须放在前面
class RectItem : public QObject, public QGraphicsItem
{
    Q_OBJECT
public:
    RectItem(const QRectF& rect = QRectF(), QGraphicsItem *parent = nullptr);

    // 图元边界函数,必须实现
    QRectF boundingRect() const override;

    void setRect(const QRectF& rect){ m_rect = rect; this->update(); }

    // 设置绘制标志
    void SetDrawFlag(bool bDrawFlag){ m_bDrawFlag = bDrawFlag; }

protected:
    void paint(QPainter *painter, const QStyleOptionGraphicsItem *option, QWidget *widget = nullptr) override;

	// 鼠标移动事件,需要特殊处理,防止鼠标拖动绘制时图元移动
    void mouseMoveEvent(QGraphicsSceneMouseEvent *event) override;

private:
	// 需要绘制的矩形
    QRectF m_rect;

    // 绘制标志,防止第一次鼠标拖动绘制时,图元的鼠标移动事件触发,使得图元移动
    bool m_bDrawFlag = false;
};
源文件示例代码如下:
// .cpp文件
#include "RectItem.h"
#include <QPainter>
#include <QStyleOptionGraphicsItem>
#include <QGraphicsSceneMouseEvent>

RectItem::RectItem(const QRectF &rect, QGraphicsItem *parent): QGraphicsItem(parent), m_rect(rect)
{
    // 设置可移动、可选择、接收焦点等属性
    this->setFlags(QGraphicsItem::ItemIsMovable |
//                   QGraphicsItem::ItemIsFocusable |
                   QGraphicsItem::ItemIsSelectable);
}

QRectF RectItem::boundingRect() const
{
    // 设置图元绘制边界距离图元两个像素
    qreal dAdjust = 5;

    return m_rect.adjusted(-dAdjust, -dAdjust, dAdjust, dAdjust);
}

void RectItem::paint(QPainter *painter, const QStyleOptionGraphicsItem *option, QWidget *widget)
{
    // 重绘函数,绘制矩形
    Q_UNUSED(widget);

    // 设置画笔和画刷
    painter->setPen(QPen(Qt::black, 1));
    painter->setBrush(Qt::green);
    // 绘制矩形
    painter->drawRect(m_rect);

    // 绘制选中时的虚框
    if (option->state & QStyle::State_Selected)
    {
        // 获取图元绘制区域
        QRectF rect = this->boundingRect();

        // 绘制虚线框
        painter->setPen(QPen(option->palette.windowText(), 0, Qt::DashLine));
        painter->setBrush(Qt::NoBrush);

        // 设置虚线框距离绘图区域的间距,因为画笔有宽度
        const qreal pad = painter->pen().widthF() / 2;

        painter->drawRect(rect.adjusted(pad, pad, -pad, -pad));
    }
}

void RectItem::mouseMoveEvent(QGraphicsSceneMouseEvent *event)
{
    // 左键按下,并且当前处于绘制状态
    if (event->buttons() == Qt::LeftButton && m_bDrawFlag)
    {
        return;
    }
    return QGraphicsItem::mouseMoveEvent(event);
}
直接添加到之前创建的工程,替换QGraphicsRectItem图元类即可,另外需要在场景的鼠标按下时,调用图元的设置绘制标志SetDrawFlag函数设置标志为true,鼠标释放时设置标志为false;
关于为什么QGraphicsRectItem在鼠标拖动绘制时,图元不会跟着移动,我看了下Qt源码,没找到具体原因,知道的大佬可以评论区留言
总结
下一节,将介绍如何使用鼠标拖动缩放图元


 5725
5725


 被折叠的 条评论
为什么被折叠?
被折叠的 条评论
为什么被折叠?
 到【灌水乐园】发言


