


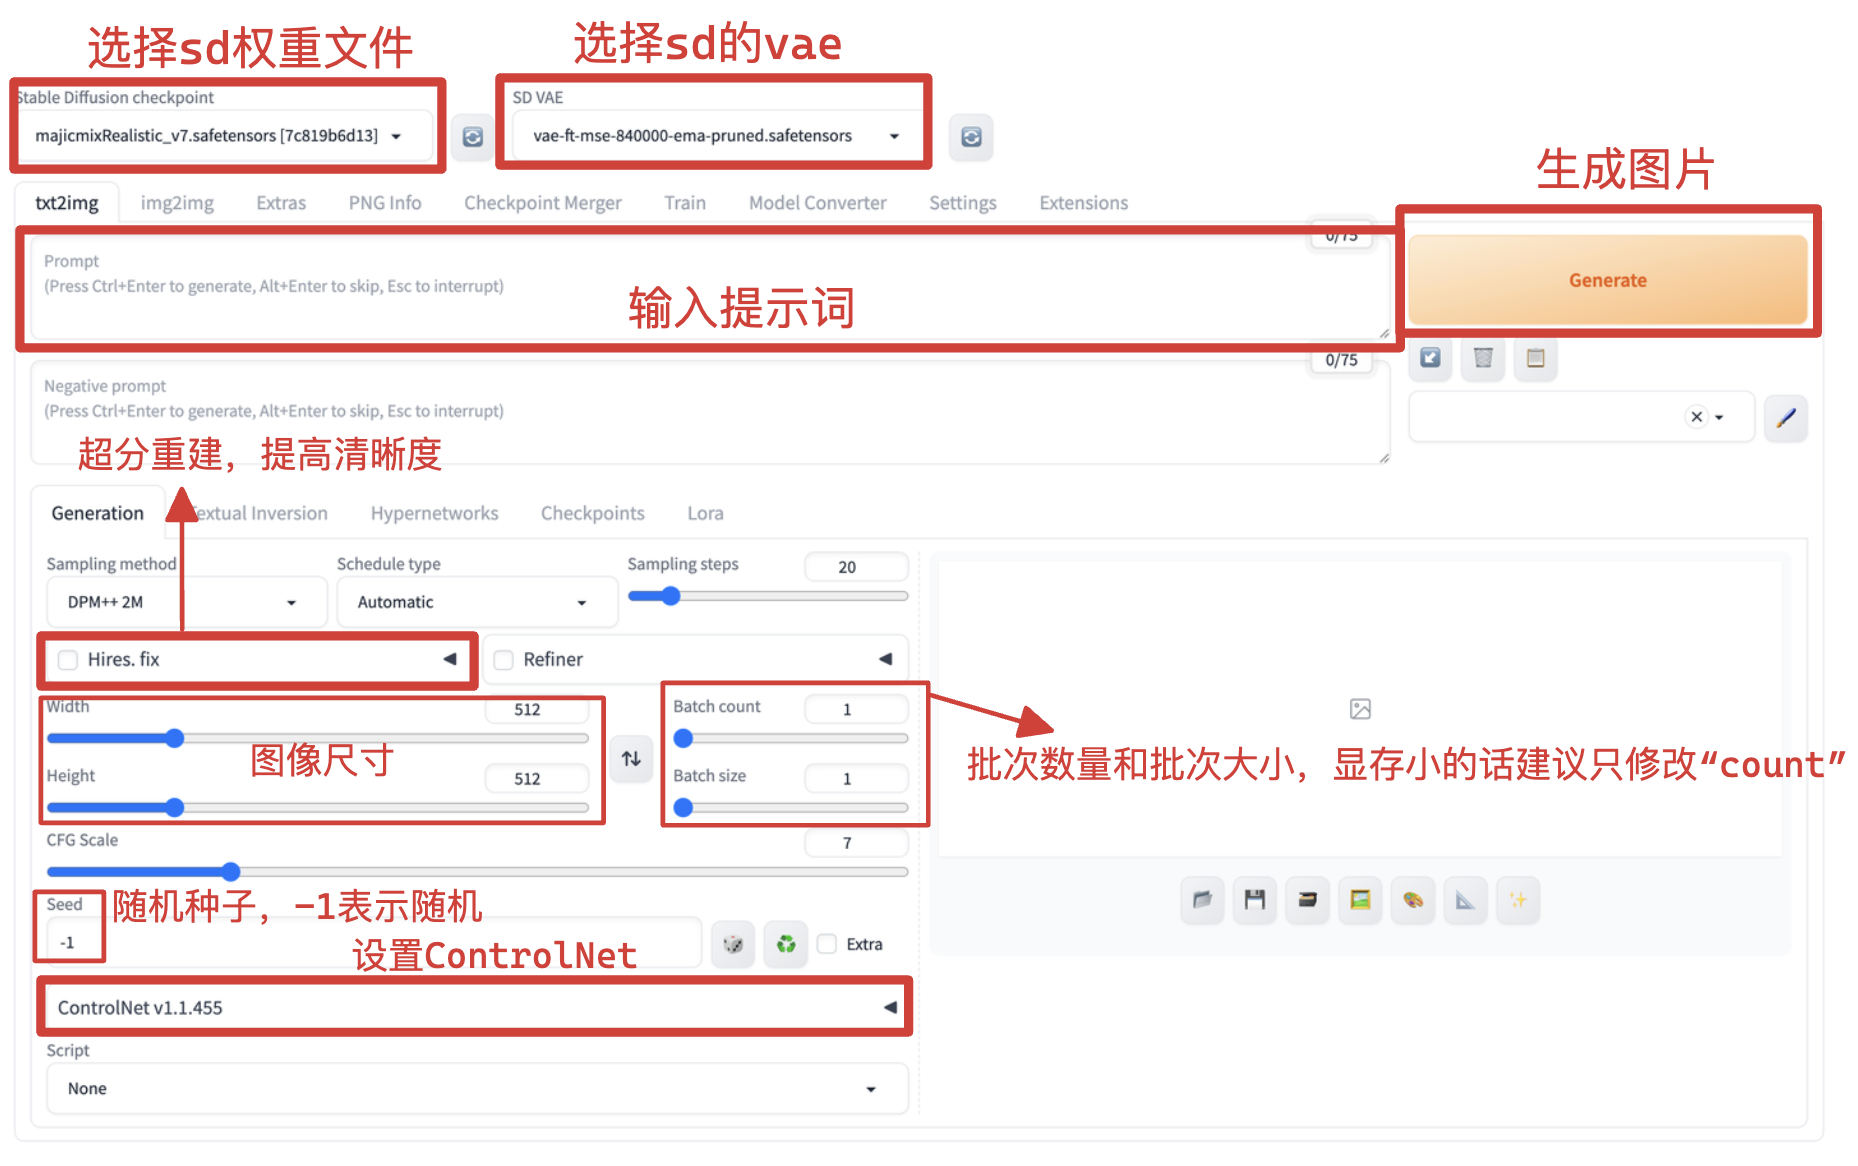
笔者在2025.4手动搭建了SDWebUI,方便后续二次开发。本项目基于Gradio实现。
项目原地址:Github Star 151K;参考教程:Stable Diffusion]webui部署(Linux)
笔者使用的版本:
- CUDA 11.8、torch 2.0.1、xformers 0.0.23.post1(自动安装无需指定版本)
一、Stable-Diffusion-WebUI(下面简称SDWebUI)
#1. SDWebUI的概念
SDWebUI是一个基于StableDiffusion扩散模型的开源WebUI,旨在简化和增强使用Stable Diffusion模型进行图像生成的体验。
- 简化:让用户无需代码,直接与生成模型交互。
- 增强:结合了超分重建、ControNet、Lora等模型来增强生成效果。
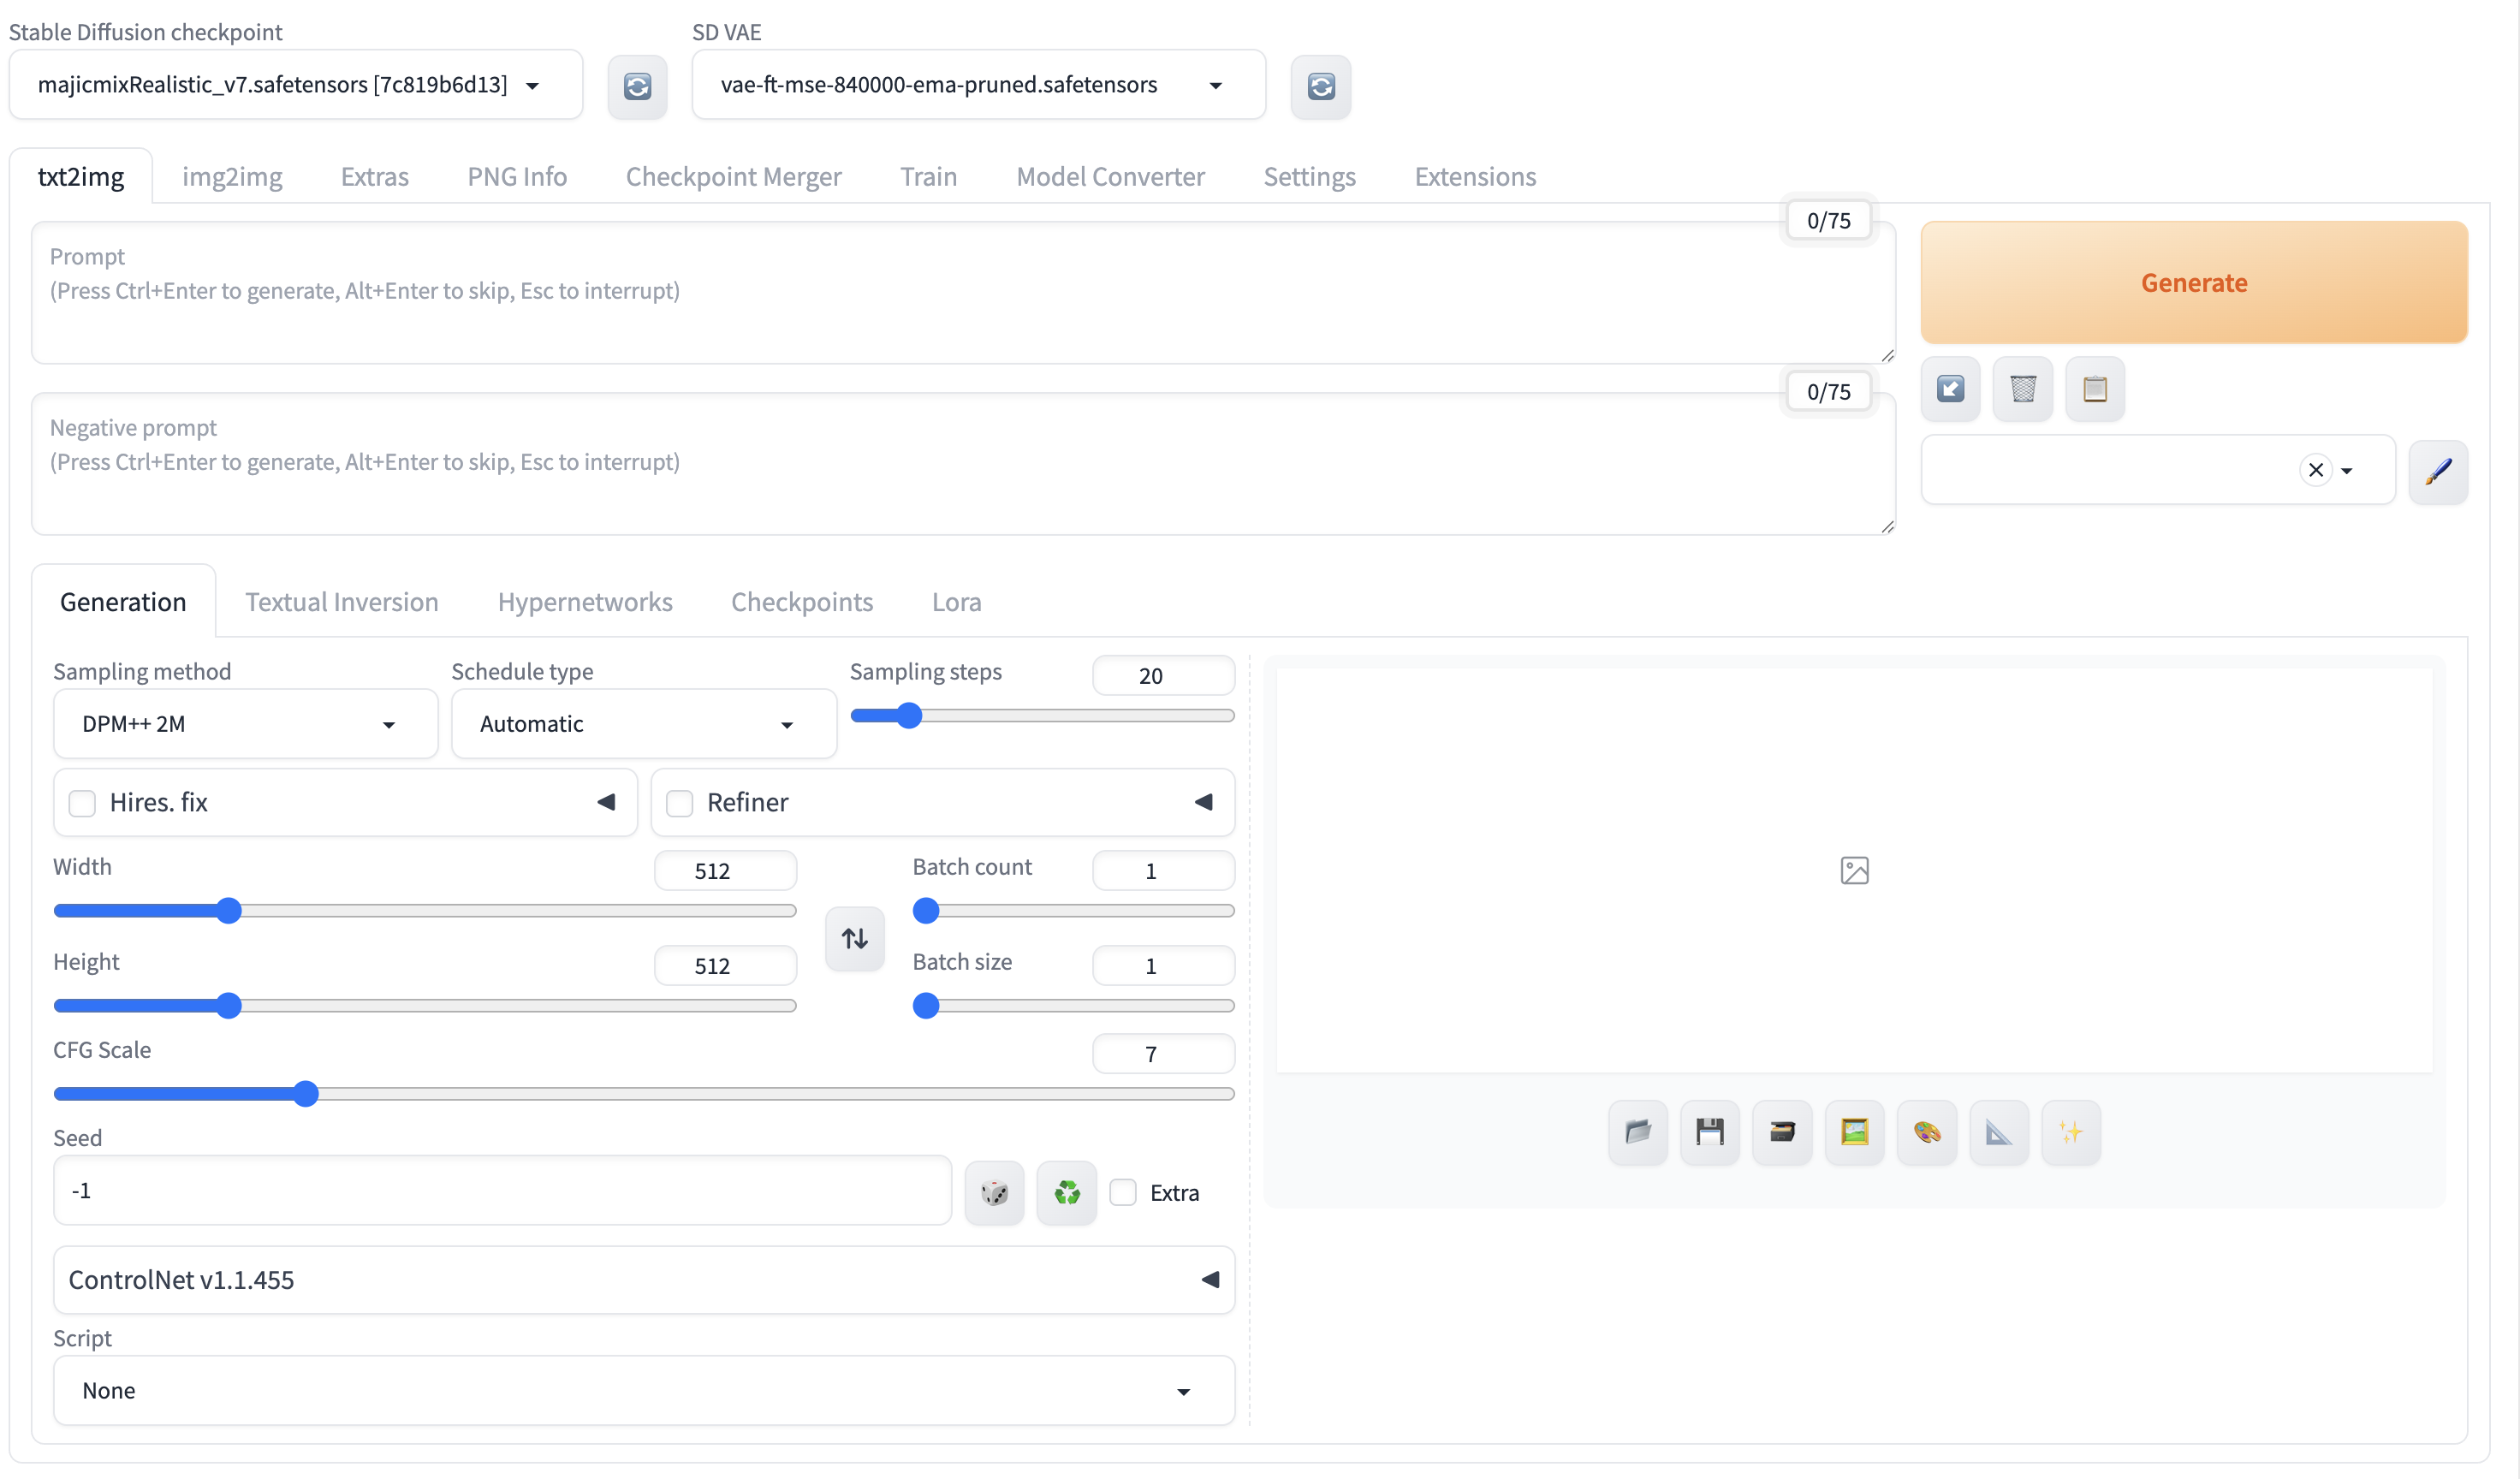
笔者的搭建界面如下图所示:
#2. 搭建流程图
二、开发环境搭建
Step1.下载源码:SDWebUI
git clone https://github.com/AUTOMATIC1111/stable-diffusion-webui.git
mv stable-diffusion-webui sd-webui
cd sd-webui && mkdir repositories
SDWeb仅仅是外层界面,核心功能存放在
repositories中进行管理
Step2.下载SDWebUI的依赖项目
1️⃣StableDiffusion
git clone https://github.com/Stability-AI/stablediffusion.git ./repositories/stable-diffusion-stability-ai
git -C ./repositories/stable-diffusion-stability-ai checkout cf1d67a6fd5ea1aa600c4df58e5b47da45f6bdbf	# 切换到合适的版本,预防兼容性问题
2️⃣generative-models
git clone https://github.com/Stability-AI/generative-models.git ./repositories/generative-models
git -C ./repositories/generative-models checkout 45c443b316737a4ab6e40413d7794a7f5657c19f
3️⃣k-diffusion
git clone https://github.com/crowsonkb/k-diffusion.git ./repositories/k-diffusion
git -C ./repositories/k-diffusion checkout ab527a9a6d347f364e3d185ba6d714e22d80cb3c
4️⃣CodeFormer
git clone https://github.com/sczhou/CodeFormer.git ./repositories/CodeFormer
git -C ./repositories/CodeFormer checkout c5b4593074ba6214284d6acd5f1719b6c5d739af
5️⃣BLIP
git clone https://github.com/salesforce/BLIP.git ./repositories/BLIP
git -C ./repositories/BLIP checkout 48211a1594f1321b00f14c9f7a5b4813144b2fb9
6️⃣stable-diffusion-webui-assets
git clone https://github.com/AUTOMATIC1111/stable-diffusion-webui-assets.git ./repositories/stable-diffusion-webui-assets
Step3.创建虚拟环境
conda create -n sd-webui python=3.10
conda activate sd-webui

pip install torch==2.0.1 torchvision==0.15.2 --extra-index-url https://download.pytorch.org/whl/cu118

pip install tb-nightly
pip install -r requirements_versions.txt

pip install https://github.com/openai/CLIP/archive/d50d76daa670286dd6cacf3bcd80b5e4823fc8e1.zip  # 将CLIP项目安装成python库包
pip install https://github.com/mlfoundations/open_clip/archive/bb6e834e9c70d9c27d0dc3ecedeebeaeb1ffad6b.zip
pip install xformers --index-url https://download.pytorch.org/whl/cu118
pip install ngrok
pip install -r repositories/CodeFormer/requirements.txt

# 后续Bug的处理
pip install open-clip-torch==2.20.0
三、配置预训练权重
#1. 下载预训练权重(需要翻墙)
1️⃣v1.5版本的权重
https://huggingface.co/stable-diffusion-v1-5/stable-diffusion-v1-5
2️⃣v2版本的权重
https://huggingface.co/stabilityai/stable-diffusion-2-1
#2. 下载后放到./models/Stable-diffusion/下即可在webui中调用
如下图所示:

四、测试运行WebUI
# 进入项目根路径
cd sd-webui

# 测试启动
python webui.py		# 默认只允许本地访问(127.0.0.1/localhost)
其他参数介绍:(仅介绍笔者常用的)
--listen:监听所有网络接口(0.0.0.0)--port:端口--xformers:使用 xformers 优化时间和空间,推荐使用--enable-insecure-extension-access:运行网络中所有用户安装插件(后面“安装常用扩展”中有用到)
启动后的网页如下图所示:
五、SDWebUI的基础模块配置
#1.高清修复模块Hires.fix的了解
该模块额外增加了一个类超分重建的过程。
- 上采样放大图片:使用上采样算法如
R-ESRGAN对SD生成图片进行上采样放大到目标尺寸(如1024×1024)。 - 局部重绘:扩散模型(U-Net)对上采样图片进行去噪,补充细节(受
Denoising strength控制)。 - 最终解码:修复后的潜变量通过 VAE 解码器输出高清图像(如 1024×1024)。
| 关键参数 | 作用 | 推荐值 |
|---|---|---|
| Hires steps | 第二阶段的重绘步数(细节优化强度) | 10~20(过高可能过拟合) |
| Denoising strength | 重绘时的噪声强度(值越高,改动越大) | 0.3~0.5(平衡细节与稳定) |
| Upscaler | 上采样算法(选择不同算法影响细节风格) | R-ESRGAN 4x+(通用) |
| Upscale by | 放大倍数(如2x表示512→1024) | 1.5~2.0(视显存而定) |
Hires steps,Denoising strength,Upscale by的值极大程度影响处理速度,值越大速度越慢。Hires steps若设置为0,则程序默认为20(猜测是这样,还得看看代码)Denoising strength=0=> 普通超分(仅放大,无重绘)。
Denoising strength>0.6=> 大幅度改变原图内容(类似图生图)。
#2. 如何开启VAE选项卡?
Step1. 将VAE权重文件放到项目根目录下的models/VAE
Step2. Setting - User interface,在Quicksettings list中加入sd_vae,如下图所示。
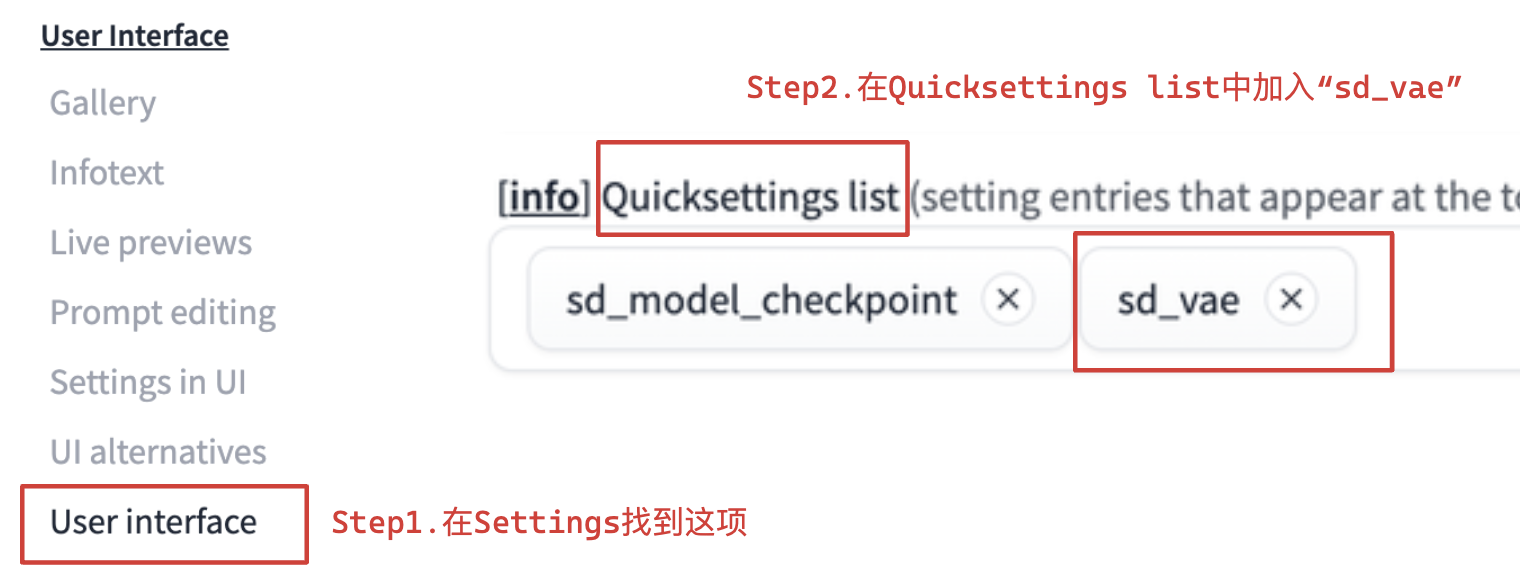
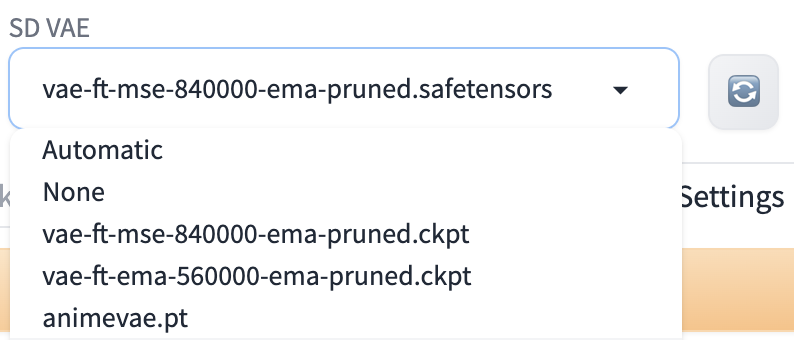
Step3. 重启命令行服务,然后就可以在网页中选择vae
如下图所示:
六、安装常用扩展
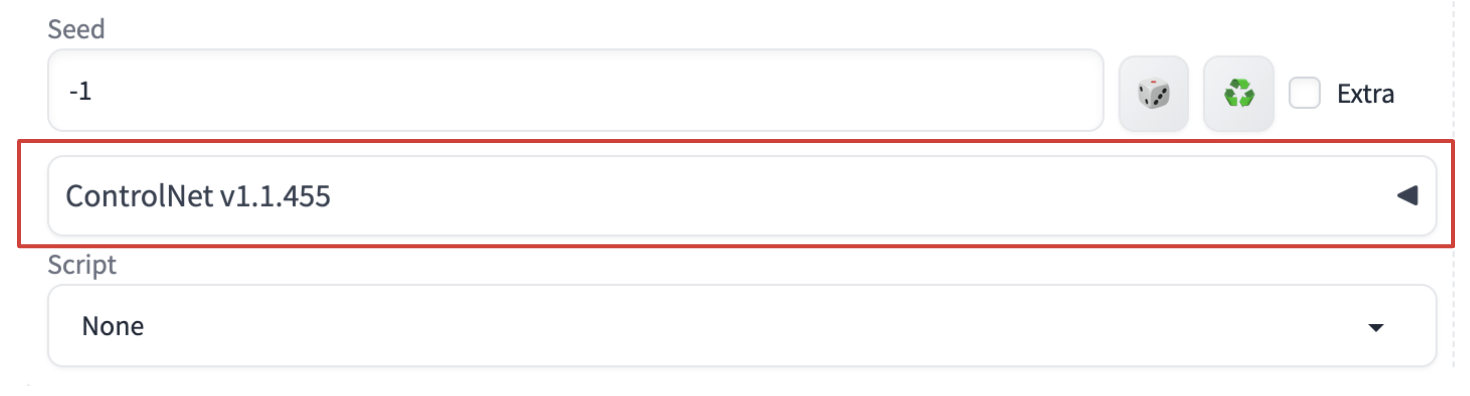
#1.安装ControlNet扩展(通过“Extensions”)
1️⃣安装
增加启动参数--enable-insecure-extension-access(知晓风险再使用,该参数是允许网络中所有用户安装插件),然后:
-
Extensions - Install from URL
-
将项目路径
https://github.com/Mikubill/sd-webui-controlnet粘贴到URL for extension's git repository并安装(建议该浏览器进行翻墙) -
等待消息
"Installed into sd-webui\extensions\sd-webui-controlnet. Use Installed tab to restart"即安装完成,然后在Installed选项卡中,点击"Check for updates"与Apply and quit -
最后,重启sd-webui包括命令行界面。当命令行出现以下信息即启动成功:
ControlNet preprocessor location: /home/xx/sd-webui/extensions/sd-webui-controlnet/annotator/downloads
2025-04-09 10:01:30,189 - ControlNet - INFO - ControlNet v1.1.455
Loading weights [7c819b6d13] from /home/xx/sd-webui/models/Stable-diffusion/majicmixRealistic_v7.safetensors
2025-04-09 10:01:30,361 - ControlNet - INFO - ControlNet UI callback registered.
下载好的controlnet插件位于./extensions/sd-webui-controlnet
然后就可以在网页中选择ControlNet了,如下图所示:
2️⃣添加ControlNet的预处理器文件和模型文件
预处理器文件的路径:sd-webui/extensions/sd-webui-controlnet/annotator(默认有几十个了)
模型文件的路径:sd-webui/models/ControlNet
#2. 安装model-converter扩展
增加启动参数--enable-insecure-extension-access(谨慎使用,该参数是允许网络中所有用户安装插件),然后:
-
Extensions - Install from URL
-
将项目路径
https://github.com/Mikubill/sd-webui-controlnet粘贴到URL for extension's git repository并安装(建议该浏览器进行翻墙) -
等待消息
"Installed into sd-webui\extensions\sd-webui-controlnet. Use Installed tab to restart"即安装完成,然后在Installed选项卡中,点击"Check for updates"与Apply and quit -
最后,重启sd-webui包括命令行界面。
七、Bug汇总处理
Bug处理#1.
现象:运行中,在控制台跳出无法启用xformers
/home/xx/anaconda3/envs/sd-webui/lib/python3.10/site-packages/timm/models/layers/__init__.py:48: FutureWarning: Importing from timm.models.layers is deprecated, please import via timm.layers
  warnings.warn(f"Importing from {__name__} is deprecated, please import via timm.layers", FutureWarning)
No module 'xformers'. Proceeding without it.
原因:版本冲突引起的,该问题会导致无法启用xformers,引起模型推理训练效率变低。
解决:xformers要同时与torch版本和cuda版本相匹配,才能安装成功。所以直接一起安装了,让pip处理依赖关系。
如下面笔者安装的命令:
# 先卸载现有版本
pip uninstall torch torchvision torchaudio xformers

# 安装(笔者是cuda 11.8,所以cu118)
pip install torch torchvision torchaudio xformers --index-url https://download.pytorch.org/whl/cu118
Bug处理#2.
现象:增加了XL模型文件后,读取该模型文件在控制台出现Model config for ViT-bigG-14 not found.
原因:缺少依赖库。
解决:pip install open-clip-torch==2.20.0
Bug处理#3.
现象:控制台跳出找不到模块controlnet_aux
from controlnet_aux import “SamDetector”
ModuleNotFoundError: No module named 'controlnet_aux'
原因:缺少依赖库。
解决:pip install controlnet-aux
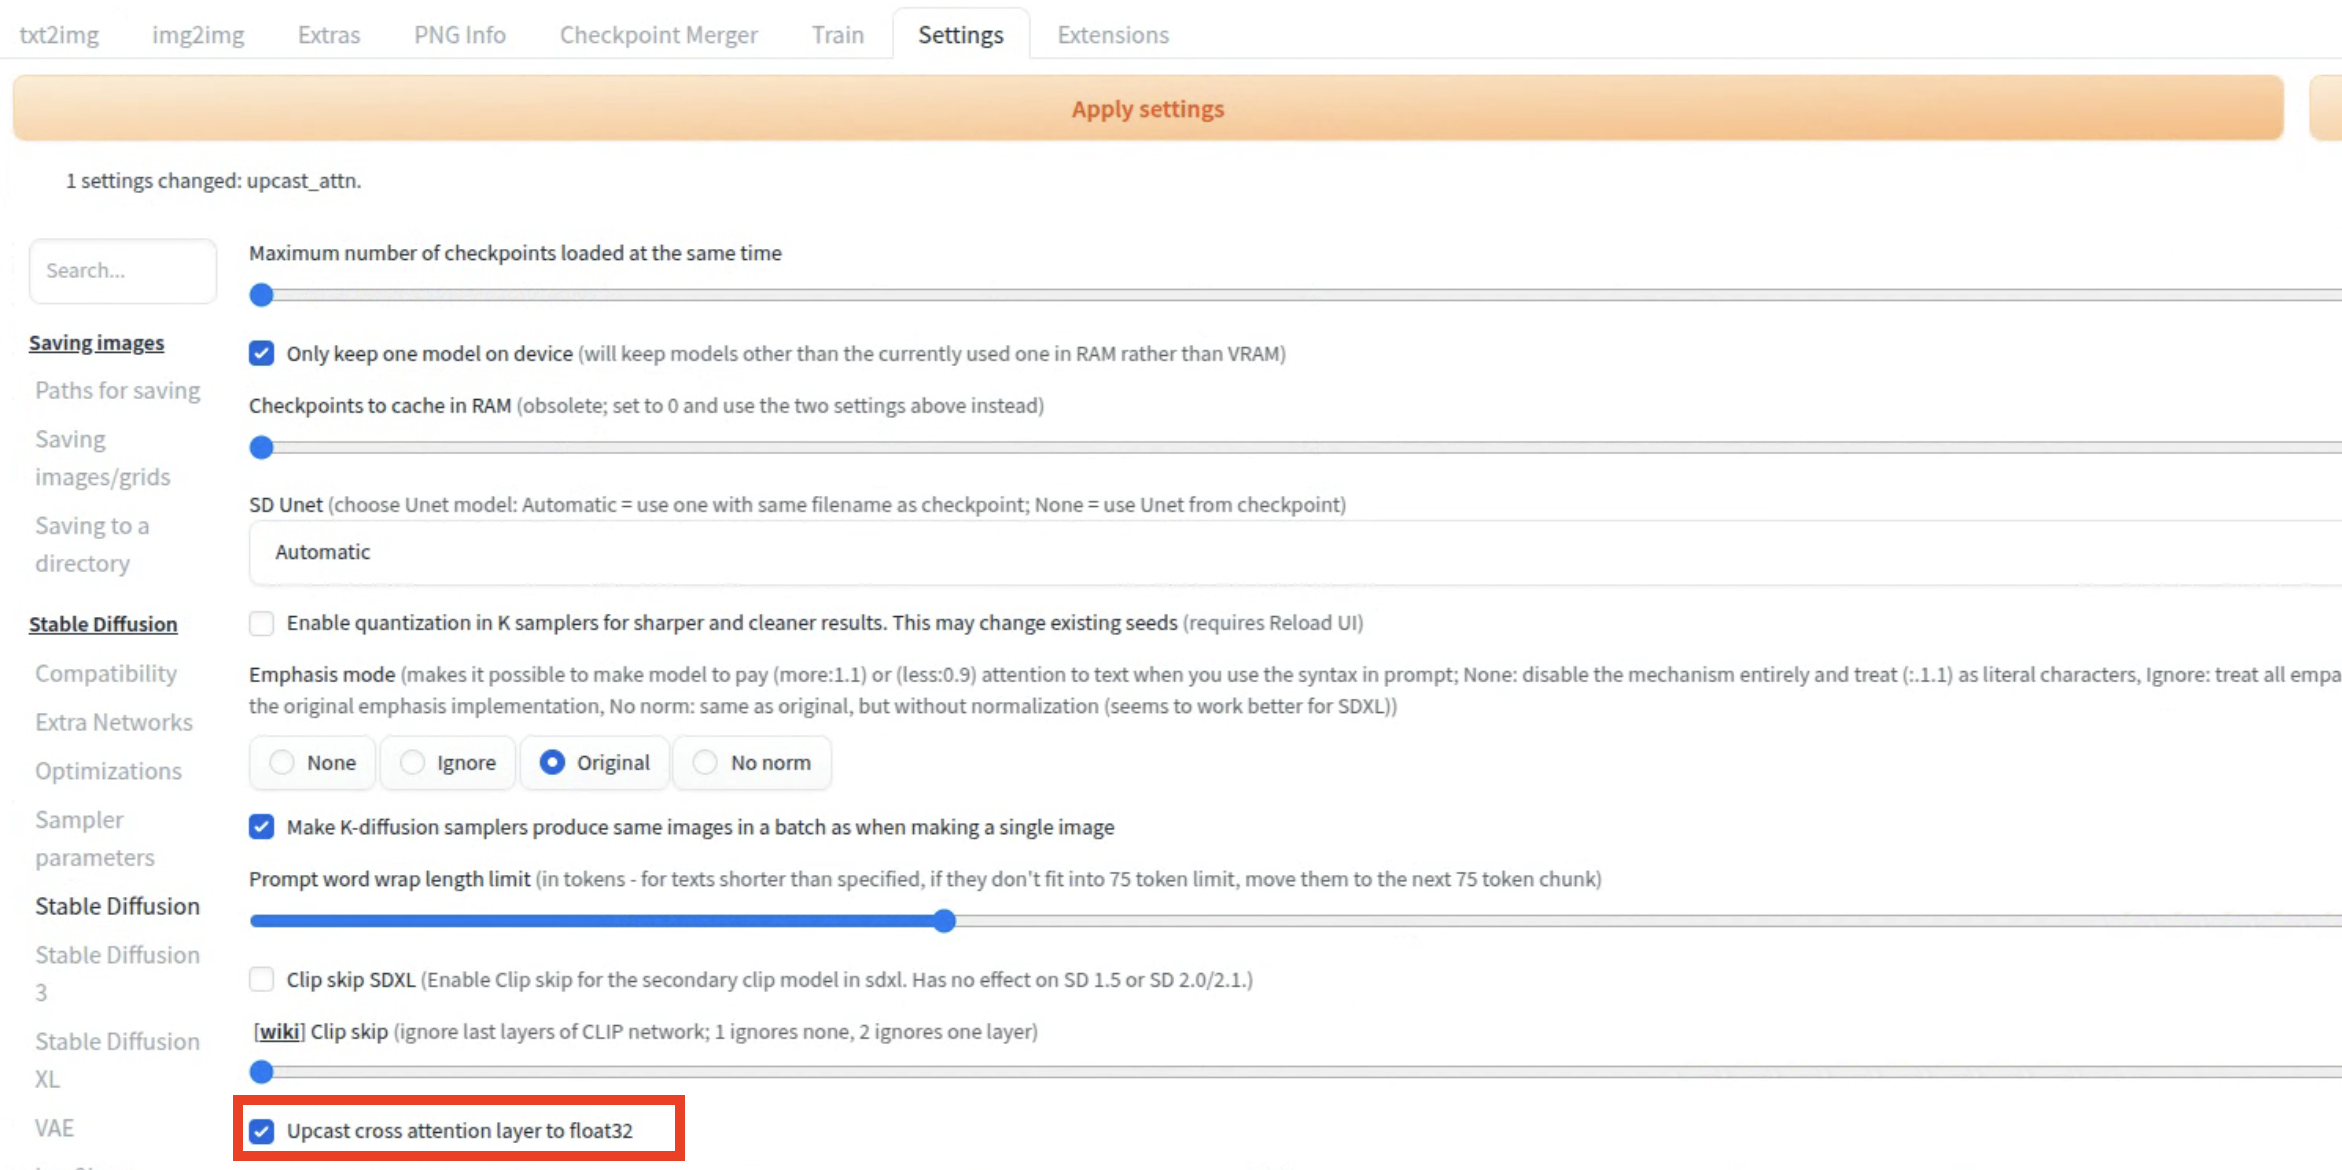
Bug处理#4:
现象:
在WebUI上生成图片时,控制台出现:NansException: A tensor with all NaNs was produced in Unet
解决:
- 在WebUI的Settings里,勾上
Upcast cross attention layer to float32
Bug处理#5
现象:在WebUI上加载模型权重时,出现:
OSError: Can't load tokenizer for 'openai/clip-vit-large-patch14'. If you were trying to load it from 'https\://huggingface.co/models', make sure you don't have a local directory with the same name. Otherwise, make sure 'openai/clip-vit-large-patch14' is the correct path to a directory containing all relevant files for a CLIPTokenizer tokenizer.
解决:
-
在huggingface点击
Clone repository下载库
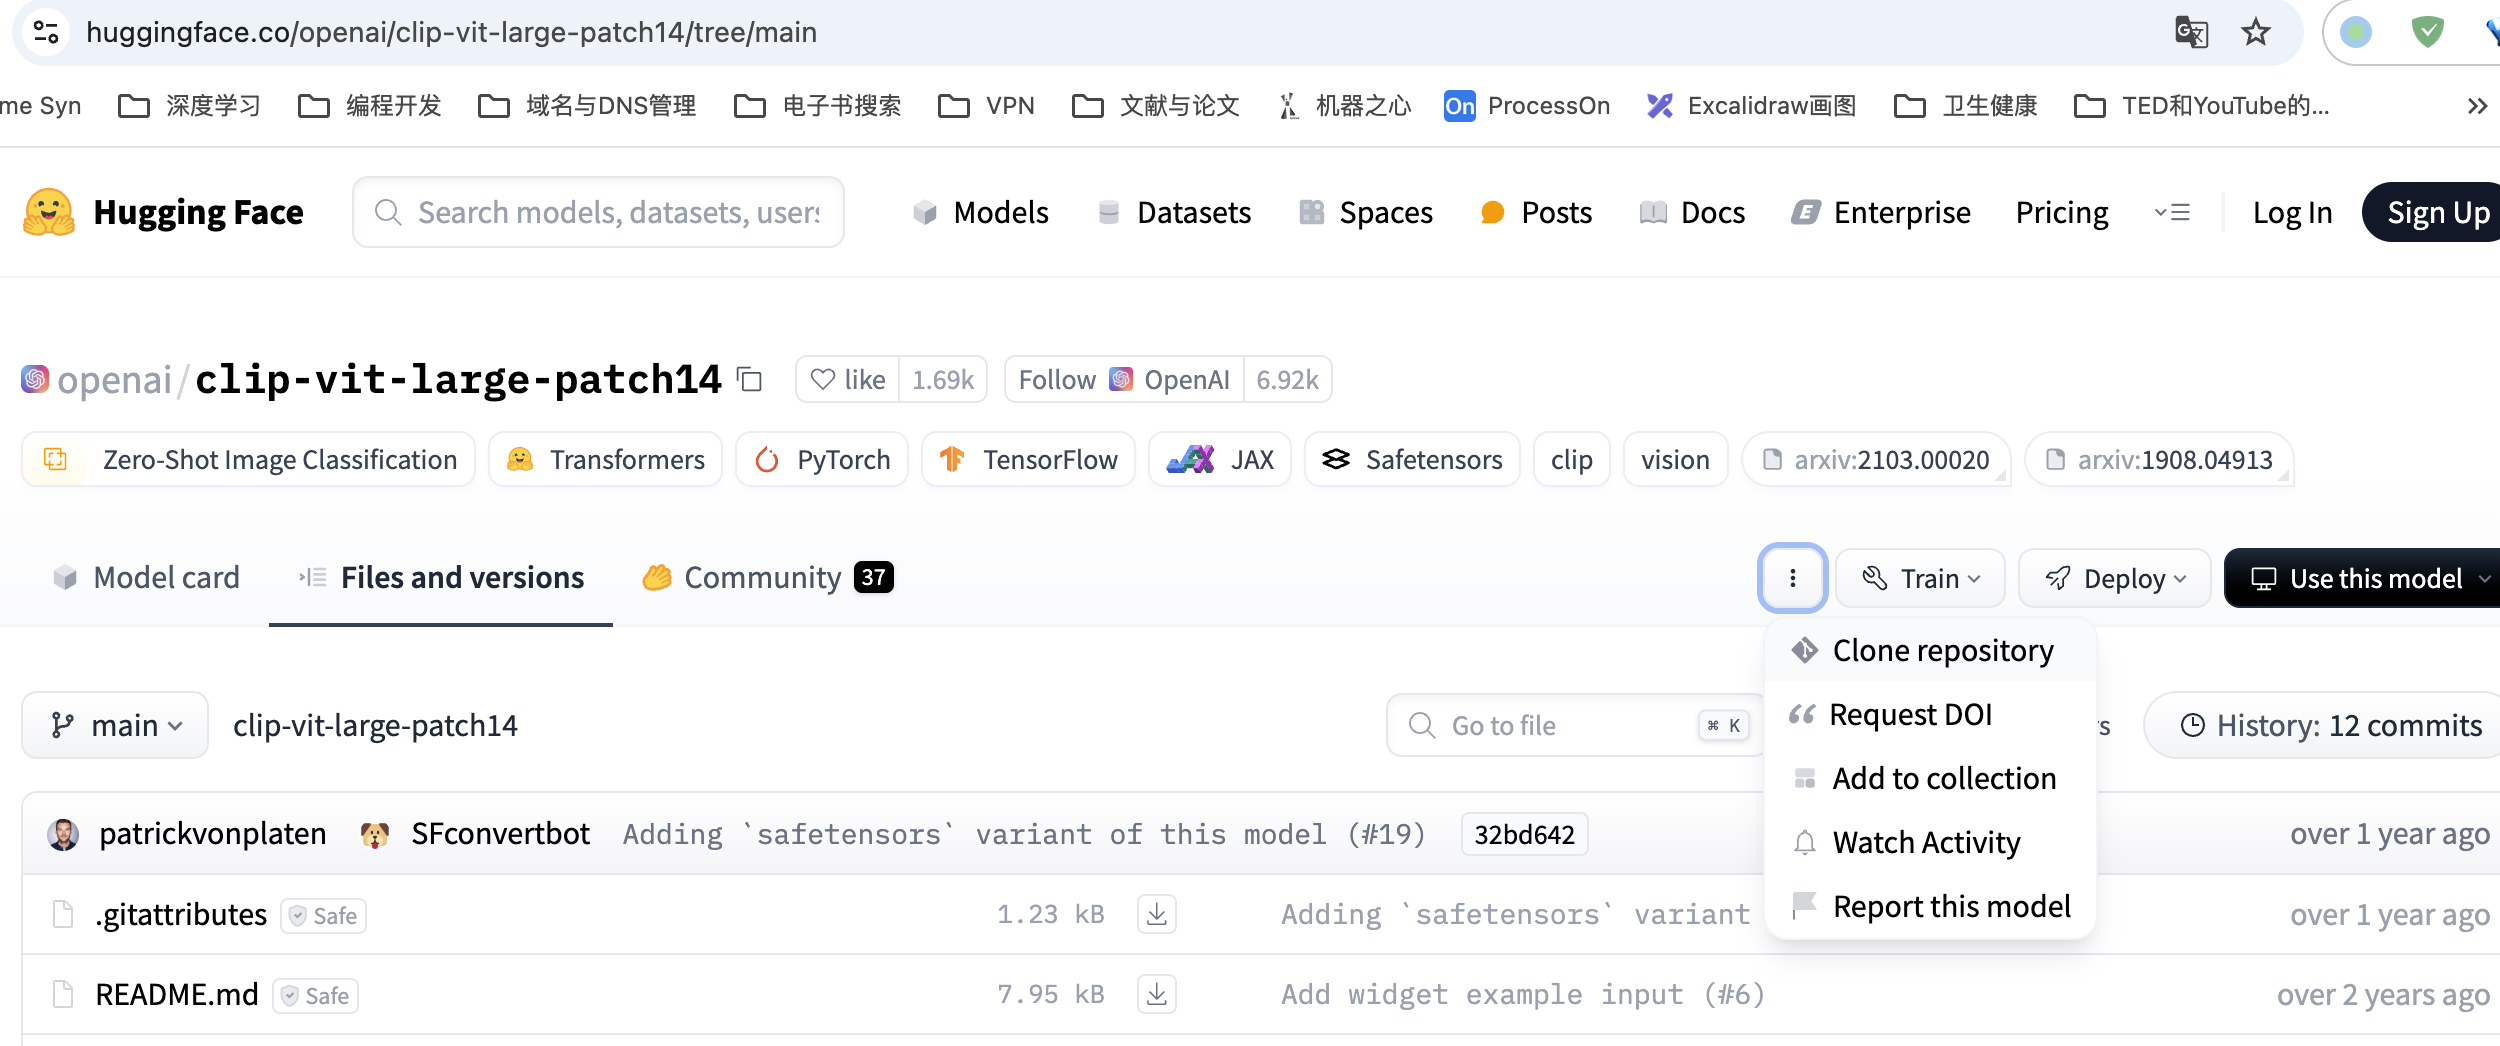
-
将下载到的
clip-vit-large-patch14放到项目的新建文件夹openai下 -
重启
webui.py并重新加载模型权重文件即可。
到底咯,如果这篇文章对您有些许帮助,请帮忙点个赞👍或收个藏📃。您的支持是我继续创作的动力💪!
当暴风雨⚡️过去,你不会记得自己是如何度过的,你甚至不确定暴风雨是否真的结束了。但你已经不再是当初走进暴风雨的那个人了,这就是暴风雨的意义💪。


 被折叠的 条评论
为什么被折叠?
被折叠的 条评论
为什么被折叠?
 到【灌水乐园】发言


