


最近在Github上发现了一个大神免费提供的GPT-3.5转发服务,这样就可以在不使用科学上网的情况下直接使用了,真的很厉害!
Github地址:https://github.com/chatanywhere/GPT_API_free
下面是大神整理的一些可用
常见软件/插件使用方法
最方便的使用方法
python openai官方库(使用AutoGPT等)
示例代码请参考demo.py
方法一
import openai
openai.api_base = "https://api.chatanywhere.com.cn/v1"
# openai.api_base = "https://api.chatanywhere.cn/v1"
方法二
修改环境变量OPENAI_API_BASE,各个系统怎么改环境变量请自行搜索,修改环境变量后不起作用请重启系统。
OPENAI_API_BASE=https://api.chatanywhere.com.cn/v1
或 OPENAI_API_BASE=https://api.chatanywhere.cn/v1
开源gpt_academic
找到config.py文件中的API_URL_REDIRECT配置并修改为以下内容:
API_URL_REDIRECT = {"https://api.openai.com/v1/chat/completions": "https://api.chatanywhere.com.cn/v1/chat/completions"}
# API_URL_REDIRECT = {"https://api.openai.com/v1/chat/completions": "https://api.chatanywhere.cn/v1/chat/completions"}
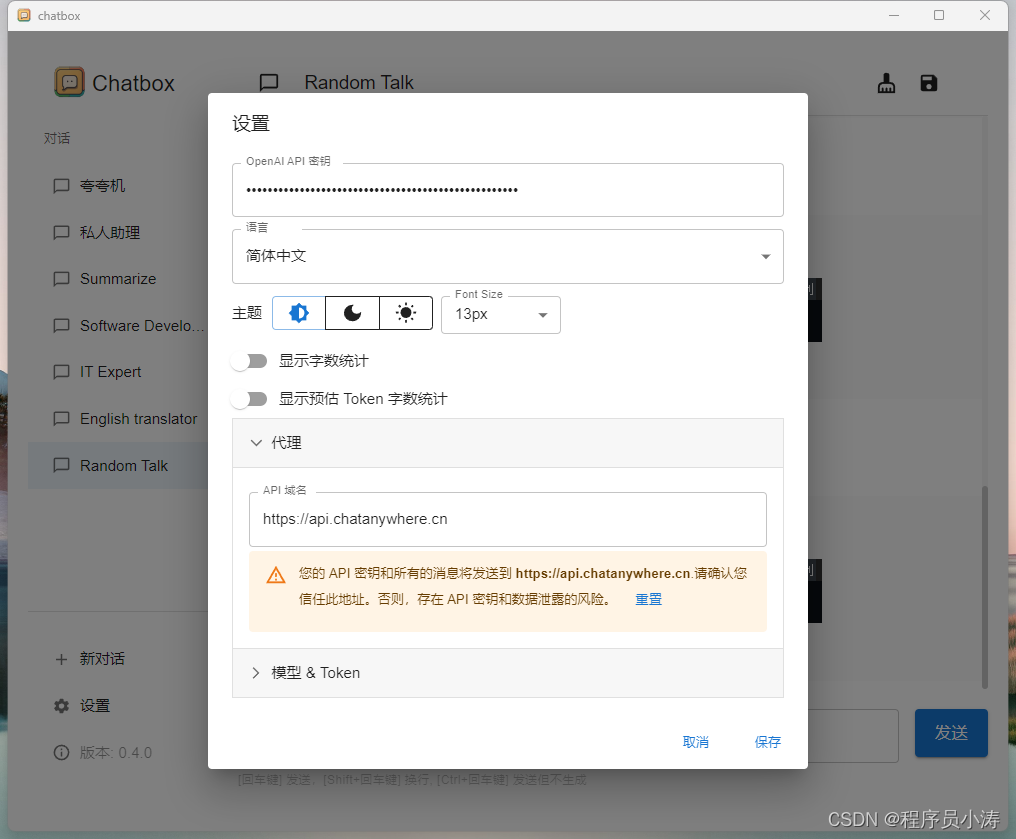
ChatBox(推荐使用)
ChatGPT开源桌面应用,支持全部桌面平台。
下载链接:https://github.com/Bin-Huang/chatbox/releases
使用方法:如图在设置中填入购买的密钥,并将代理设置为https://api.chatanywhere.cn 或者 https://api.chatanywhere.com.cn 即可
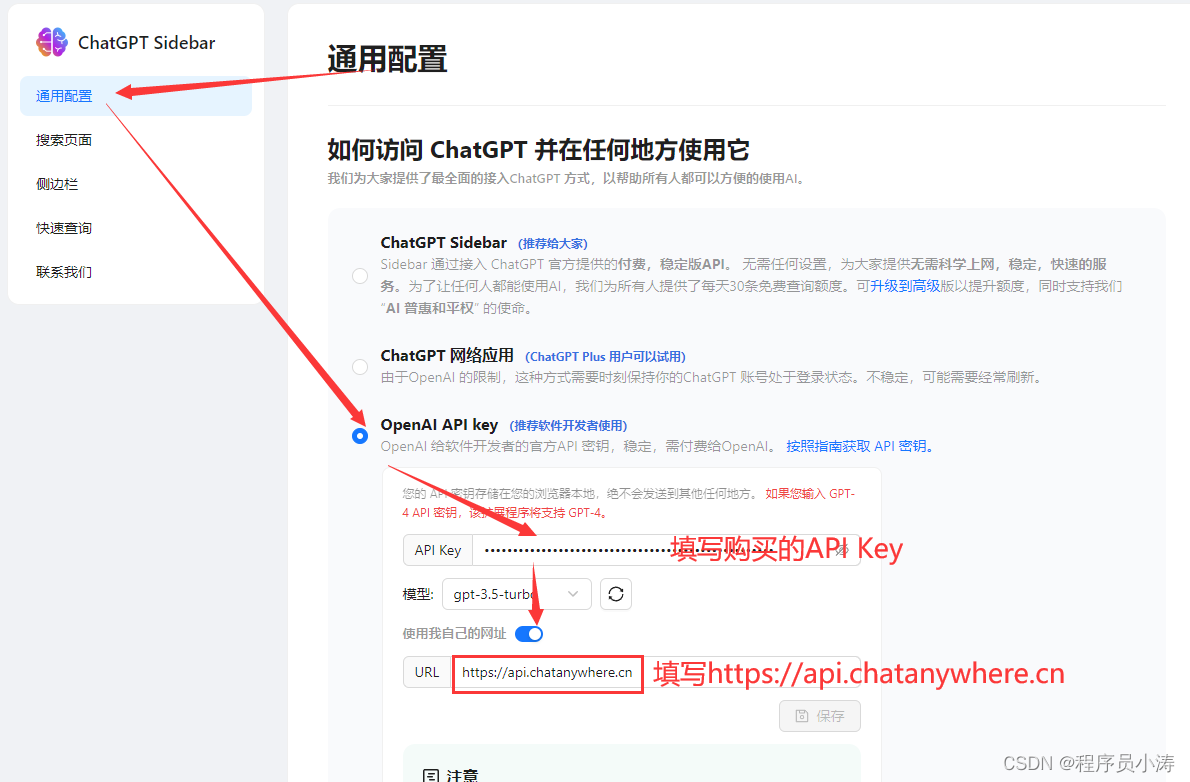
浏览器插件ChatGPT Sidebar
安装好插件后进入设置页面,如图所示修改设置,将url修改为 https://api.chatanywhere.cn 或者 https://api.chatanywhere.com.cn 。
Jetbrains插件ChatGPT
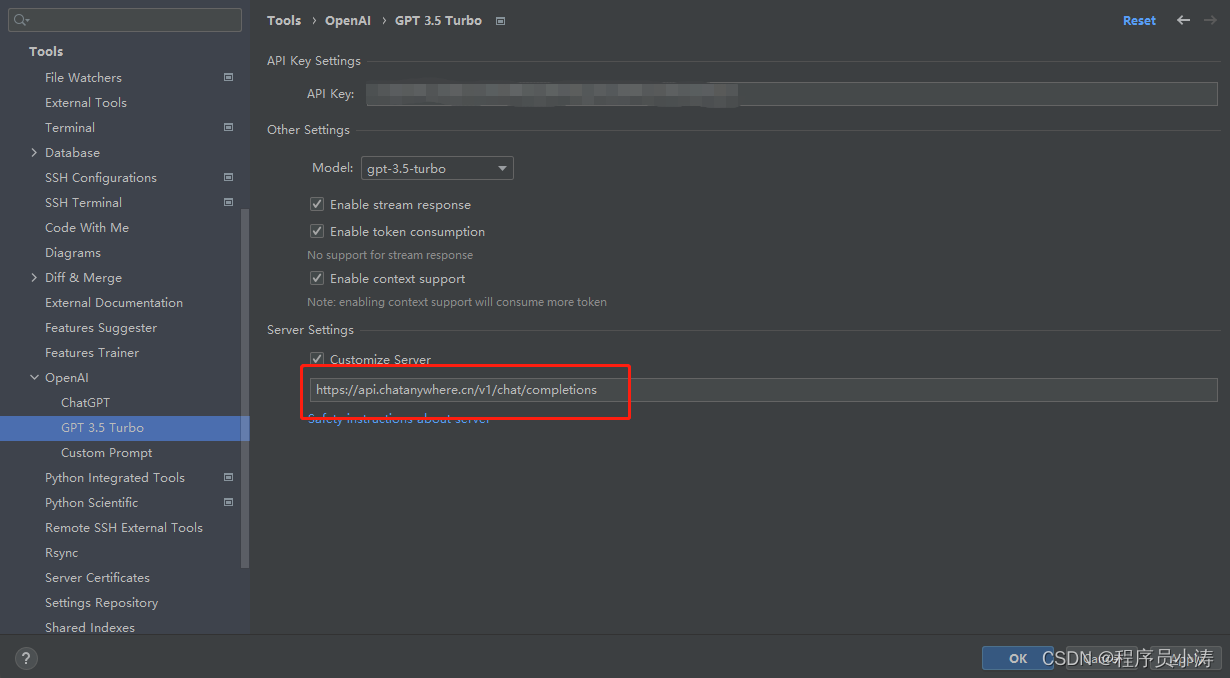
安装好插件后在Settings > Tools > OpenAI > GPT 3.5 Turbo中如图所示配置好插件,重点要将Server Settings 修改为 https://api.chatanywhere.cn/v1/chat/completions 或者 https://api.chatanywhere.com.cn/v1/chat/completions 。并勾选Customize Server。
VSCode插件Code GPT
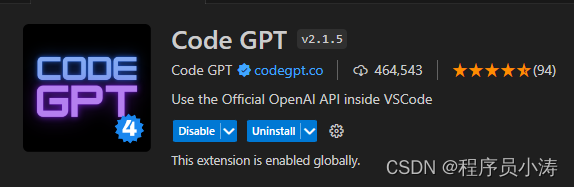
这个插件修改Host相对麻烦一些,需要修改源码才可以使用。
-
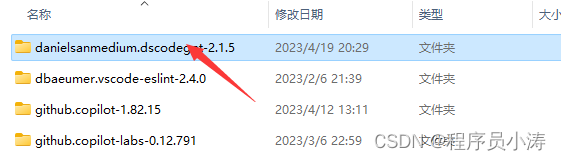
安装插件。安装好后按Ctrl+Shift+P,弹出框中输入Open Extensions Floder

-
点击Extensions: Open Extensions Floder,这将打开插件目录,找到Code GPT的文件夹。
-
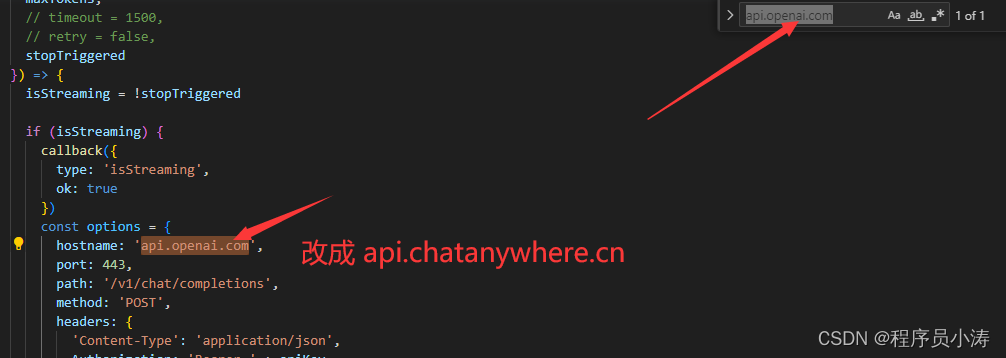
打开后进入打开文件./src/clients/openai_client.js,搜索文件中的api.openai.com,并替换为
api.chatanywhere.cn或者api.chatanywhere.com.cn。保存文件。
-
再次回到vscode,按Ctrl+Shift+P,弹出框中输入CodeGPT: Set API KEY,点击CodeGPT: Set API KEY。然后将购买的Key输入进去即可。

-
以上步骤完成后,重启VSCode
- 其他VSCode插件类似。


 1万+
1万+


 被折叠的 条评论
为什么被折叠?
被折叠的 条评论
为什么被折叠?
 到【灌水乐园】发言


