


博客从wordpress迁移到hexo已经两周至于,在github page上自己看还行(梯子),但分享链接访问就很慢,再加上导致以前买的学生服务器闲置,有必要把hexo部署到自己的服务器上(
还在考虑使用cdn加速绕过备案,或许可以,备案已经完成),现记录方法
再次继续写这篇博客是服务器被黑客搞了,被迫重装系统,密码千万不要设置12345678!!
现在就在这台服务器上从零开始搞一遍
一、本地操作
由于原先已经成功部署到github服务器上,本地不需要操作
二、服务器端操作
我的大致理解就是在服务器上创建一个git仓库,然后本地同步的时候即同步到github的仓库也同步到服务器上的仓库就可以
发现git的知识还是很薄弱,就大概会用
1、git环境准备
查看是否已经安装了git,我也不知道啥时候安装的
[root@VM-0-15-centos ~]# git --version
git version 1.8.3.1
安装命令:
[root@VM-0-15-centos ~]# npm install git
然后就是个难点了,需要自己的电脑和服务器建立连接,相当于在服务器上搭建git服务(我的大致理解)
先鼓捣鼓捣测试,再继续
先创建用户组和用户,并授予权限,创建仓库
[root@VM-0-15-centos ~]# groupadd git
[root@VM-0-15-centos ~]# useradd git -g git
//给git用户一个复杂的密码,否则可能会被破解
[root@VM-0-15-centos /]# passwd git
Changing password for user git.
New password:
Retype new password:
Sorry, passwords do not match.
New password:
Retype new password:
passwd: all authentication tokens updated successfully.
//先创建一个用与测试功能的仓库
[root@VM-0-15-centos git]# cd /home/git
[root@VM-0-15-centos git]# git init --bare test.git
// 需要将文件授予git用户
[root@VM-0-15-centos git]# chown -R git test.git
使用钩子函数,在文件提交到仓库时,同步到指定的目录
先在git目录下创建target文件夹用于同步
[root@VM-0-15-centos git]# mkdir target
[root@VM-0-15-centos git]# ls
target  test.git
进入仓库,在hooks下创建的post-receice文件,编辑
输入以下内容:git --work-tree=/home/git/target checkout -f
[root@VM-0-15-centos hooks]# vim post-receive
[root@VM-0-15-centos hooks]# chown -R git post-receive //
[root@VM-0-15-centos hooks]# chmod +x post-receive //脚本需有可执行权限
这时候可以开始测试:
执行 :git clone git@yourip :/home/git/test.git
$ git clone git@212.64.71.101:/home/git/test.git
Cloning into 'test'...
The authenticity of host '212.64.71.101 (212.64.71.101)' can't be established.
ECDSA key fingerprint is SHA256:eX/LeVy7VZ0JxJ5Y88NE5kJ/zUozVdpjQ7IDKRqqkN8.
Are you sure you want to continue connecting (yes/no/[fingerprint])? y
Please type 'yes', 'no' or the fingerprint: yes
Warning: Permanently added '212.64.71.101' (ECDSA) to the list of known hosts.
git@212.64.71.101's password:
warning: You appear to have cloned an empty repository.
客隆仓库后在仓库里添加文件用于测试
[外链图片转存失败,源站可能有防盗链机制,建议将图片保存下来直接上传(img-D8TrKauT-1608124384327)(https://i.loli.net/2020/12/16/8sAnmxdIPG634uW.png)]
$ git add 1.txt

admin@DESKTOP-P6D5FT4 MINGW64 ~/Desktop/test/test (master)
$ git commit -'测试钩子函数'
[master (root-commit) a5b6704] 娴嬭瘯閽╁瓙鍑芥暟
 1 file changed, 1 insertion(+)
 create mode 100644 1.txt

admin@DESKTOP-P6D5FT4 MINGW64 ~/Desktop/test/test (master)
$ git push origin master
git@212.64.71.101's password:
Enumerating objects: 3, done.
Counting objects: 100% (3/3), done.
Writing objects: 100% (3/3), 229 bytes | 229.00 KiB/s, done.
Total 3 (delta 0), reused 0 (delta 0), pack-reused 0
remote: error: unable to create file 1.txt (Permission denied)
To 212.64.71.101:/home/git/test.git
 * [new branch]      master -> master
不幸的报错了然而 remote: error: unable to create file 1.txt (Permission denied)
先看git日志:
[root@VM-0-15-centos test.git]# git log
commit a5b6704a8b2db43bf715babcd05e4df86f6c10d0
Author: liaotao421 <1984457659@qq.com>
Date:   Wed Dec 16 12:50:07 2020 +0800

    测试钩子函数
是提交成功了的,再根据报错信息可能是权限问题,发现target目录拥有者并不是git

chown -R git /home/git/target
再来一次:
admin@DESKTOP-P6D5FT4 MINGW64 ~/Desktop/test/test (master)
$ git add 1.txt
admin@DESKTOP-P6D5FT4 MINGW64 ~/Desktop/test/test (master)
$ git commit -m '再次测试'
[master 03a6964] 鍐嶆娴嬭瘯
1 file changed, 1 insertion(+), 1 deletion(-)
admin@DESKTOP-P6D5FT4 MINGW64 ~/Desktop/test/test (master)
$ git pull origin master
git@212.64.71.101's password:
From 212.64.71.101:/home/git/test
* branch master -> FETCH_HEAD
Already up to date.
并没有报错,查看服务器上文件:
咋还没有。。。。
应该是target文件没有写入权限
chown 777 target
再创建个文件试一次:
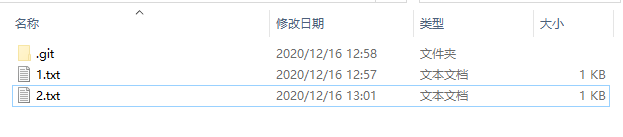
再次提交发现文件以及同步到target目录
[外链图片转存失败,源站可能有防盗链机制,建议将图片保存下来直接上传(img-TlvE2pds-1608124384334)(https://i.loli.net/2020/12/16/sEFgDfHQUt5h4T9.png)]
没有问题,继续
2、ssh秘钥
现在发现每次提交都要输入密码,意味着每次更新博客都需要输密码,肯定是太麻烦了,于是有听说有种避免这种情况的方法
这种输入用户名,密码的加密方式为对称加密,还有一种加密方式为非对称加密,有两个秘钥:私钥和公钥
- 私钥是每个人私有的(需妥善保管),而公钥顾名思义是公开的
- 私钥和公钥是一一对应的
- 用私钥加密的数据只能公钥可以解开,用公钥加密的数据只有私钥可以解
这里主要使用的是认证(不知道传输过程中对数据加密了没有emmm)
服务器需要知道传输文件的是我的笔记本,而不是假冒的,就需要知道到我笔记本的公钥,然后我发送私钥加密的文件,服务器用公钥解,如果解的开就是笔记本发送的文件
在本地生成私钥和秘钥:
$ ssh-keygen
Generating public/private rsa key pair.
Enter file in which to save the key (/c/Users/admin/.ssh/id_rsa):
Enter passphrase (empty for no passphrase):
Enter same passphrase again:
Your identification has been saved in /c/Users/admin/.ssh/id_rsa
Your public key has been saved in /c/Users/admin/.ssh/id_rsa.pub
The key fingerprint is:
SHA256:d8OT9qgBdSRjA/3xXYPSZgJXk34UIBxbmTGNueL2uXM admin@DESKTOP-P6D5FT4
The key's randomart image is:
+---[RSA 3072]----+
|        .+B+=B@..|
|         .oO=@o+.|
|          .oBoo.o|
|         . +.+...|
|        S o O .  |
|         o = =   |
|          o o o  |
|           o + E |
|          .  .+  |
+----[SHA256]-----+
[外链图片转存失败,源站可能有防盗链机制,建议将图片保存下来直接上传(img-151uC8jt-1608124384335)(https://i.loli.net/2020/12/16/yzWskvmxheUoJp4.png)]
.pub就是公钥,没有.pub的是私钥
将公钥给服务器:
ssh-copy-id -i id_rsa.pub git@212.64.71.101
$ ssh-copy-id -i id_rsa.pub git@212.64.71.101
/usr/bin/ssh-copy-id: INFO: Source of key(s) to be installed: "id_rsa.pub"
/usr/bin/ssh-copy-id: INFO: attempting to log in with the new key(s), to filter out any that are already installed
/usr/bin/ssh-copy-id: INFO: 1 key(s) remain to be installed -- if you are prompted now it is to install the new keys
git@212.64.71.101's password:
Permission denied, please try again.
git@212.64.71.101's password:
Permission denied, please try again.
git@212.64.71.101's password:

Number of key(s) added: 1

Now try logging into the machine, with:   "ssh 'git@212.64.71.101'"
and check to make sure that only the key(s) you wanted were added.
貌似这样就行了,测试
admin@DESKTOP-P6D5FT4 MINGW64 ~/Desktop/test/test (master)
$ git add 3.txt

admin@DESKTOP-P6D5FT4 MINGW64 ~/Desktop/test/test (master)
$ git commit -m '测试免密'
[master 1cff8de] 娴嬭瘯鍏嶅瘑
 1 file changed, 0 insertions(+), 0 deletions(-)
 create mode 100644 3.txt

admin@DESKTOP-P6D5FT4 MINGW64 ~/Desktop/test/test (master)
$ git push origin master
Enumerating objects: 4, done.
Counting objects: 100% (4/4), done.
Delta compression using up to 8 threads
Compressing objects: 100% (2/2), done.
Writing objects: 100% (3/3), 300 bytes | 300.00 KiB/s, done.
Total 3 (delta 0), reused 0 (delta 0), pack-reused 0
To 212.64.71.101:/home/git/test.git
   101e4bc..1cff8de  master -> master

admin@DESKTOP-P6D5FT4 MINGW64 ~/Desktop/test/test (master)
没有问题,现在可以免密提交
[外链图片转存失败,源站可能有防盗链机制,建议将图片保存下来直接上传(img-qASqzA2V-1608124384337)(https://i.loli.net/2020/12/16/Pz7cOx8WArKVZgd.png)]
3、站点开设
今天也是域名刚完成了备案,但是还要进行公安备案,不知道能直接用不
宝塔傻瓜式操作即可

[外链图片转存失败,源站可能有防盗链机制,建议将图片保存下来直接上传(img-ytVhsaP1-1608124384339)(https://i.loli.net/2020/12/16/jrPaEFkyHzIi5Rx.png)]
4、博客仓库创建
有了上面的经验,现在所需要进行的有:
- 新建仓库用来存放博客内容
- 提交后把内容自动同步到站点目录
没有错,只有两步!
[root@VM-0-15-centos git]# git init --bare blog.git
Initialized empty Git repository in /home/git/blog.git/
[root@VM-0-15-centos git]# chown -R git blog.git
[root@VM-0-15-centos hooks]# vim post-recieve
[root@VM-0-15-centos hooks]# chown -R git post-recieve
[root@VM-0-15-centos hooks]# chmod +x post-recieve
//将网站目录授予git用户(重要!)
[root@VM-0-15-centos wwwroot]# chown -R git taoblog421.cn
chown: changing ownership of ‘taoblog421.cn/.user.ini’: Operation not permitted //这个文件不影响
5、最终测试
修改hexo配置:
deploy:
  - type: git
    repo: git@212.64.71.101:/home/git/blog.git
    branch: master
运行:hexo clean && hexo deploy
[外链图片转存失败,源站可能有防盗链机制,建议将图片保存下来直接上传(img-3jYBOLoZ-1608124384340)(https://i.loli.net/2020/12/16/DVlZFTuNxcRrpvi.png)]
访问:
[外链图片转存失败,源站可能有防盗链机制,建议将图片保存下来直接上传(img-Pt1fWwTg-1608124384341)(https://i.loli.net/2020/12/16/JtDWCwF8Pk4ufiL.png)]
三、cdn加速 优化配置
这时候我发现 只要开了vpn访问速度就飞快,但是资源都是在国内服务器上
访问速度不使用VPN自然势必托管github快
在来个cdn加速直接起飞(访问量较少,应该花不到好多钱)
选阿里云,虽然都是资本家,还是选择阿里,emmm
我开了之后发现加速并不是很明显,emmm,还是从优化配置入手吧
好像有种说法是代码托管在github再使用cdn加速会有效果
大概能用就行,考试要紧,假期慢慢再搞优化吧,现在对国内访问已经足够友好了
原文链接:http://taoblog421.cn/posts/4bd2c845/


 3870
3870


 被折叠的 条评论
为什么被折叠?
被折叠的 条评论
为什么被折叠?
 到【灌水乐园】发言


