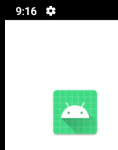
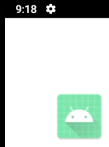
视图动画
视图动画不具备交互性,发生动画后,其响应事件还在之前的位置
AlphaAnimation
ImageView iv = findViewById(R.id.iv);
AlphaAnimation aa = new AlphaAnimation(0, 1);
aa.setDuration(3000);
iv.startAnimation(aa);
如上设置3秒从透明到不透明的动画

RotateAnimation
 ImageView iv = findViewById(R.id.iv);
 RotateAnimation ra = new RotateAnimation(0, 360, 100, 100);
 ra.setDuration(3000);
 iv.startAnimation(ra);
如上设置绕(100, 100)从0°旋转到360°

若绕自身中心旋转则为
ImageView iv = findViewById(R.id.iv);
RotateAnimation ra = new RotateAnimation(0, 360,
        Animation.RELATIVE_TO_SELF, 0.5F,
        Animation.RELATIVE_TO_SELF, 0.5F);
ra.setDuration(3000);
iv.startAnimation(ra);
TranslateAnimation
ImageView iv = findViewById(R.id.iv);
TranslateAnimation ta = new TranslateAnimation(0, 200, 0, 300);
ta.setDuration(3000);
iv.startAnimation(ta);
如上设置从(0, 0)平移到(200, 300)

ScaleAnimation
ImageView iv = findViewById(R.id.iv);
ScaleAnimation sa = new ScaleAnimation(0, 2, 0, 2);
sa.setDuration(3000);
iv.startAnimation(sa);
如上设置从0开始放大2倍

AnimationSet
用于混合动画
ImageView iv = findViewById(R.id.iv);
AnimationSet as = new AnimationSet(true);
as.setDuration(3000);
AlphaAnimation aa = new AlphaAnimation(0, 1);
aa.setDuration(3000);
as.addAnimation(aa);

TranslateAnimation ta = new TranslateAnimation(0, 200, 0, 300);
ta.setDuration(3000);
as.addAnimation(ta);
iv.startAnimation(as);
如上边平移边改变透明度

动画监听
对于上面每一个动画,都可获取其开始、结束、重复事件
AlphaAnimation aa = new AlphaAnimation(0, 1);
aa.setAnimationListener(new Animation.AnimationListener() {
    @Override
    public void onAnimationStart(Animation animation) {
    }
    @Override
    public void onAnimationEnd(Animation animation) {
    }
    @Override
    public void onAnimationRepeat(Animation animation) {
    }
});
属性动画
属性动画解决了视图动画的弊端,在发生动画后,其响应事件会跟随移动,默认时间间隔为300ms,帧率为10ms/帧
ImageView iv = findViewById(R.id.iv);
ObjectAnimator animator = ObjectAnimator.ofFloat(iv, "translationX", 300);
animator.setDuration(3000);
animator.start();
如上实现平移,第二个参数为操作的属性,其必须有get()/set()方法(利用反射调用),可选的属性有
- translationX / translationY:相对于父布局左上角偏移的位置
- rotation / rotationX / rotationY:围绕某点2D或3D旋转
- scaleX / scaleY:围绕某点缩放
- pivotX / pivotY:围绕某点旋转和缩放,默认为View中点
- x / y:最终位置
- alpha:透明度,默认为1(不透明)
若一个属性无get()/set()方法,则可自定义属性类或包装类,间接增加get()/set()方法
private static class WrapperView {
    private View mTarget;
    public WrapperView(View target) {
        mTarget = target;
    }
    public int getWidth() {
        return mTarget.getLayoutParams().width;
    }

    public void setWidth(int width) {
        mTarget.getLayoutParams().width = width;
        mTarget.requestLayout();
    }
}
如上包装了View的width,然后可利用ObjectAnimator调用
ImageView iv = findViewById(R.id.iv);
WrapperView wrapperView = new WrapperView(iv);
ObjectAnimator.ofInt(wrapperView, "width", 500).setDuration(3000).start();
PropertyValuesHolder
用于实现混合动画效果,如下实现平移过程中先缩小后放大
ImageView iv = findViewById(R.id.iv);
PropertyValuesHolder pvh1 = PropertyValuesHolder.ofFloat("translationX", 300f);
PropertyValuesHolder pvh2 = PropertyValuesHolder.ofFloat("scaleX", 1f, 0, 1f);
PropertyValuesHolder pvh3 = PropertyValuesHolder.ofFloat("scaleY", 1f, 0, 1f);
ObjectAnimator.ofPropertyValuesHolder(iv, pvh1, pvh2, pvh3).setDuration(3000).start();
AnimatorSet
也是用于实现混合动画效果,能实现比PropertyValuesHolder更为精细的顺序控制,有before()、after()等方法
ImageView iv = findViewById(R.id.iv);
ObjectAnimator animator1 = ObjectAnimator.ofFloat(iv, "translationX", 300f);
ObjectAnimator animator2 = ObjectAnimator.ofFloat(iv, "scaleX", 1f, 0f, 1f);
ObjectAnimator animator3 = ObjectAnimator.ofFloat(iv, "scaleY", 1f, 0f, 1f);
AnimatorSet set = new AnimatorSet();
set.setDuration(3000);
set.playTogether(animator1, animator2, animator3);
set.start();
ValueAnimator
用于产生具有一定规律的数字,用于表示动画的过程,以实现动画的变换
ImageView iv = findViewById(R.id.iv);
ValueAnimator animator = ValueAnimator.ofFloat(0, 100);
animator.setTarget(iv);
animator.setDuration(3000).start();
animator.addUpdateListener(new ValueAnimator.AnimatorUpdateListener() {
    @Override
    public void onAnimationUpdate(ValueAnimator animation) {
        Float animatedValue = (Float) animation.getAnimatedValue();

    }
});
动画监听
利用AnimatorListener可监听动画Start、Repeat、End、Cancel过程
ImageView iv = findViewById(R.id.iv);
ObjectAnimator animator = ObjectAnimator.ofFloat(iv, "alpha", 0.5f);
animator.addListener(new Animator.AnimatorListener() {
    @Override
    public void onAnimationStart(Animator animation) {

    }
    @Override
    public void onAnimationEnd(Animator animation) {

    }
    @Override
    public void onAnimationCancel(Animator animation) {
    }
    @Override
    public void onAnimationRepeat(Animator animation) {
    }
});
若只需监听其中一个,可利用AnimatorListenerAdapter
ImageView iv = findViewById(R.id.iv);
ObjectAnimator animator = ObjectAnimator.ofFloat(iv, "alpha", 0.5f);
animator.addListener(new AnimatorListenerAdapter() {
    @Override
    public void onAnimationEnd(Animator animation) {
        super.onAnimationEnd(animation);
    }
});
XML中使用
res下新建animator文件夹,新建scalex.xml放置在此处
<?xml version="1.0" encoding="utf-8"?>
<objectAnimator xmlns:android="http://schemas.android.com/apk/res/android"
    android:duration="1000"
    android:propertyName="scaleX"
    android:valueFrom="1.0"
    android:valueTo="2.0"
    android:valueType="floatType">
</objectAnimator>
要引用xml则通过
ImageView iv = findViewById(R.id.iv);
Animator animator = AnimatorInflater.loadAnimator(this, R.animator.scalex);
animator.setTarget(iv);
animator.start();
animate()
可直接使用view中的animate()实现属性动画
ImageView iv = findViewById(R.id.iv);
iv.animate()
        .alpha(0)
        .y(300)
        .setDuration(3000)
        .withStartAction(new Runnable() {
            @Override
            public void run() {
            }
        })
        .withEndAction(new Runnable() {
            @Override
            public void run() {
                runOnUiThread(new Runnable() {
                    @Override
                    public void run() {
                    }
                });
            }
        })
        .start();
布局动画
布局动画作用在ViewGroup上,用于ViewGroup增加View时添加一个动画过渡效果
<LinearLayout xmlns:android="http://schemas.android.com/apk/res/android"
    xmlns:tools="http://schemas.android.com/tools"
    android:id="@+id/root"
    android:layout_width="match_parent"
    android:layout_height="match_parent"
    android:animateLayoutChanges="true"
    android:background="#ffffff"
    android:orientation="vertical">

    <ImageView
        android:layout_width="wrap_content"
        android:layout_height="wrap_content"
        android:src="@drawable/ic_launcher" />

    <ImageView
        android:layout_width="wrap_content"
        android:layout_height="wrap_content"
        android:src="@drawable/ic_launcher" />
</LinearLayout>
如上设置animateLayoutChanges="true"打开布局动画
LinearLayout ll = findViewById(R.id.root);
ScaleAnimation sa = new ScaleAnimation(0, 1, 0, 1);
sa.setDuration(3000);
LayoutAnimationController lac = new LayoutAnimationController(sa, 0.5F);
lac.setOrder(LayoutAnimationController.ORDER_NORMAL);
ll.setLayoutAnimation(lac);
如上通过LayoutAnimationController控制子View的过渡效果,第二个参数为子View显示的时间,不为0时可设置子View显示的顺序,如上第二个View开始动画的时间为3000*0.5F = 1500
- LayoutAnimationController.ORDER_NORMAL——顺序
- LayoutAnimationController.ORDER_RANDOM——随机
- LayoutAnimationController.ORDER_REVERSE——反序
Interpolator和TypeEvaluator
Interpolators 根据时间流逝的百分比来计算出当前属性值改变的百分比,如对于平移动画,使用不同的Interpolators:
- LinearInterpolator:单位时间所移动的距离都是一样的
- AccelerateInterpolator:单位时间所移动的距离将越来越大
- 上面两者速度不同,但最终平移距离是一样的
TypeEvaluator根据当前属性改变的百分比来计算改变后的属性值,有IntEvaluator、FloatEvaluator和ArgbEvaluator
如在40ms内,x属性实现从0到40的变换,默认帧率为10ms/帧,则在20ms时,时间流逝百分比为 20 / 40 = 0.5
若采用LinearInterpolator,传入多少即是多少,故x也改变0.5
public class LinearInterpolator extends BaseInterpolator implements NativeInterpolatorFactory {

    public LinearInterpolator() {
    }

    public LinearInterpolator(Context context, AttributeSet attrs) {
    }

    public float getInterpolation(float input) {
        return input;
    }

    /** @hide */
    @Override
    public long createNativeInterpolator() {
        return NativeInterpolatorFactoryHelper.createLinearInterpolator();
    }
}
若采用IntEvaluator,最终x=0+0.5*(40-0)=20
public class IntEvaluator implements TypeEvaluator<Integer> {
    public Integer evaluate(float fraction, Integer startValue, Integer endValue) {
        int startInt = startValue;
        return (int)(startInt + fraction * (endValue - startInt));
    }
}
自定义动画
自定义动画需继承Animation并重写applyTransformation()
- 第一个参数为Interpolator的时间因子,由动画当前完成的百分比和当前时间所对应的插值所计算得来,范围为0-1.0
- 第二个参数为矩阵的封装类,用于获取矩阵
如下缩小图片的纵向,模拟电视机关闭动画
public class MyAnimation extends Animation {

    private int mCenterWidth;
    private int mCenterHeight;

    @Override
    public void initialize(int width, int height, int parentWidth, int parentHeight) {
        super.initialize(width, height, parentWidth, parentHeight);
        mCenterWidth = width / 2;
        mCenterHeight = height / 2;
    }

    @Override
    protected void applyTransformation(float interpolatedTime, Transformation t) {
        Matrix matrix = t.getMatrix();
        matrix.preScale(1, 1 - interpolatedTime, mCenterWidth, mCenterHeight);
    }
}
使用方法和其他动画一样
ImageView iv = findViewById(R.id.iv);
MyAnimation myAnimation = new MyAnimation();
myAnimation.setDuration(3000);
iv.startAnimation(myAnimation);

SVG矢量动画
Scalable Vector Graphics为可伸缩矢量图形
- www标准,用于网络的基于矢量的图形
- 用XML定义
- 放大或改变尺寸不会导致图形质量损失
path
用于设置指令控制画笔,有以下指令
- M = moveto(M X,Y):画笔移动到(x, y),未绘制
- L = lineto(L X,Y):画直线到(x, y)
- H = horizontal lineto( H X):画水平线到X
- V = vertical lineto(V Y ):画垂直线到Y
- C = curveto(C ,X1,Y1,X2,Y2,ENDX,ENDY):三次贝塞尔曲线
- S = smooth curveto(S X2,Y2,ENDX,ENDY):三次贝塞尔曲线
- Q = quadratic Belzier curve(Q X Y,ENDX,ENDY):二次贝塞尔曲线
- T = smooth quadratic Belzier curvrto(T,ENDX,ENDY):映射前面路径的终点
- A = elliptical Are(A RX,RY,XROTATION,FLAG1FLAG2,X,Y):弧线
- Z = closepath():关闭路径
需注意
- 指令大写为绝对定位(全局坐标系),小写为相对定位(父容器坐标系)
- 指令和数据间的空格可以省略
- 同一指令出现多次可以只用一个
vector
用于在XML创建SVG图形,如下在drawable文件夹新增vector.xml
- width / height:实际大小
- viewportWidth / viewportHeight:表示划分比例,将200dp分为100份
- M 25 50 表示移动到(25, 50)坐标,即距离原点x=25 / 100 * 200 = 50dp,y=50 / 100 * 200=100dp的位置
- A指令绘制椭圆,参数12:XY轴长度。参数3:X轴与水平顺时针方向的夹角。参数4:1大角度弧线 / 0小角度弧线。参数5:起点到终点的方向,1顺时针 / 0逆时针。参数67:XY轴终点坐标
<?xml version="1.0" encoding="utf-8"?>
<vector xmlns:android="http://schemas.android.com/apk/res/android"
    android:width="200dp"
    android:height="200dp"
    android:viewportWidth="100"
    android:viewportHeight="100">
    <group
        android:name="svg"
        android:rotation="0">
        <path
            android:fillColor="@android:color/holo_blue_light"
            android:pathData="
            M 25 50
            a 25,25 0,1,0 50,0" />
    </group>
</vector>
通过 background / src 属性引用,效果如下

如果不需要填充,则可改为
android:strokeColor="@android:color/holo_blue_light"
android:strokeWidth="2"

animate-vector
用于给图形添加动画,先在animator文件夹新增anim_path1.xml
- android:propertyName 引用vector.xml中group的属性
- 若为属性为pathData,则需要添加android:valueType=“pathType”
<?xml version="1.0" encoding="utf-8"?>
<objectAnimator xmlns:android="http://schemas.android.com/apk/res/android"
    android:duration="4000"
    android:propertyName="rotation"
    android:valueFrom="0"
    android:valueTo="360" />
然后在drawable文件夹新增vector_animate.xml
- android:drawable 引用上面的vector.xml
- android:name 需要与vector.xml的group名称一样
- android:animation 引用上面anim_path1.xml
<?xml version="1.0" encoding="utf-8"?>
<animated-vector xmlns:android="http://schemas.android.com/apk/res/android"
    android:drawable="@drawable/vector">
    <target
        android:name="svg"
        android:animation="@animator/anim_path1" />
</animated-vector>
使用src属性引用vector_animate.xml
<LinearLayout xmlns:android="http://schemas.android.com/apk/res/android"
    xmlns:tools="http://schemas.android.com/tools"
    android:layout_width="match_parent"
    android:layout_height="match_parent"
    android:background="#ffffff"
    android:orientation="vertical">

    <ImageView
        android:id="@+id/iv"
        android:layout_width="wrap_content"
        android:layout_height="wrap_content"
        android:src="@drawable/vector_animate" />
</LinearLayout>
转为Animatable并开启动画
public class MainActivity extends AppCompatActivity {

    protected void onCreate(Bundle savedInstanceState) {
        super.onCreate(savedInstanceState);
        setContentView(R.layout.activity_main);
        ImageView iv = findViewById(R.id.iv);
        ((Animatable) iv.getDrawable()).start();
    }
}
效果为旋转一圈

实例——线图动画
创建line.xml,绘制两条直线,path1先移动到(20,80),再绘制直线到(50,80)和(80,80),形成3个点(中点用于动画),path2同理
<?xml version="1.0" encoding="utf-8"?>
<vector xmlns:android="http://schemas.android.com/apk/res/android"
    android:width="200dp"
    android:height="200dp"
    android:viewportWidth="100"
    android:viewportHeight="100">
    <group>
        <path
            android:name="path1"
            android:pathData="M 20,80
            L 50,80 80,80"
            android:strokeWidth="5"
            android:strokeColor="@android:color/holo_green_dark"
            android:strokeLineCap="round" />
        <path
            android:name="path2"
            android:pathData="M 20,20
            L 50,20 80,20"
            android:strokeWidth="5"
            android:strokeColor="@android:color/holo_green_dark"
            android:strokeLineCap="round" />
    </group>
</vector>
创建line_animator1.xml用于path1,让动画先移动到(20,80),再绘制直线到(50,50)和(80,80),即让中点变换
<?xml version="1.0" encoding="utf-8"?>
<objectAnimator xmlns:android="http://schemas.android.com/apk/res/android"
    android:duration="5000"
    android:interpolator="@android:anim/bounce_interpolator"
    android:propertyName="pathData"
    android:valueFrom="M 20,80
     L 50,80 80,80"
    android:valueTo="M 20,80
    L 50,50 80,80"
    android:valueType="pathType" />
创建line_animator2.xml用于path2,同理
<?xml version="1.0" encoding="utf-8"?>
<objectAnimator xmlns:android="http://schemas.android.com/apk/res/android"
    android:duration="5000"
    android:interpolator="@android:anim/bounce_interpolator"
    android:propertyName="pathData"
    android:valueFrom="M 20,20
    L 50,20 80,20"
    android:valueTo="M 20,20
    L 50,50 80,20"
    android:valueType="pathType" />
创建line_animate.xml合并动画
<?xml version="1.0" encoding="utf-8"?>
<animated-vector xmlns:android="http://schemas.android.com/apk/res/android"
    android:drawable="@drawable/line">
    <target
        android:name="path1"
        android:animation="@animator/line_animator1" />
    <target
        android:name="path2"
        android:animation="@animator/line_animator2" />
</animated-vector>
布局通过src属性引用
<LinearLayout xmlns:android="http://schemas.android.com/apk/res/android"
    xmlns:tools="http://schemas.android.com/tools"
    android:layout_width="match_parent"
    android:layout_height="match_parent"
    android:background="#ffffff"
    android:orientation="vertical">

    <ImageView
        android:id="@+id/iv"
        android:layout_width="wrap_content"
        android:layout_height="wrap_content"
        android:src="@drawable/line_animate" />
</LinearLayout>
通过点击事件开启动画
public class MainActivity extends AppCompatActivity {

    private ImageView mIv;

    protected void onCreate(Bundle savedInstanceState) {
        super.onCreate(savedInstanceState);
        setContentView(R.layout.activity_main);
        mIv = findViewById(R.id.iv);
        mIv.setOnClickListener(new View.OnClickListener() {
            @Override
            public void onClick(View v) {
                animate();
            }
        });
    }

    private void animate() {
        ((Animatable) mIv.getDrawable()).start();
    }
}
效果为两平行的直线,中点合并为一个X

实例——模拟三球仪
创建sun_earth.xml,绘制静态的三个球,在(60,60)绘制半径为10的sun,在(75,55)绘制半径为5的earth,在(89,55)绘制半径为4的moon
<?xml version="1.0" encoding="utf-8"?>
<vector xmlns:android="http://schemas.android.com/apk/res/android"
    android:width="200dp"
    android:height="200dp"
    android:viewportWidth="100"
    android:viewportHeight="100">
    <group
        android:name="sun"
        android:pivotX="60"
        android:pivotY="50"
        android:rotation="0">
        <path
            android:name="path_sun"
            android:fillColor="@android:color/holo_blue_light"
            android:pathData="M 50,50
            a 10,10 0,1,0 20,0
            a 10,10 0,1,0 -20,0" />
        <group
            android:name="earth"
            android:pivotX="75"
            android:pivotY="50"
            android:rotation="0">
            <path
                android:name="path_earth"
                android:fillColor="@android:color/holo_orange_dark"
                android:pathData="M 70,50
                a 5,5 0,1,0 10,0
                a 5,5 0,1,0 -10,0" />
            <group>
                <path
                    android:fillColor="@android:color/holo_green_dark"
                    android:pathData="M 90,50
                    m -5 0
                    a 4,4 0,1,0 8,0
                    a 4,4 0,1,0 -8,0" />
            </group>
        </group>
    </group>
</vector>
创建sun_earth_animator.xml,为两个group设置旋转动画
<?xml version="1.0" encoding="utf-8"?>
<objectAnimator xmlns:android="http://schemas.android.com/apk/res/android"
    android:duration="4000"
    android:propertyName="rotation"
    android:valueFrom="0"
    android:valueTo="360" />
创建sun_earth_animate.xml设置动画
<?xml version="1.0" encoding="utf-8"?>
<animated-vector xmlns:android="http://schemas.android.com/apk/res/android"
    android:drawable="@drawable/sun_earth">
    <target
        android:name="sun"
        android:animation="@animator/sun_earth_animator" />
    <target
        android:name="earth"
        android:animation="@animator/sun_earth_animator" />
</animated-vector>
使用方法同上,不再赘述,效果为三个球绕其旋转中心旋转

实例——轨迹动画
创建search.xml绘制搜索栏
<?xml version="1.0" encoding="utf-8"?>
<vector xmlns:android="http://schemas.android.com/apk/res/android"
    android:width="160dp"
    android:height="30dp"
    android:viewportWidth="160"
    android:viewportHeight="30">
    <path
        android:name="search"
        android:pathData="M 141,17
        A 9,9 0,1,1 142,16
        L 149,23"
        android:strokeWidth="2"
        android:strokeAlpha="0.8"
        android:strokeColor="#ff3570be"
        android:strokeLineCap="square" />
    <path
        android:name="bar"
        android:pathData="M 0,23
        L 149,23"
        android:strokeWidth="2"
        android:strokeAlpha="0.8"
        android:strokeColor="#ff3570be"
        android:strokeLineCap="square" />
</vector>
创建search_animator.xml,设置android:propertyName=“trimPathStart”,其利用0-1百分比按照轨迹绘制SVG
<?xml version="1.0" encoding="utf-8"?>
<objectAnimator xmlns:android="http://schemas.android.com/apk/res/android"
    android:duration="1000"
    android:interpolator="@android:interpolator/accelerate_decelerate"
    android:propertyName="trimPathStart"
    android:valueFrom="0"
    android:valueTo="1"
    android:valueType="floatType" />
创建search_animate.xml,设置动画
<?xml version="1.0" encoding="utf-8"?>
<animated-vector xmlns:android="http://schemas.android.com/apk/res/android"
    android:drawable="@drawable/search">
    <target
        android:name="search"
        android:animation="@animator/search_animator" />

</animated-vector>
使用方法同上,不再赘述,效果为点击后搜索框会沿着绘制的轨迹消失

Activity过渡动画
- 进入 / 退出动画:Activity中的视图如何 进入 / 退出屏幕
- 共享元素:两个Activity过渡时如何共享它们的视图
进入和退出动画包括
- explode / slide:从屏幕 中间 / 边缘 进出
- fade:改变不透明度实现添加或移除视图
共享元素动画包括
- changeBounds / changeClipBounds:改变 / 裁剪目标视图边界
- changeTransfrom:改变目标视图的缩放比例和旋转角度
- changeImageTransfrom:改变目标图片的大小和缩放比例
如下为Actvitiy1的布局,设置了4个按钮分别实现 explode、slide、fade和share,其中共享元素需要配置android:transitionName属性
<?xml version="1.0" encoding="utf-8"?>
<LinearLayout xmlns:android="http://schemas.android.com/apk/res/android"
    android:layout_width="match_parent"
    android:layout_height="match_parent"
    android:orientation="vertical">

    <Button
        android:layout_width="match_parent"
        android:layout_height="100dp"
        android:onClick="explode"
        android:text="explode" />

    <Button
        android:layout_width="match_parent"
        android:layout_height="100dp"
        android:onClick="slide"
        android:text="slide" />

    <Button
        android:layout_width="match_parent"
        android:layout_height="100dp"
        android:onClick="fade"
        android:text="fade" />

    <Button
        android:layout_width="match_parent"
        android:layout_height="100dp"
        android:onClick="share"
        android:text="share"
        android:transitionName="share" />

    <Button
        android:id="@+id/fab_button"
        android:layout_width="56dp"
        android:layout_height="56dp"
        android:background="@mipmap/ic_launcher"
        android:elevation="5dp"
        android:transitionName="fab" />

</LinearLayout>
通过ActivityOptions.makeSceneTransitionAnimation开启Activity2,若共享元素多于一个,则使用Pair组合
public class MainActivity extends AppCompatActivity {
    private Intent intent;

    @Override
    protected void onCreate(@Nullable Bundle savedInstanceState) {
        super.onCreate(savedInstanceState);
        setContentView(R.layout.activity_main);
    }

    public void explode(View view) {
        intent = new Intent(this, MainActivity2.class);
        intent.putExtra("flag", 0);
        startActivity(intent, ActivityOptions.makeSceneTransitionAnimation(this).toBundle());
    }

    public void slide(View view) {
        intent = new Intent(this, MainActivity2.class);
        intent.putExtra("flag", 1);
        startActivity(intent, ActivityOptions.makeSceneTransitionAnimation(this).toBundle());
    }

    public void fade(View view) {
        intent = new Intent(this, MainActivity2.class);
        intent.putExtra("flag", 2);
        startActivity(intent, ActivityOptions.makeSceneTransitionAnimation(this).toBundle());
    }

    public void share(View view) {
        View fab = findViewById(R.id.fab_button);
        intent = new Intent(this, MainActivity2.class);
        intent.putExtra("flag", 3);
        //创建单个共享元素
        //startActivity(intent, ActivityOptions.makeSceneTransitionAnimation(this, view, "share").toBundle());
        //创建多个共享单元
        startActivity(intent, ActivityOptions.makeSceneTransitionAnimation(this, Pair.create(view, "share"), Pair.create(fab, "fab")).toBundle());
    }
}
如下为Activity2的布局,放置两个共享元素,且需要与上面的android:transitionName相同
<?xml version="1.0" encoding="utf-8"?>
<RelativeLayout xmlns:android="http://schemas.android.com/apk/res/android"
    android:layout_width="match_parent"
    android:layout_height="match_parent">

    <View
        android:id="@+id/holder_view"
        android:layout_width="match_parent"
        android:layout_height="300dp"
        android:background="@color/colorPrimary"
        android:transitionName="share" />

    <Button
        android:layout_width="56dp"
        android:layout_height="56dp"
        android:layout_below="@id/holder_view"
        android:layout_alignParentEnd="true"
        android:layout_marginTop="-26dp"
        android:layout_marginRight="15dp"
        android:background="@mipmap/ic_launcher"
        android:elevation="5dp"
        android:transitionName="fab" />
</RelativeLayout>
MainActivity2通过requestFeature()开启动画效果,或者在style.xml中的样式添加如下属性,根据传入参数设置不同的进入退出动画(这里的共享元素无需设置也会自动变化)
<item name="android:windowContentTransitions">true</item>
public class MainActivity2 extends Activity {
    @Override
    protected void onCreate(@Nullable Bundle savedInstanceState) {
        super.onCreate(savedInstanceState);

        getWindow().requestFeature(Window.FEATURE_CONTENT_TRANSITIONS);
        int flag = getIntent().getExtras().getInt("flag");
        switch (flag) {
            case 0:
                getWindow().setEnterTransition(new Explode());
                break;
            case 1:
                getWindow().setEnterTransition(new Slide());
                break;
            case 2:
                getWindow().setEnterTransition(new Fade());
                getWindow().setExitTransition(new Fade());
                break;
        }
        setContentView(R.layout.activity_main2);
    }
}
此外,还可通过overridePendingTransition设置Activity进/出动画,其需要在startActivity()或finish()后使用,enter.xml如下
<?xml version="1.0" encoding="utf-8"?>
<alpha xmlns:android="http://schemas.android.com/apk/res/android"
    android:duration="3000"
    android:fromAlpha="0"
    android:toAlpha="1">

</alpha>
exit.xml如下
<?xml version="1.0" encoding="utf-8"?>
<alpha xmlns:android="http://schemas.android.com/apk/res/android"
    android:duration="3000"
    android:fromAlpha="1"
    android:toAlpha="0">

</alpha>
public class MainActivity extends AppCompatActivity {

    private static final String TAG = "MainActivity";

    protected void onCreate(Bundle savedInstanceState) {
        super.onCreate(savedInstanceState);
        setContentView(R.layout.activity_main);
        Intent intent = new Intent(this, SecondActivity.class);
        startActivity(intent);
        overridePendingTransition(R.anim.enter, R.anim.exit);
    }
}
public class SecondActivity extends AppCompatActivity {

    @Override
    protected void onCreate(Bundle savedInstanceState) {
        super.onCreate(savedInstanceState);
        setContentView(R.layout.activity_second);
    }

    @Override
    public void finish() {
        super.finish();
        overridePendingTransition(R.anim.enter, R.anim.exit);
    }
}
Material Design 动画
Ripple
点击后的波纹效果
<?xml version="1.0" encoding="utf-8"?>
<LinearLayout xmlns:android="http://schemas.android.com/apk/res/android"
    android:layout_width="match_parent"
    android:layout_height="match_parent"
    android:background="@android:color/holo_blue_light"
    android:gravity="center"
    android:orientation="vertical">

    <Button
        android:layout_width="100dp"
        android:layout_height="100dp"
        android:background="?android:attr/selectableItemBackground"
        android:text="有界波纹"
        android:textColor="@android:color/white" />

    <Button
        android:layout_width="100dp"
        android:layout_height="100dp"
        android:background="?android:attr/selectableItemBackgroundBorderless"
        android:text="无界波纹"
        android:textColor="@android:color/white" />

</LinearLayout>
效果如下,一个限制在边界中,一个呈圆形扩散


也可创建XML,通过背景设置
<?xml version="1.0" encoding="utf-8"?>
<ripple xmlns:android="http://schemas.android.com/apk/res/android"
    android:color="@android:color/holo_blue_dark">
    <item>
        <shape android:shape="oval">
            <solid android:color="@color/colorPrimary" />
        </shape>
    </item>
</ripple>
Circular Reveal
让View以圆形展开、显示
<?xml version="1.0" encoding="utf-8"?>
<LinearLayout xmlns:android="http://schemas.android.com/apk/res/android"
    android:layout_width="match_parent"
    android:layout_height="match_parent"
    android:orientation="vertical"
    android:gravity="center">

    <ImageView
        android:id="@+id/oval"
        android:layout_width="100dp"
        android:layout_height="100dp"
        android:background="@mipmap/ic_launcher" />

    <ImageView
        android:id="@+id/rect"
        android:layout_width="100dp"
        android:layout_height="100dp"
        android:background="@mipmap/ic_launcher" />

</LinearLayout>
如下分别设置了从中心点缩小和扇形展开
public class MainActivity extends AppCompatActivity {
    @Override
    protected void onCreate(@Nullable Bundle savedInstanceState) {
        super.onCreate(savedInstanceState);
        setContentView(R.layout.activity_main);

        View oval = findViewById(R.id.oval);
        oval.setOnClickListener(new View.OnClickListener() {
            @Override
            public void onClick(View v) {
                Animator animator = ViewAnimationUtils.createCircularReveal(
                        oval,
                        oval.getWidth() / 2,
                        oval.getHeight() / 2,
                        oval.getWidth(),
                        0);
                animator.setInterpolator(new AccelerateDecelerateInterpolator());
                animator.setDuration(2000);
                animator.start();
            }
        });
        View rect = findViewById(R.id.rect);
        rect.setOnClickListener(new View.OnClickListener() {
            @Override
            public void onClick(View v) {
                Animator animator = ViewAnimationUtils.createCircularReveal(
                        rect,
                        0,
                        0,
                        0,
                        (float) Math.hypot(rect.getWidth(),
                                rect.getHeight()));
                animator.setInterpolator(new AccelerateInterpolator());
                animator.setDuration(2000);
                animator.start();
            }
        });
    }
}
效果如下


View state change Animation
当视图状态改变(Press、Focus)时设置切换动画
<?xml version="1.0" encoding="utf-8"?>
<selector xmlns:android="http://schemas.android.com/apk/res/android">
    <item android:state_pressed="true">
        <set>
            <objectAnimator
                android:duration="2000"
                android:propertyName="rotationX"
                android:valueTo="360"
                android:valueType="floatType" />
        </set>
    </item>

    <item android:state_pressed="false">
        <set>
            <objectAnimator
                android:duration="2000"
                android:propertyName="rotationX"
                android:valueTo="0"
                android:valueType="floatType" />
        </set>
    </item>
</selector>
如上,在点击时翻转360°,松开后恢复,可通过stateListAnimator属性设置
<?xml version="1.0" encoding="utf-8"?>
<LinearLayout xmlns:android="http://schemas.android.com/apk/res/android"
    android:layout_width="match_parent"
    android:layout_height="match_parent"
    android:gravity="center"
    android:orientation="vertical">

    <Button
        android:id="@+id/btn"
        android:layout_width="200dp"
        android:layout_height="200dp" />

</LinearLayout>
或通过代码设置
public class MainActivity extends AppCompatActivity {
    @Override
    protected void onCreate(@Nullable Bundle savedInstanceState) {
        super.onCreate(savedInstanceState);
        setContentView(R.layout.activity_main);
        Button button = findViewById(R.id.btn);
        button.setStateListAnimator(AnimatorInflater.loadStateListAnimator(this, R.animator.button_selector_animator));
    }
}
效果如下

动画实例
灵动菜单
如下实现菜单的弹出、聚拢特效,先放置5个图片在同一位置
<RelativeLayout xmlns:android="http://schemas.android.com/apk/res/android"
    xmlns:tools="http://schemas.android.com/tools"
    android:layout_width="match_parent"
    android:layout_height="match_parent"
    android:background="#ffffff">

    <ImageView
        android:id="@+id/iv0"
        android:layout_width="wrap_content"
        android:layout_height="wrap_content"
        android:layout_centerInParent="true"
        android:src="@drawable/ic_launcher" />
    <ImageView
        android:id="@+id/iv1"
        android:layout_width="wrap_content"
        android:layout_height="wrap_content"
        android:layout_centerInParent="true"
        android:src="@drawable/ic_launcher" />
    <ImageView
        android:id="@+id/iv2"
        android:layout_width="wrap_content"
        android:layout_height="wrap_content"
        android:layout_centerInParent="true"
        android:src="@drawable/ic_launcher" />
    <ImageView
        android:id="@+id/iv3"
        android:layout_width="wrap_content"
        android:layout_height="wrap_content"
        android:layout_centerInParent="true"
        android:src="@drawable/ic_launcher" />
    <ImageView
        android:id="@+id/iv4"
        android:layout_width="wrap_content"
        android:layout_height="wrap_content"
        android:layout_centerInParent="true"
        android:src="@drawable/ic_launcher" />
</RelativeLayout>
如下为每个图片设置动画(为什么设置相反的数值不能close回去,而是需要调用getScrollX)
public class MainActivity extends AppCompatActivity {

    private boolean mFlag = true;
    private ImageView iv0;
    private ImageView iv1;
    private ImageView iv2;
    private ImageView iv3;
    private ImageView iv4;

    protected void onCreate(Bundle savedInstanceState) {
        super.onCreate(savedInstanceState);
        setContentView(R.layout.activity_main);
        iv0 = findViewById(R.id.iv0);
        iv1 = findViewById(R.id.iv1);
        iv2 = findViewById(R.id.iv2);
        iv3 = findViewById(R.id.iv3);
        iv4 = findViewById(R.id.iv4);
        iv0.setOnClickListener(new View.OnClickListener() {
            @Override
            public void onClick(View v) {
                if (mFlag) {
                    statAnim();
                } else {
                    closeAnim();
                }
            }
        });
    }

    private void closeAnim() {
        ObjectAnimator animator0 = ObjectAnimator.ofFloat(iv0, "alpha", 0.5F, 1F);
        ObjectAnimator animator1 = ObjectAnimator.ofFloat(iv1, "translationY", -iv1.getScrollY());
        ObjectAnimator animator2 = ObjectAnimator.ofFloat(iv2, "translationX", -iv2.getScrollX());
        ObjectAnimator animator3 = ObjectAnimator.ofFloat(iv3, "translationY", iv3.getScrollY());
        ObjectAnimator animator4 = ObjectAnimator.ofFloat(iv4, "translationX", iv3.getScrollX());
        AnimatorSet set = new AnimatorSet();
        set.setInterpolator(new AccelerateDecelerateInterpolator());
        set.playTogether(animator0, animator1, animator2, animator3, animator4);
        set.start();
        mFlag = true;
    }

    private void statAnim() {
        ObjectAnimator animator0 = ObjectAnimator.ofFloat(iv0, "alpha", 1F, 0.5F);
        ObjectAnimator animator1 = ObjectAnimator.ofFloat(iv1, "translationY", 200F);
        ObjectAnimator animator2 = ObjectAnimator.ofFloat(iv2, "translationX", 200F);
        ObjectAnimator animator3 = ObjectAnimator.ofFloat(iv3, "translationY", -200F);
        ObjectAnimator animator4 = ObjectAnimator.ofFloat(iv4, "translationX", -200F);
        AnimatorSet set = new AnimatorSet();
        set.setInterpolator(new BounceInterpolator());
        set.playTogether(animator0, animator1, animator2, animator3, animator4);
        set.start();
        mFlag = false;
    }
}
效果如下,点击中间的图片让其他图片弹出或聚拢

计时器动画
<RelativeLayout xmlns:android="http://schemas.android.com/apk/res/android"
    xmlns:tools="http://schemas.android.com/tools"
    android:layout_width="match_parent"
    android:layout_height="match_parent"
    android:background="#ffffff">

    <TextView
        android:id="@+id/tv"
        android:layout_width="wrap_content"
        android:layout_height="wrap_content"
        android:layout_centerInParent="true"
        android:text="Start Timer"
        android:textSize="30sp"
        android:textColor="#000000" />
</RelativeLayout>
public class MainActivity extends AppCompatActivity {

    protected void onCreate(Bundle savedInstanceState) {
        super.onCreate(savedInstanceState);
        setContentView(R.layout.activity_main);
        TextView tv = findViewById(R.id.tv);
        tv.setOnClickListener(new View.OnClickListener() {
            @Override
            public void onClick(View v) {
                tvTimer(v);
            }
        });
    }

    private void tvTimer(final View view) {
        ValueAnimator va = ValueAnimator.ofInt(0, 100);
        va.addUpdateListener(new ValueAnimator.AnimatorUpdateListener() {
            @Override
            public void onAnimationUpdate(ValueAnimator animation) {
                ((TextView) view).setText("$" + animation.getAnimatedValue());
            }
        });
        va.setDuration(3000);
        va.start();
    }
}
点击后,通过onAnimationUpdate()不断设置数值,将在3秒内从0增加到100,如下

下拉展开动画
设置两个LinearLayout,一个常显,一个隐藏
<?xml version="1.0" encoding="utf-8"?>
<LinearLayout xmlns:android="http://schemas.android.com/apk/res/android"
    android:layout_width="match_parent"
    android:layout_height="match_parent"
    android:orientation="vertical">

    <LinearLayout
        android:layout_width="match_parent"
        android:layout_height="wrap_content"
        android:background="@android:color/holo_blue_bright"
        android:gravity="center_vertical"
        android:onClick="llClick"
        android:orientation="horizontal">

        <ImageView
            android:id="@+id/app_icon"
            android:layout_width="wrap_content"
            android:layout_height="wrap_content"
            android:layout_gravity="center"
            android:src="@mipmap/ic_launcher" />

        <TextView
            android:layout_width="wrap_content"
            android:layout_height="wrap_content"
            android:layout_marginLeft="5dp"
            android:gravity="left"
            android:text="Click me"
            android:textSize="30sp" />
    </LinearLayout>

    <LinearLayout
        android:id="@+id/hidden_view"
        android:layout_width="match_parent"
        android:layout_height="40dp"
        android:background="@android:color/holo_orange_light"
        android:orientation="horizontal"
        android:visibility="gone">

        <ImageView
            android:layout_width="wrap_content"
            android:layout_height="wrap_content"
            android:layout_gravity="center"
            android:src="@mipmap/ic_launcher" />

        <TextView
            android:id="@+id/tv_hidden"
            android:layout_width="wrap_content"
            android:layout_height="match_parent"
            android:gravity="center"
            android:text="I Am Hidden"
            android:textSize="20sp" />
    </LinearLayout>
</LinearLayout>
通过ValueAnimator的onAnimationUpdate()方法逐渐增加或减少View的高度,关闭时通过onAnimationEnd()在动画结束时隐藏View
public class MainActivity extends AppCompatActivity {

    private LinearLayout mHiddenView;
    private float mDensity;
    private int mHiddenViewMeasuredHeight;

    protected void onCreate(Bundle savedInstanceState) {
        super.onCreate(savedInstanceState);
        setContentView(R.layout.activity_main);
        mHiddenView = (LinearLayout) findViewById(R.id.hidden_view);
        //获取像素密度
        mDensity = getResources().getDisplayMetrics().density;
        //获取布局的高度
        mHiddenViewMeasuredHeight = (int) (mDensity * 40 + 0.5);
    }

    public void llClick(View view) {
        if (mHiddenView.getVisibility() == View.GONE) {
            animOpen(mHiddenView);
        } else {
            animClose(mHiddenView);
        }
    }

    private void animOpen(final View view) {
        view.setVisibility(View.VISIBLE);
        ValueAnimator va = createDropAnim(view, 0, mHiddenViewMeasuredHeight);
        va.start();
    }

    private void animClose(View view) {
        ValueAnimator va = createDropAnim(view, mHiddenViewMeasuredHeight, 0);
        va.addListener(new AnimatorListenerAdapter() {
            @Override
            public void onAnimationEnd(Animator animation) {
                view.setVisibility(View.GONE);
            }
        });
        va.start();
    }

    private ValueAnimator createDropAnim(final View view, int start, int end) {
        ValueAnimator va = ValueAnimator.ofInt(start, end);
        va.addUpdateListener(new ValueAnimator.AnimatorUpdateListener() {
            @Override
            public void onAnimationUpdate(ValueAnimator animation) {
                int value = (int) animation.getAnimatedValue();
                ViewGroup.LayoutParams layoutParams = view.getLayoutParams();
                layoutParams.height = value;
                view.setLayoutParams(layoutParams);
            }
        });
        return va;
    }
}
效果如下


 2791
2791


 被折叠的 条评论
为什么被折叠?


