


目录
一、弹窗内部高斯模糊效果实现:
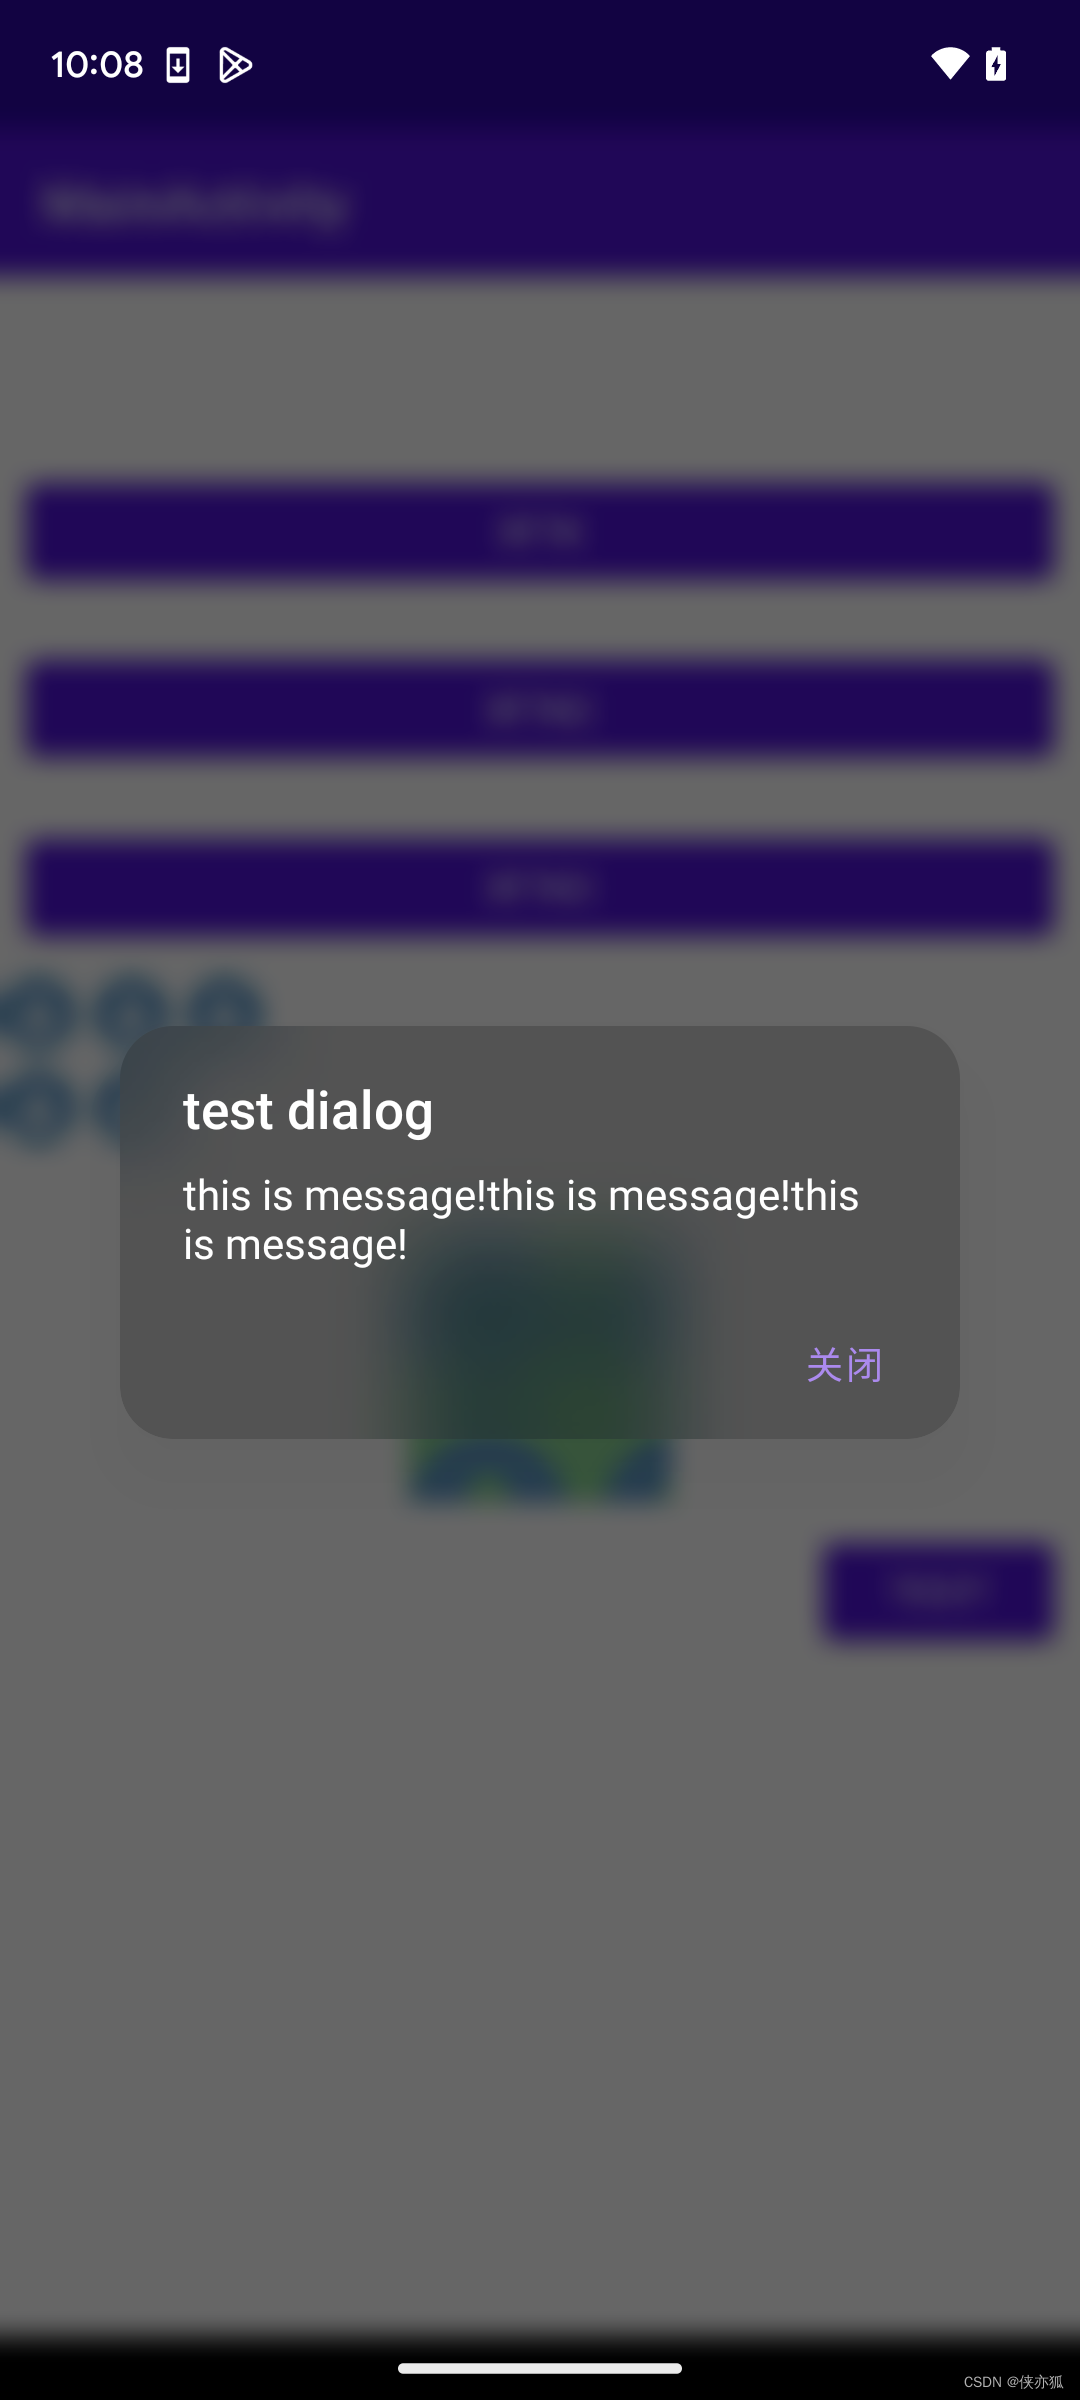
效果:


只需要在style中声明高斯模糊的属性:
<!--高斯模糊Dialog-->
<style name="BlurDialogTheme" parent="Theme.MaterialComponents.Dialog">
    <item name="android:backgroundDimEnabled">false</item>
    <item name="android:windowIsTranslucent">true</item>
    <item name="android:windowBackground">@drawable/dialog_bg</item>
    <item name="android:windowBackgroundBlurRadius" tools:ignore="NewApi">30dp</item>
</style>
backgroundDimEnabled是弹窗外的暗色是否开启,根据实际情况设置即可。
dialog_bg.xml可以声明半径和背景暗色程度:
<?xml version="1.0" encoding="utf-8"?>
<shape xmlns:android="http://schemas.android.com/apk/res/android"
    android:shape="rectangle">
        <solid android:color="#2f000000"/>
        <corners android:radius="20dp"/>
</shape>
dialog中使用:
new AlertDialog.Builder(this, R.style.BlurDialogTheme)二、弹窗外部高斯模糊效果实现:
实现效果:

方案一:
Android12 新增有高斯模糊API:
Android 12 中,可以更轻松地将常用图形效果应用于View上,View中增加了setRenderEffect接口:
public void setRenderEffect(@Nullable RenderEffect renderEffect) {
        ...
}
实现:
所以我们使用这个api实现:
View decorView = getWindow().getDecorView();
decorView.setRenderEffect(RenderEffect.createBlurEffect(25F, 25F, Shader.TileMode.CLAMP));
Dialog dialog = new AlertDialog.Builder(this)
                    .setTitle("test dialog")
                    .setMessage("this is message!")
                    .setPositiveButton("关闭",null)
                    .create();
dialog.setOnDismissListener(dialog1 -> {
         decorView.setRenderEffect(null);
});
dialog.show();
如果是非Android12的话也能实现,需要有最外层的view,获取到当前界面所显示的内容高斯模糊后设置给外层view当背景,本文不做赘述。
实际上,style也为我们提供了弹窗外部高斯模糊的属性,不需要代码来动态设置:
方案二:
style中声明:
    <!--高斯模糊Dialog-->
    <style name="BlurDialogTheme" parent="Theme.MaterialComponents.Dialog">
        <item name="android:windowBlurBehindEnabled" tools:ignore="NewApi">true</item>
        <item name="android:windowBlurBehindRadius" tools:ignore="NewApi">10dp</item>
    </style>
然后dialog中使用:
new AlertDialog.Builder(this, R.style.BlurDialogTheme)两种方式有一个区别,使用style设置了之后如果背景是动态的,模糊效果依然存在,而使用setRenderEffect的方式则模糊效果会消失。
三、弹窗内外均带高斯模糊效果:
效果:
dialog_bg.xml:左#2f000000,右#2fffffff
实现:
就是以上两种情况的结合,如果比较懒的话直接用style:
   <!--高斯模糊Dialog-->
    <style name="BlurDialogTheme" parent="Theme.MaterialComponents.Dialog">
        <item name="android:windowIsTranslucent">true</item>
        <item name="android:windowBackground">@drawable/dialog_bg</item>
        <item name="android:windowBlurBehindEnabled" tools:ignore="NewApi">true</item>
        <item name="android:windowBlurBehindRadius" tools:ignore="NewApi">10dp</item>
        <item name="android:windowBackgroundBlurRadius" tools:ignore="NewApi">30dp</item>
    </style>


 251
251


 被折叠的 条评论
为什么被折叠?
被折叠的 条评论
为什么被折叠?
 到【灌水乐园】发言


