


Vue3.0由单页面应用改为多页面开发
一、使用vue cli创建一个单页面应用程序
1、在命令行窗口敲如下图命令,输入完成敲回车会自动打开一个vue的管理界面

2、在管理界面中创建项目
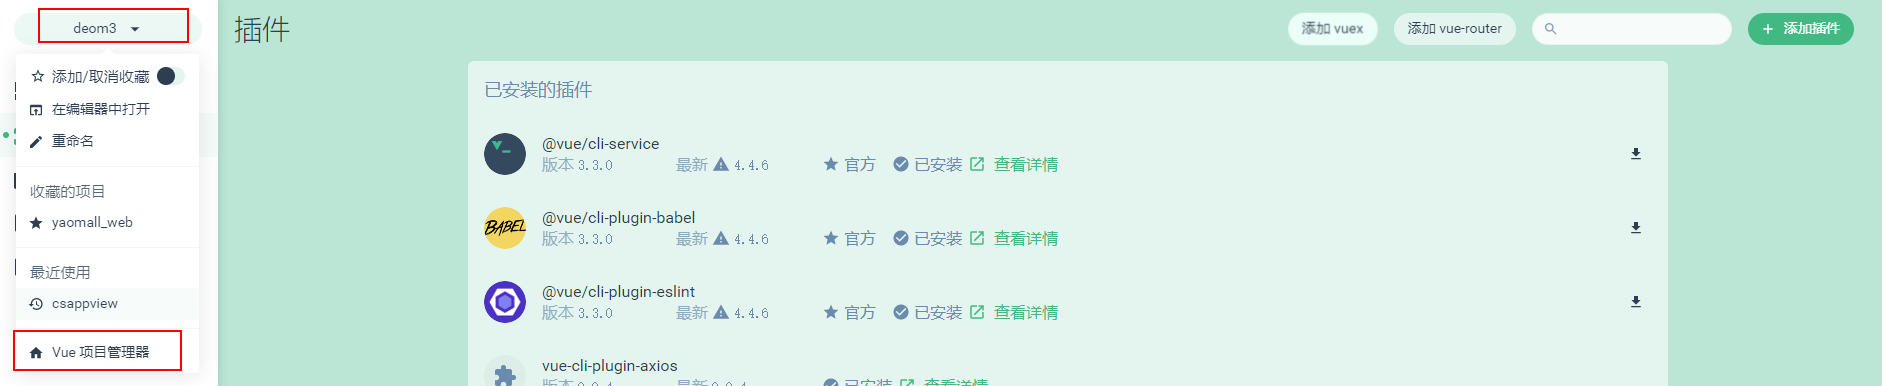

选择好配置开始创建。
具体可以参考vue cli 的官方文档:
二、导入项目项目开始配置
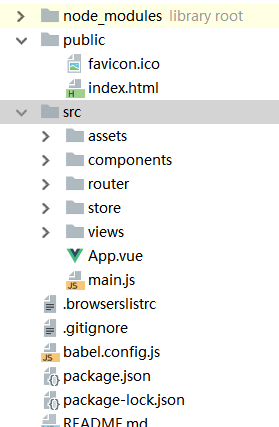
1、使用vue 的相关开发工具导入,导入后的目录结构如下:
三、配置多页面开发(创一个Home页面)
1、在views目录下创建一个home页面如图: (目录是可以自己选择的)

2、APP.vue
<template>
    <div>
        我的home 页面
        <a href="about.html">abc</a>
    </div>
</template>

<script>
    export default {
        name: "Home"
    }
</script>


<style lang="stylus" rel="stylesheet/stylus">

</style>
3、index.js
import Vue from 'vue'
import Home from './App'
import router from './router'
import '@/plugins/element.js'


// 阻止启动生产消息,常用作指令
Vue.config.productionTip = false


new Vue({
    router,
    render: h => h(Home)


}).$mount('#home')
3、router.js
import Vue from 'vue'
import Router from 'vue-router'


Vue.use(Router)


export default  new Router({
    mode: 'history',
    base: process.env.BASE_URL,
    routes:[


    ]
})
4、在vue.config.js中配置页面
module.exports = {
    pages: {
        index: {
            entry: 'src/views/home/index.js', // 指定你刚才创建的index.js位置
            template: 'public/index.html',    // 主的htmml页面位置
            filename: 'index.html',
            title: 'home Page'
        }
    }
};
注:默认的项目是没有vue.config.js这个文件,这是vue3.0 的特性简化相关配置,如果需要特殊指定则
需要自己创建并进行相关配置。
三、配置多页面开发(创一个abou页面)
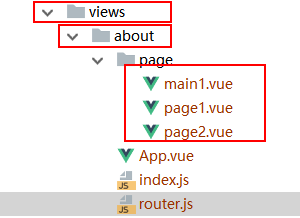
1、在views目录下创建在创建一个about页面如图:
2、App.vue
<template>
    <div>
        我的about页面
        <el-button type="primary" @click="goMain"> main</el-button>
        <el-button type="primary" @click="goPage1"> Page1</el-button>
        <el-button type="primary" @click="goPage2"> Page2</el-button>
        <router-view></router-view>
    </div>
</template>


<script>
    export default {
        name: "App.vue",
        methods:{
            goMain(){
                this.$router.push("/")
            },
            goPage1(){
                this.$router.push("/page1")
            },
            goPage2(){
                this.$router.push("/page2")
            }
        }
    }
</script>


<style lang="stylus" rel="stylesheet/stylus">

</style>
3、index.js
import Vue from 'vue'
import About from './App'
import router from './router'
import '@/plugins/element.js'


// 阻止启动生产消息,常用作指令
Vue.config.productionTip = false


new Vue({
    router,
    render: h => h(About)


}).$mount('#about')
4、router.js
import Vue from 'vue'
import Router from 'vue-router'
const main1 = () =>import('./page/main1.vue');
const page1 = () =>import('./page/page1.vue');
const page2 = () =>import('./page/page2.vue');


Vue.use(Router)


export default  new Router({
    mode: 'history',
    base: process.env.BASE_URL,
    routes:[
        {
            path:"/",
            name: 'page1',
            component: main1
        },
        {
            path:"/page1",
            name: 'page1',
            component: page1
        },
        {
            path:"/page2",
            name: 'page2',
            component: page2
        }
    ]
})
5、然后在依据上面路由创建3个普通界面,测试路由跳转是否还支持

6、创建一个主的html页面
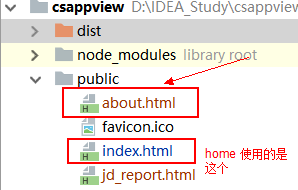
about.html
<!DOCTYPE html>
<html lang="en">
  <head>
    <meta charset="utf-8">
    <meta http-equiv="X-UA-Compatible" content="IE=edge">
    <meta name="viewport" content="width=device-width,initial-scale=1.0">
    <link rel="icon" href="<%= BASE_URL %>favicon.ico">
    <title><%= htmlWebpackPlugin.options.title %></title>
  </head>
  <body>
    <noscript>
      <strong>We're sorry but <%= htmlWebpackPlugin.options.title %> doesn't work properly without JavaScript enabled. Please enable it to continue.</strong>
    </noscript>
        <!--这个id必须指定成 index.js中写的id-->
    <div id="about"></div>
    <!-- built files will be auto injected -->
  </body>
</html>
注: 这里需要注意的一点是,千万不要忘记这个id的配置需要和index.js中的vue指定id一致
7、在vue.config.js中配置该页面:
module.exports = {
    pages: {
        index: {
            entry: 'src/views/home/index.js',
            template: 'public/index.html',
            filename: 'index.html',
            title: 'home Page'
        },
        about: {
            entry: 'src/views/about/index.js',
            template: 'public/about.html',
            filename: 'about.html',
            title: 'About Page'
        }
    }
};
四、使用工具启动项目
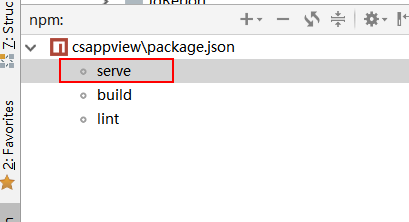
或者使用npm 命令:
npm run serve
五、最终效果
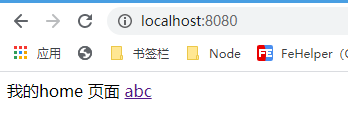
1、home 界面
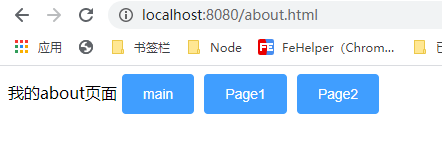
2、点击上面abc链接跳转到about页面
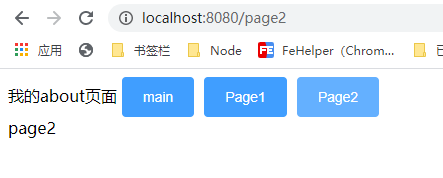
3、点击about页面上的page2,下面路由到page2页面
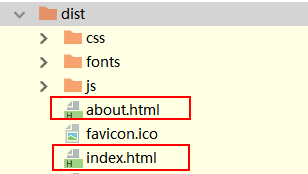
六、打包后的会区分开


 5230
5230


 被折叠的 条评论
为什么被折叠?
被折叠的 条评论
为什么被折叠?
 到【灌水乐园】发言


