等是有家归不得,杜鹃休向耳边啼!<水水獭>
UIGestureRecognize手势识别器的使用简介
-
手势识别器是一个抽象类, 特殊的触摸事件. 我们不使用它本身,而是使用它的子类
类型 | 类 名|
:-----:||:------|
平移 | UIPanGestureRecognizer
轻扫(滑动) | UISwipeGestureRecognizer
长按 | UILongPressGestureRecognizer
捏合 | UIPinchGestureRecognizer
旋转 | UIRotationGestureRecognizer
轻拍 | UITapGestureRecognizer
下面结合代码一一解读:
- 首先如果你想实现同时触发手势(捏合旋转等)的作用,需要实现下面的协议
<UIGestureRecognizerDelegate>方法(其他方法可以进去看下)
# Simultaneously : 同时识别手势
- (BOOL)gestureRecognizer:(UIGestureRecognizer *)gestureRecognizer shouldRecognizeSimultaneouslyWithGestureRecognizer:(UIGestureRecognizer *)otherGestureRecognizer
{
    return YES;
}```


-------------
这里我都把手势都添加到自定义的一个 UImageView 上面
--------------
--------
####轻拍手势:
- 第一步:创建并添加
```code
UITapGestureRecognizer *tap = [UITapGestureRecognizer new];
// 手势添加手势事件
 [tap addTarget:self action:@selector(tapView:)];
# 关键属性: 设置轻拍的次数:
tap.numberOfTapsRequired = 1;
 // 将轻拍的手势添加到 UIimageView 上
 [self.imageView  addGestureRecognizer:tap];
- 第二步: 实现手势事件
-(void)tapView:(UITapGestureRecognizer *)tap
{
    NSLog(@"我被轻轻的拍了~~~我要换图片了~~~~");
    self.imgeView.image = [UIImage imageNamed:@"2.jpg"];
}
长按手势:
- 第一步: 创建并添加到 ImageView 上
UILongPressGestureRecognizer *longPress = [UILongPressGestureRecognizer new];
[longPress addTarget:self action:@selector(longPress)]:
# 关键属性: 至少按0.5秒才会有反应
longPress.minimumPressDuration = 0.5;
[self.imageView addGestureRecognizer:longPress];```
- 第二步: 实现长按手势事件
```code
-(void)longPress
{
NSLog(@"你在长按着我~~我的背景要变色");
self.imageView.backgroundColor = [UIColor redColor];
}```
----------
####平移手势:
- 第一步: 创建并添加
```code
UIPanGestureRecognizer *pan = [UIPanGestureRecognizer new];
[pan addTarget:self action:@selector(panView:)];
//将手势添加到图片上
[self.imageView addGestureRecognizer:pan];```
第二步: 实现平移事件: 这里我们让照片跟着手指的平移一起移动
```code
-(void)panView:(UIPanGestureRecognizer *)pan
{
#这里有个区别
#1 locationInView:获取到的是手指点击屏幕实时的坐标点;
#2 translationInView:获取到的是手指移动后,在相对坐标中的偏移量
//在pan.view上移动的距离
CGPoint translation = [pan translationInView:pan.view];
//获取View的中心点
CGPoint center = pan.view.center;
//中心点的x值+挪动距离的x值
center.x = center.x + translation.x;
//中心点的y值+挪动距离的y值
center.y = center.y+translation.y;
pan.view.center = center;
//清空移动距离
[pan setTranslation:CGPointZero inView:pan.view];
}```
效果展示:

------------------
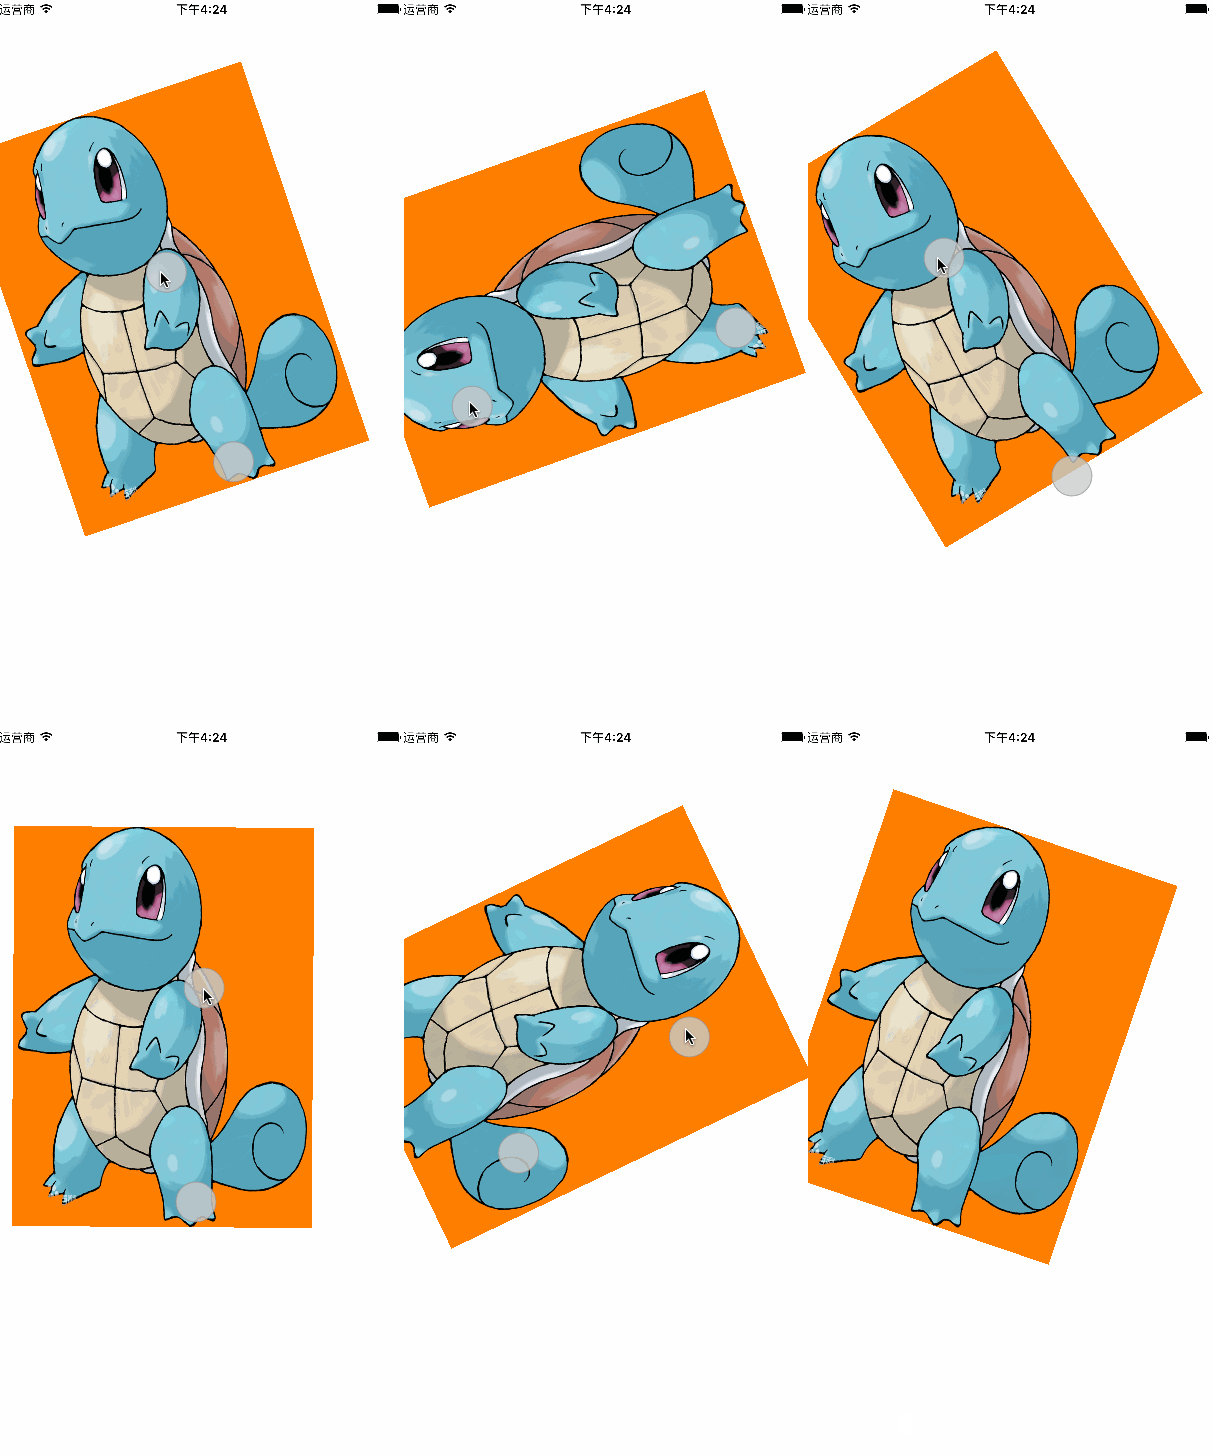
####旋转手势:
- 第一步: 创建并添加
```code
UIRotationGestureRecognizer *ritation = [UIRotationGestureRecognizer new];
[ritation addTarget:self action:@selector(ritationView:)];
//将手势放到图片上
[self.imageView addGestureRecognizer:ritation];
- 第二步: 实现旋转事件 这里我们让照片跟着一起旋转
-(void)ritationView:(UIRotationGestureRecognizer *)rotation
{
# 这是一个二维坐标转换的结构体数据
    /*
    struct CGAffineTransform {
        CGFloat a, b, c, d;
        CGFloat tx, ty;
    };
     其中a,d表示放大缩小有关
     b,c表示的是选择角度有关
     tx,ty是和平移有关*/
# 这句意思是 手势所在视图的转化形式是
    rotation.view.transform =  CGAffineTransformRotate(rotation.view.transform, rotation.rotation);
#  每转一次要把角度调回到0 要不然下次旋转家督实在上次的基础之上
rotation.rotation = 0;//rotation:代表的是旋转的弧度
    NSLog(@"旋转~~~转啊转~~~");
}
效果图:

旋转事件效果示意
- 第一步: 创建并添加
    UIPinchGestureRecognizer *pinch = [UIPinchGestureRecognizer new];
    [pinch addTarget:self action:@selector(pinchView:)];

//将手势添加到图片之上
    [self.imageView addGestureRecognizer:pinch];
第二步: 实现捏合事件 这里我们让图片随着捏合缩放
-(void)pinchView:(UIPinchGestureRecognizer *)pinch
{
NSLog(@"捏合,捏一捏~~~ 我正在被捏~~~");
pinch.view.transform = CGAffineTransformScale(pinch.view.transform, pinch.scale, pinch.scale);
//scale 相对于屏幕来说的坐标点
pinch.scale = 1;
}```
效果示意图:

-------------------
####清扫(滑动)手势:
- 第一步: 创建并添加
```code
UISwipeGestureRecognizer *left = [[UISwipeGestureRecognizer alloc] initWithTarget:self action:@selector(leftAction:)];
# 注意重要属性: 这个手势 默认属性direction(方向)只有向右滑动 所以要为左滑动更改下属性 向右是默认 可以不改
left.direction = UISwipeGestureRecognizerDirectionLeft;
[self.imageView addGestureRecognizer:left];```
- 第二步: 实现事件
```code
- (void)leftAction:(UISwipeGestureRecognizer *)sender
{
NSLog(@"向右滑动了");
}```
[结合动画动画清扫(滑动)手势实例:](http://www.jianshu.com/p/a730199dd12b)


 7034
7034


 被折叠的 条评论
为什么被折叠?


