


一、使用springBoot 官网提供的工具初始化springBoot 项目
1. 访问网站:https://start.spring.io/ 看到如下页面,
选择使用maven 管理项目,使用Java语言,使用最新版本

2. 导入依赖包(这里我们先导入一个最基础的就好,后续根据功能再一个一个导入)


3. 项目打包导出
点击 导出zip,解压到自己的文件夹下,idea 引入,项目结构如下

4. 该项目已经可以跑rest 风格的请求了,做个小测试体验以下
我们在:com.bl.blSpboot 下建个 start 包,在包里建个controller,代码如下:
package com.bl.blSpboot.start;

import org.springframework.web.bind.annotation.GetMapping;
import org.springframework.web.bind.annotation.RestController;

@RestController
public class TestController {

    @GetMapping("hello")
    public String hello() {

        return "hello baby";
    }
}
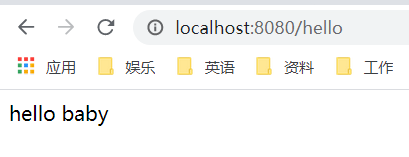
启动项目,在浏览器中输入:http://localhost:8080/hello,返回如下结果 :
二、引入 thymeleaf
- 在pom.xml 中引入如下依赖
        <dependency>
			<groupId>org.springframework.boot</groupId>
			<artifactId>spring-boot-starter-thymeleaf</artifactId>
		</dependency>
- application.yml 文件(初始化的时候如果是 application.properties,直接将后缀改成yml)
spring:
  thymeleaf:
    suffix: ".html"
    prefix: "classpath:/templates/"
    mode: "LEGACYHTML5"
    servlet:
      content-type: "text/html"
    encoding: "utf-8"
    cache: false
- 在package com.bl.blSpboot.start下创建 ThymeleafTestController
package com.bl.blSpboot.start;

import org.springframework.stereotype.Controller;
import org.springframework.ui.Model;
import org.springframework.web.bind.annotation.RequestMapping;

@Controller
public class ThymeleafTestController {

    @RequestMapping("testThymeleaf")
    public String testThymeleaf(Model model) {

        model.addAttribute("name", "blackLine");
        return "test";
    }
}
- 在resource的 templates 下创建 test.html
<!DOCTYPE html>
<html lang="en" xmlns:th="http://www.thymeleaf.org">
<head>
    <meta charset="UTF-8">
 最低0.47元/天 解锁文章


 182
182


 被折叠的 条评论
为什么被折叠?
被折叠的 条评论
为什么被折叠?
 到【灌水乐园】发言


