


1、新建ApplicationEvent
在Spring Boot中实现监听器(Listener)的一种常见方式是使用Spring Boot的事件监听机制。
下面是一个简单的步骤说明,帮助你实现一个自定义的监听器:
创建事件:首先,你需要创建一个事件类。这个类将继承ApplicationEvent类,并添加一些自定义的数据。
import org.springframework.context.ApplicationEvent;

public class CustomEvent extends ApplicationEvent {
    private String message;

    public CustomEvent(Object source, String message) {
        super(source);
        this.message = message;
    }

    public String getMessage() {
        return message;
    }
}
2、创建事件监听器
你需要创建一个事件监听器类,该类将实现ApplicationListener接口,并指定需要监听的事件类型。
import org.springframework.context.ApplicationListener;
import org.springframework.stereotype.Component;

@Component
public class CustomEventListener implements ApplicationListener<CustomEvent> {
    @Override
    public void onApplicationEvent(CustomEvent event) {
        System.out.println("Received custom event - " + event.getMessage());
    }
}
注意:@Component注解用于将此类作为Spring Bean注册到应用程序上下文中。
3、发布事件
要触发事件,你需要创建一个事件发布者。在Spring应用中,你可以通过ApplicationEventPublisher接口来发布事件。
import org.springframework.beans.factory.annotation.Autowired;
import org.springframework.context.ApplicationEventPublisher;
import org.springframework.stereotype.Service;
@Service
public class EventPublisherService {
@Autowired
private ApplicationEventPublisher applicationEventPublisher;
public void doStuffAndPublishAnEvent(final String message) {
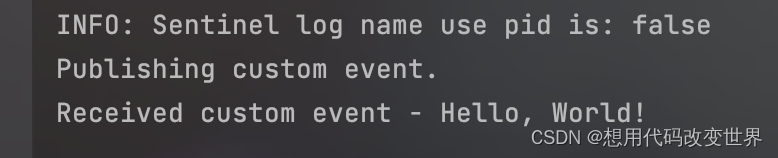
System.out.println("Publishing custom event. ");
CustomEvent customEvent = new CustomEvent(this, message);
applicationEventPublisher.publishEvent(customEvent);
}
}
4、触发事件
你可以在需要的地方调用EventPublisherService的doStuffAndPublishAnEvent方法来触发事件。例如,你可以在一个Controller或者Service中调用这个方法。
    @Autowired
    private EventPublisherService eventPublisherService;


    @GetMapping("/event")
    public void someMethod() {
        eventPublisherService.doStuffAndPublishAnEvent("Hello, World!");
    }
当你调用doStuffAndPublishAnEvent方法时,它将发布一个CustomEvent事件,你的CustomEventListener将接收到这个事件,并执行相应的操作。


 1729
1729


 被折叠的 条评论
为什么被折叠?
被折叠的 条评论
为什么被折叠?
 到【灌水乐园】发言


