


Busybox构建根文件系统
前期准备
安装交叉编译工具链(如遇到无法成功加载系统问题,可尝试更换交叉编译工具或直接自己搞一个)
wget https://releases.linaro.org/components/toolchain/binaries/latest-7/arm-linux-gnueabi/gcc-linaro-7.5.0-2019.12-x86_64_arm-linux-gnueabi.tar.xz
sudo tar -Jxvf gcc-linaro-7.5.0-2019.12-x86_64_arm-linux-gnueabi.tar.xz -C /opt/
Busybox 简介
一个集成了大量Linux指令和工具的软件,例如ls、cp、cat等命令它都提供。
BusyBox 就是一个大的工具箱,这个工具箱里面集成了 Linux 的许多工具和命令。下载 BusyBox 的源码,然后配置 BusyBox,选择自己想要的功能,最后编译即可。
官网下载链接:Busybox
如下图,选择需要的版本点击下载
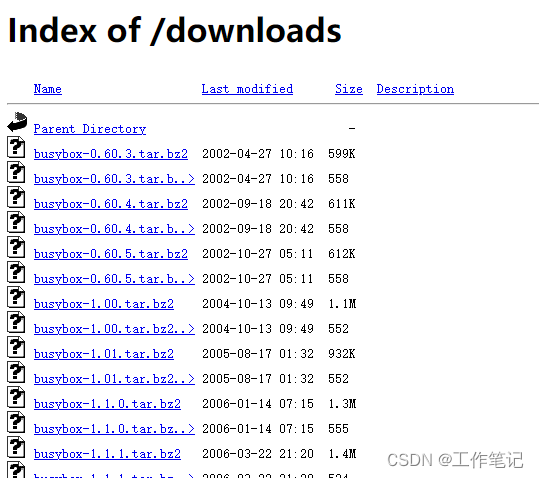
这里选择 busybox-1.36.0.tar.bz2
编译 Busybox
环境:
Ubuntu 18.04.6 LTS 64位
解压文件:
tar -vxjf busybox-1.36.0.tar.bz2
解压完后进入busybox-1.36.0文件夹,内容如图所示:

- 修改Makefile 指定交叉编译器
打开 Busybox 的顶层 Makefile,添加 ARCH 和 CROSS_COMPILE的值,如下图所示

- 修改源码 使得Busybox支持中文字符
打开文件 busybox-1.36.0/libbb/printable_string.c,做如下修改
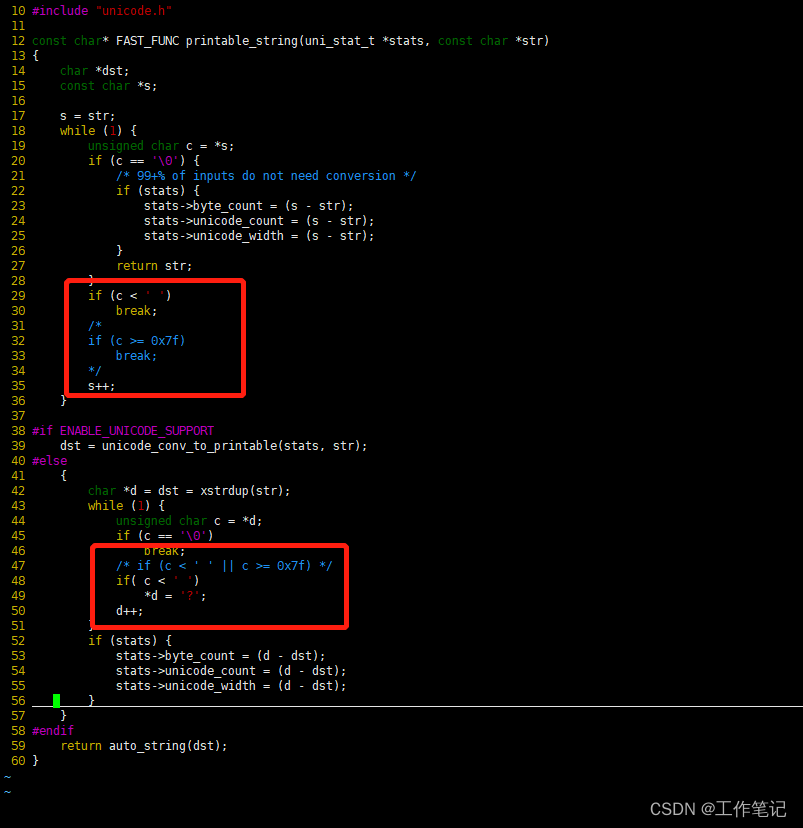
打开文件 busybox-1.36.0/libbb/unicode.c,做如下修改

- 配置Busybox
使用默认配置即可
make defconfig
通过图形化配置,选择自己想要的功能
make menuconfig
此处配置为静态编译
Location:
	-> Settings
		-> Build static binary (no shared libs)

Location:
	-> Settings
		-> vi-style line editing commands									<选中
		-> Support Unicode													<选中
			->Check $LC_ALL, $LC_CTYPE and $LANG environment variables		<选中

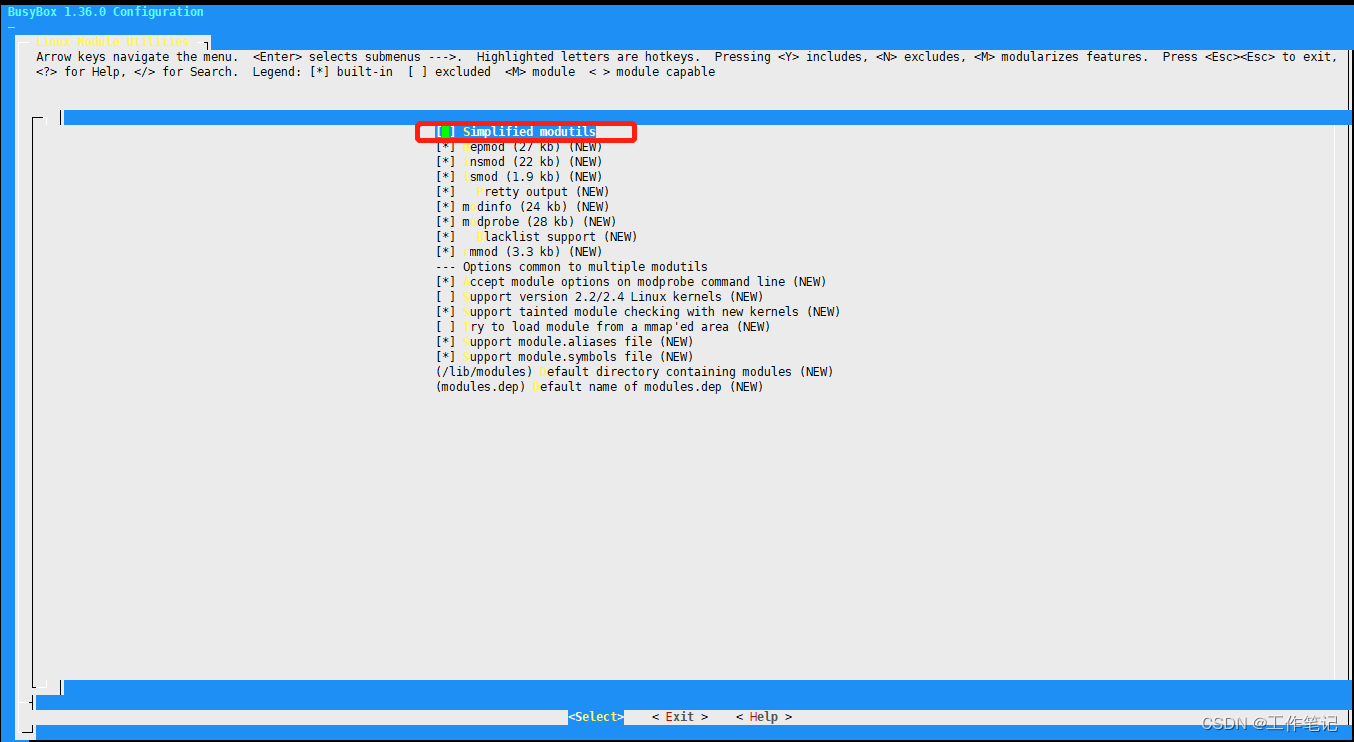
Location:
	-> Linux Module Utilities
		-> Simplified modutils		<取消选中>
4. 编译Busybox
路径仅供参考
mkdir /home/xiaoming/rootfs -p
make
make install CONFIG_PREFIX=/home/xiaoming/rootfs
编译完成以后busybox 的所有工具和文件就会被安装到 rootfs 目录中

- 基本完成…
库问题
由于这里是静态编译方式,所以不会涉及到程序运行时动态库的链接问题。
如果在配置Busybox时选择的是动态编译,则需要将依赖的动态库拷贝至usr/lib或者lib/目录下。如何查看依赖库及如何拷贝,不再多说。
补充目录并创建必须文件
cd /home/xiaoming/rootfs
mkdir lib usr/lib etc/init.d dev sys proc mnt tmp root usr/share/udhcpc var/run/wpa_supplicant -p
(如果用不到udhcpc wpa_supplicant 可以不需要创建,下同)
将busybox/examples/udhcp/simple.script 拷贝至 rootfs/usr/share/udhcpc/default.script 并添加可执行权限
etc/目录下添加以下文件及内容(如有上文未提到的目录自行创建):
etc/fsab
proc        /proc    proc    defaults    0    0
tmpfs        /tmp    tmpfs    defaults    0    0
sysfs        /sys    sysfs    defaults    0    0
etc/passwd
root:x:0:0:root:/root:/bin/sh
etc/inittab
# /etc/inittab
#
# Copyright (C) 2001 Erik Andersen <andersen@codepoet.org>
#
# Note: BusyBox init doesn't support runlevels.  The runlevels field is
# completely ignored by BusyBox init. If you want runlevels, use
# sysvinit.
#
# Format for each entry: <id>:<runlevels>:<action>:<process>
#
# id        == tty to run on, or empty for /dev/console
# runlevels == ignored
# action    == one of sysinit, respawn, askfirst, wait, and once
# process   == program to run

# Startup the system
::sysinit:/bin/mount -t proc proc /proc
::sysinit:/bin/mount -o remount,rw /
::sysinit:/bin/mkdir -p /dev/pts /dev/shm
::sysinit:/bin/mount -a
::sysinit:/sbin/swapon -a
null::sysinit:/bin/ln -sf /proc/self/fd /dev/fd
null::sysinit:/bin/ln -sf /proc/self/fd/0 /dev/stdin
null::sysinit:/bin/ln -sf /proc/self/fd/1 /dev/stdout
null::sysinit:/bin/ln -sf /proc/self/fd/2 /dev/stderr
::sysinit:/bin/hostname -F /etc/sysconfig/HOSTNAME
# now run any rc scripts
::sysinit:/etc/init.d/rcS

# Put a getty on the serial port
console::respawn:/sbin/getty -L  console 0 vt100 # GENERIC_SERIAL

# Stuff to do for the 3-finger salute
#::ctrlaltdel:/sbin/reboot

# Stuff to do before rebooting
::shutdown:/etc/init.d/rcK
::shutdown:/sbin/swapoff -a
::shutdown:/bin/umount -a -r
etc/profile
USER="`id -un`"
LOGNAME=$USER
HOME=/root
PS1='[\u@\h \W]\# '
export PS1 USER HOME LOGNAME
etc/init.d/rcS
#!/bin/sh


# Start all init scripts in /etc/init.d
# executing them in numerical order.
#
for i in /etc/init.d/S??* ;do

     # Ignore dangling symlinks (if any).
     [ ! -f "$i" ] && continue

     case "$i" in
	*.sh)
	    # Source shell script for speed.
	    (
		trap - INT QUIT TSTP
		set start
		. $i
	    )
	    ;;
	*)
	    # No sh extension, so fork subprocess.
	    $i start
	    ;;
    esac
done
etc/rcK
#!/bin/sh


# Stop all init scripts in /etc/init.d
# executing them in reversed numerical order.
#
for i in $(ls -r /etc/init.d/S??*) ;do

     # Ignore dangling symlinks (if any).
     [ ! -f "$i" ] && continue

     case "$i" in
        *.sh)
            # Source shell script for speed.
            (
                trap - INT QUIT TSTP
                set stop
                . $i
            )
            ;;
        *)
            # No sh extension, so fork subprocess.
            $i stop
            ;;
    esac
done
etc/sysconfig/HOSTNAME
busybox
etc/wpa_supplicant.conf
ctrl_interface=/var/run/wpa_supplicant
ap_scan=1
network={
 ssid="123"
 psk="123456"
}
其它
- 为根文件系统制作jffs2镜像包
mkfs.jffs2 -s xx -e xx --pad=xx -d rootfs/ -o jffs2.img
需要自行了解mkfs.jffs2用法 - 其它格式文件系统镜像制作百度上有很多,是的。
- 如有其它问题,则未完待续,…


 6245
6245


 被折叠的 条评论
为什么被折叠?
被折叠的 条评论
为什么被折叠?
 到【灌水乐园】发言


