


1.先创建conda的虚拟环境
conda create -n gputorch python==3.10
2.激活刚刚创建好的虚拟环境
conda activate gputorch
3.设置国内镜像源
修改anaconda的源,即修改.condarc配置文件
.condarc在 home/用户/user/
conda config --add channels https://mirrors.tuna.tsinghua.edu.cn/anaconda/cloud/pytorch/
conda config --add channels https://mirrors.tuna.tsinghua.edu.cn/anaconda/pkgs/free/
conda config --add channels https://mirrors.tuna.tsinghua.edu.cn/anaconda/pkgs/main/
conda config --add channels https://mirrors.bfsu.edu.cn/anaconda/pkgs/free/
conda config --add channels https://mirrors.bfsu.edu.cn/anaconda/pkgs/main/
conda config --add channels https://mirrors.tuna.tsinghua.edu.cn/anaconda/cloud/conda-forge/
conda config --add channels https://mirrors.tuna.tsinghua.edu.cn/anaconda/cloud/msys2/
conda config --add channels https://mirrors.tuna.tsinghua.edu.cn/anaconda/cloud/bioconda/
conda config --add channels https://mirrors.tuna.tsinghua.edu.cn/anaconda/cloud/menpo/
conda config --add channels https://mirrors.tuna.tsinghua.edu.cn/anaconda/cloud/fastai/
# 设置搜索时显示通道地址 从channel中安装包时显示channel的url,这样就可以知道包的安装来源
conda config --set show_channel_urls yes
安装时,去掉-c pytorch
4.查看电脑的显卡驱动版本
在cmd命令窗口中输入nvidia-smi
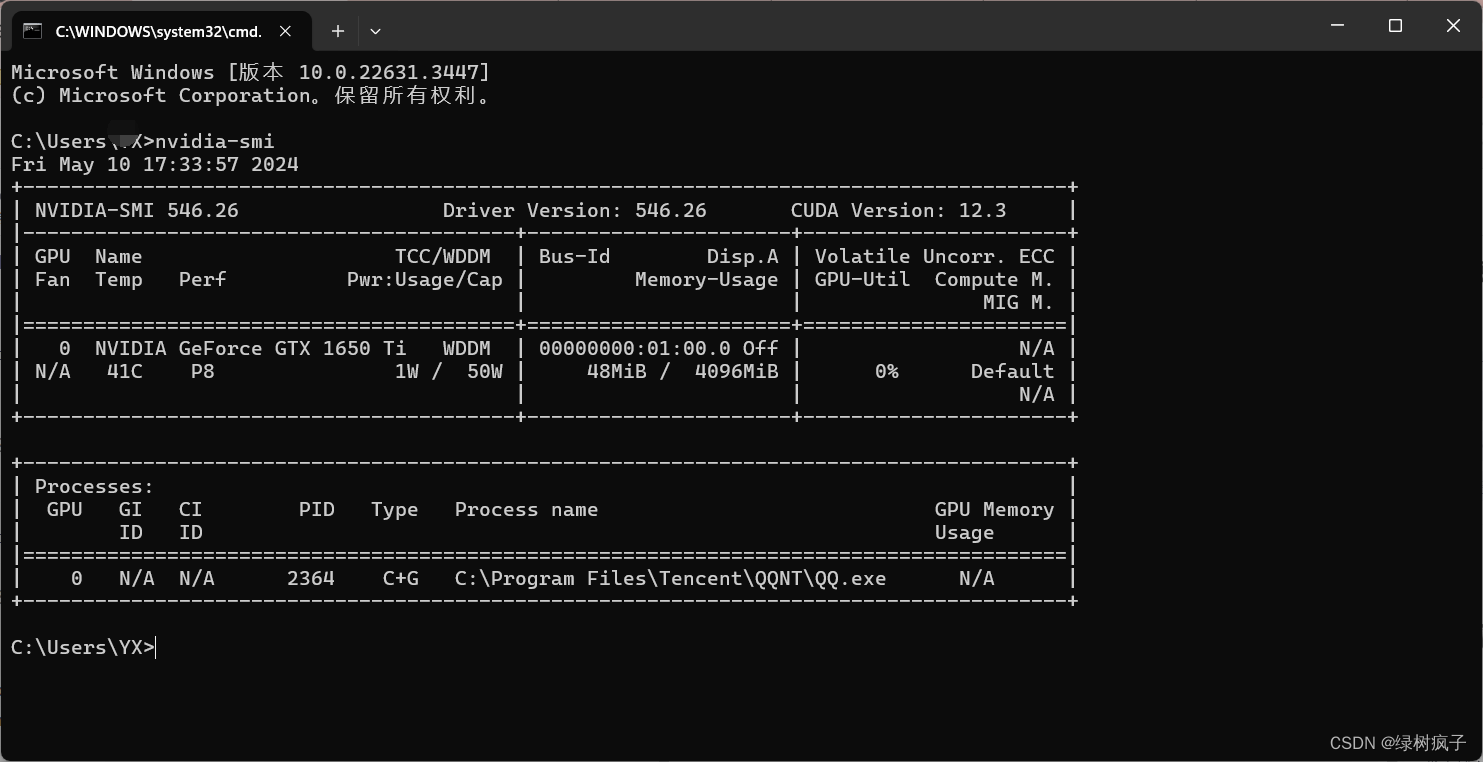
如图,CUDA为12.3
5.安装
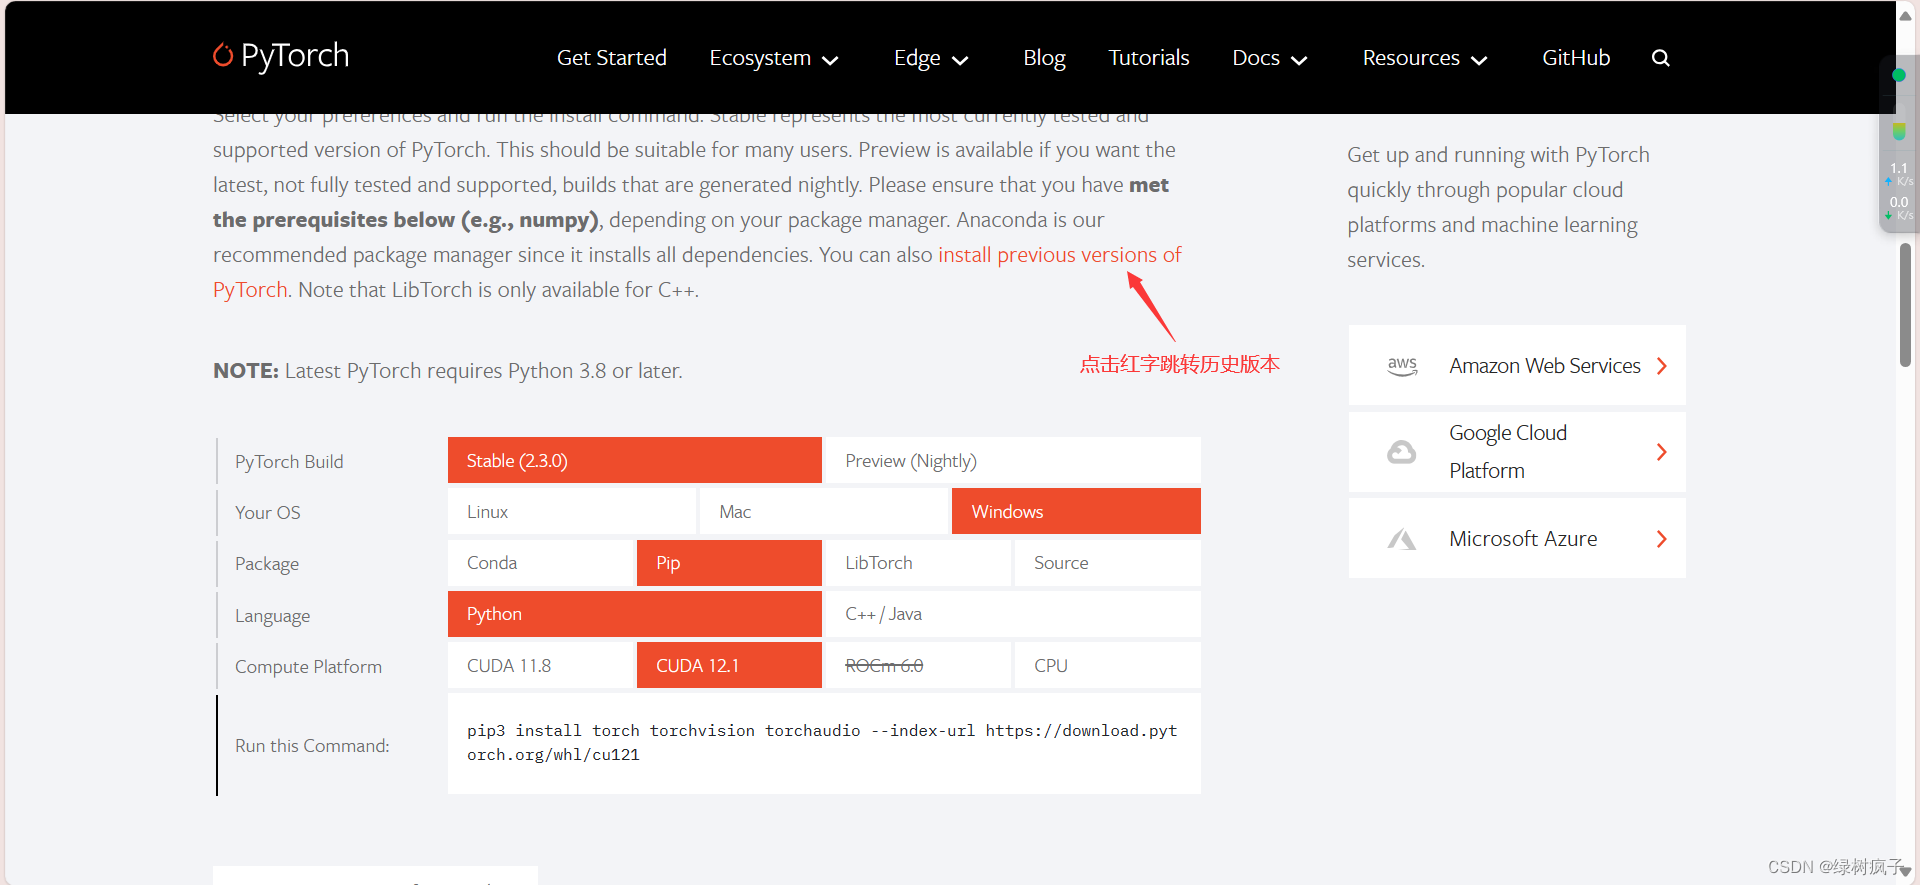
- 方法1: 在pytorch官网https://pytorch.org/,直接复制命令进行安装

在命令窗口中直接输入命令–回车安装
pip3 install torch torchvision torchaudio --index-url https://download.pytorch.org/whl/cu121
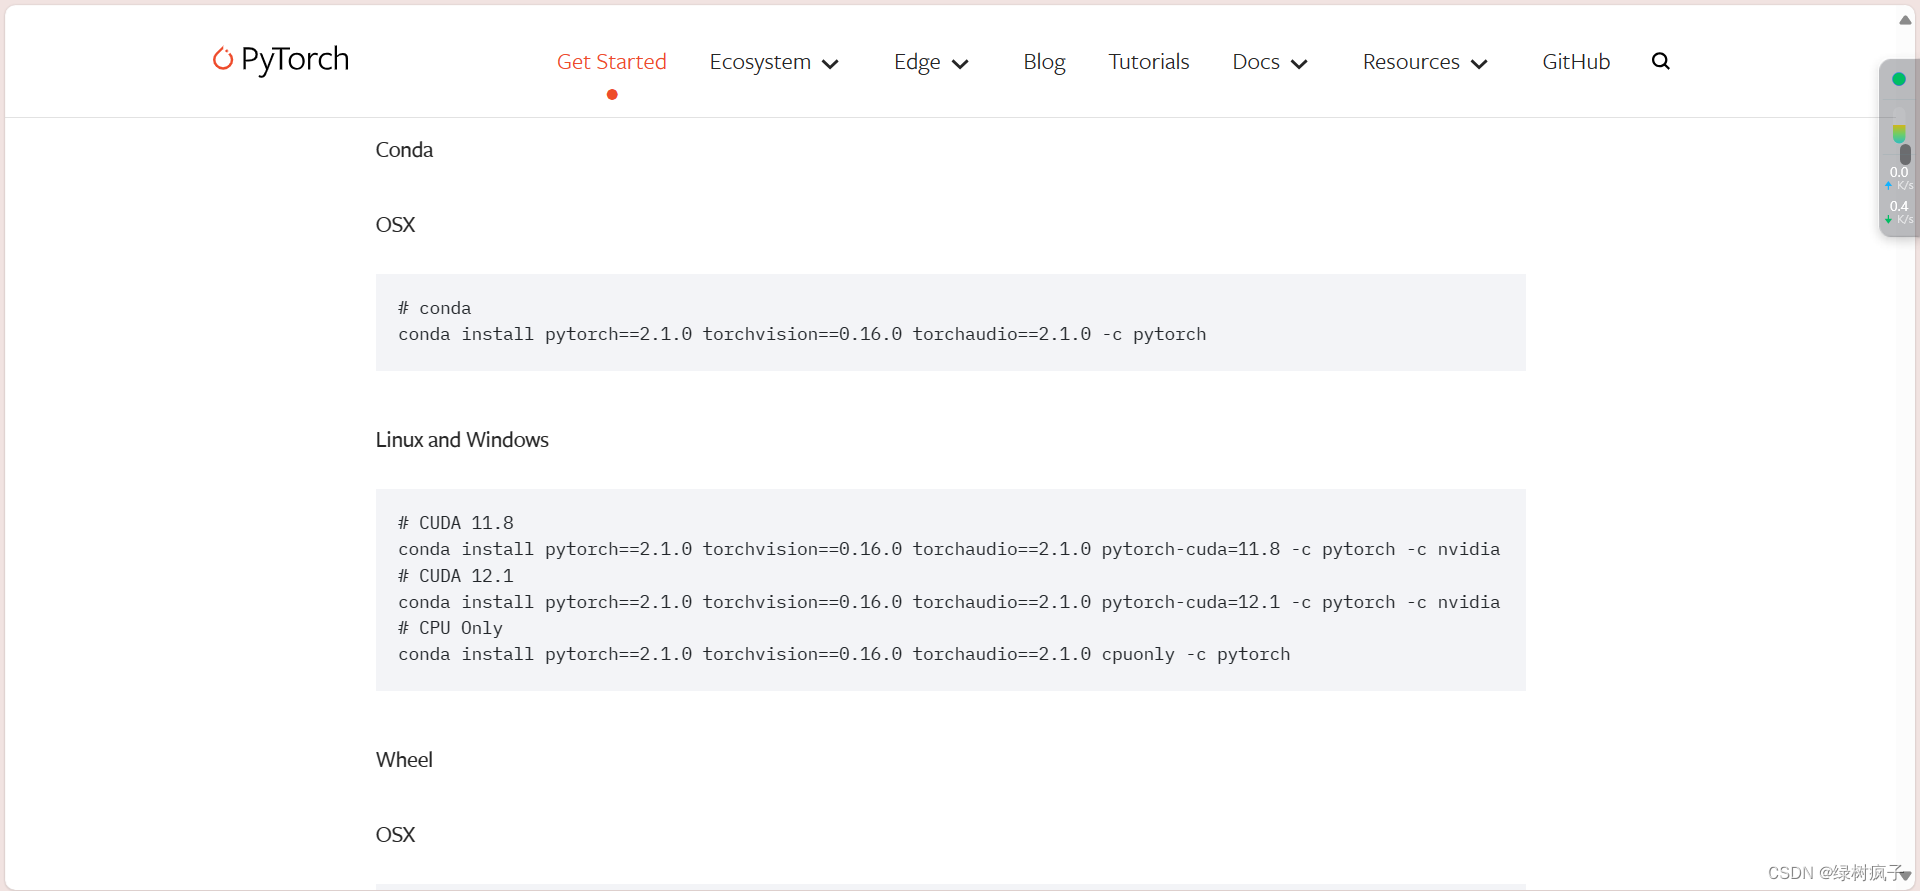
- 方法2:本文使用的pytorch版本是torch==2.2.2,检索历史记录可以找到这个版本,并且它的CUDA版本要求是12.1(我是12.3)因此可以兼容。如果CUDA版本达不到要求,又想用论文项目对应的pytorch,可以选择CPU训练。
注意:这里查看一下,自己的显卡驱动所能支持的版本,我这显卡驱动支持cuda12.3,所以我安装的cuda和pytorch都很新,你只需要根据自己需要更改版本就好了。
# CUDA 12.1
conda install pytorch==2.1.0 torchvision==0.16.0 torchaudio==2.1.0 pytorch-cuda=12.1 -c pytorch -c nvidia
注意:以镜像源安装时,去掉-c pytorch。-c pytorch意思是使用pytorch官方源,这很慢。
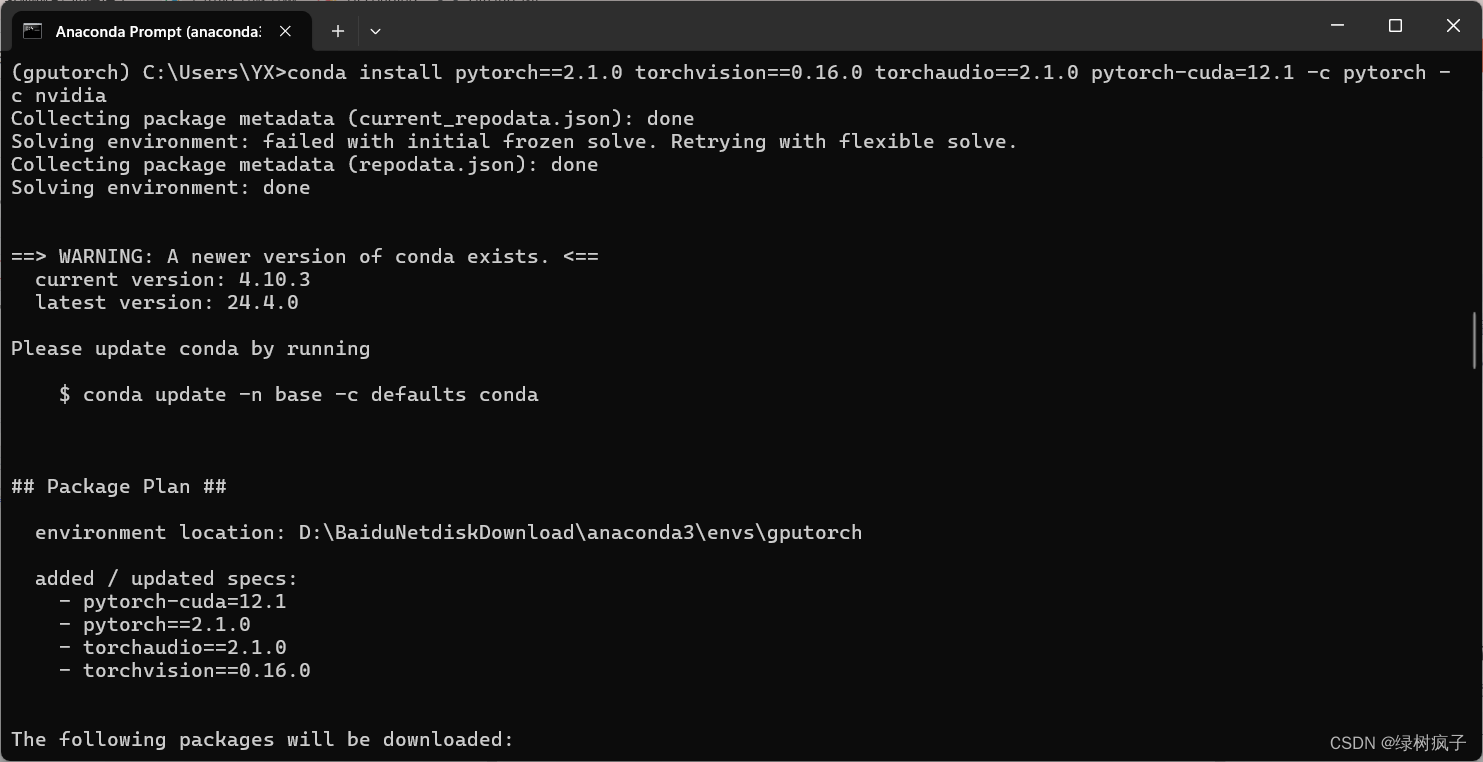
下载时间会有一点久,耐心等待……
注意:Pytorch官网首页目前只更新到支持DUDA12.1的,还没更新到支持CDUA12.3 GPU的安装,官网首页的命令安装后只支持CPU。使用的文中这个末尾带nvidia的之前版本的命令,安装后CUDA12.3可正常在环境中使用GPU的Pytorch。

成功!
6.验证PyTorch是否安装成功
- 检查版本信息:在Python环境中运行以下代码来打印出已安装的PyTorch版本
import torch
print(torch.__version__)
- 执行简单计算:使用PyTorch进行一些基本的操作,如创建张量(tensor)并执行加法操作。这可以确保库的基本功能可用。
#python
import torch
x = torch.rand(5, 3)
y = torch.rand(5, 3)
z = x + y
print(z)
- 测试GPU支持(如果有)
如果你的系统配置有NVIDIA GPU并安装了CUDA以利用GPU加速,那么可以测试PyTorch是否能识别到GPU。运行以下代码:
#python
import torch
device = torch.device("cuda:0" if torch.cuda.is_available() else "cpu")
print(device)
- 查看CUDA和CUDNN信息
如果你想进一步确认CUDA和cuDNN的支持情况,你可以在Python shell中输入以下命令:
#python
import torch
print("CUDA available:", torch.cuda.is_available())
print("cuDNN enabled:", torch.backends.cudnn.enabled)
以上就是验证PyTorch是否安装成功的常用方法。


 4万+
4万+

 被折叠的 条评论
为什么被折叠?
被折叠的 条评论
为什么被折叠?
 到【灌水乐园】发言


