


一、目的
使用香橙派5驱动1.47寸oled并播放视频,
效果见:https://www.bilibili.com/video/BV1vQ4y1w7CS
代码见仓库的opencv-local分支,链接: https://github.com/jibi17/lcd-opencv.git
二、物料
香橙派5 、中景园1.47寸lcd屏幕(型号:ZJY147S0800TG01),杜邦线若干
三、过程
1.在香橙派上编译安装opencv c++
2.安装wiringop
3.写代码驱动屏幕(这里我用的开发环境是在windows上使用vscode的remote插件,直接在香橙派上本地编译,没有使用交叉编译的方法。
具体remote怎么安装建议百度,然后最好把密钥配好,不然每次打开工程都输密码很麻烦。)
1.安装opencv
链接: https://opencv.org/releases/去官网下。
我试了几个版本,只有4.5.5编译不报错,其他的都编译报错。

下载源码。
参考这位大佬的博客安装就行,这里就不重复写了:
链接: https://blog.csdn.net/qq_16792139/article/details/124079537
2.安装wiringop
默认情况下应该是已经安装了wiringop
输入:
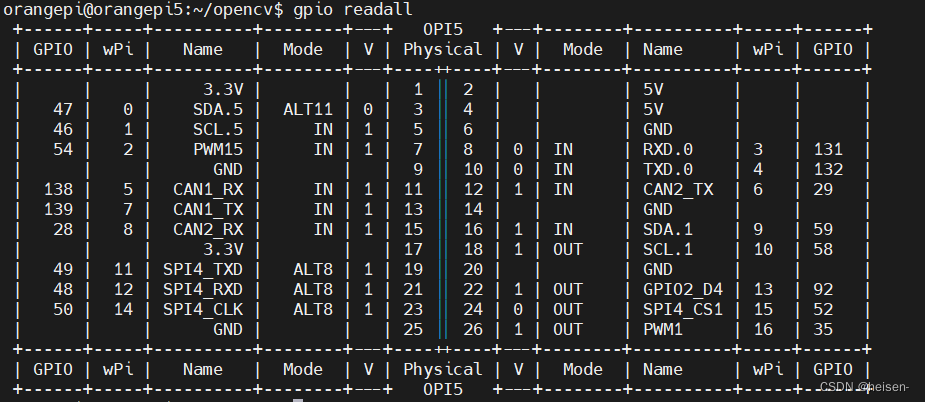
gpio readall
如果能看到下面的输出,说明wiringOP 已经预装并且能正常使用。
否则需要自己手动安装。
下面是安装过程,按照官方的使用手册安装:
1)下载wiringop的代码
sudo apt update
sudo apt install -y git
git clone https://github.com/orangepi-xunlong/wiringOP.git -b next
建议看着手册安装!!!不同的机器安装过程不一样,这里是香橙派5的
2)安装wiringop
cd wiringOP
sudo ./build clean
sudo ./build
输入:
gpio readall
如果能看到下面的输出,说明wiringOP 已经安装并且能正常使用。
和上面一样的。
3.屏幕驱动
1)首先要打开香橙派5的spi,这里按照手册打开就行了,具体的自己看手册。
打开后注意我们能使用的是/dev/spidev4.1,不是/dev/spidev4.0!!!
2)然后是lcd的驱动,我这里是在商家给的资料上改的。先来看lcd_init.h 和lcd_init.cpp。首先lcd_init.h 中定义了RESET_PIN,CS_PIN,DC_PIN,BLK_PIN,SPI_CHAN的针脚,可以根据自己的喜好来改,我这里定义如下
#define RESET_PIN 13
#define CS_PIN 15
#define DC_PIN 16
#define BLK_PIN 10
#define	SPI_CHAN 4
然后是定义了如下函数
void lcd_init(void);//LCD初始化
void bsp_init(void);//初始化GPIO
void LCD_Writ_Bus(u8 dat);//模拟SPI时序
void LCD_WR_DATA8(u8 dat);//写入一个字节
void LCD_WR_DATA(u16 dat);//写入两个字节
void LCD_WR_REG(u8 dat);//写入一个指令
void LCD_Address_Set(u16 x1,u16 y1,u16 x2,u16 y2);//设置坐标函数
void spi_send_frame(u8 *data,int sizeOfData);
这么多函数本质上就是需要通过spi向屏幕发送数据,所以我们只需要把最底层的发送数据的代码改成wiringop的发送函数就好。这里面就两个要改,一个是LCD_Writ_Bus(u8 dat)。
void LCD_Writ_Bus(u8 dat)
{
	LCD_CS_Clr();
	wiringPiSPIDataRW(SPI_CHAN,&dat,sizeof(dat));//wiringopi的发送函数
	LCD_CS_Set();
}
还有一是个spi_send_frame,这个好像是我自己写的。代码如下
void spi_send_frame(u8 *data,int sizeOfData)
{
	LCD_CS_Clr();
	uint8_t temp[4096];
	for(int i=0;i<sizeOfData;i=i+sizeof(temp))
	{
		if(i<=sizeOfData && (i+sizeof(temp))>=sizeOfData)
		{
			int size_least=sizeOfData-i;
			memmove(temp,data+i,(uint32_t)size_least);
			if(wiringPiSPIDataRW(SPI_CHAN,temp,size_least)==-1)
			{
				printf ("SPI failure:2 \n") ;
			}
#if DEBUG
			std::cout << "send last buf:" << size_least<<std::endl;
#endif
			break;
		}
		memmove(temp,data+i,sizeof(temp));
		if(wiringPiSPIDataRW(SPI_CHAN,temp,sizeof(temp))==-1)
		{
		 	printf ("SPI failure: %s\n", strerror (errno)) ;
		}
	}
	LCD_CS_Set();
}
这个uint8_t temp[4096]是spi一次发送的数据量,好像驱动里面的spi发送的buffer就这么大,再大发送就要报错了。这个函数的作用就是连续发送一个大的数据包。
3)下面来看lcd.h和lcd.cpp
首先定义了一帧的大小
uint8_t show_frame[LCD_W*LCD_H*2];
这个屏幕是320x172 每个像素占用2byte,用的是rgb565格式。
下面是lcd.h实现了哪些函数
void LCD_Fill2(u16 xsta,u16 ysta,u16 xend,u16 yend,u16 color);
void LCD_Fill(u16 xsta,u16 ysta,u16 xend,u16 yend,u16 color);//指定区域填充颜色
void LCD_DrawPoint(u16 x,u16 y,u16 color);//在指定位置画一个点
void LCD_DrawLine(u16 x1,u16 y1,u16 x2,u16 y2,u16 color);//在指定位置画一条线
void LCD_DrawRectangle(u16 x1, u16 y1, u16 x2, u16 y2,u16 color);//在指定位置画一个矩形
void Draw_Circle(u16 x0,u16 y0,u8 r,u16 color);//在指定位置画一个圆
void LCD_ShowChinese(u16 x,u16 y,u8 *s,u16 fc,u16 bc,u8 sizey,u8 mode);//显示汉字串
void LCD_ShowChinese12x12(u16 x,u16 y,u8 *s,u16 fc,u16 bc,u8 sizey,u8 mode);//显示单个12x12汉字
void LCD_ShowChinese16x16(u16 x,u16 y,u8 *s,u16 fc,u16 bc,u8 sizey,u8 mode);//显示单个16x16汉字
void LCD_ShowChinese24x24(u16 x,u16 y,u8 *s,u16 fc,u16 bc,u8 sizey,u8 mode);//显示单个24x24汉字
void LCD_ShowChinese32x32(u16 x,u16 y,u8 *s,u16 fc,u16 bc,u8 sizey,u8 mode);//显示单个32x32汉字
void LCD_ShowChar(u16 x,u16 y,u8 num,u16 fc,u16 bc,u8 sizey,u8 mode);//显示一个字符
void LCD_ShowString(u16 x,u16 y,const u8 *p,u16 fc,u16 bc,u8 sizey,u8 mode);//显示字符串
u32 mypow(u8 m,u8 n);//求幂
void LCD_ShowIntNum(u16 x,u16 y,u16 num,u8 len,u16 fc,u16 bc,u8 sizey);//显示整数变量
void LCD_ShowFloatNum1(u16 x,u16 y,float num,u8 len,u16 fc,u16 bc,u8 sizey);//显示两位小数变量
void LCD_ShowPicture(u16 x,u16 y,u16 length,u16 width,const u8 pic[]);//显示图片
void LCD_ShowPicture2(u16 x,u16 y,u16 length,u16 width,const u8 pic[]);
void clear_frame(void);
这里主要看LCD_ShowPicture2(),这个函数是我在原来的基础上改的,用来实现将一帧数据给显示到屏幕上,
void LCD_ShowPicture2(u16 x,u16 y,u16 length,u16 width,const u8 pic[])
{
	u16 i,j;
	u32 k=0;
	LCD_Address_Set(0,0,LCD_W,LCD_H);//设置显示范围
	//there is a postion offset
	//this is the start postion
	uint32_t offset=y*LCD_W*2+x*2;
	for(int i=0;i<width;i++)
	{
		//std::cout << "i:" <<i<< std::endl;
		for(int j=0;j<length;j++)
		{
			//std::cout << "j" <<j<< std::endl;
			show_frame[offset+j*2]=pic[k];
			show_frame[offset+j*2+1]=pic[k+1];
			k=k+2;
		}
		offset=offset+LCD_W*2;//every time just plause one line
	}
	spi_send_frame(show_frame,LCD_W*LCD_H*2);
}
void clear_frame()
{
	memset(show_frame,0xff,num_of_pixs*2);
}
就是把一帧的数据放到show_frame,然后把show_frame发给屏幕。
4.opencv处理图像
1)在main函数里面是建了两个线程。一个生产者线程用于不断的解码每一帧并放到缓冲buffer。一个消费者线程把缓冲buffer发送给屏幕。
建两个线程的原因:当把数据发送给屏幕的时候会大量的使用io会阻塞线程,效率就变低了。
main.cpp如下:
    // 创建生产者和消费者线程
    std::thread producerThread(create);
    std::thread consumerThread(display);

    // 等待线程完成
    producerThread.join();
    consumerThread.join();
下面先看生产者线程:
const int QUEUE_SIZE = 10;
std::queue<uint8_t*> imageQueue;
std::mutex mtx;
std::condition_variable var;
void create()
{
    //打开视频
    cv::VideoCapture cap("./test.mp4");
    // 检查视频是否成功打开
    if (!cap.isOpened()) {
        std::cerr << "Error opening video file." << std::endl;
        return ;
    }
    cv::Mat frame;
    while(1){
        //先生成以一个image
        cap >> frame;  // 从视频捕获设备读取一帧
        // 检查是否成功读取一帧
        if (frame.empty()) {
            std::cerr << "End of video" << std::endl;
            break;
        }
        // 缩放图像为320x172
        cv::Mat resizedImage;
        cv::resize(frame, resizedImage, cv::Size(320, 172),cv::INTER_CUBIC);
        //cv::imshow("Resized RGB565 Image", resizedImage);
        //转换为RGB565格式
        cv::Mat rgb565Image;
        cv::cvtColor(resizedImage, rgb565Image, cv::COLOR_BGR2BGR565);
        // 获取图像的宽度和高度
        int width = rgb565Image.cols;
        int height = rgb565Image.rows;
        uint8_t* imageData = new uint8_t[110080];
        for (int y = 0; y < height; y++) {
            for (int x = 0; x < width; x++) {
                // 获取RGB565值
                uint16_t rgb565Value = rgb565Image.at<uint16_t>(y, x);
                // 分开高位和低位,并写入数组
                uint8_t highByte = (rgb565Value >> 8) & 0xFF;
                uint8_t lowByte = rgb565Value & 0xFF;
                imageData[(y * width + x) * 2]=highByte;
                imageData[(y * width + x) * 2 + 1]=lowByte;
        //现在获得到了image——temp要把他放到队列里面去
        // 生产者获取锁
        std::unique_lock<std::mutex> lock(mtx);
        // 检查队列是否满
        var.wait(lock, [] { return imageQueue.size() < QUEUE_SIZE; });
         // 将图片放入队列
        imageQueue.push(imageData);
        var.notify_one();
       // std::cout<<"进入一次生产者"<<std::endl;
    }
    return;
因为两个线程要访问共享的资源所以在开始加了互斥锁。
下面是消费者的部分:
void display()
{
    while(1){
        {std::unique_lock<std::mutex> lock(mtx);
        // 使用条件变量等待,直到队列非空或达到一定大小
        var.wait(lock, [] { return !imageQueue.empty() || imageQueue.size() >= QUEUE_SIZE; });
        // 取出队列中的数据进行处理
         uint8_t* imageData = nullptr;
        imageData = imageQueue.front();
        imageQueue.pop();
        LCD_ShowPicture2(0,0,320,172,imageData);
        delete[] imageData;
        }
        var.notify_one();
        //std::cout<<"进入一次消费者"<<std::endl;
    }
    return;
}
就是不停的取数据出来发送到屏幕。
最后cmake的部分就不多赘述了。
我自己都感觉写的有点粗制滥造,而且很多地方我自己也是糊里糊涂的,请各位批评指正


 4480
4480

 被折叠的 条评论
为什么被折叠?
被折叠的 条评论
为什么被折叠?
 到【灌水乐园】发言


