


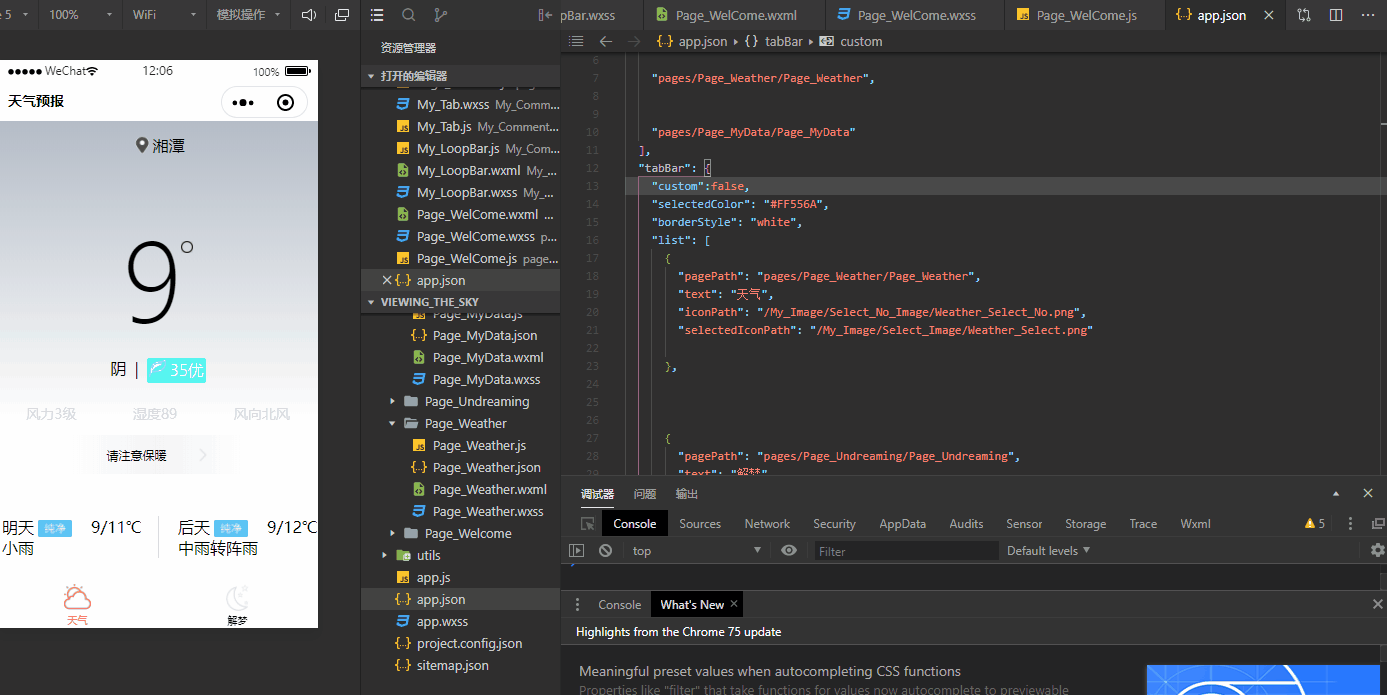
因为小微信默认的tabbar有很多限制(如tabbar图标大小不能自定义),所以有时候为了满足一些特殊的项目需求就就需要使用自定义tabbar,在使用自定义tabbar之前,必需让默认tabbar不显示,这里就要用到默认tabbar的custom属性,将custom设为true,默认tabbar就会不显示(如下图)
这里注意一下,是让默认tabbar不显示,不是直接去除默认tabbar,而且想跳转的页面也必须在默认tabbar的list属性里注册,因为后面自定义tabbar页面跳转需要用到。
默认tabbar不显示之后,就空出了位置放自定义tabbar了,所以接下来我们就可以开始写我们的自定义tabbar。
首先新建Comment,然后往这个Comment的wxml和wxss文件中写入自定义组件的UI和样式,这里在写自定义组件UI的时候,推荐使用cover-view和cover-image组件,这两个组件默认覆盖在原生组件之上,使用之后就不用担心自定义tabbar被其他原生组件遮住(wxml和wxss的代码如下)
wxml的代码
<cover-view class="Tabbar">
   <cover-view wx:for="{{Tabbar_List}}" wx:key="index" class="Tabbar_Item" data-path="{{item.PagePath}}" data-index="{{index}}" bindtap="Tabbar_Button">
     <cover-image src="{{activeIdx == index ? item.SelectedIconPath : item.IconPath}}"></cover-image>
      <cover-view >   </cover-view>
   </cover-view>
</cover-view>
wxss的代码
.Tabbar {
  position: fixed;
  bottom: 0;
  left: 0;
  right: 0;
  height: 48px;
  background: white;
  display: flex;
  padding-bottom: 33px;
}


.Tabbar_Item {
  flex: 1;
  text-align: center;
  display: flex;
  justify-content: center;
  align-items: center;
  flex-direction: column;

}

.Tabbar_Item cover-image {
  width: 50px;
  height: 50px;

}
接下来就是往这个自定义tabbar的JS文件写入逻辑。
这里跳转是使用 了 wx.switchTab()进行跳转,又因为wx.switchTab()的跳转目标只能是在默认tabbar的list属性里注册的页面,所以之前在默认tabbar的list属性里注册页面的作用就体现了出来,然后跳转逻辑解决之后,就要写好按钮反馈逻辑,效果就是按钮被选中后样式会发生变化,要实现这个效果,先要在JS文件中使用e.currentTarget.dataset.index获取当前被点击按钮的index值,然后在properties里声明一个变量,因为变量是在properties里声明的,所以使用该组件的页面要传值给自定义组件,这里每个页面传入跟按钮index值相同的值,使此值与按钮的index值有了一一对应关系,这样当传入的值等于index值的时候,对应页面的图标就会发生改变(代码如下)
JS文件中的代码
Component({
  /**
   * 组件的属性列表
   */

  properties: {
    activeIdx: {
      type: Number,
      value: 0
    },
  },

  /**
   * 组件的初始数据
   */
  data: {
    Selected: 0,

    Tabbar_List: [{
      PagePath: "pages/Weather/Weather",
      IconPath: "/My_Image/My_Tabbar_Image/天气_未被选中.png",
      SelectedIconPath: "/My_Image/My_Tabbar_Image/天气_被选中.png"

    }, {
      PagePath: "pages/ReadingDreams/ReadingDreams",
      IconPath: "/My_Image/My_Tabbar_Image/解梦_未被选中.png",
      SelectedIconPath: "/My_Image/My_Tabbar_Image/解梦_被选中.png"

    }, {
      PagePath: "pages/ExchangeRate/ExchangeRate",
      IconPath: "/My_Image/My_Tabbar_Image/汇率_未被选中.png",
      SelectedIconPath: "/My_Image/My_Tabbar_Image/汇率_被选中.png"

    }]
  },
  attached() {
  },
  /**
   * 组件的方法列表
   */
  methods: {
    Tabbar_Button(e)
    {
      const data = e.currentTarget.dataset
      const url = data.path
      wx.switchTab({url: `/${url}`,})
      console.log(data)
      this.setData({
        Selected: data.index
      })
    }
  }
})
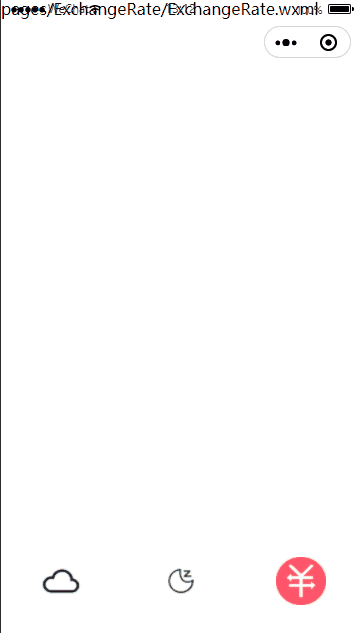
最后,使用自定义tabbar的方法跟使用其他普通自定义组件一样,现在页面的json文件里注册,然后再该页面的wxml文件里引用就行了,使用之后的效果如下


 231
231


 被折叠的 条评论
为什么被折叠?
被折叠的 条评论
为什么被折叠?
 到【灌水乐园】发言


