


1. 自动编号
我们在查看文档时候,希望编译器能够自动根据标题样式按顺序编号,不需要用户自行添加相应标题。这样也方便用户随时更新文档时候不会因为修改了某个编号而要去修改其它的编号以符合自然顺序。
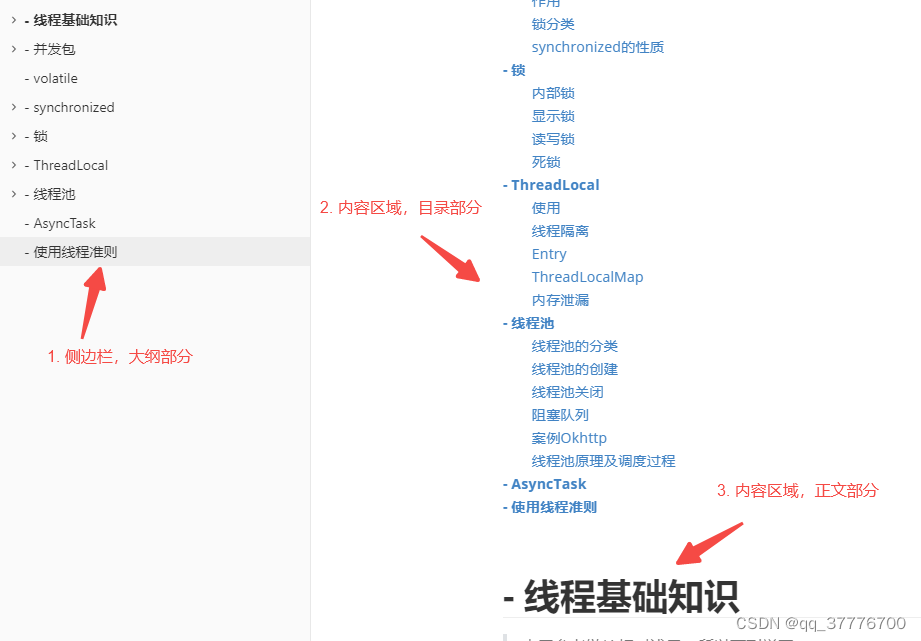
下面我们来看看编译器查看文档,原始的风格,总共分为三部分涉及到需要自动编号
- 侧边栏,大概部分
- 如果添加了目录,内容区域的目录部分
- 正文部分
下面我们来看看如何进行配置,从而达到自动编号的目的
1.1 大纲编号
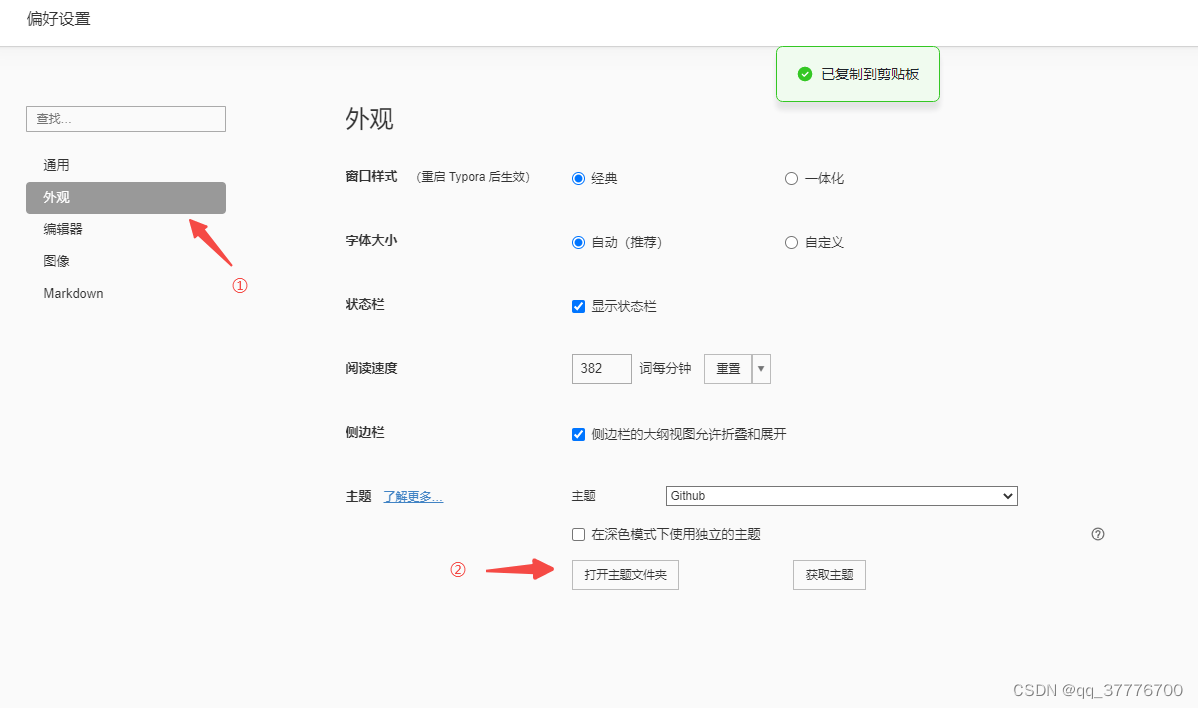
首先选择菜单栏的文件,进入偏好设置面板,找到外观-> 打开主题文件夹
找到base.user.css文件,如果没有,手动创建一份
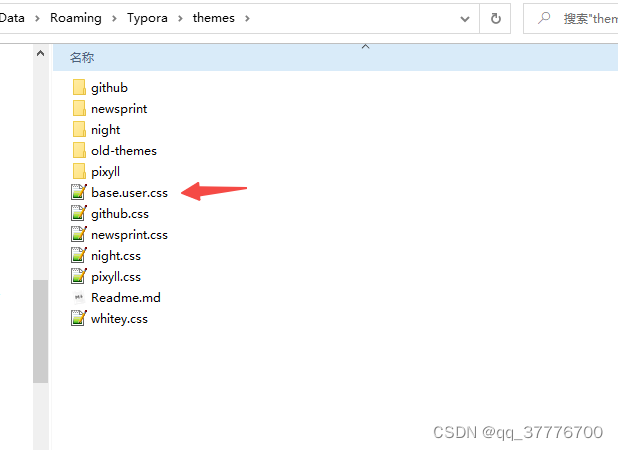
输入以下css代码,保存后,重启typora,再查看编译器
/** 1. 大纲自动编号 */
.sidebar-content {
    counter-reset: h1
}

.outline-h1 {
    counter-reset: h2
}

.outline-h2 {
    counter-reset: h3
}

.outline-h3 {
    counter-reset: h4
}

.outline-h4 {
    counter-reset: h5
}

.outline-h5 {
    counter-reset: h6
}

.outline-h1>.outline-item>.outline-label:before {
    counter-increment: h1;
    content: counter(h1) ". "
}

.outline-h2>.outline-item>.outline-label:before {
    counter-increment: h2;
    content: counter(h1) "." counter(h2) ". "
}

.outline-h3>.outline-item>.outline-label:before {
    counter-increment: h3;
    content: counter(h1) "." counter(h2) "." counter(h3) ". "
}

.outline-h4>.outline-item>.outline-label:before {
    counter-increment: h4;
    content: counter(h1) "." counter(h2) "." counter(h3) "." counter(h4) ". "
}

.outline-h5>.outline-item>.outline-label:before {
    counter-increment: h5;
    content: counter(h1) "." counter(h2) "." counter(h3) "." counter(h4) "." counter(h5) ". "
}

.outline-h6>.outline-item>.outline-label:before {
    counter-increment: h6;
    content: counter(h1) "." counter(h2) "." counter(h3) "." counter(h4) "." counter(h5) "." counter(h6) ". "
}
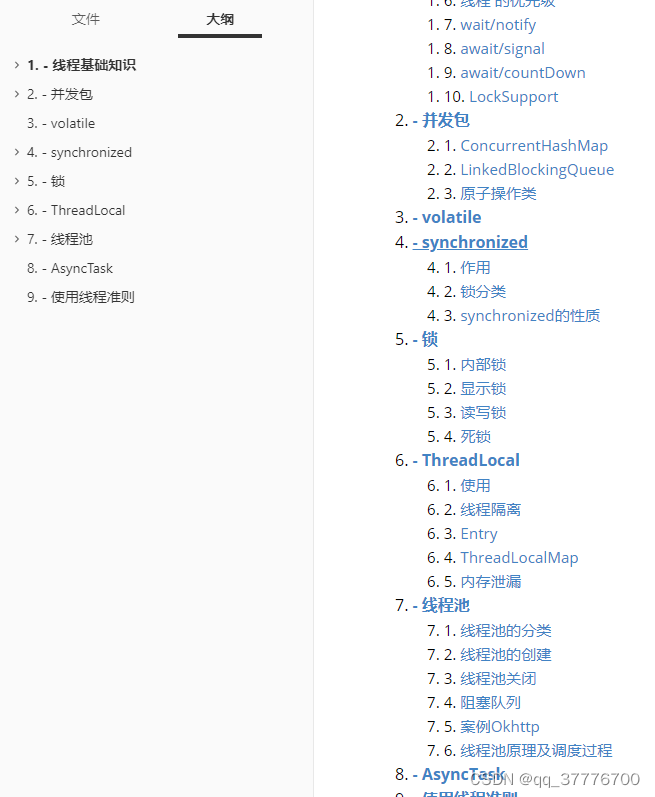
对比原生结构,这里已将大纲视图自动编号,并且在随意位置处添加标题,也会自动更新编号,无需用户手动更新编号,非常方便查看

1.2 目录编号
按照以上教程,我们继续编辑base.user.css文件,这部分我们让正文的目录[toc]部分也能自动编号
/** 2. 内容区域,目录自动编号 */
.md-toc-inner {
    text-decoration: inherit;
}

.md-toc-content {
    counter-reset: h1toc
}

.md-toc-h1 {
    margin-left: 0;
    font-size: 1rem;
	font-style:normal;
	font-weight:100;
    counter-reset: h2toc
}

.md-toc-h2 {
    font-size: 0.95rem;
    margin-left: 2rem;
    counter-reset: h3toc
}

.md-toc-h3 {
    margin-left: 3rem;
    font-size: .9rem;
    counter-reset: h4toc
}

.md-toc-h4 {
    margin-left: 4rem;
    font-size: .85rem;
    counter-reset: h5toc
}

.md-toc-h5 {
    margin-left: 5rem;
    font-size: .8rem;
    counter-reset: h6toc
}

.md-toc-h6 {
    margin-left: 6rem;
    font-size: .75rem;
}

.md-toc-h1:before {
    color: black;
    counter-increment: h1toc;
    content: counter(h1toc) ". "
}

.md-toc-h1 .md-toc-inner {
    margin-left: 0;
}

.md-toc-h2:before {
    color: black;
    counter-increment: h2toc;
    content: counter(h1toc) ". " counter(h2toc) ". "
}

.md-toc-h2 .md-toc-inner {
    margin-left: 0;
}

.md-toc-h3:before {
    color: black;
    counter-increment: h3toc;
    content: counter(h1toc) ". " counter(h2toc) ". " counter(h3toc) ". "
}

.md-toc-h3 .md-toc-inner {
    margin-left: 0;
}

.md-toc-h4:before {
    color: black;
    counter-increment: h4toc;
    content: counter(h1toc) ". " counter(h2toc) ". " counter(h3toc) ". " counter(h4toc) ". "
}

.md-toc-h4 .md-toc-inner {
    margin-left: 0;
}

.md-toc-h5:before {
    color: black;
    counter-increment: h5toc;
    content: counter(h1toc) ". " counter(h2toc) ". " counter(h3toc) ". " counter(h4toc) ". " counter(h5toc) ". "
}

.md-toc-h5 .md-toc-inner {
    margin-left: 0;
}

.md-toc-h6:before {
    color: black;
    counter-increment: h6toc;
    content: counter(h1toc) ". " counter(h2toc) ". " counter(h3toc) ". " counter(h4toc) ". " counter(h5toc) ". " counter(h6toc) ". "
}

.md-toc-h6 .md-toc-inner {
    margin-left: 0;
}
保存后,重启typora后,我们再看看编辑器。对比原始视图,现在目录部分也可以显示自动编号了
3. 正文部分
/** 3. 内容区域,正文自动编号*/
/** put counter result into headings */
#write h1:before {
    counter-increment: h1;
    content: counter(h1) ". "
}

#write h2:before {
    counter-increment: h2;
    content: counter(h1) "." counter(h2) ". "
}

#write h3:before, h3.md-focus.md-heading:before { /*override the default style for focused headings */
    counter-increment: h3;
    content: counter(h1) "." counter(h2) "." counter(h3) ". "
}

#write h4:before, h4.md-focus.md-heading:before {
    counter-increment: h4;
    content: counter(h1) "." counter(h2) "." counter(h3) "." counter(h4) ". "
}

#write h5:before, h5.md-focus.md-heading:before {
    counter-increment: h5;
    content: counter(h1) "." counter(h2) "." counter(h3) "." counter(h4) "." counter(h5) ". "
}

#write h6:before, h6.md-focus.md-heading:before {
    counter-increment: h6;
    content: counter(h1) "." counter(h2) "." counter(h3) "." counter(h4) "." counter(h5) "." counter(h6) ". "
}

/** override the default style for focused headings */
#write>h3.md-focus:before, #write>h4.md-focus:before, #write>h5.md-focus:before, #write>h6.md-focus:before, h3.md-focus:before, h4.md-focus:before, h5.md-focus:before, h6.md-focus:before {
    color: inherit;
    border: inherit;
    border-radius: inherit;
    position: inherit;
    left: initial;
    float: none;
    top: initial;
    font-size: inherit;
    padding-left: inherit;
    padding-right: inherit;
    vertical-align: inherit;
    font-weight: inherit;
    line-height: inherit;
}
对比原始视图,我们发现现在的正文内容要清晰很多
2. 自定义快捷键
有很多开发者平时习惯了自己开发过程中的编辑器快捷键,所以想着也能修改typora的快捷键,这里我罗列两个我平时较常使用的快捷键配置,供大家进行参考
首先进入偏好设置,找到通用 -> 快捷键,这里我们点击 自定义快捷键,会跳转到外网,国内也有相对应的镜像供我们参考Shortcut Keys,这里定义了一些快捷键的键值对,我们需要根据这份文档来自定义我们习惯的快捷键
接着上面,我们找到 通用 -> 高级设置,打开高级设置

找到config.user.json,点击打开
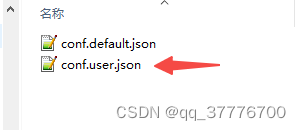
在这个文件下,keyBinding这个对象就是用来自定义我们快捷键的配置对象
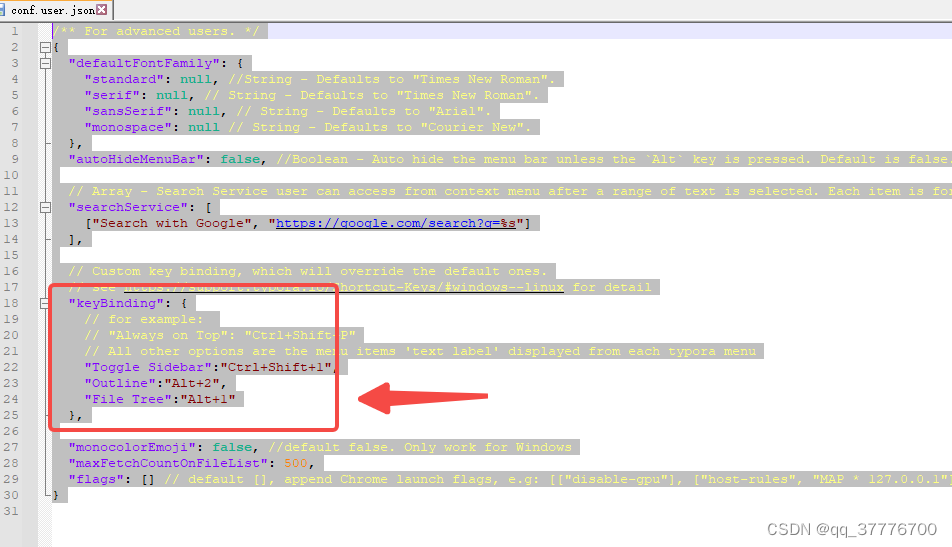
参考上面提供的快捷键配置文档,这里我习惯将文件视图、大纲视图修改成了 Alt+1和 Alt+2快捷键。当然上述修改完毕后,也需要重启typora编辑器才能生效。


 被折叠的 条评论
为什么被折叠?
被折叠的 条评论
为什么被折叠?
 到【灌水乐园】发言


