


一、RGB565是一种简化的颜色表达方式介绍
RGB565是一种简化的颜色表达方式,用于数字图像处理中,尤其常见于嵌入式系统和移动设备中,因其能够在只需较少的数据量的情况下表达彩色图像。在RGB565格式中,一个像素的颜色用16位(2字节)来表示,分配给红色、绿色和蓝色通道的位数分别是5位、6位和5位。
RGB565颜色格式详解:
- 红色(R):占有5位,能表示的范围是0到31(25−125−1),实际颜色值是通过将这个5位数值标准化到8位范围(0到255)来实现。
- 绿色(G):占有6位,能表示的范围是0到63(26−126−1)。绿色给予的位数最多,是因为人眼对绿色的敏感度较高,提供更多的绿色级别可以使图像看起来更自然。
- 蓝色(B):占有5位,与红色通道相同,范围是0到31。
数据存储格式
一个16位的数值中:
- 最高的5位(位15到位11)表示红色。
- 中间的6位(位10到位5)表示绿色。
- 最低的5位(位4到位0)表示蓝色。
因此,一个像素点的色彩值可以表示为:
Pixel=(R≪11)+(G≪5)+BPixel=(R≪11)+(G≪5)+B
其中“≪≪”是位移操作符。
优势和限制
优势:
- 节省空间:相比于标准的24位RGB(每个通道8位),RGB565能够在一定程度上减少图像数据的大小,对于内存有限的设备非常有用。
- 易于处理:由于RGB565使用固定长度的16位来表示一个像素,所以在图像处理和传输时,数据的解析和操作相对简单。
限制:
- 颜色精度降低:与24位RGB相比,RGB565的颜色表达能力受限,可能会导致颜色带或阶梯效应。
- 颜色转换:在将图片转换为RGB565格式时,需要进行颜色深度的降低处理,这可能会略微影响图像质量。
应用场景
RGB565主要应用于资源受限的环境,如嵌入式系统、旧式手机、小型显示器等,其中对图像质量的要求不是非常高,但对存储空间和处理速度有限制的场合。在现代的应用中,随着存储和处理能力的提升,RGB565可能不如高色深格式(如RGB888或RGBA8888)常见,但在某些专门的或古老的设备和系统中依然有其应用价值。
二、在ubuntu上面使用java 获取jpg图片转变成rgb565格式数据,保存为bin文件。
import javax.imageio.ImageIO;
import java.awt.image.BufferedImage;
import java.io.BufferedOutputStream;
import java.io.FileOutputStream;
import java.io.IOException;

public class ImageConverter {

    public static void main(String[] args) {
        // 图片文件路径
        String filePath = "image.jpg";

        // 将jpg图片转换为bin文件
        convertJpgToBin(filePath);
    }

    public static void convertJpgToBin(String filePath) {
        try {
            // 读取jpg图片
            BufferedImage image = ImageIO.read(ImageConverter.class.getResource(filePath));

            // 获取图片的宽度和高度
            int width = image.getWidth();
            int height = image.getHeight();
            System.out.println("width:" + width + " height:" + height);
            // 创建存储像素数据的数组
            short[] pixels = new short[width * height];

            // 遍历像素数据,将RGB信息转换为RGB565格式并存储到数组中
            for (int row = 0; row < height; row++) {
                for (int col = 0; col < width; col++) {
                    int rgb = image.getRGB(col, row);
                    int r = (rgb >> 16) & 0xFF;
                    int g = (rgb >> 8) & 0xFF;
                    int b = rgb & 0xFF;

                    // 将RGB信息转换为RGB565格式
                    short rgb565 = (short) ((r & 0xF8) << 8 | (g & 0xFC) << 3 | (b & 0xF8) >> 3);

                    // 存储到数组中
                    pixels[row * width + col] = rgb565;
                }
            }

            // 创建保存为bin文件的输出流
            try (BufferedOutputStream outputStream = new BufferedOutputStream(new FileOutputStream("output.bin"))) {
                // 遍历像素数据,将每个像素的RGB565信息写入bin文件
                for (int i = 0; i < pixels.length; i++) {
                    short pixel = pixels[i];

                    // 将RGB565信息写入bin文件
                    outputStream.write(pixel & 0xFF);
                    outputStream.write((pixel >> 8) & 0xFF);
                }

                // 关闭输出流
                outputStream.flush();
                outputStream.close();
                System.out.println("Conversion completed successfully.");
            } catch (IOException e) {
                e.printStackTrace();
            }
        } catch (IOException e) {
            e.printStackTrace();
        }
    }
}

三、Android java app 读取绝对路径下rgb565 的bin文件数据,然后在ImageView显示出。
1. 读取bin数据
public byte[] readBinaryFile(String absolutePath) {
try {
File file = new File(absolutePath);
FileInputStream fis = new FileInputStream(file);
byte[] buffer = new byte[(int)file.length()];
fis.read(buffer);
fis.close();
return buffer;
} catch (IOException e) {
e.printStackTrace();
return null; // 发生错误时返回null
}
}
2. 将RGB565数据转换为Bitmap
public Bitmap rgb565ToBitmap(byte[] rgb565Data, int width, int height) {
Bitmap bitmap = Bitmap.createBitmap(width, height, Bitmap.Config.RGB_565);
ByteBuffer buffer = ByteBuffer.wrap(rgb565Data);
bitmap.copyPixelsFromBuffer(buffer);
return bitmap;
}
3. 在ImageView中显示Bitmap
定义一个函数,把Bitmap显示到ImageView上:
public void displayImageInImageView(ImageView imageView, Bitmap bitmap) {
imageView.setImageBitmap(bitmap);
}
4.调用
String absolutePath = "/sdcard/download/image.bin";
int width = 640, height = 480;
// 确保已有读取存储的权限后
byte[] rgb565Data = readBinaryFile(absolutePath);
if (rgb565Data != null) {
Bitmap bitmap = rgb565ToBitmap(rgb565Data, width, height);
ImageView imageView = findViewById(R.id.your_image_view_id); // 使用具体的ID替代
displayImageInImageView(imageView, bitmap);
} else {
Log.e("ImageLoadError", "Failed to load binary file.");
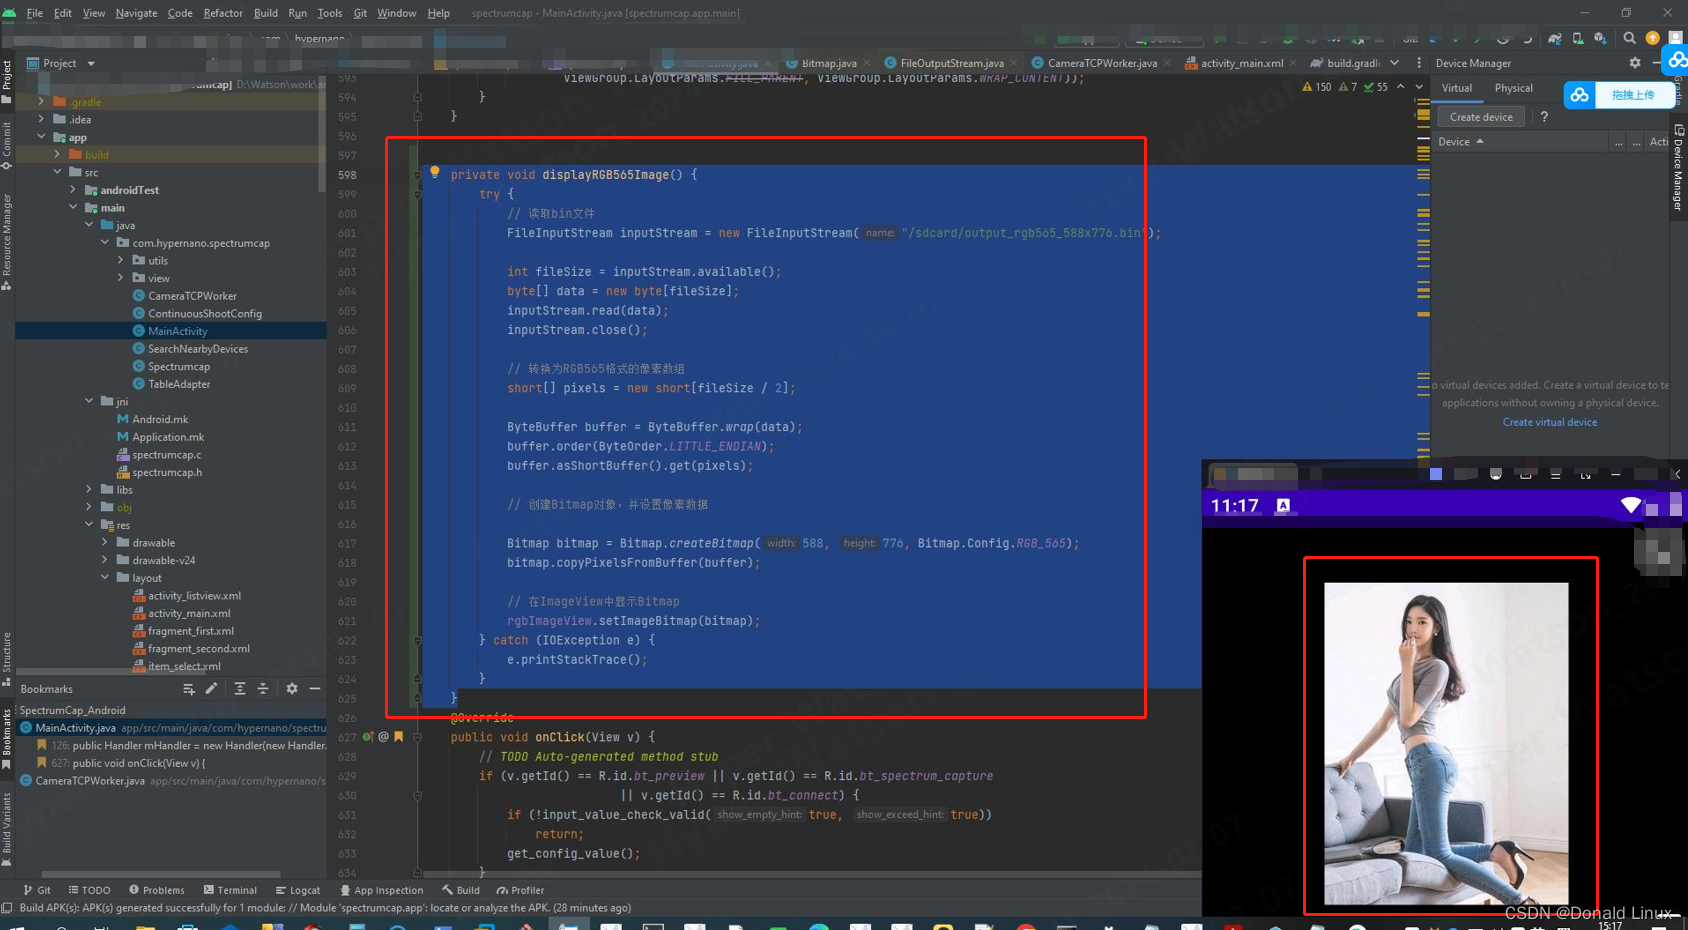
}四、Android app运行效果


 9032
9032


 被折叠的 条评论
为什么被折叠?
被折叠的 条评论
为什么被折叠?
 到【灌水乐园】发言


