


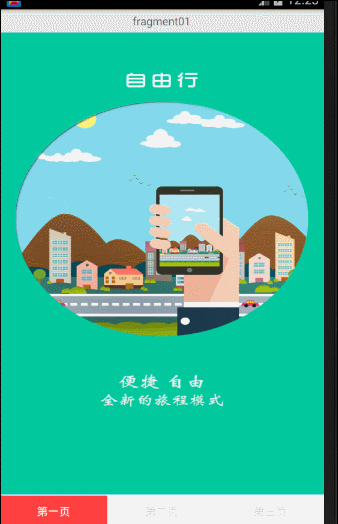
功能效果图如下:
fragment+viewpager实践
一、效果图

下面直接上代码:
public class MainActivity extends AppCompatActivity implements ViewPager.OnPageChangeListener{
    private ViewPager vp;
    private RadioGroup rg;
    private Button btn;
    List<View> list;
    RadioButton[] rbArray;

    @Override
    protected void onCreate(Bundle savedInstanceState) {
        super.onCreate(savedInstanceState);
        setContentView(R.layout.activity_main);
        vp=(ViewPager)findViewById(R.id.vp);
        rg=(RadioGroup)findViewById(R.id.rg);
        btn=(Button)findViewById(R.id.btn);
        list=new ArrayList<>();
        //把加载的布局填充到集合里
        list.add(View.inflate(this,R.layout.view1,null));
        list.add(View.inflate(this,R.layout.view2,null));
        list.add(View.inflate(this,R.layout.view3,null));
        MySPQ adapter=new MySPQ(list);
        vp.setAdapter(adapter);
        //ViewPager的页面改变事件
        vp.setOnPageChangeListener(this);

        rbArray=new RadioButton[rg.getChildCount()];
        for (int i=0;i<rg.getChildCount();i++){
            //循环获取指定位置的RadioButton
            rbArray[i]=(RadioButton) rg.getChildAt(i);
        }
        //设置第一个RadioButton为选中状态
        rbArray[0].setChecked(true);
        //rg的状态改变事件
        rg.setOnCheckedChangeListener(new RadioGroup.OnCheckedChangeListener() {
            @Override
            public void onCheckedChanged(RadioGroup group, int checkedId) {
                //让页面跟着点的选中而改变
                for (int i=0;i<rg.getChildCount();i++){
                    if(checkedId==rbArray[i].getId()){
                        vp.setCurrentItem(i);//设置选中radioButton对应的页面选中
                    }
                }
            }
        });
    }

    /*
    * 页面滚动的时候执行的方法
    * */
    @Override
    public void onPageScrolled(int position, float positionOffset, int positionOffsetPixels) {

    }

    /*
    * 页面选择的时候执行的事件
    * */
    @Override
    public void onPageSelected(int position) {
        //设置当前页面对应的RadioButton为选中状态
        rbArray[position].setChecked(true);
        //当是最后一个页面的时候,让按钮显示,其它时候不显示
        if(position==rg.getChildCount()-1){
            btn.setVisibility(View.VISIBLE);
        }else {
            btn.setVisibility(View.GONE);
        }
    }

    /*
    * 页面滚动状态改变的时候
    * */
    @Override
    public void onPageScrollStateChanged(int state) {

    }
}
public class MySPQ extends PagerAdapter{
   List<View> list;

    public MySPQ(List<View> list) {
        this.list = list;
    }

    @Override
    public int getCount() {
        return list.size();
    }

    @Override
    public boolean isViewFromObject(View view, Object object) {
        return view==object;
    }

    @Override
    public Object instantiateItem(ViewGroup container, int position) {
        container.addView(list.get(position));
        return list.get(position);
    }

    @Override
    public void destroyItem(ViewGroup container, int position, Object object) {
        container.removeView(list.get(position));
    }
}
XML布局:
<?xml version="1.0" encoding="utf-8"?>
<RelativeLayout xmlns:android="http://schemas.android.com/apk/res/android"
    xmlns:tools="http://schemas.android.com/tools" android:id="@+id/activity_main"
    android:layout_width="match_parent" android:layout_height="match_parent"
    android:paddingBottom="@dimen/activity_vertical_margin"
    android:paddingLeft="@dimen/activity_horizontal_margin"
    android:paddingRight="@dimen/activity_horizontal_margin"
    android:paddingTop="@dimen/activity_vertical_margin"
    tools:context="com.example.hd.MainActivity">

    <android.support.v4.view.ViewPager
        android:id="@+id/vp"
        android:layout_width="wrap_content"
        android:layout_height="wrap_content">

    </android.support.v4.view.ViewPager>
    <RadioGroup
        android:id="@+id/rg"
        android:layout_width="match_parent"
        android:layout_height="wrap_content"
        android:layout_alignParentBottom="true"
        android:layout_marginBottom="10dp"
        android:gravity="center"
        android:orientation="horizontal">
        <RadioButton
            android:id="@+id/rb1"
            android:layout_width="wrap_content"
            android:layout_height="wrap_content"
            android:button="@null"
            android:background="@drawable/img"
            />
        <RadioButton
            android:id="@+id/rb2"
            android:layout_width="wrap_content"
            android:layout_height="wrap_content"
            android:button="@null"
            android:background="@drawable/img"
            />
        <RadioButton
            android:id="@+id/rb3"
            android:layout_width="wrap_content"
            android:layout_height="wrap_content"
            android:button="@null"
            android:background="@drawable/img"
            />
    </RadioGroup>
    <Button
        android:id="@+id/btn"
        android:layout_width="wrap_content"
        android:layout_height="wrap_content"
        android:text="开始体验"
        android:background="#FF7800"
        android:layout_alignParentBottom="true"
        android:layout_marginBottom="50dp"
        android:layout_centerHorizontal="true"
        android:visibility="gone"
        />
</RelativeLayout>
View1:<?xml version="1.0" encoding="utf-8"?>
<LinearLayout xmlns:android="http://schemas.android.com/apk/res/android"
android:orientation="vertical" android:layout_width="match_parent"
android:layout_height="match_parent">
<ImageView
android:layout_width="match_parent"
android:layout_height="match_parent"
android:src="@mipmap/mv1"
/>
</LinearLayout>
<?xml version="1.0" encoding="utf-8"?>
<LinearLayout xmlns:android="http://schemas.android.com/apk/res/android"
    android:orientation="vertical" android:layout_width="match_parent"
    android:layout_height="match_parent">
    <ImageView
        android:layout_width="match_parent"
        android:layout_height="match_parent"
        android:src="@mipmap/mv2"
        />
</LinearLayout>
<?xml version="1.0" encoding="utf-8"?>
<LinearLayout xmlns:android="http://schemas.android.com/apk/res/android"
    android:orientation="vertical" android:layout_width="match_parent"
    android:layout_height="match_parent">
    <ImageView
        android:layout_width="match_parent"
        android:layout_height="match_parent"
        android:src="@mipmap/mv3"
        />
</LinearLayout>
需注意的是,在Drawable文件夹中创建一个新的XML文件。
<?xml version="1.0" encoding="utf-8"?>
<selector xmlns:android="http://schemas.android.com/apk/res/android">
    <item android:drawable="@mipmap/icon01" android:state_checked="false"/>
    <item android:drawable="@mipmap/icon02" android:state_checked="true"/>
</selector>
本章结束。


 272
272

 被折叠的 条评论
为什么被折叠?
被折叠的 条评论
为什么被折叠?
 到【灌水乐园】发言


