


Android移动开发第一次作业
一、作业目标
在本次作业中,我们需要设计和开发一个符合以下要求App的门户页面:
- 具有3-4个可切换的tab页面
- 使用Activity、XML和Fragment实现切换效果
- 在其中一个标签页中展示一个列表效果
- 使用RecyclerView实现列表效果。
二、技术说明
在本次实验中,我们主要采用以下技术:
- Activity:官网指南
- Activity是Android应用程序的一个基本组件,用于展示用户界面和处理用户交互。
- 我们将使用Activity来承载整个门户页面,并在其中管理标签页的切换。
- XML布局:官网指南
- 我们将使用XML布局文件来定义App的门户页面的结构和外观。
- 通过在XML文件中定义视图组件和布局容器,我们可以实现页面的层次结构和样式。
- Fragment:官网指南
- Fragment是一种可重用的UI模块,可以嵌入到Activity中,用于实现灵活的界面组合。
- 我们将使用Fragment来实现每个标签页的内容,并在Activity中进行切换。
- RecyclerView:官网指南
- RecyclerView是一个高度可定制的列表视图,用于展示大量数据的列表。
- 我们将使用RecyclerView来在一个标签页中展示列表效果,并实现列表项的显示和交互。
- ViewBinding:官网指南
- ViewBinding是一种用于简化Android视图与代码交互的技术。
- 通过使用ViewBinding,我们可以在编译时生成与布局文件对应的绑定类,从而避免了手动查找和绑定视图的繁琐过程。
三、项目主要文件说明
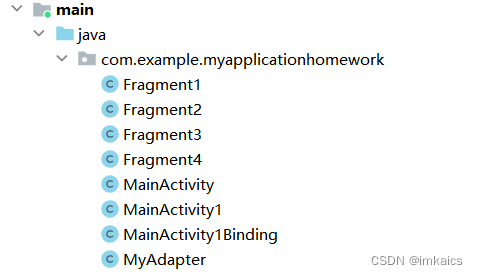

- Java文件说明:
- Fragment1、Fragment2、Fragment3、Fragment4:四个Tab页面管理
- MainActivity1:App主程序
- MainActivity1Binding:MainActivity1的ViewBinding版本
- 布局文件说明:
- 在activity_main1.xml:整体布局框架
- buttom.xml:底部布局
- fragment1.xml、fragment2.xml、fragment3.xml、fragment4.xml:四个Tab页面的布局
- item.xml:列表具体内容的布局
- top.xml:顶部布局
四、关键代码解析
- buttom.xml
定义了一个包含底部导航栏的线性布局。- 布局中包含了四个水平方向排列的LinearLayout,每个LinearLayout代表一个导航选项。
- 每个导航选项包含一个ImageView和一个TextView,用于显示图标和文本内容。
<?xml version="1.0" encoding="utf-8"?>
<LinearLayout xmlns:android="http://schemas.android.com/apk/res/android"
······
    <LinearLayout
        android:id="@+id/id_tab_home"
        android:layout_width="0dp"
        android:layout_height="match_parent"
        android:layout_gravity="center"
        android:layout_weight="1"
        android:gravity="center"
        android:orientation="vertical">
        <ImageView
            android:id="@+id/tab_iv_home"
            android:layout_width="match_parent"
            android:layout_height="wrap_content"
            android:adjustViewBounds="true"
            android:scaleType="centerCrop"
            android:src="@mipmap/ml23_16_9_removebg_preview" />
        <TextView
            android:id="@+id/text_home"
            android:layout_width="match_parent"
            android:layout_height="wrap_content"
            android:gravity="center"
            android:text="首页"
            android:textSize="25sp" />
    </LinearLayout>

    <LinearLayout
    ······
            android:text="探索" />
    ······
    </LinearLayout>

    <LinearLayout
    ······
            android:text="消息" />
    ······
    </LinearLayout>

    <LinearLayout
    ······
            android:text="我的" />
    ······
    </LinearLayout>

</LinearLayout>
- fragment1.xml
定义了一个使用ConstraintLayout作为根元素的布局。- 根元素是一个ConstraintLayout,它是AndroidX库中提供的一种灵活的布局容器。
- 在ConstraintLayout中,定义了一个RecyclerView,用于显示列表或网格数据。
- RecyclerView的宽度和高度都设置为match_parent,使其填充整个父容器。
<?xml version="1.0" encoding="utf-8"?>
<androidx.constraintlayout.widget.ConstraintLayout xmlns:android="http://schemas.android.com/apk/res/android"
    xmlns:app="http://schemas.android.com/apk/res-auto"
    xmlns:tools="http://schemas.android.com/tools"
    android:layout_width="match_parent"
    android:layout_height="match_parent">

    <androidx.recyclerview.widget.RecyclerView
        android:id="@+id/recylerview"
        android:layout_width="match_parent"
        android:layout_height="match_parent"
        app:layout_constraintBottom_toBottomOf="parent"
        app:layout_constraintStart_toStartOf="parent"
        app:layout_constraintTop_toTopOf="parent" />
</androidx.constraintlayout.widget.ConstraintLayout>
- fragment2.xml
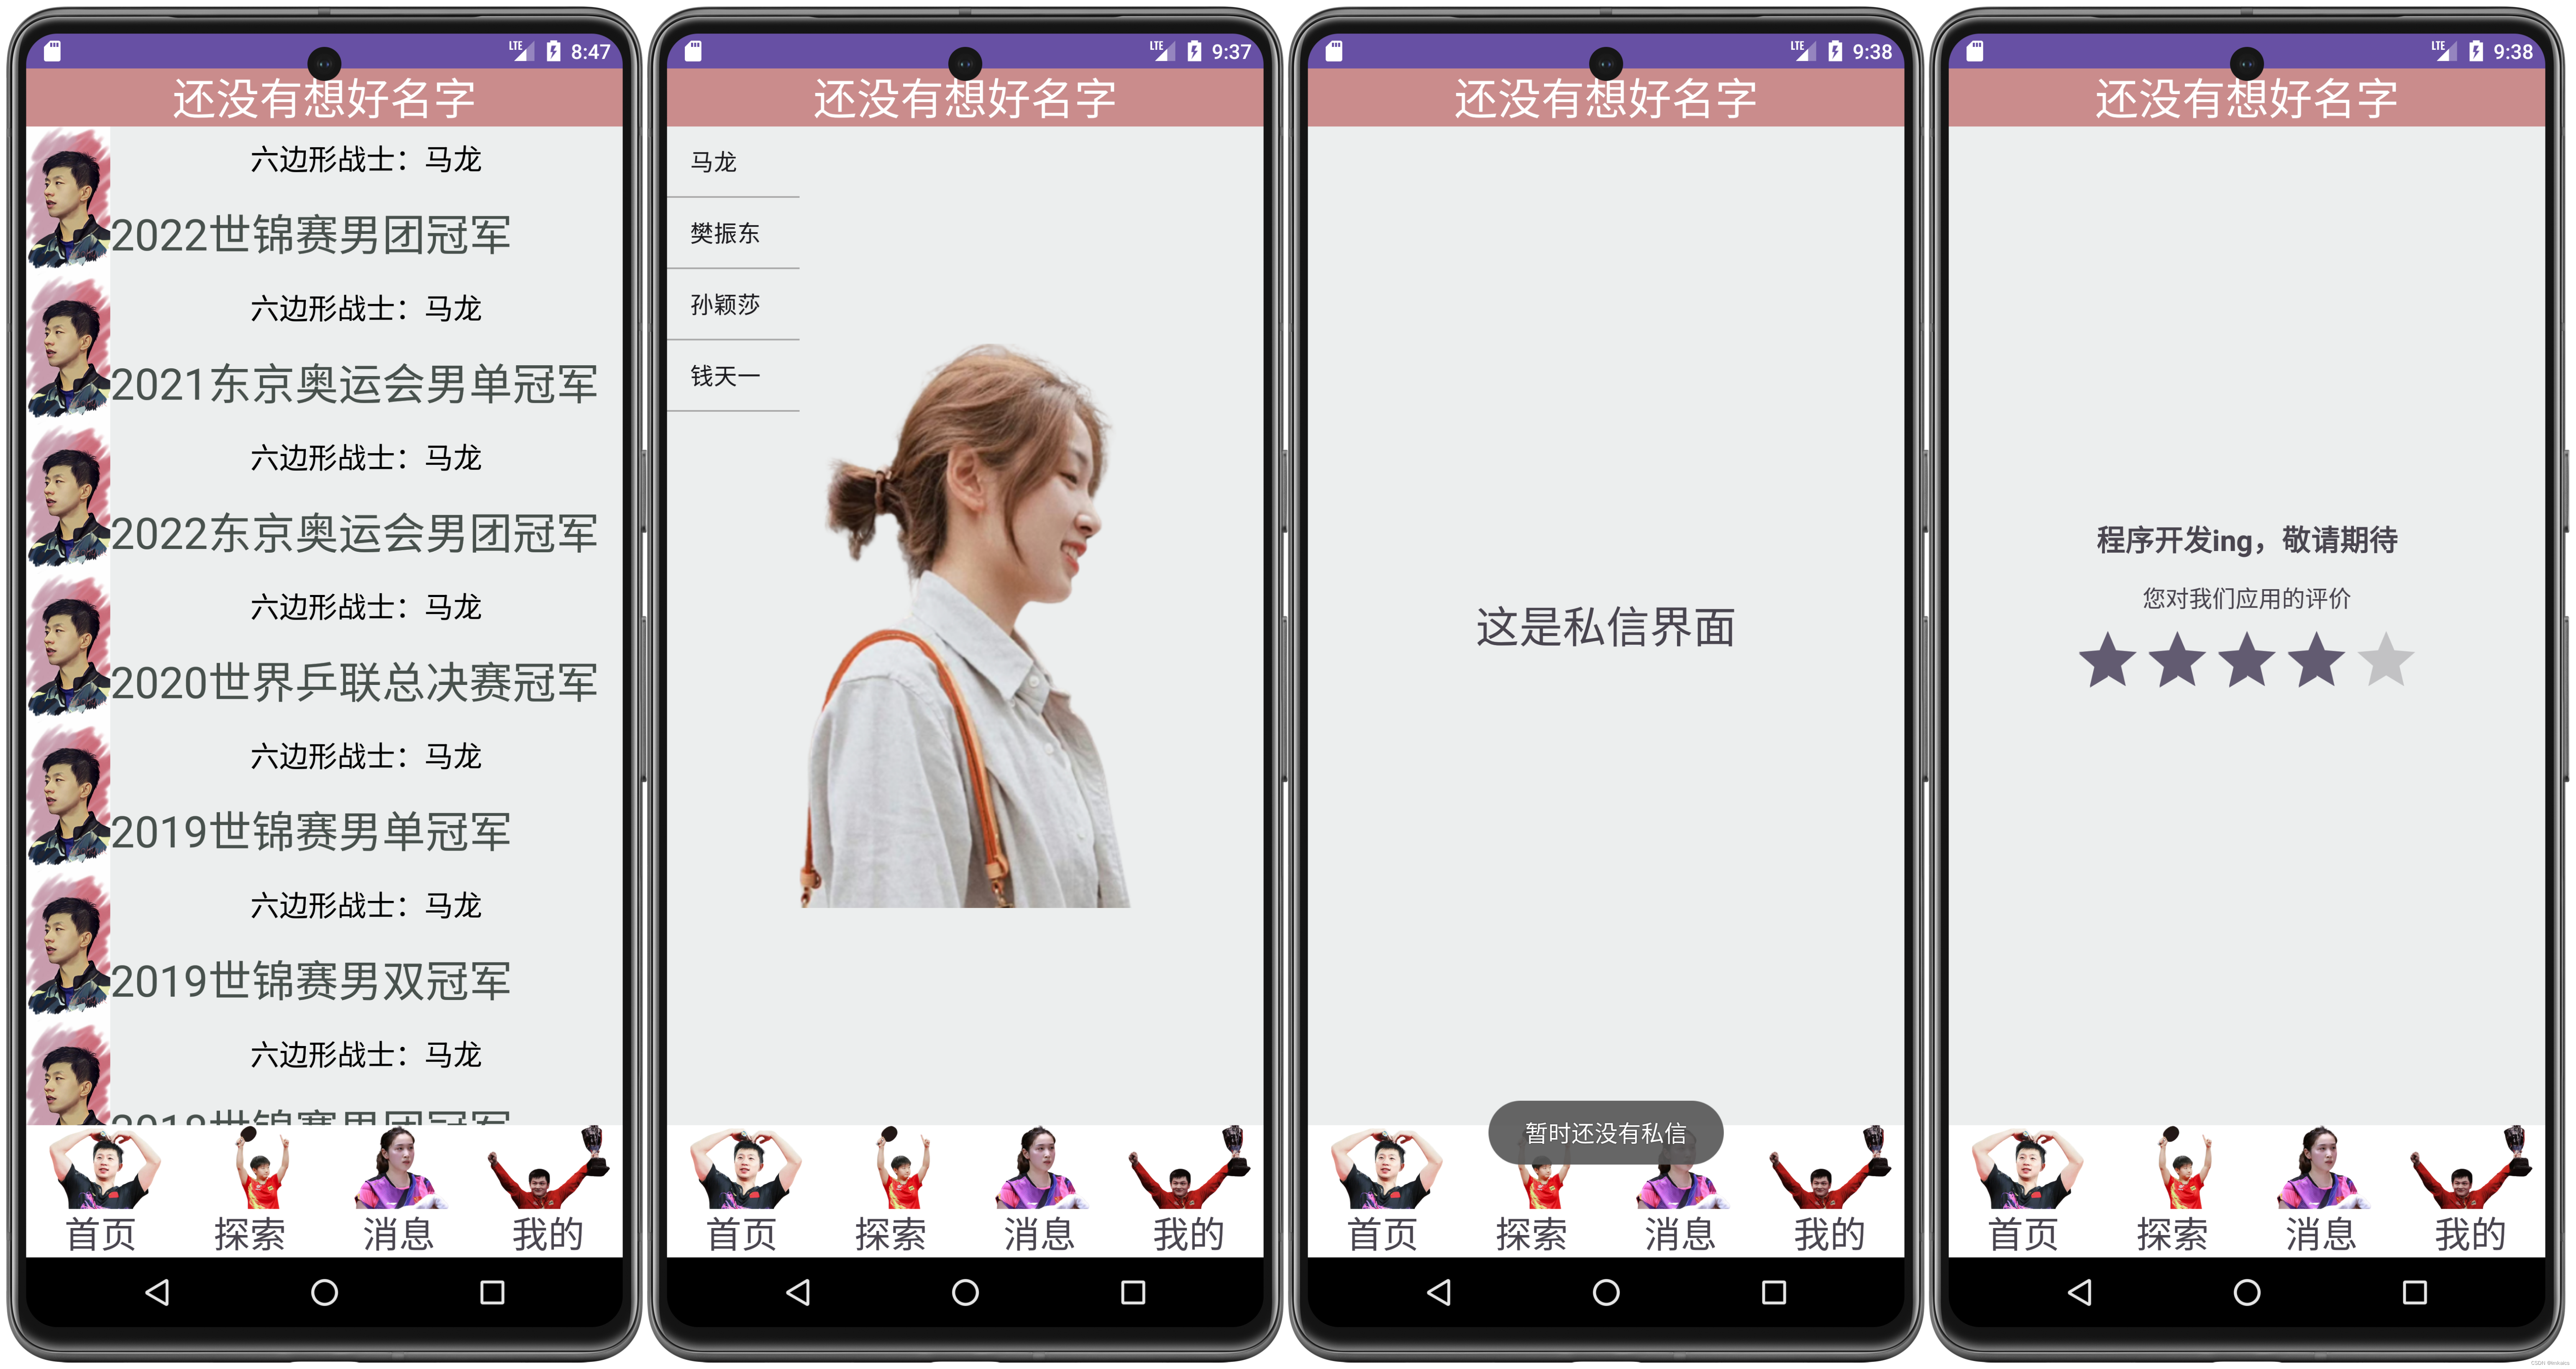
这个布局的目的是在左侧显示一个列表,右侧显示对应列表项的图片。
通过android:layout_weight属性设置了宽度的比例,使得ListView占据了父容器的2/9宽度,ImageView占据了父容器的7/9宽度。
<?xml version="1.0" encoding="utf-8"?>
<LinearLayout xmlns:android="http://schemas.android.com/apk/res/android"
    android:layout_width="match_parent"
    android:layout_height="match_parent">

    <ListView
        android:id="@+id/list_view"
        android:layout_width="0dp"
        android:layout_height="match_parent"
        android:layout_weight="2"
        android:divider="@android:color/darker_gray"
        android:dividerHeight="1dp" />

    <ImageView
        android:id="@+id/image_view"
        android:layout_width="0dp"
        android:layout_height="match_parent"
        android:layout_weight="7"
        android:scaleType="fitCenter" />

</LinearLayout>
- item.xml
创建一个水平布局,其中包含一个ImageView和一个LinearLayout。图像显示在左侧,而两个文本视图在图像的右侧,并且垂直居中对齐- ImageView元素用于显示图片。
- adjustViewBounds属性设置为true,以保持图像的纵横比。
- scaleType属性设置为centerCrop,以使图像居中裁剪并填充ImageView。src属性引用了图像资源。
- 一个垂直方向排列的LinearLayout,宽度为208dp,高度为match_parent。这个LinearLayout用于包含两个TextView元素。
- ImageView元素用于显示图片。
<?xml version="1.0" encoding="utf-8"?>
<LinearLayout xmlns:android="http://schemas.android.com/apk/res/android"
    android:layout_width="match_parent"
    android:layout_height="wrap_content"
    android:orientation="horizontal">

    <ImageView
        android:id="@+id/imageView"
        android:layout_width="58dp"
        android:layout_height="match_parent"
        android:adjustViewBounds="true"
        android:scaleType="centerCrop"
        android:src="@mipmap/ml19" />

    <LinearLayout
        android:layout_width="208dp"
        android:layout_height="match_parent"
        android:layout_gravity="center"
        android:layout_weight="1"
        android:gravity="center"
        android:orientation="vertical">

        <TextView
            android:id="@+id/textView21"
            android:layout_width="match_parent"
            android:layout_height="wrap_content"
            android:layout_weight="1"
            android:gravity="center"
            android:text="TextView"
            android:textColor="@color/black"
            android:textSize="20sp" />

        <TextView
            android:id="@+id/textView22"
            android:layout_width="match_parent"
            android:layout_height="wrap_content"
            android:layout_weight="1"
            android:gravity="center|left"
            android:text="TextView"
            android:textColor="#48514D"
            android:textSize="30sp" />
    </LinearLayout>

</LinearLayout>
- top.xml
- 包含一个TextView,用于显示文本内容。
<?xml version="1.0" encoding="utf-8"?>
<androidx.constraintlayout.widget.ConstraintLayout xmlns:android="http://schemas.android.com/apk/res/android"
    xmlns:app="http://schemas.android.com/apk/res-auto"
    xmlns:tools="http://schemas.android.com/tools"
    android:id="@+id/linearLayout2"
    android:layout_width="match_parent"
    android:layout_height="wrap_content"
    android:background="#CA8C8C">

    <TextView
        android:id="@+id/textView3"
        android:layout_width="0dp"
        android:layout_height="wrap_content"
        android:gravity="center"
        android:text="还没有想好名字"
        android:textColor="@color/white"
        android:textSize="30sp"
        app:layout_constraintEnd_toEndOf="parent"
        app:layout_constraintStart_toStartOf="parent"
        app:layout_constraintTop_toTopOf="parent" />

</androidx.constraintlayout.widget.ConstraintLayout>
- activity_main1.xml
创建一个垂直布局,其中包含了一个顶部布局、一个内容显示区域(FrameLayout)和一个底部布局。- 第一个include标签,用于引用top.xml。该布局文件的内容将被包含在这个LinearLayout中,并具有一个唯一的id为"id_top"。
- 第二个是一个FrameLayout,用于作为内容显示区域。它的宽度设置为match_parent,高度设置为wrap_content,并使用layout_weight属性值为1来占据剩余的可用空间。
- 第三个另一个include标签,用于引用bottom.xml。该布局文件的内容也将被包含在这个LinearLayout中,并具有一个唯一的id为"id_bottom"。
<?xml version="1.0" encoding="utf-8"?>
<LinearLayout xmlns:android="http://schemas.android.com/apk/res/android"
    android:layout_width="match_parent"
    android:layout_height="match_parent"
    android:orientation="vertical">

    <include
        android:id="@+id/id_top"
        layout="@layout/top" />

    <FrameLayout
        android:id="@+id/content1"
        android:layout_width="match_parent"
        android:layout_height="wrap_content"
        android:layout_weight="1"
        android:background="#ECEEEE">

    </FrameLayout>

    <include
        android:id="@+id/id_buttom"
        layout="@layout/buttom" />

</LinearLayout>
- MyAdapter.java
该适配器类的功能是将数据从列表(list1和list2)绑定到RecyclerView的每个列表项中,以便在列表中显示相应的文本内容- 构造函数:接收两个列表(list1和list2)以及一个上下文对象(context)作为参数。
- onCreateViewHolder()方法:在RecyclerView需要创建新的ViewHolder时调用。
- 通过LayoutInflater从指定的布局文件(R.layout.item)创建一个新的View对象,并将其传递给Myholder构造函数来创建一个ViewHolder对象。
- onBindViewHolder()方法:将数据绑定到ViewHolder中的视图元素上。
- 根据当前位置(position)从列表(list1和list2)中获取相应的数据,并将其设置到对应的TextView视图上。
- getItemCount()方法:返回列表(list1)的大小,即适配器应该显示的项数。
- Myholder类:自定义的ViewHolder内部类,继承自RecyclerView.ViewHolder。
- 它持有每个列表项的视图元素,这里是两个TextView(textView1和textView2)。
package com.example.myapplicationhomework;
import ···

public class MyAdapter extends RecyclerView.Adapter<MyAdapter.Myholder> {
    List<String> list1, list2;
    Context context1;

    public MyAdapter(List list_1, List list_2, Context context) {
        list1 = list_1;
        list2 = list_2;
        context1 = context;
    }

    @NonNull
    @Override
    public Myholder onCreateViewHolder(@NonNull ViewGroup parent, int viewType) {
        View view = LayoutInflater.from(context1).inflate(R.layout.item, parent, false);
        Myholder myholder = new Myholder(view);
        return myholder;
    }


    public void onBindViewHolder(@NonNull Myholder holder, int position) {
        holder.textView1.setText(list1.get(position));
        holder.textView2.setText(list2.get(position));
    }

    @Override
    public int getItemCount() {
        return list1.size();
    }

    class Myholder extends RecyclerView.ViewHolder {
        TextView textView1, textView2;

        public Myholder(@NonNull View itemView) {
            super(itemView);
            textView1 = itemView.findViewById(R.id.textView21);
            textView2 = itemView.findViewById(R.id.textView22);
        }
    }
}
- Fragment1.java:
该Fragment类的主要功能是创建一个显示列表数据的RecyclerView,并将其与布局文件进行绑定- onCreateView()方法:在Fragment的生命周期中,当创建Fragment的视图层次结构时调用。
- 首先通过Fragment1Binding类将布局文件与该Fragment绑定。
- 然后通过调用inflate()方法,将布局文件转换为View对象。
- 最后,设置RecyclerView的适配器和布局管理器,并返回最终的视图。
- setList()方法:这是一个自定义方法,用于为列表数据集合(list1和list2)添加数据。
- onDestroyView()方法:在Fragment视图被销毁时调用。
- onCreateView()方法:在Fragment的生命周期中,当创建Fragment的视图层次结构时调用。
package com.example.myapplicationhomework;
import ···

public class Fragment1 extends Fragment {
    private Fragment1Binding fragment1Binding;
    ArrayList<String> list1 = new ArrayList<>();
    ArrayList<String> list2 = new ArrayList<>();

    @Override
    public View onCreateView(LayoutInflater inflater, ViewGroup container,
                             Bundle savedInstanceState) {

        fragment1Binding = Fragment1Binding.inflate(inflater, container, false);
        View view = fragment1Binding.getRoot();
        setList();
        MyAdapter myAdapter = new MyAdapter(list1, list2, view.getContext());
        fragment1Binding.recylerview.setAdapter(myAdapter);
        LinearLayoutManager manager = new LinearLayoutManager(view.getContext());
        manager.setOrientation(RecyclerView.VERTICAL);
        fragment1Binding.recylerview.setLayoutManager(manager);
        return view;
    }

    private void setList() {
        for (int i = 1; i <= 11; i++) {
            list1.add("六边形战士:马龙");
        }
        list2.add("2022世锦赛男团冠军");
        list2.add("2021东京奥运会男单冠军");
        list2.add("2022东京奥运会男团冠军");
        list2.add("2020世界乒联总决赛冠军");
        list2.add("2019世锦赛男单冠军");
        list2.add("2019世锦赛男双冠军");
        list2.add("2018世锦赛男团冠军");
        list2.add("2017世锦赛男单冠军");
        list2.add("2016世锦赛男团冠军");
        list2.add("2016巴西奥运会男单冠军");
        list2.add("2016巴西奥运会男团冠军");
    }

    @Override
    public void onDestroyView() {
        super.onDestroyView();
        fragment1Binding = null;
    }
}
- MainActivity1Binding.java
主要功能是管理四个Fragment的显示和隐藏,并通过底部导航栏按钮切换不同的Fragment。- onCreate()方法:在活动创建时调用。
- 首先通过ActivityMain1Binding类将布局文件与该活动绑定。
- 然后获取根视图并设置为活动的内容视图。
- 接着初始化FragmentManager和四个Fragment对象。
- 设置底部导航栏按钮的监听器。
- fragmentshow()方法:用于显示指定的Fragment。
- initial()方法:用于初始化Fragment。
- fragmenthide()方法:用于隐藏所有的Fragment。
- onClick()方法:底部导航栏按钮的点击事件。根据不同的点击事件,调用fragmentshow()方法显示相应的Fragment。
- onCreate()方法:在活动创建时调用。
package com.example.myapplicationhomework;

import ···
public class MainActivity1Binding extends AppCompatActivity implements View.OnClickListener {
    Fragment fragment1, fragment2, fragment3, fragment4;
    private ActivityMain1Binding activityMain1Binding;
    FragmentManager fragmentManager;


    @Override
    protected void onCreate(Bundle savedInstanceState) {
        super.onCreate(savedInstanceState);
        activityMain1Binding = ActivityMain1Binding.inflate(getLayoutInflater());
        View view = activityMain1Binding.getRoot();
        setContentView(view);
        fragmentManager = getSupportFragmentManager();

        fragment1 = new Fragment1();
        fragment2 = new Fragment2();
        fragment3 = new Fragment3();
        fragment4 = new Fragment4();

        initial();
        fragmentshow(fragment1);

        activityMain1Binding.idButtom.idTabHome.setOnClickListener(this);
        activityMain1Binding.idButtom.idTabExplore.setOnClickListener(this);
        activityMain1Binding.idButtom.idTabMessage.setOnClickListener(this);
        activityMain1Binding.idButtom.idTabMy.setOnClickListener(this);

    }

    private void fragmentshow(Fragment fragment) {
        fragmenthide();
        FragmentTransaction ft = fragmentManager.beginTransaction()
                .show(fragment);
        ft.commit();
    }


    private void initial() {
        FragmentTransaction ft = fragmentManager.beginTransaction()
                .add(activityMain1Binding.content1.getId(), fragment1)
                .add(activityMain1Binding.content1.getId(), fragment2)
                .add(activityMain1Binding.content1.getId(), fragment3)
                .add(activityMain1Binding.content1.getId(), fragment4);
        ft.commit();
    }

    private void fragmenthide() {
        FragmentTransaction ft = fragmentManager.beginTransaction()
                .hide(fragment1)
                .hide(fragment2)
                .hide(fragment3)
                .hide(fragment4);
        ft.commit();
    }

    @Override
    public void onClick(View view) {
        if (view == activityMain1Binding.idButtom.idTabHome)
            fragmentshow(fragment1);
        else if (view == activityMain1Binding.idButtom.idTabExplore)
            fragmentshow(fragment2);
        else if (view == activityMain1Binding.idButtom.idTabMessage)
            fragmentshow(fragment3);
        else if (view == activityMain1Binding.idButtom.idTabMy)
            fragmentshow(fragment4);
    }
}
五、效果展示


 4892
4892


 被折叠的 条评论
为什么被折叠?
被折叠的 条评论
为什么被折叠?
 到【灌水乐园】发言


