


 本文详述了使用LCN框架解决分布式事务的过程,包括事务管理器的配置与启动,数据库准备,创建SpringBoot项目,服务注册到Consul,以及在业务代码中应用分布式事务。通过实例演示了分布式事务在解决跨服务数据库事务问题中的作用。
前言
关于分布式事务概念 在本片章节就不详细说了 不了解的童鞋可以自行百度 本篇主要来说分布式事务中LCN框架的基本使用方式 本文很长 但是非常详细 花费您2小时时间 能够让自己学会分布式事务如何解决 是否值得
- DEMO获取 提取码:lmlh
开始
第一步
在我们的LCN中 有 发起方和参与方两种角色
下载事务管理器项目
我们需要下载LCN的tm(事务管理器)并配置
下载地址
或者直接执行如下命令 也好
git clone https://github.com/codingapi/tx-lcn.git & cd txlcn-tm
修改配置信息 tx-lcn-5.0.2.RELEASE\txlcn-tm\src\main\resources\application.properties
spring.application.name=tx-manager
server.port=7970

spring.datasource.driver-class-name=com.mysql.jdbc.Driver
spring.datasource.url=jdbc:mysql://127.0.0.1:3306/tx-manager?characterEncoding=UTF-8
spring.datasource.username=root
spring.datasource.password=root

mybatis.configuration.map-underscore-to-camel-case=true
mybatis.configuration.use-generated-keys=true

#tx-lcn.logger.enabled=true
# TxManager Host Ip
#tx-lcn.manager.host=127.0.0.1
# TxClient连接请求端口
#tx-lcn.manager.port=8070
# 心跳检测时间(ms)
#tx-lcn.manager.heart-time=15000
# 分布式事务执行总时间
#tx-lcn.manager.dtx-time=30000
#参数延迟删除时间单位ms
#tx-lcn.message.netty.attr-delay-time=10000
#tx-lcn.manager.concurrent-level=128
# 开启日志
#tx-lcn.logger.enabled=true
#logging.level.com.codingapi=debug
#redis 主机
#spring.redis.host=127.0.0.1
#redis 端口
#spring.redis.port=6379
#redis 密码
#spring.redis.password=
注意 事务管理器 需要使用到Redis 注意开启redis服务 注意修改数据源配置
事务管理器需要自己的数据库和数据库表 所以下面是执行SQL脚本
执行数据库脚本
/*
 Navicat Premium Data Transfer

 Source Server         : local
 Source Server Type    : MySQL
 Source Server Version : 100309
 Source Host           : localhost:3306
 Source Schema         : tx-manager

 Target Server Type    : MySQL
 Target Server Version : 100309
 File Encoding         : 65001

 Date: 29/12/2018 18:35:59
*/
CREATE DATABASE IF NOT EXISTS  `tx-manager` DEFAULT CHARSET utf8 COLLATE utf8_general_ci;
USE `tx-manager`;

SET NAMES utf8mb4;
SET FOREIGN_KEY_CHECKS = 0;

-- ----------------------------
-- Table structure for t_tx_exception
-- ----------------------------
DROP TABLE IF EXISTS `t_tx_exception`;
CREATE TABLE `t_tx_exception`  (
  `id` bigint(20) NOT NULL AUTO_INCREMENT,
  `group_id` varchar(64) CHARACTER SET utf8mb4 COLLATE utf8mb4_general_ci NULL DEFAULT NULL,
  `unit_id` varchar(32) CHARACTER SET utf8mb4 COLLATE utf8mb4_general_ci NULL DEFAULT NULL,
  `mod_id` varchar(128) CHARACTER SET utf8mb4 COLLATE utf8mb4_general_ci NULL DEFAULT NULL,
  `transaction_state` tinyint(4) NULL DEFAULT NULL,
  `registrar` tinyint(4) NULL DEFAULT NULL,
  `ex_state` tinyint(4) NULL DEFAULT NULL COMMENT '0 待处理 1已处理',
  `remark` varchar(10240) NULL DEFAULT NULL COMMENT '备注',
  `create_time` datetime(0) NULL DEFAULT NULL,
  PRIMARY KEY (`id`) USING BTREE
) ENGINE = InnoDB AUTO_INCREMENT = 967 CHARACTER SET = utf8mb4 COLLATE = utf8mb4_general_ci ROW_FORMAT = Dynamic;

SET FOREIGN_KEY_CHECKS = 1;
同时这个数据库脚本在项目目录 tx-lcn-5.0.2.RELEASE\txlcn-tm\src\main\resources\tx-manager.sql中也可以获取到
创建完毕之后和修改完毕之后 编译构建
mvn clean package '-Dmaven.test.skip=true'
如果使用cmd执行mvn命令报错可以尝试使用以下git bash here 哦
运行
编译构建完毕之后运行项目
内也有Dockerfile构建镜像的启动方式 在 docker 文件夹下 这里就不细说了
进入到 target目录
java -jar txlcn-tm-5.0.2.RELEASE.jar
运行如果报错 jar中没有主清单属性
在pom.xml中加入如下配置
<plugin>
       <groupId>org.apache.maven.plugins</groupId>
           <artifactId>maven-compiler-plugin</artifactId>
           <configuration>
               <source>1.8</source>
               <target>1.8</target>
           </configuration>
       </plugin>
       <plugin>
           <groupId>org.springframework.boot</groupId>
           <artifactId>spring-boot-maven-plugin</artifactId>
           <executions>
               <execution>
                   <goals>
                       <goal>repackage</goal>
                   </goals>
               </execution>
           </executions>
       </plugin>
再次启动 之后访问
http://127.0.0.1:7970
默认密码是 codingapi
成功之后会看到如下界面
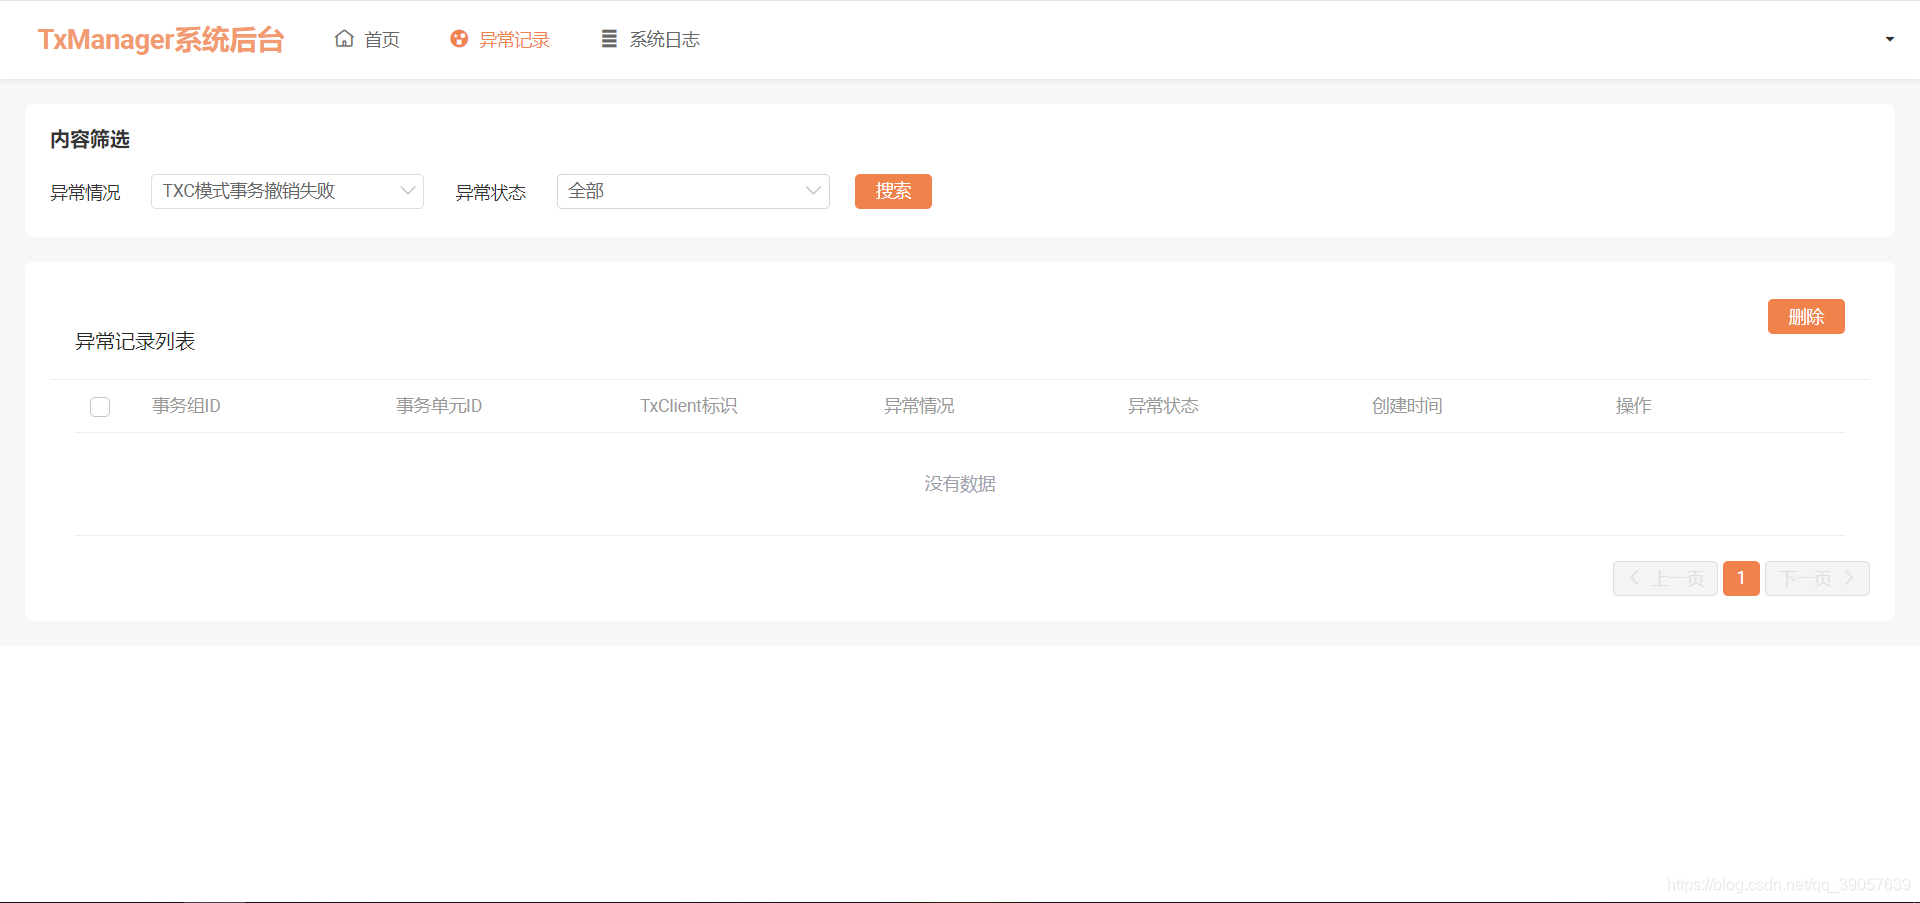
至此 事务管理器成功启动
第二步
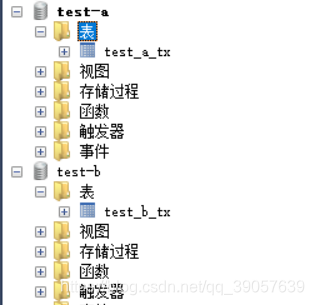
创建程序测试所需数据库test-a 和 test-b
数据库自行创建
下面是表数据SQL脚本 将两个库
test_a_tx
CREATE TABLE `test_a_tx`(
id BIGINT(20) NOT NULL AUTO_INCREMENT,
money INT(10) DEFAULT NULL ,
USER VARCHAR(32) DEFAULT NULL,
PRIMARY KEY (id)
) ENGINE = INNODB DEFAULT CHARSET =utf8 ROW_FORMAT=DYNAMIC
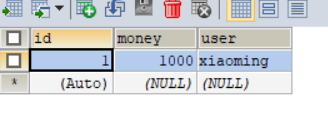
INSERT INTO test_a_tx (money,USER) VALUES (1000,"xiaoming")
test_b_tx
CREATE TABLE `test_b_tx`(
id BIGINT(20) NOT NULL AUTO_INCREMENT,
money INT(10) DEFAULT NULL ,
USER VARCHAR(32) DEFAULT NULL,
PRIMARY KEY (id)
) ENGINE = INNODB DEFAULT CHARSET =utf8 ROW_FORMAT=DYNAMIC
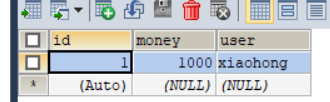
INSERT INTO test_a_tx (money,USER) VALUES (1000,"xiaohong")
test_a_tx 数据
test_b_tx 数据
第三步
如果你没有学习过SpringBoot也不要紧 本文会一步一步带你构建项目
创建SpringCloud项目 开发工具这里使用 idea 去下载
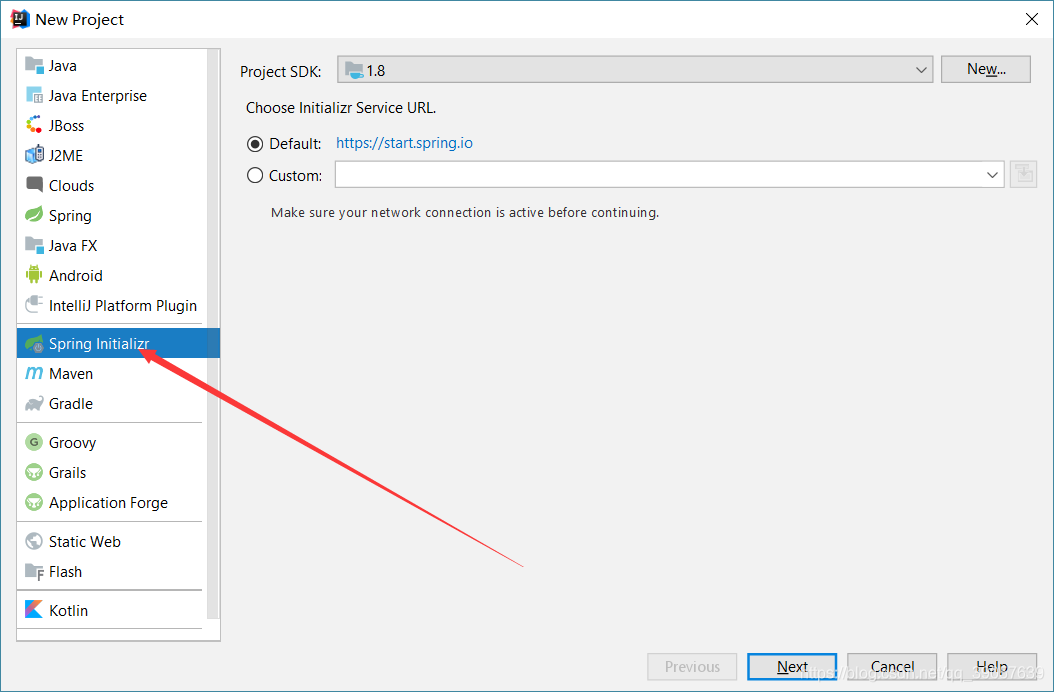
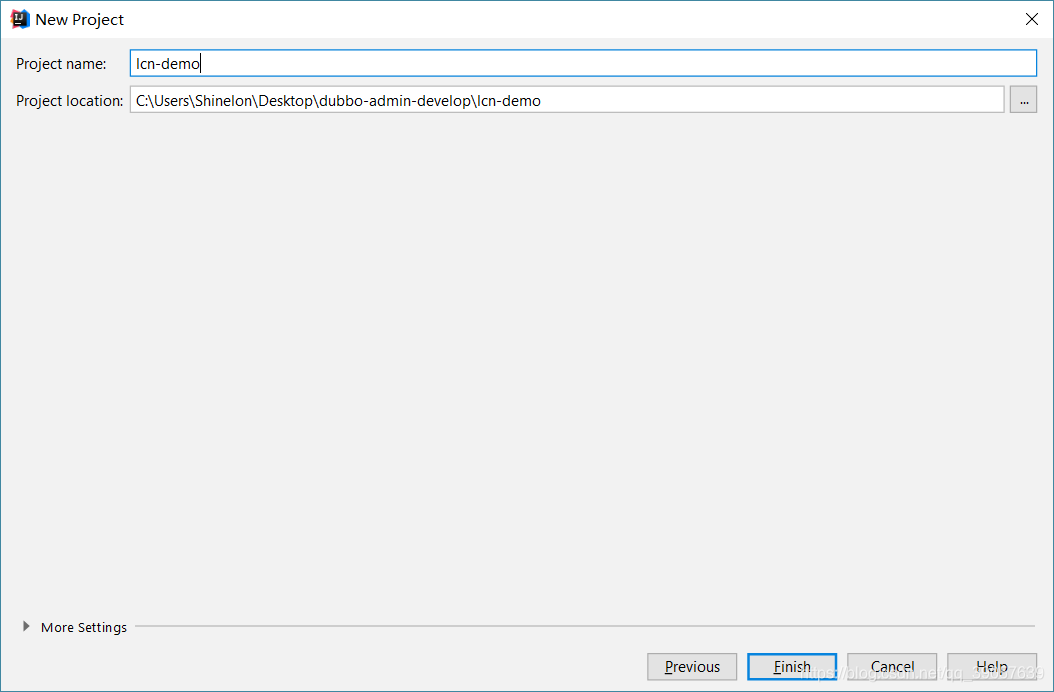
我们使用idea创建一个springboot项目
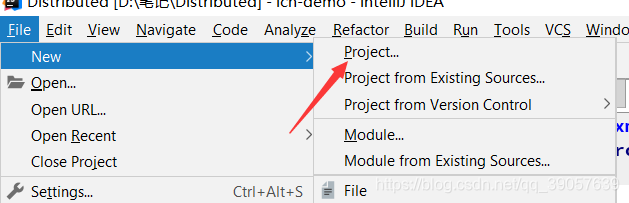
选择Spring初始化器 然后点击next
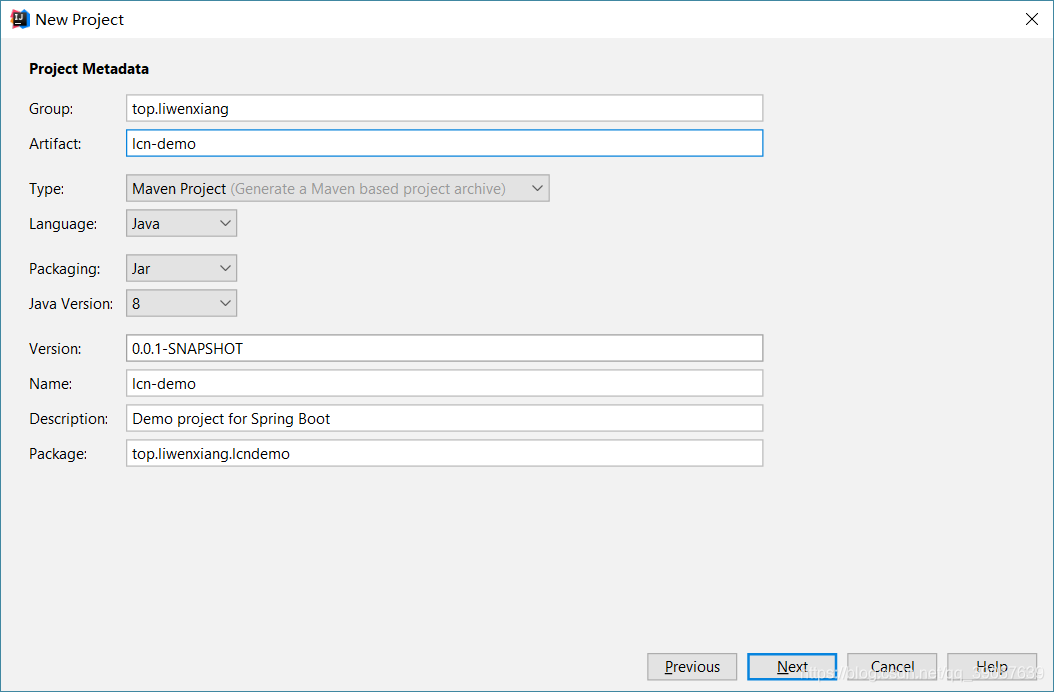
编辑groupId和aftifactId jdk版本是8 maven作为构建工具 之后点击next
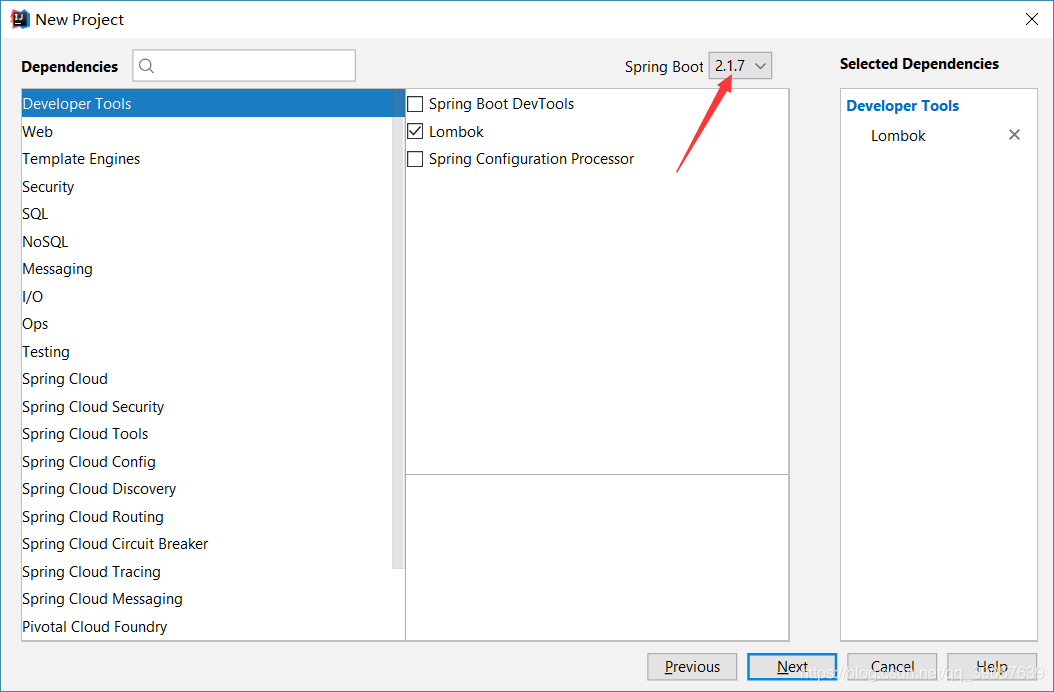
选择SpringBoot版本 2.1.7 单机next
单机 finish 完成 等待项目加载
pom.xml内容
如果你这里在创建项目的时候填写的和本文不一致 修改 groupId 和 artifactId 两个标签内的内容
<?xml version="1.0" encoding="UTF-8"?>
<project xmlns="http://maven.apache.org/POM/4.0.0" xmlns:xsi="http://www.w3.org/2001/XMLSchema-instance"
         xsi:schemaLocation="http://maven.apache.org/POM/4.0.0 https://maven.apache.org/xsd/maven-4.0.0.xsd">
    <modelVersion>4.0.0</modelVersion>
    <parent>
        <groupId>org.springframework.boot</groupId>
        <artifactId>spring-boot-starter-parent</artifactId>
        <version>2.1.7.RELEASE</version>
        <relativePath/> <!-- lookup parent from repository -->
    </parent>
    <groupId>top.liwenxiang</groupId>
    <artifactId>lcn-demo</artifactId>
    <version>0.0.1-SNAPSHOT</version>
    <name>lcn-demo</name>
    <description>Demo project for Spring Boot</description>

    <packaging>pom</packaging>

    <properties>
        <java.version>1.8</java.version>
        <spring-cloud.version>Greenwich.SR2</spring-cloud.version>
    </properties>

    <dependencies>
        <dependency>
            <groupId>org.springframework.boot</groupId>
            <artifactId>spring-boot-starter-actuator</artifactId>
        </dependency>
        <dependency>
            <groupId>org.springframework.boot</groupId>
            <artifactId>spring-boot-starter-thymeleaf</artifactId>
        </dependency>
        <dependency>
            <groupId>org.springframework.boot</groupId>
            <artifactId>spring-boot-starter-web</artifactId>
        </dependency>
        <dependency>
            <groupId>org.mybatis.spring.boot</groupId>
            <artifactId>mybatis-spring-boot-starter</artifactId>
            <version>2.1.0</version>
        </dependency>
        <dependency>
            <groupId>org.springframework.cloud</groupId>
            <artifactId>spring-cloud-starter-consul-discovery</artifactId>
        </dependency>
           <dependency>
            <groupId>org.springframework.cloud</groupId>
            <artifactId>spring-cloud-starter-consul-config</artifactId>
        </dependency>
        <dependency>
            <groupId>org.springframework.cloud</groupId>
            <artifactId>spring-cloud-starter-openfeign</artifactId>
        </dependency>

        <dependency>
            <groupId>org.springframework.boot</groupId>
            <artifactId>spring-boot-devtools</artifactId>
            <scope>runtime</scope>
            <optional>true</optional>
        </dependency>
        <dependency>
            <groupId>mysql</groupId>
            <artifactId>mysql-connector-java</artifactId>
            <scope>runtime</scope>
        </dependency>
        <dependency>
            <groupId>org.projectlombok</groupId>
            <artifactId>lombok</artifactId>
            <optional>true</optional>
        </dependency>
        <dependency>
            <groupId>org.springframework.boot</groupId>
            <artifactId>spring-boot-starter-test</artifactId>
            <scope>test</scope>
        </dependency>
    </dependencies>

    <dependencyManagement>
        <dependencies>
            <dependency>
                <groupId>org.springframework.cloud</groupId>
                <artifactId>spring-cloud-dependencies</artifactId>
                <version>${spring-cloud.version}</version>
                <type>pom</type>
                <scope>import</scope>
            </dependency>
        </dependencies>
    </dependencyManagement>

    <build>
        <plugins>
            <plugin>
                <groupId>org.springframework.boot</groupId>
                <artifactId>spring-boot-maven-plugin</artifactId>
            </plugin>
        </plugins>
    </build>

</project>
紧接着 我们创建两个服务模块
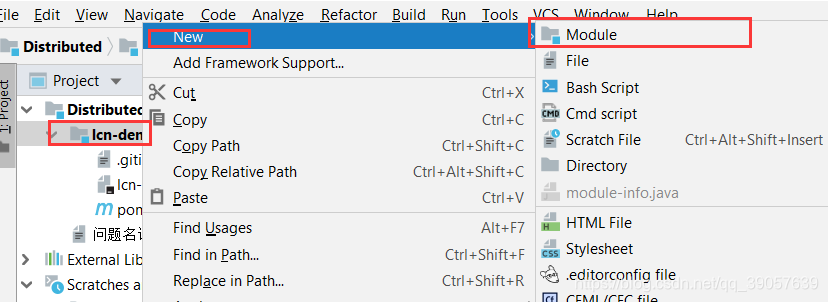
接下来的界面和刚刚创建项目是一样的 这次我们创建一个maven项目 选择maven 直接下一步

groupid保持不变 修改 artifactId 点击next 下一个面板直接 finish 完成

pom.xml 由于这里的父工程已经依赖了我们所需要的jar包 所以这里无需引入多余的jar
<?xml version="1.0" encoding="UTF-8"?>
<project xmlns="http://maven.apache.org/POM/4.0.0"
         xmlns:xsi="http://www.w3.org/2001/XMLSchema-instance"
         xsi:schemaLocation="http://maven.apache.org/POM/4.0.0 http://maven.apache.org/xsd/maven-4.0.0.xsd">
    <parent>
        <artifactId>lcn-demo</artifactId>
        <groupId>top.liwenxiang</groupId>
        <version>0.0.1-SNAPSHOT</version>
    </parent>
    <modelVersion>4.0.0</modelVersion>

    <artifactId>test_a</artifactId>
    <version>0.0.1-SNAPSHOT</version>
</project>
在我们的java源码目录创建包

内容为

点击OK
新建我们的启动类 SpringBoot 呢 没有了繁杂的XML配置文件 内置TOMCAT 我们可以编写一个启动类来启动SpringBoot项目


点击OK
LcnApplication.java 文件内容
@SpringBootApplication 是一个SpringBoot 应用程序
@EnableFeignClients 开启Feign客户端
@EnableDiscoveryClient 开启服务注册能够扫描到本服务 这个可以使用任意的注册中心
@EnableEurekaClient 这个不适用 因为现在eureka已经进入维护阶段 使用这个注解就只能够使用eureka注册中心了
@SpringBootApplication
@EnableFeignClients
@EnableDiscoveryClient
public class LcnApplication {
    public static void main(String[] args) {
        SpringApplication.run(LcnApplication.class,args);
    }
}
新建配置文件 application.yml


点击OK
注册中心我们这里采用consul作为注册中心 同时它还可以当作配置中心
新建配置文件 bootstrap.yml 文件 这个配置文件会在application.yml 之前被加载
springBoot 配置文件加载顺序
bootstrap.properties > bootstrap.yml > application.properties > application.yml
创建方式同上 以下是内容 这里不创建此文件 直接在到 application.yml 里也是可以的 这里只是引出
这个知识点
如果这里的内容要放在 application.yml 中的话 直接复制 cloud 以及 以下内容到 application.yml 中的 spring下即可
spring:
  cloud:
    consul:
      host: localhost
      port: 8500
      config:
        enabled: true #false禁用Consul配置,默认true
        format: YAML    # 表示consul上面文件的格式 有四种 YAML PROPERTIES KEY-VALUE FILES
        #data-key: configuration    #表示consul上面的KEY值(或者说文件的名字) 默认是data
        data-key: data    #表示consul上面的KEY值(或者说文件的名字) 默认是data
        #prefix设置配置值的基本文件夹
        #defaultContext设置所有应用程序使用的文件夹名称
        #profileSeparator设置用于使用配置文件在属性源中分隔配置文件名称的分隔符的值
安装consul
刚刚在上面已经把配置信息 添加上了但是我们还没有安装呢 我们来安装一下
安装Consul,找到适合你系统的包下载他.Consul打包为一个’Zip’文件 下载地址
下载后解开压缩包.拷贝Consul到你的PATH路径中,在Unix系统中~/bin和/usr/local/bin
是通常的安装目录.根据你是想为单个用户安装还是给整个系统安装来选择.
在Windows系统中有可以安装到%PATH%的路径中.
完成安装后,通过打开一个新终端窗口检查consul安装是否成功.
下载下来是一个 consul_1.2.1_windows_amd64.zip 的压缩包,解压是是一个 consul.exe 的执行文件

cd 到对应的目录下,使用 cmd 启动 Consul
通过执行 consul你应该看到类似下面的输出 这里的执行指的是在cmd中执行
[root@dhcp-10-201-102-248 ~]# consul
usage: consul [--version] [--help] <command> [<args>]
Available commands are:
    agent          Runs a Consul agent
    configtest     Validate config file
    event          Fire a new event
    exec           Executes a command on Consul nodes
    force-leave    Forces a member of the cluster to enter the "left" state
    info           Provides debugging information for operators
    join           Tell Consul agent to join cluster
    keygen         Generates a new encryption key
    keyring        Manages gossip layer encryption keys
    kv             Interact with the key-value store
    leave          Gracefully leaves the Consul cluster and shuts down
    lock           Execute a command holding a lock
    maint          Controls node or service maintenance mode
    members        Lists the members of a Consul cluster
    monitor        Stream logs from a Consul agent
    operator       Provides cluster-level tools for Consul operators
    reload         Triggers the agent to reload configuration files
    rtt            Estimates network round trip time between nodes
    snapshot       Saves, restores and inspects snapshots of Consul server state
    version        Prints the Consul version
    watch          Watch for changes in Consul
启动
#cmd启动:
consul agent -dev

启动成功之后访问:http://localhost:8500,可以看到 Consul 的管理界面
我这里是已经注册进去一个服务了 你们这里应该没有test-a

这样就意味着我们的 Consul 服务启动成功了。
Consul 服务端
这个就是我们的具体项目了 通过添加依赖
第一个是健康检查 第二个是客户端依赖 者依赖在我们之前的依赖已经包含了 所以不需要重复导入 这里只是单独提出来告诉你们需要这两个依赖进行服务注册
 <dependency>
            <groupId>org.springframework.boot</groupId>
            <artifactId>spring-boot-starter-actuator</artifactId>
</dependency>
<dependency>
            <groupId>org.springframework.cloud</groupId>
            <artifactId>spring-cloud-starter-consul-discovery</artifactId>
</dependency>
这个时候我们可以启动一下项目 看是否能够注册到consul中

进入上面的文件 运行
成功之后访问 http://localhost:8080/
出现以下界面 代表启动成功

刷新 consul 列表 出现 test-a 代表成功注册进去

到这里我们的服务注解就OK了 接着开始编写业务代码
在 包下面 创建如下 文件

Account 实体类 表示一下 实际没用到 但是还是要有实体类
内容
package top.liwenxiang.lcn;

import lombok.AllArgsConstructor;
import lombok.Data;
import lombok.NoArgsConstructor;
import lombok.ToString;
import lombok.experimental.Accessors;


/**
 * 实体类  但是没有用到此DEMO中
 */

@Data
@ToString
@AllArgsConstructor
@NoArgsConstructor
@Accessors(chain = true)
public class Account {
    private Integer id;
    private Integer money;
    private String user;
}
AccountDao 就是数据访问层 直接和数据库打交道的
内容
package top.liwenxiang.lcn;


import org.apache.ibatis.annotations.Mapper;
import org.apache.ibatis.annotations.Param;
import org.apache.ibatis.annotations.Update;

@Mapper
public interface AccountDao {

          @Update("UPDATE test_a_tx SET money = money - #{money} WHERE user = #{user}")
         int update(@Param("money") int money, @Param("user") String user);

}
AccountService 业务层接口定义
内容
package top.liwenxiang.lcn;

import org.springframework.beans.factory.annotation.Autowired;

public interface AccountService {

    /**
     * @param money  支付金额
     * @param user  支付用户名称
     * @return
     */
    public int pay(int money,String user);


}

```java

AccountServiceImpl  业务层实现类

`内容`

package top.liwenxiang.lcn;

import org.springframework.beans.factory.annotation.Autowired;
import org.springframework.stereotype.Service;
import org.springframework.transaction.annotation.Transactional;

@Service
@Transactional(readOnly = true)
public class AccountServiceImpl implements AccountService {


    @Autowired
    AccountDao accountDao;

    /**
     * 支付金额  支付用户名称
     *
     * @param money
     * @param user
     * @return
     */
    @Override
    @Transactional(readOnly = false)
    public int pay(int money, String user) {
        return accountDao.update(money,user);
    }
}

AccountController  控制器层

`内容`

```java
package top.liwenxiang.lcn;

import org.springframework.beans.factory.annotation.Autowired;
import org.springframework.web.bind.annotation.RequestMapping;
import org.springframework.web.bind.annotation.RequestMethod;
import org.springframework.web.bind.annotation.RestController;

@RestController
@RequestMapping(value = {"tx"})
public class AccountController {

     @Autowired
     AccountService accountService;


     @RequestMapping(value = {"pay"},method = RequestMethod.GET)
     public int pay(int  money,String user){
          return accountService.pay(money,user);
     }

}
TestBClient 调取test-b服务接口 使用Feign实现
现在还没有创建test-b服务所以还没有使用Feign
内容
package top.liwenxiang.lcn;

public interface TestBClent {

}
现在我们再次启动服务 访问 http://localhost:8080/tx/pay?money=100&user=xiaoming
去到数据库查看 是否money字段减去了100

如果成功减去100 那么本地事务和数据库操作是没有问题的
在控制台可以看到类似信息

如果你看不到 在 application.yml 中加入以下配置 重试
mybatis:
  configuration:
    log-impl: org.apache.ibatis.logging.stdout.StdOutImpl
操作成功后 页面返回1

现在开始创建test-b服务 步骤和创建test-a一致 这里就省略了
记得名字不要错 尽量和教程一致

业务代码和文件看下图

修改内容如下
application.yml
修改数据源
  datasource:
      url: jdbc:mysql://localhost:3307/test-b?useUnicode=true&characterEncoding=utf-8&useSSL=false
      username: root
      password: root
      # MySQL 8.x: com.mysql.cj.jdbc.Driver
      driver-class-name: com.mysql.jdbc.Driver
      type: com.alibaba.druid.pool.DruidDataSource
修改 端口
server:
    port : 8081
修改AccountController , AccountService , AccountServiceImpl 中的方法名为 addMoney 并修改Controller的映射路径为addMoney
     @RequestMapping(value = {"addMoney"},method = RequestMethod.GET)
     public int addMoney(int  money,String user){
          return accountService.addMoney(money,user);
     }
LcnApplication 中的 @EnableFeignClients 可以删掉 也可以留着
AccountDao 中修改 - 为 + 并修改表名称
  @Update("UPDATE test_b_tx SET money = money + #{money} WHERE user = #{user}")
          int update(@Param("money") int money, @Param("user") String user);
启动test-b服务测试本地事务是否有效
启动完毕访问
http://localhost:8081/tx/addMoney?money=100&user=xiaohong
页面返回1代表成功
去数据库看是否增加100金额
同时刷新consul 看到两个服务上线

此时修改test_a项目中的TestBClient文件
package top.liwenxiang.lcn;

import org.springframework.cloud.openfeign.FeignClient;
import org.springframework.web.bind.annotation.RequestMapping;
import org.springframework.web.bind.annotation.RequestMethod;
import org.springframework.web.bind.annotation.RequestParam;

@FeignClient(value = "test-b")
public interface TestBClent {

    @RequestMapping(value = {"/tx/addMoney"},method = RequestMethod.GET)
    public int addMoney(@RequestParam int  money,@RequestParam String user);

}
并修改AccountServiceImpl为
package top.liwenxiang.lcn;

import org.springframework.beans.factory.annotation.Autowired;
import org.springframework.stereotype.Service;
import org.springframework.transaction.annotation.Transactional;

@Service
@Transactional(readOnly = true)
public class AccountServiceImpl implements AccountService {


    @Autowired
    AccountDao accountDao;

    @Autowired
    TestBClent testBClent;

    /**
     * 支付金额  支付用户名称
     *
     * @param money
     * @param user
     * @return
     */
    @Override
    @Transactional(readOnly = false)
    public int pay(int money, String user) {
        String testBUser = "xiaohong";
        int i = testBClent.addMoney(money, testBUser);
        if (i > 0) {
            return accountDao.update(money,user) + i;
        }
        return -1;
    }
}
重新启动test-a服务 访问 http://localhost:8080/tx/pay?money=100&user=xiaoming
看到页面返回2代表成功 再去观察数据库是否进行对应的修改 test-a 减 test-b 加
现在开始测试报错 体现本地事务的弊端 领会分布式事务的应用场景
修改AccountServiceImpl文件为
package top.liwenxiang.lcn;

import org.springframework.beans.factory.annotation.Autowired;
import org.springframework.stereotype.Service;
import org.springframework.transaction.annotation.Transactional;

@Service
@Transactional(readOnly = true)
public class AccountServiceImpl implements AccountService {


    @Autowired
    AccountDao accountDao;

    @Autowired
    TestBClent testBClent;

    /**
     * 支付金额  支付用户名称
     *
     * @param money
     * @param user
     * @return
     */
    @Override
    @Transactional(readOnly = false)
    public int pay(int money, String user) {
        String testBUser = "xiaohong";
        int i = testBClent.addMoney(money, testBUser);
        // 增加内容
        int o = 2 / 0;
       // 增加内容
        if (i > 0) {
            return accountDao.update(money,user) + i;
        }
        return -1;
    }
}
程序运行起来之后访问 http://localhost:8080/tx/pay?money=100&user=xiaoming
看到如下 界面

然后去看数据库 test-a 金额改变 test-b 增加金额
这个时候是不是出现问题了呢 这就是分布式事务的应用场景 能够解决跨服务的数据库事务问题 也就是不同的jdbc链接所操作的数据源 那么就真正的使用LCN
第四步
加入依赖信息 test-a test-b 都要加
  <dependency>
            <groupId>com.codingapi.txlcn</groupId>
            <artifactId>txlcn-tc</artifactId>
            <version>5.0.2.RELEASE</version>
        </dependency>

        <dependency>
            <groupId>com.codingapi.txlcn</groupId>
            <artifactId>txlcn-txmsg-netty</artifactId>
            <version>5.0.2.RELEASE</version>
        </dependency>
我们直接加入到父工程中
在两个服务的启动类上添加如下注解 开启分布式事务
@EnableDistributedTransaction
在业务方法上添加如下注解@LcnTransaction 或者 @LxcTransaction 两个服务都添加 采用切面的方式 在方法一开始 就会创建一个事务组 当调用到参与方的时候 是通过HTTP协议通信的 请求头中包含组ID 当发起方方法执行完毕之后 事务协调者会告诉参与方可以提交了 在之前 参与方会有假提交操作
@LcnTransaction //分布式事务注解
重新启动两个服务 在去测试接口 http://localhost:8080/tx/pay?money=100&user=xiaoming
看到如下界面

这个时候如果你的数据库没有做任何改变 那么恭喜你 分布式事务已经生效了
如果你这个时候报错了 提示如下错误
No lcn connection when clear transaction
这个是很大可能性没有进到拦截器中所导致的错误 解决方法有如下几种(直接在官网搬的 学东西记得看官网)
确认Tx-client(TC)与Tx-manager™的版本是完全一致的。
确认TC与TM的配置都没有问题,并确认TM是启动状态,可访问后台(默认密码:codingapi)。
检测TM下TC在线模块是否正常对应。
当以上都没有问题的时候,检查能否进入了DataSourceAspect的拦截,在开发工具的debug下环境下断点确认。
若没有进入拦截器,可能存在两种情况。
一:确认Datasource 是否为spring的bean对象,若非spring对象,请先处理成spring对象。
二:若是spring对象,但是无法进入拦截。可以自行添加切面的方式进入拦截。
该org.apache.tomcat.jdbc.pool.DataSourceProxy.getConnection方法就不能进入DataSource的拦截,可自行添加如下所示:
@Component
@Aspect
@Slf4j
public class TomcatDataSourceAspect implements Ordered {

    @Autowired
    private DTXResourceWeaver dtxResourceWeaver;//TX-LCN 资源切面处理对象

    @Around("execution(public java.sql.Connection org.apache.tomcat.jdbc.pool.DataSourceProxy.getConnection(..) )")
    public Object around(ProceedingJoinPoint point) throws Throwable {
        log.info("proxy my aspect..");
        return dtxResourceWeaver.getConnection(() -> (Connection) point.proceed());
    }

    @Override
    public int getOrder() {
        return 0;
    }
}
其他说明
可选配置 application.yml
默认之配置为TM的本机默认端口
tx-lcn.client.manager-address=127.0.0.1:8070
其他配置
TM(事务管理器) 配置
spring.application.name=TransactionManager
server.port=7970

# JDBC 数据库配置
spring.datasource.driver-class-name=com.mysql.jdbc.Driver
spring.datasource.url=jdbc:mysql://127.0.0.1:3306/tx-manager?characterEncoding=UTF-8
spring.datasource.username=root
spring.datasource.password=123456

# 数据库方言
spring.jpa.database-platform=org.hibernate.dialect.MySQL5InnoDBDialect

# 第一次运行可以设置为: create, 为TM创建持久化数据库表
spring.jpa.hibernate.ddl-auto=validate

# TM监听IP. 默认为 127.0.0.1
tx-lcn.manager.host=127.0.0.1

# TM监听Socket端口. 默认为 ${server.port} - 100
tx-lcn.manager.port=8070

# 心跳检测时间(ms). 默认为 300000
tx-lcn.manager.heart-time=300000

# 分布式事务执行总时间(ms). 默认为36000
tx-lcn.manager.dtx-time=8000

# 参数延迟删除时间单位ms  默认为dtx-time值
tx-lcn.message.netty.attr-delay-time=${tx-lcn.manager.dtx-time}

# 事务处理并发等级. 默认为机器逻辑核心数5倍
tx-lcn.manager.concurrent-level=160

# TM后台登陆密码,默认值为codingapi
tx-lcn.manager.admin-key=codingapi

# 分布式事务锁超时时间 默认为-1,当-1时会用tx-lcn.manager.dtx-time的时间
tx-lcn.manager.dtx-lock-time=${tx-lcn.manager.dtx-time}

# 雪花算法的sequence位长度,默认为12位.
tx-lcn.manager.seq-len=12

# 异常回调开关。开启时请制定ex-url
tx-lcn.manager.ex-url-enabled=false

# 事务异常通知(任何http协议地址。未指定协议时,为TM提供内置功能接口)。默认是邮件通知
tx-lcn.manager.ex-url=/provider/email-to/***@**.com


# 开启日志,默认为false
tx-lcn.logger.enabled=true
tx-lcn.logger.enabled=false
tx-lcn.logger.driver-class-name=${spring.datasource.driver-class-name}
tx-lcn.logger.jdbc-url=${spring.datasource.url}
tx-lcn.logger.username=${spring.datasource.username}
tx-lcn.logger.password=${spring.datasource.password}

# redis 的设置信息. 线上请用Redis Cluster
spring.redis.host=127.0.0.1
spring.redis.port=6379
spring.redis.password=
TC(事务客户端) 配置
# 是否启动LCN负载均衡策略(优化选项,开启与否,功能不受影响)
tx-lcn.ribbon.loadbalancer.dtx.enabled=true

# tx-manager 的配置地址,可以指定TM集群中的任何一个或多个地址
# tx-manager 下集群策略,每个TC都会从始至终<断线重连>与TM集群保持集群大小个连接。
# TM方,每有TM进入集群,会找到所有TC并通知其与新TM建立连接。
# TC方,启动时按配置与集群建立连接,成功后,会再与集群协商,查询集群大小并保持与所有TM的连接
tx-lcn.client.manager-address=127.0.0.1:8070

# 该参数是分布式事务框架存储的业务切面信息。采用的是h2数据库。绝对路径。该参数默认的值为{user.dir}/.txlcn/{application.name}-{application.port}
tx-lcn.aspect.log.file-path=logs/.txlcn/demo-8080

# 调用链长度等级,默认值为3(优化选项。系统中每个请求大致调用链平均长度,估算值。)
tx-lcn.client.chain-level=3

# 该参数为tc与tm通讯时的最大超时时间,单位ms。该参数不需要配置会在连接初始化时由tm返回。
tx-lcn.client.tm-rpc-timeout=2000

# 该参数为分布式事务的最大时间,单位ms。该参数不允许TC方配置,会在连接初始化时由tm返回。
tx-lcn.client.dtx-time=8000

# 该参数为雪花算法的机器编号,所有TC不能相同。该参数不允许配置,会在连接初始化时由tm返回。
tx-lcn.client.machine-id=1

# 该参数为事务方法注解切面的orderNumber,默认值为0.
tx-lcn.client.dtx-aspect-order=0

# 该参数为事务连接资源方法切面的orderNumber,默认值为0.
tx-lcn.client.resource-order=0

# 是否开启日志记录。当开启以后需要配置对应logger的数据库连接配置信息。
tx-lcn.logger.enabled=false
tx-lcn.logger.driver-class-name=${spring.datasource.driver-class-name}
tx-lcn.logger.jdbc-url=${spring.datasource.url}
tx-lcn.logger.username=${spring.datasource.username}
tx-lcn.logger.password=${spring.datasource.password}
结语
到此为止 这个DEMO就完了 应该能够实现基本的分布式事务解决方案了吧~ 博主辛辛苦苦边敲编写 真实辛苦啦 写了三个小时这一篇文章 !!


 496
496

 被折叠的 条评论
为什么被折叠?
被折叠的 条评论
为什么被折叠?
 到【灌水乐园】发言


