


前言
之前讲解了redis的使用 这一篇主要来说redis和springboot整合的一个方式 单机版
改DEMO 获取地址
链接:https://pan.baidu.com/s/1bN2wAts-gzdGZWrIk7NBFA
提取码:13c5
开始
依赖
springboot 版本是 2.1.9
默认使用lettuce操作redis的
<?xml version="1.0" encoding="UTF-8"?>
<project xmlns="http://maven.apache.org/POM/4.0.0" xmlns:xsi="http://www.w3.org/2001/XMLSchema-instance"
         xsi:schemaLocation="http://maven.apache.org/POM/4.0.0 https://maven.apache.org/xsd/maven-4.0.0.xsd">
    <modelVersion>4.0.0</modelVersion>
    <parent>
        <groupId>org.springframework.boot</groupId>
        <artifactId>spring-boot-starter-parent</artifactId>
        <version>2.1.9.RELEASE</version>
        <relativePath/> <!-- lookup parent from repository -->
    </parent>
    <groupId>REDIS</groupId>
    <artifactId>redis</artifactId>
    <version>0.0.1-SNAPSHOT</version>
    <name>redis</name>
    <description>Demo project for Spring Boot</description>

    <properties>
        <java.version>1.8</java.version>
    </properties>

    <dependencies>
         <dependency>
            <groupId>org.springframework.boot</groupId>
            <artifactId>spring-boot-starter-web</artifactId>
        </dependency>
        <dependency>
            <groupId>org.springframework.boot</groupId>
            <artifactId>spring-boot-starter-data-redis</artifactId>
        </dependency>
        <dependency>
            <groupId>org.springframework.boot</groupId>
            <artifactId>spring-boot-starter-test</artifactId>
            <scope>test</scope>
        </dependency>
        <dependency>
            <groupId>org.apache.commons</groupId>
            <artifactId>commons-pool2</artifactId>
        </dependency>
    </dependencies>

    <build>
        <plugins>
            <plugin>
                <groupId>org.springframework.boot</groupId>
                <artifactId>spring-boot-maven-plugin</artifactId>
            </plugin>
        </plugins>
    </build>

</project>
依赖web模块是 下面使用JSON序列化的时候需要用到JavaType类 否则会报错 所以这里测试用了web模块
properties 配置信息 这里还是采用了lettuce的方式
使用jedis给lettuce换成jedis就好了
# Redis数据库索引(默认为0)
spring.redis.database=0
# Redis服务器地址
spring.redis.host=192.168.190.129
# Redis服务器连接端口
spring.redis.port=6380
# Redis服务器连接密码(默认为空)
#spring.redis.password=
# 连接池最大连接数(使用负值表示没有限制)
spring.redis.lettuce.pool.max-active=8
# 连接池最大阻塞等待时间(使用负值表示没有限制)
spring.redis.lettuce.pool.max-wait=-1
# 连接池中的最大空闲连接
spring.redis.lettuce.pool.max-idle=8
# 连接池中的最小空闲连接
spring.redis.lettuce.pool.min-idle=0
# 连接超时时间(毫秒)
spring.redis.timeout=10000
然后来编写配置类 注入 redisTemplate 其实springboot是已经为我们自动注入的了 但是一般还是自己编写一个配置文件注入比较好
下面是 springboot帮助我们注入的 源代码
/*
 * Copyright 2012-2019 the original author or authors.
 *
 * Licensed under the Apache License, Version 2.0 (the "License");
 * you may not use this file except in compliance with the License.
 * You may obtain a copy of the License at
 *
 *      https://www.apache.org/licenses/LICENSE-2.0
 *
 * Unless required by applicable law or agreed to in writing, software
 * distributed under the License is distributed on an "AS IS" BASIS,
 * WITHOUT WARRANTIES OR CONDITIONS OF ANY KIND, either express or implied.
 * See the License for the specific language governing permissions and
 * limitations under the License.
 */

package org.springframework.boot.autoconfigure.data.redis;

import java.net.UnknownHostException;

import org.springframework.boot.autoconfigure.EnableAutoConfiguration;
import org.springframework.boot.autoconfigure.condition.ConditionalOnClass;
import org.springframework.boot.autoconfigure.condition.ConditionalOnMissingBean;
import org.springframework.boot.context.properties.EnableConfigurationProperties;
import org.springframework.context.annotation.Bean;
import org.springframework.context.annotation.Configuration;
import org.springframework.context.annotation.Import;
import org.springframework.data.redis.connection.RedisConnectionFactory;
import org.springframework.data.redis.core.RedisOperations;
import org.springframework.data.redis.core.RedisTemplate;
import org.springframework.data.redis.core.StringRedisTemplate;

/**
 * {@link EnableAutoConfiguration Auto-configuration} for Spring Data's Redis support.
 *
 * @author Dave Syer
 * @author Andy Wilkinson
 * @author Christian Dupuis
 * @author Christoph Strobl
 * @author Phillip Webb
 * @author Eddú Meléndez
 * @author Stephane Nicoll
 * @author Marco Aust
 * @author Mark Paluch
 * @since 1.0.0
 */
@Configuration
@ConditionalOnClass(RedisOperations.class)
@EnableConfigurationProperties(RedisProperties.class)
@Import({ LettuceConnectionConfiguration.class, JedisConnectionConfiguration.class })
public class RedisAutoConfiguration {

	@Bean
	@ConditionalOnMissingBean(name = "redisTemplate")
	public RedisTemplate<Object, Object> redisTemplate(RedisConnectionFactory redisConnectionFactory)
			throws UnknownHostException {
		RedisTemplate<Object, Object> template = new RedisTemplate<>();
		template.setConnectionFactory(redisConnectionFactory);
		return template;
	}

	@Bean
	@ConditionalOnMissingBean
	public StringRedisTemplate stringRedisTemplate(RedisConnectionFactory redisConnectionFactory)
			throws UnknownHostException {
		StringRedisTemplate template = new StringRedisTemplate();
		template.setConnectionFactory(redisConnectionFactory);
		return template;
	}

}
测试
接口序列化 key 和 value 否则有可能存入的查看的时候是乱码哦 JDK的序列化方式有很多种
字符串
JDK自带的
JSON的
等等
设置的获取的时候的序列化格式要一致哦
    @Autowired
    private RedisTemplate redisTemplate;

    @Test
    public void contextLoads() {
        System.out.println(redisTemplate);
        redisTemplate.setKeySerializer(new StringRedisSerializer());
        redisTemplate.setValueSerializer(new StringRedisSerializer());
        redisTemplate.opsForValue().set("name","www");
        System.out.println(redisTemplate.opsForValue().get("name"));
    }
运行成功

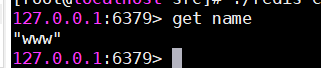

代表成功
我们其实也可以自己来编写配置类

内容
package redis.redis.config;

import org.springframework.context.annotation.Bean;
import org.springframework.context.annotation.Configuration;
import org.springframework.data.redis.connection.lettuce.LettuceConnectionFactory;
import org.springframework.data.redis.core.RedisTemplate;
import org.springframework.data.redis.serializer.GenericJackson2JsonRedisSerializer;
import org.springframework.data.redis.serializer.StringRedisSerializer;

import javax.annotation.Resource;
import java.io.Serializable;

@Configuration
public class RedisConfig {

    @Resource

    private LettuceConnectionFactory myLettuceConnectionFactory;


    @Bean

    public RedisTemplate<String, Serializable> redisTemplate() {

        RedisTemplate<String, Serializable> template = new RedisTemplate<>();

        template.setKeySerializer(new StringRedisSerializer());

        template.setValueSerializer(new StringRedisSerializer());

        template.setConnectionFactory(myLettuceConnectionFactory);

        return template;

    }
}
这样的话 就在插入的时候如果是String类型的话就不需要在重复序列化啦
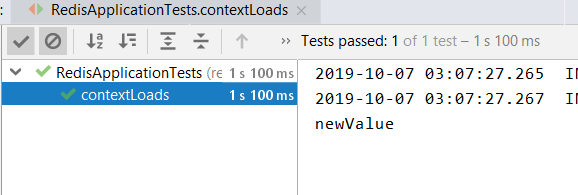
    @Test
    public void contextLoads() {
        ValueOperations<String, String> valueOperations = redisTemplate.opsForValue();
        valueOperations.set("name","newValue");
        System.out.println(redisTemplate.opsForValue().get("name"));
    }
测试成功
存储json对象的一种方式 设置序列化方式即可


但是这样好像是写死了只能是 Tests 类 所以还需要改进


像上面那样写就可以 在序列化之前 进行一个value的设置即可 读取的时候也是如此哦
记得每一个实体类都要实现序列化接口哦

这样写去除黄色警告

结语
希望能帮助到你哦 后续会出集群版的搭建和继承


 4万+
4万+


 被折叠的 条评论
为什么被折叠?
被折叠的 条评论
为什么被折叠?
 到【灌水乐园】发言


