


下载镜像
最新版本
点击64-bit PC netinst iso即可开始下载
历史版本
官方默认提供的是最新版本,如需下载其它的历史版本,则进入下面的页面中
历史版本大全←点这里

开始下载
这次我们来下载9.7.0版本 点这里打开文件目录
其中,会有各个文件的说明,具体下载哪一个也有说明:
There are lots of files here! Do I need all of them?
In most cases it is not necessary to download and use all of these images to be able to install Debian on your computer. Debian comes with a massive set of software packages, hence why it takes so many disks for a complete set. Most typical users only need a small subset of those software packages.
Initially, you will only need to download and use the first image of a set (labelled as debian-something-1 to be able to start the Debian installer and set up Debian on your computer. If there are more images available here (labelled debian-something-2, debian-something-3, etc.), they contain the extra packages that can be installed on a Debian system (as mentioned previously). They will not be bootable and are entirely optional. If you have a fast Internet connection, you’re most likely better off installing any desired extra packages directly from the Debian
大意就是不需要全部下载,只需要下载部分核心文件即可。
一开始只需要下载文件名类似于debian-xxxxx-1这样的文件即可,如果需要更多额外的软件包的话,下载debian-xxxxx-2, debian-xxxxx-3 等等即可。
于是我们先下载了debian-9.7.0-amd64-netinst.iso

在VMware Workstation中安装
安装
打开新建虚拟机向导,选择刚刚下载的镜像文件,并设置好安装位置

一路走下去,直到将镜像载入后启动
启动以后会有以下界面显示:

选择第一个Graphical install 图形化界面安装 按回车
接下来就到了安装过程中的语言选择,选择中文

点击continue到下一步
此时来到的区域选择,选择中国:

点击continue继续安装过程
来到键盘映射配置界面,选择汉语

点击继续安装过程
等待一段时间以后,继续安装

配置网络中的主机名,先随便填一个主机名:

来到域名配置,我们先暂时不填

接下来到了root账号密码配置环境,一定要牢记密码

然后就是普通用户账号,可以随意的填写用户全名

接下来就是添加一个新的普通用户,并设置他的账号和密码,这就是用来登录系统的了


接下来来到了磁盘分区配置,我们先按照以下图示进行配置即可:


等以上过程弄完以后,就开始配置软件包管理器了,按照以下配置方案即可。


最后完成安装

启动debian
打开debian虚拟机,并输入用户名和密码登陆,此时就完成了

其它问题
菱形乱码
在交互界面输入一个不存在的命令,讲道理应该提示command not found
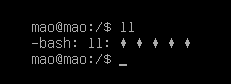
但如果使用了中文安装,且内核没有中文字库,导致某些字符显示为乱码,则会显示为菱形,此时我们需要修改编码策略。
在使用root账号登录的前提下,使用dpkg-reconfigure locales命令来修改编码方式。

找到zh_开头的选项,然后按空格取消选择

再找到en_US.UTF-8 UTF-8开头的按空格选中

最后再按回车,跳到确认界面,再选中en_US.UTF-8再回车完成配置

重启该虚拟机试试(如下图,显示 command not found) 完美


 5万+
5万+


 被折叠的 条评论
为什么被折叠?
被折叠的 条评论
为什么被折叠?
 到【灌水乐园】发言


