


在计算机视觉领域中,除了各个视觉库的人脸检测器,目前精度最高的当时 68 points landmarks,在python或者C++中调用并不困难,只需下载 dlib 库与相应文件,利用 函数即可调用。matlab 作为一款强大的数学工具,精密于矩阵运算,自带人脸检测,并且在深度学习与神经网络也具有很强大库支撑,那么如何使用matlab 进行人脸 68 points landmarks呢

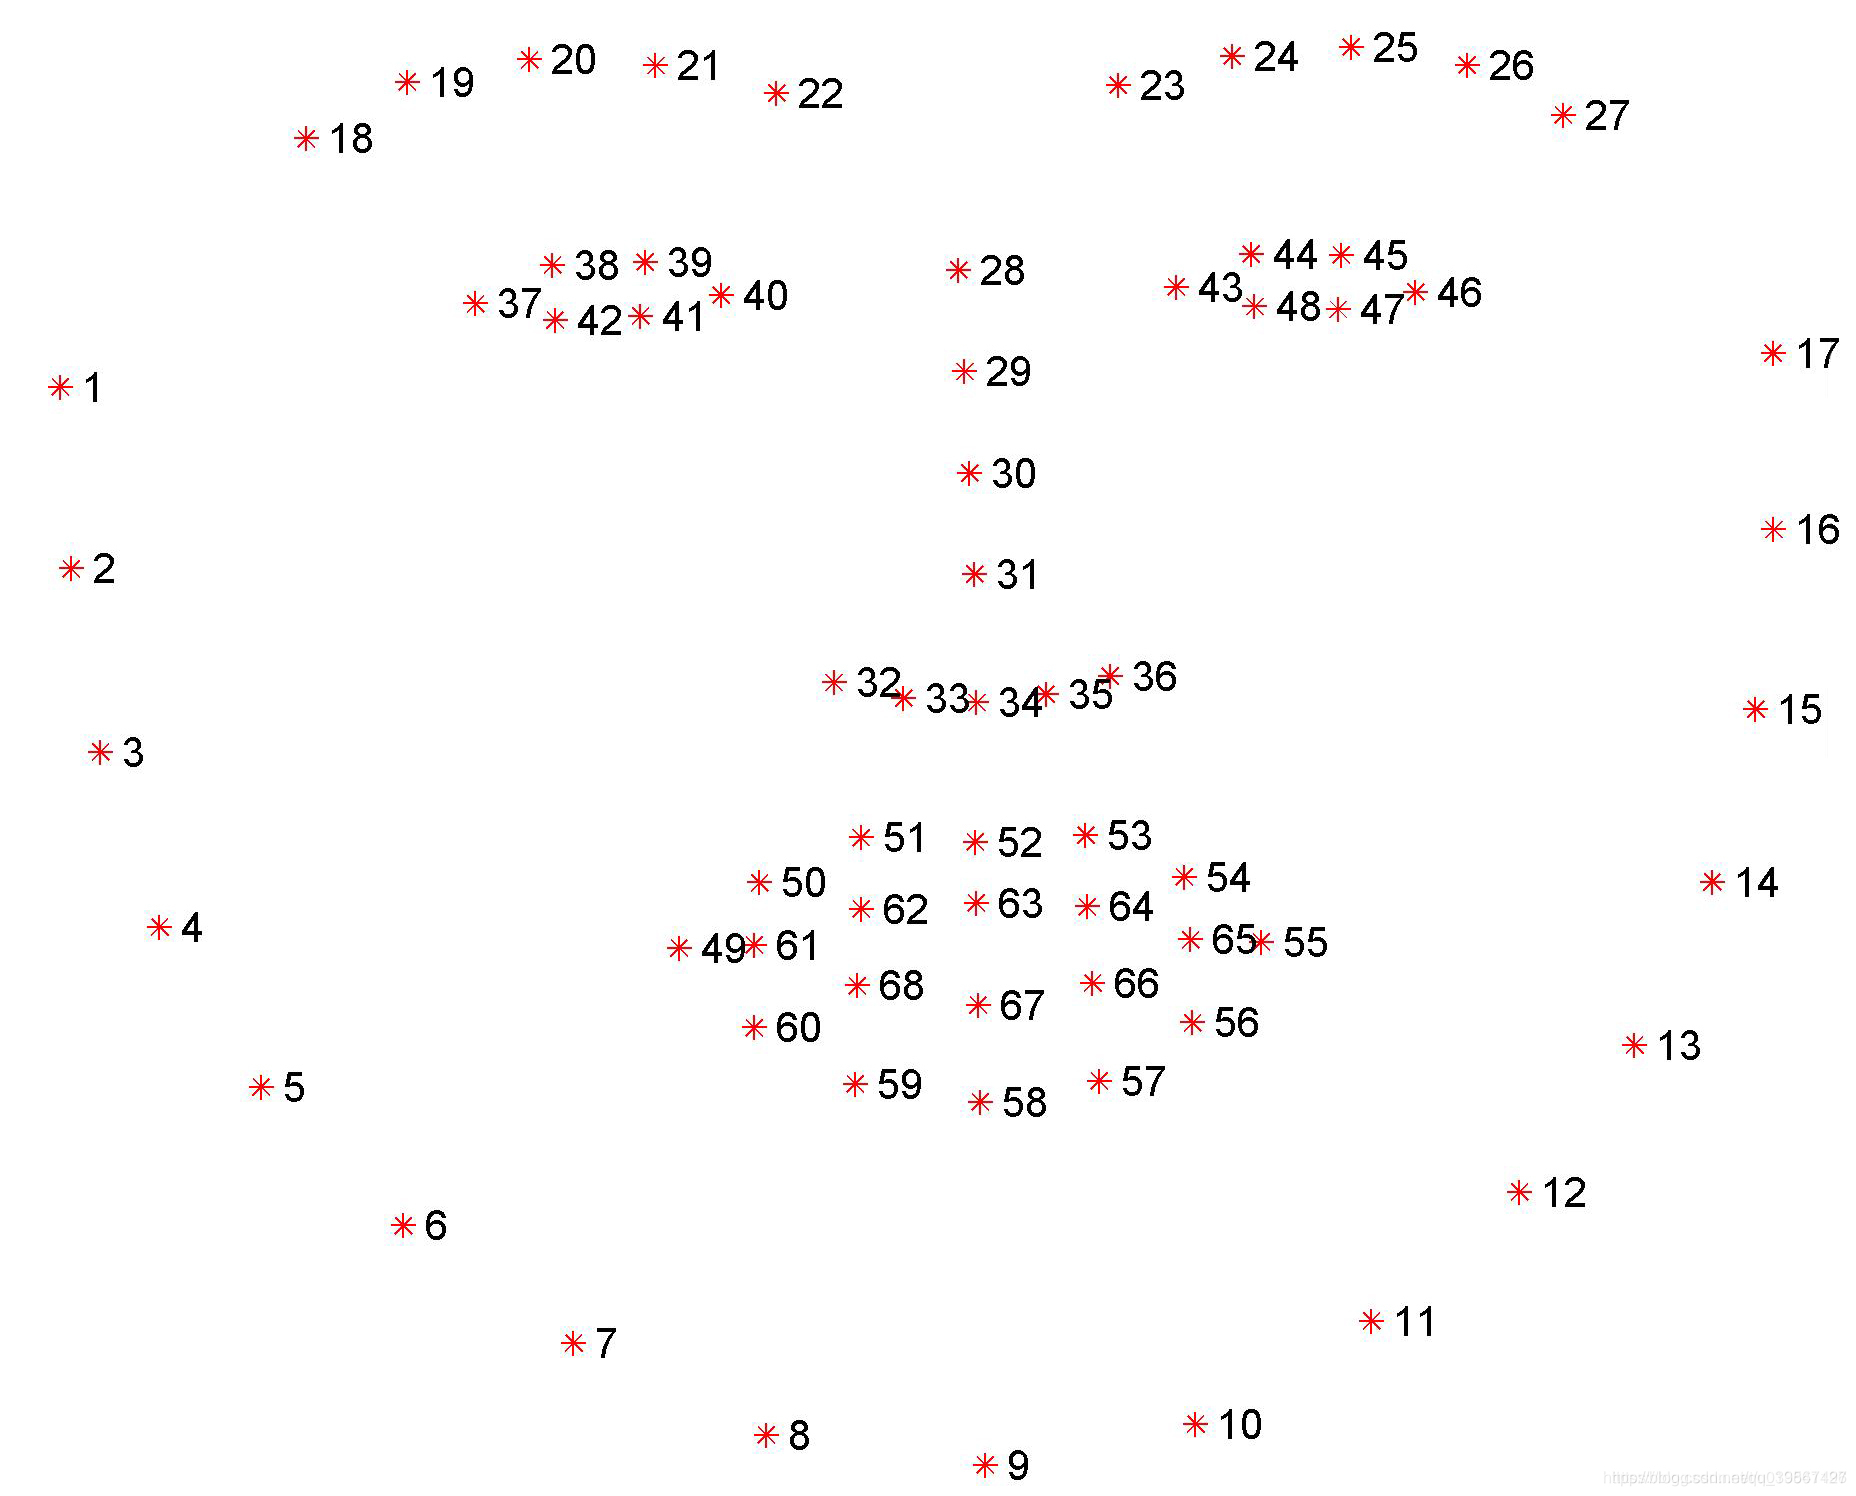
68 face landmarks 是常用的脸部标定数据,其顺序定义如下:
step 1:
使用python 进行 68 points landmarks
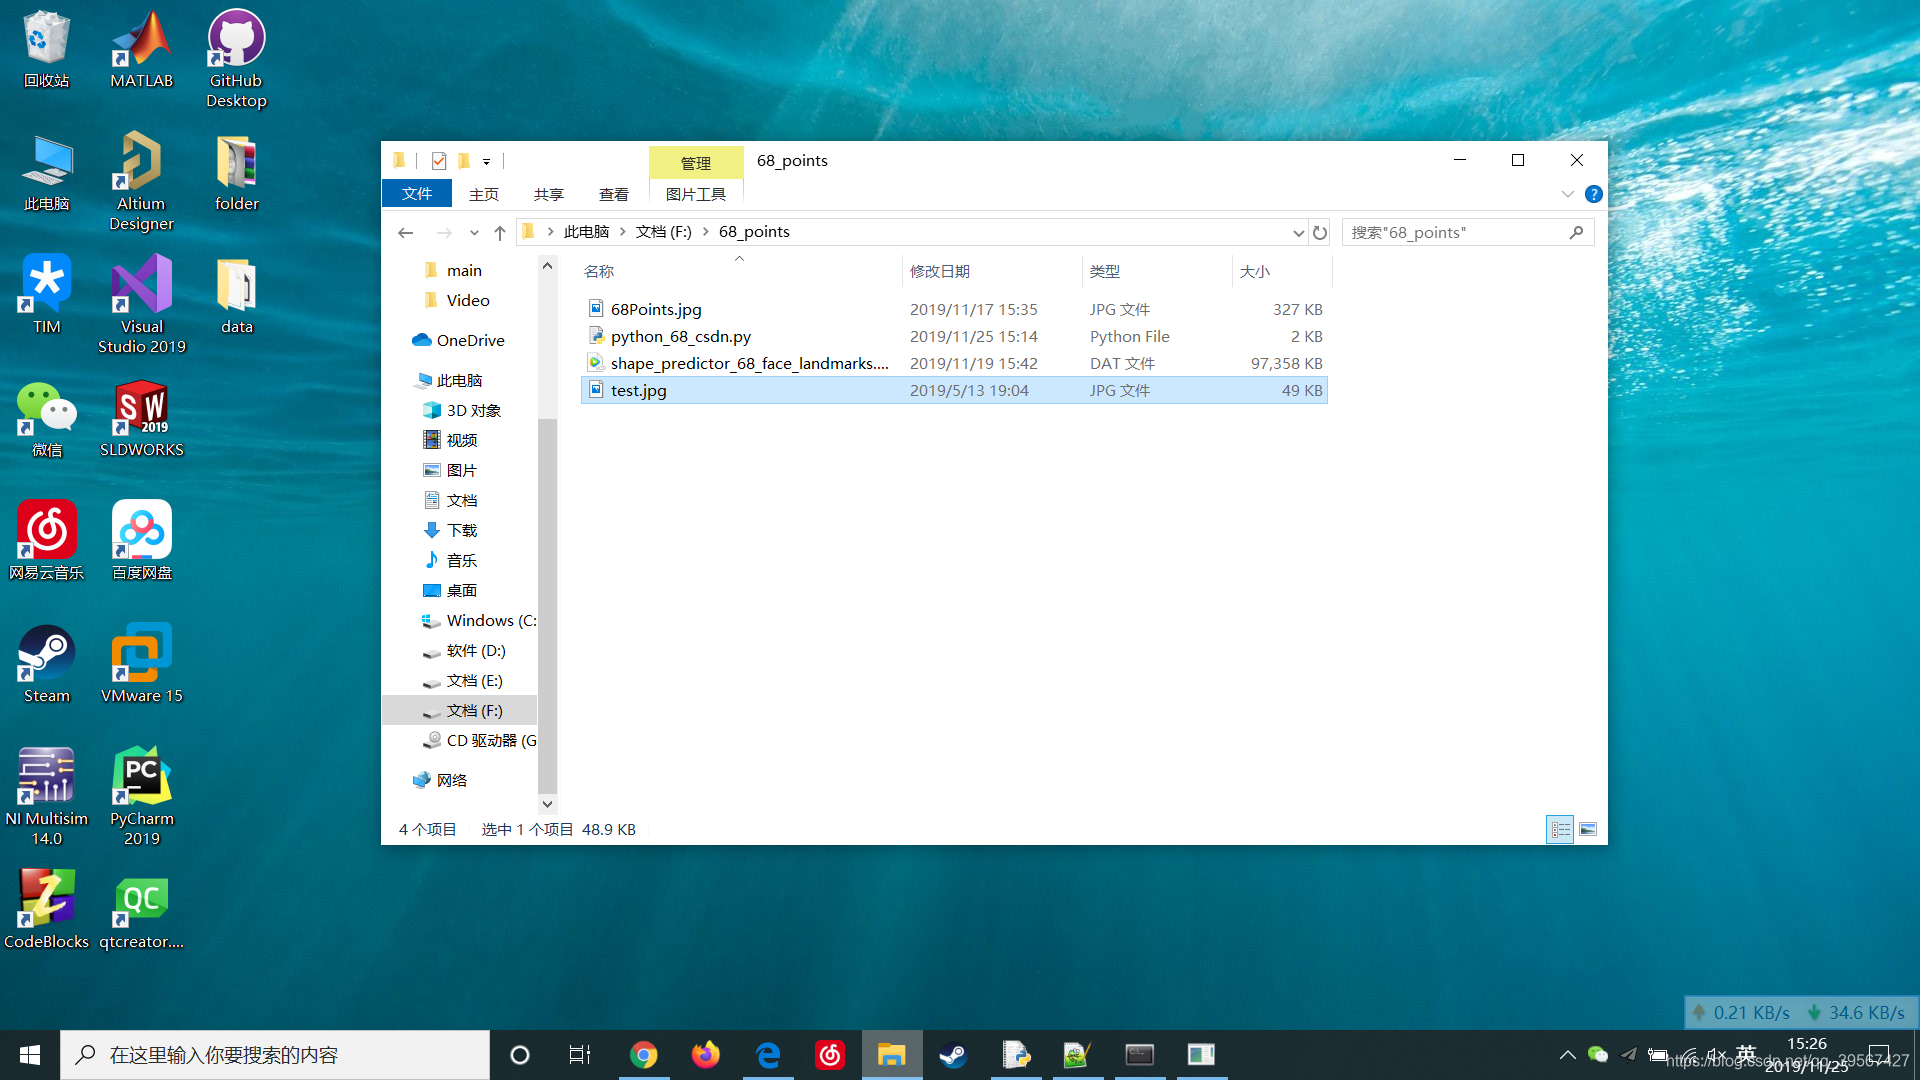
下载数据:shape_predictor_68_face_landmarks.dat 放在所写的文件同级目录中
python程序如下:
import dlib                  #人脸识别的库dlib
import numpy as np    #数据处理的库numpy
import cv2                   #图像处理的库OpenCv

#dlib预测器
detector = dlib.get_frontal_face_detector()
#读入68点数据
predictor = dlib.shape_predictor('shape_predictor_68_face_landmarks.dat')

 #cv2读取图像
img=cv2.imread("test.jpg")
#设置字体
font = cv2.FONT_HERSHEY_SIMPLEX

# 取灰度
img_gray = cv2.cvtColor(img, cv2.COLOR_RGB2GRAY)

# 人脸数rects
rects = detector(img_gray, 0)

for i in range(len(rects)):
    #获取点矩阵68*2
    landmarks = np.matrix([[p.x, p.y] for p in predictor(img, rects[i]).parts()])
    for idx, point in enumerate(landmarks):
        # 68点的坐标
        pos = (point[0, 0], point[0, 1])
        # 利用cv2.circle给每个特征点画一个点,共68个
        cv2.circle(img, pos, 1, (0, 0, 255), -1)

        #避免数字标签与68点重合,坐标微微移动
        pos = list(pos)
        pos[0] = pos[0] + 5
        pos[1] = pos[1] + 5
        pos = tuple(pos)

        #利用cv2.putText输出1-68的标签,不需要可以删除
        cv2.putText(img, str(idx+1), pos, font, 0.3, (255, 0, 0), 1, cv2.LINE_AA)

cv2.namedWindow("python_68_points", 2)
cv2.imshow("python_68_points", img)
cv2.waitKey(0)
程序运行及效果:
确保已安装 dlib 与 opencv 库,Anconda 创建的虚拟环境请参照这里
activate tensorflow
cd F:\68_points
F:
pip install dlib
pip install opencv-python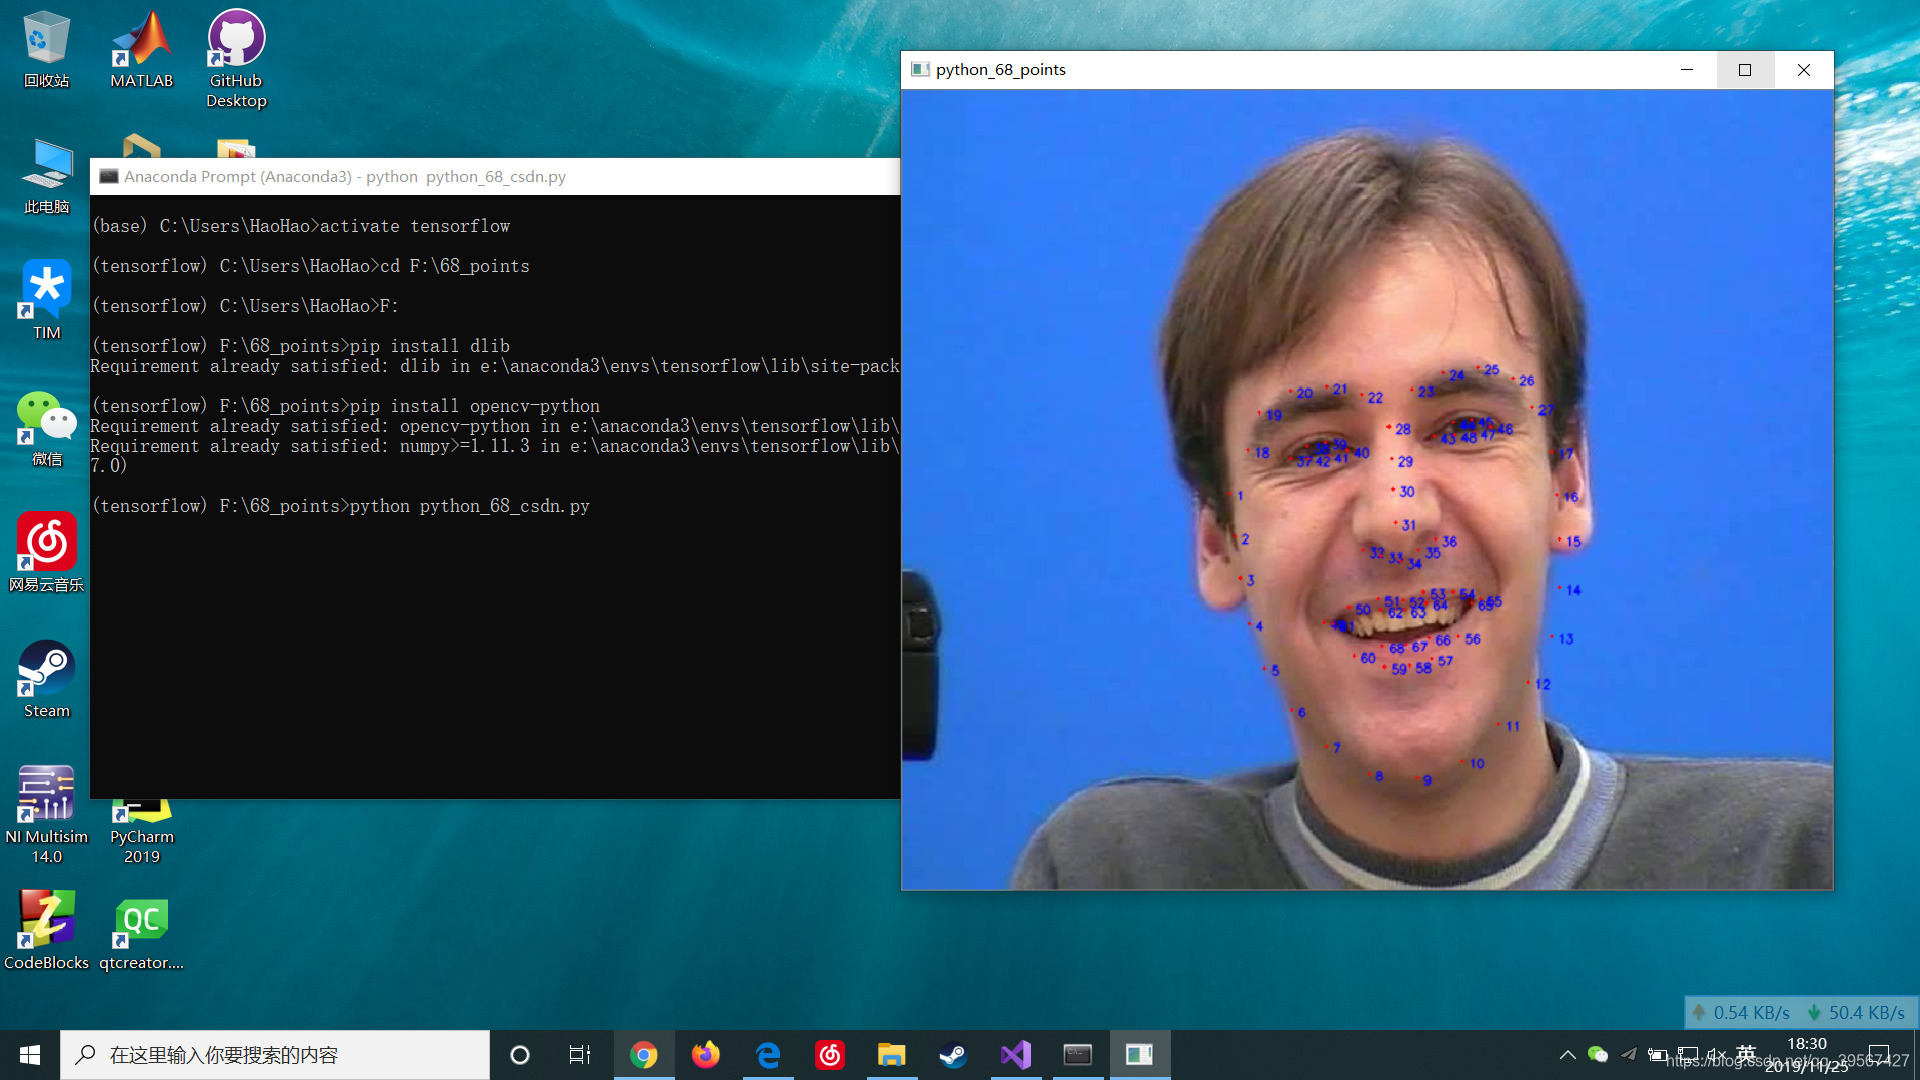
step 2:
使用C++ 进行68 points landmarks,我们采用 Microsoft Vistual Studio 2019进行此项工程,使用前需要使用 Cmake 对 dlib 进行编译,我们使用可视化而非命令行的方式对 dlib 进行编译
First:下载Cmake 我下载的 cmake-3.15.5-win64-x64.zip
解压文件,你可以选择将 bin 加入环境目录,这样你可以使用 Cmd 命令行的方式进行编译,但我们采取使用 bin 文件夹下的 cmake-gui.exe 的形式,所以这一步是可选项

下载dlib:C++ dlib 下载
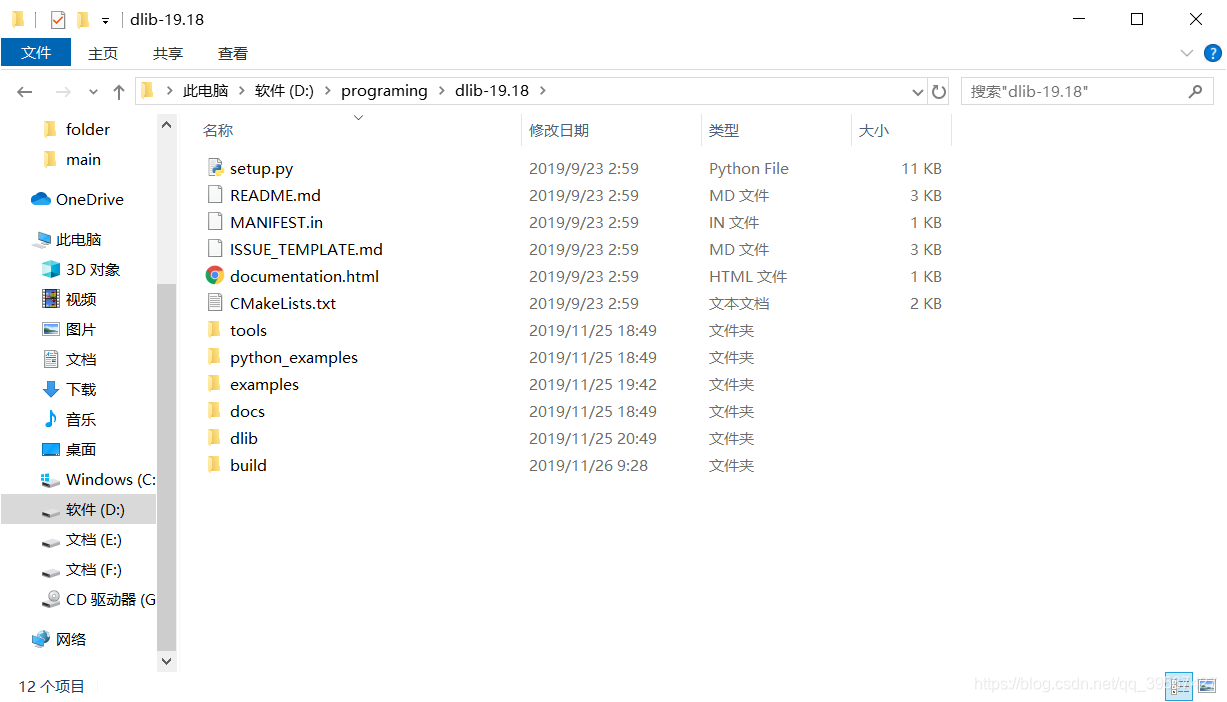
解压到你选择的路径(比如我在 D:\programing\dlib-19.18)并在此文件夹下创建一个新文件夹 build
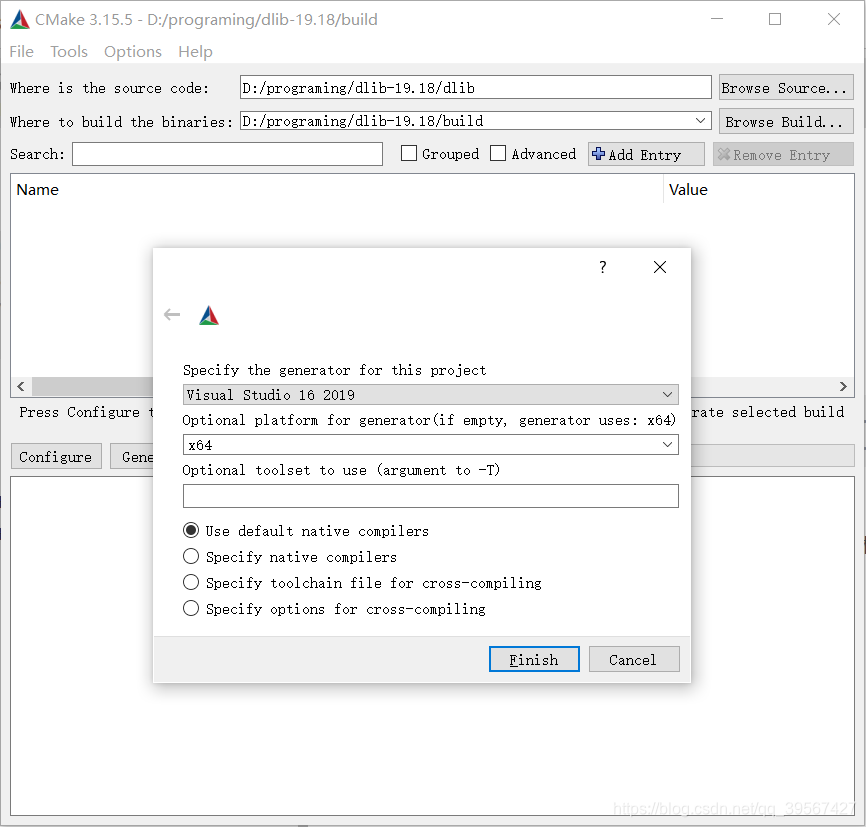
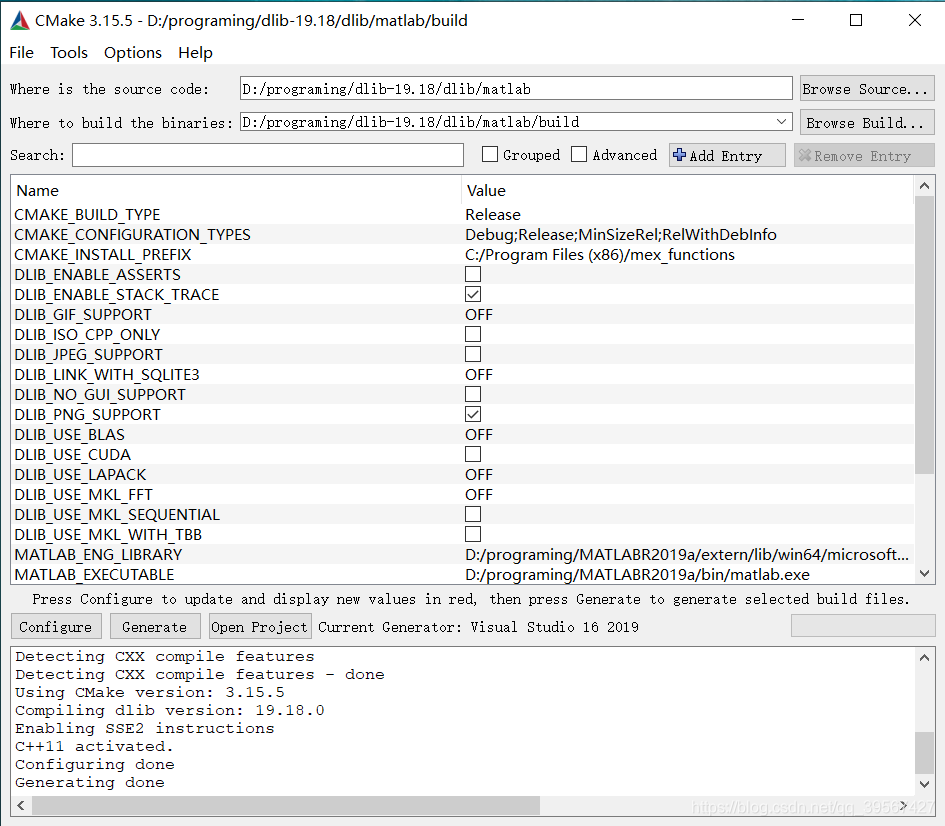
打开 cmake-gui.exe,填写如下:
where is the source code    : D:/programing/dlib-19.18/dlib
where to build the binaries : D:/programing/dlib-19.18/build选择匹配我的设置:Vistual Studio 16 2019 以及 x64,你可以根据情况选择你的配置,然后 finish→Configure→Gnerate,等待显示 Configure done 与 Generate done
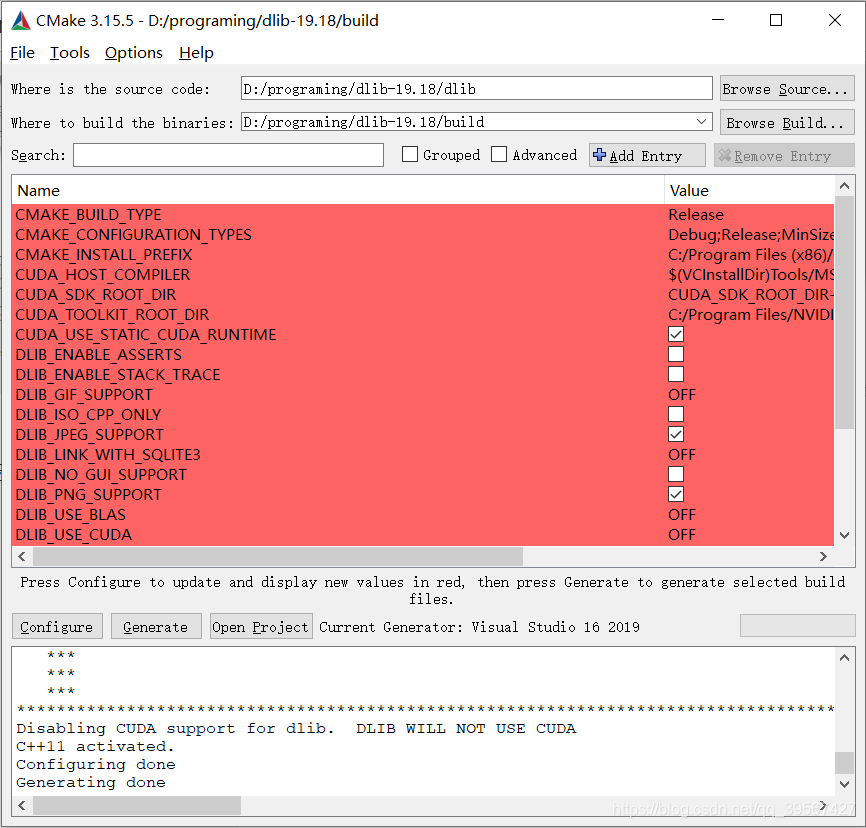
此时打开 build 文件夹,你会发现多了很多文件,我们发现在红色区域中,Name:CMAKE_BUILD_TYPE Value:Release 说明我们生成的是 Release 版本
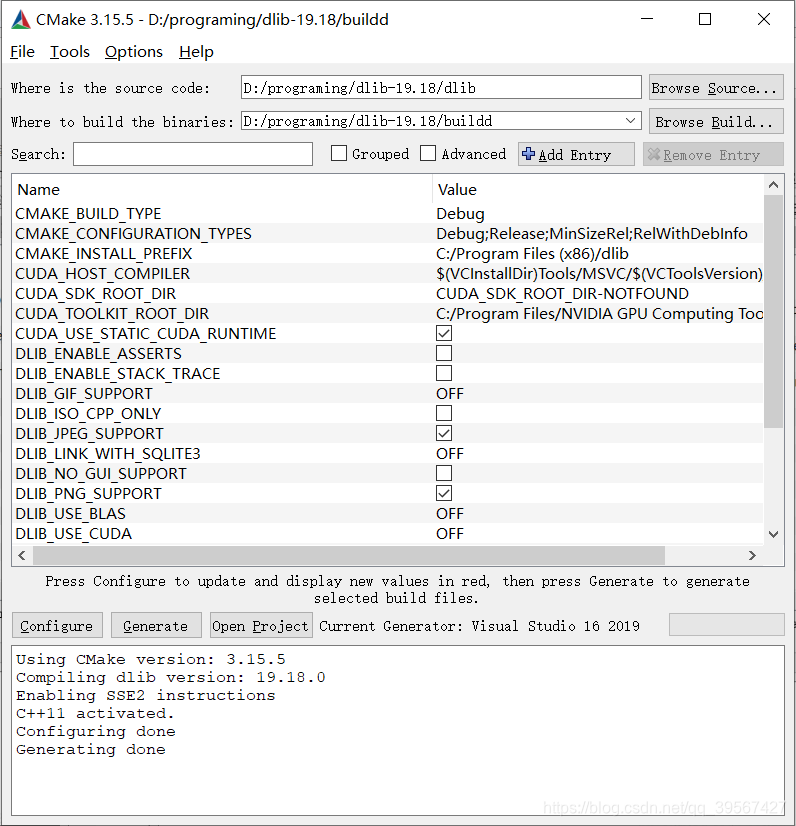
我们再在 build 同级目录新建一个文件夹 buildd 用来存放 Debug 版本,我们将 Release 换成 Debug 并勾选 右上方 Option 下的 Debug Output,配置仍然要与你电脑适配,然后 finish→Configure→Gnerate,等待显示 Configure done 与 Generate done
由于习惯,我们常常优先选择 Debug 模式,所以我们选择打开 buildd 文件夹下的 dlib.sln 后续创建 Release 版本与此相同,我们选中 ALL_BUILD 右键生成,坐等生成结束,如下表示创建并生成成功
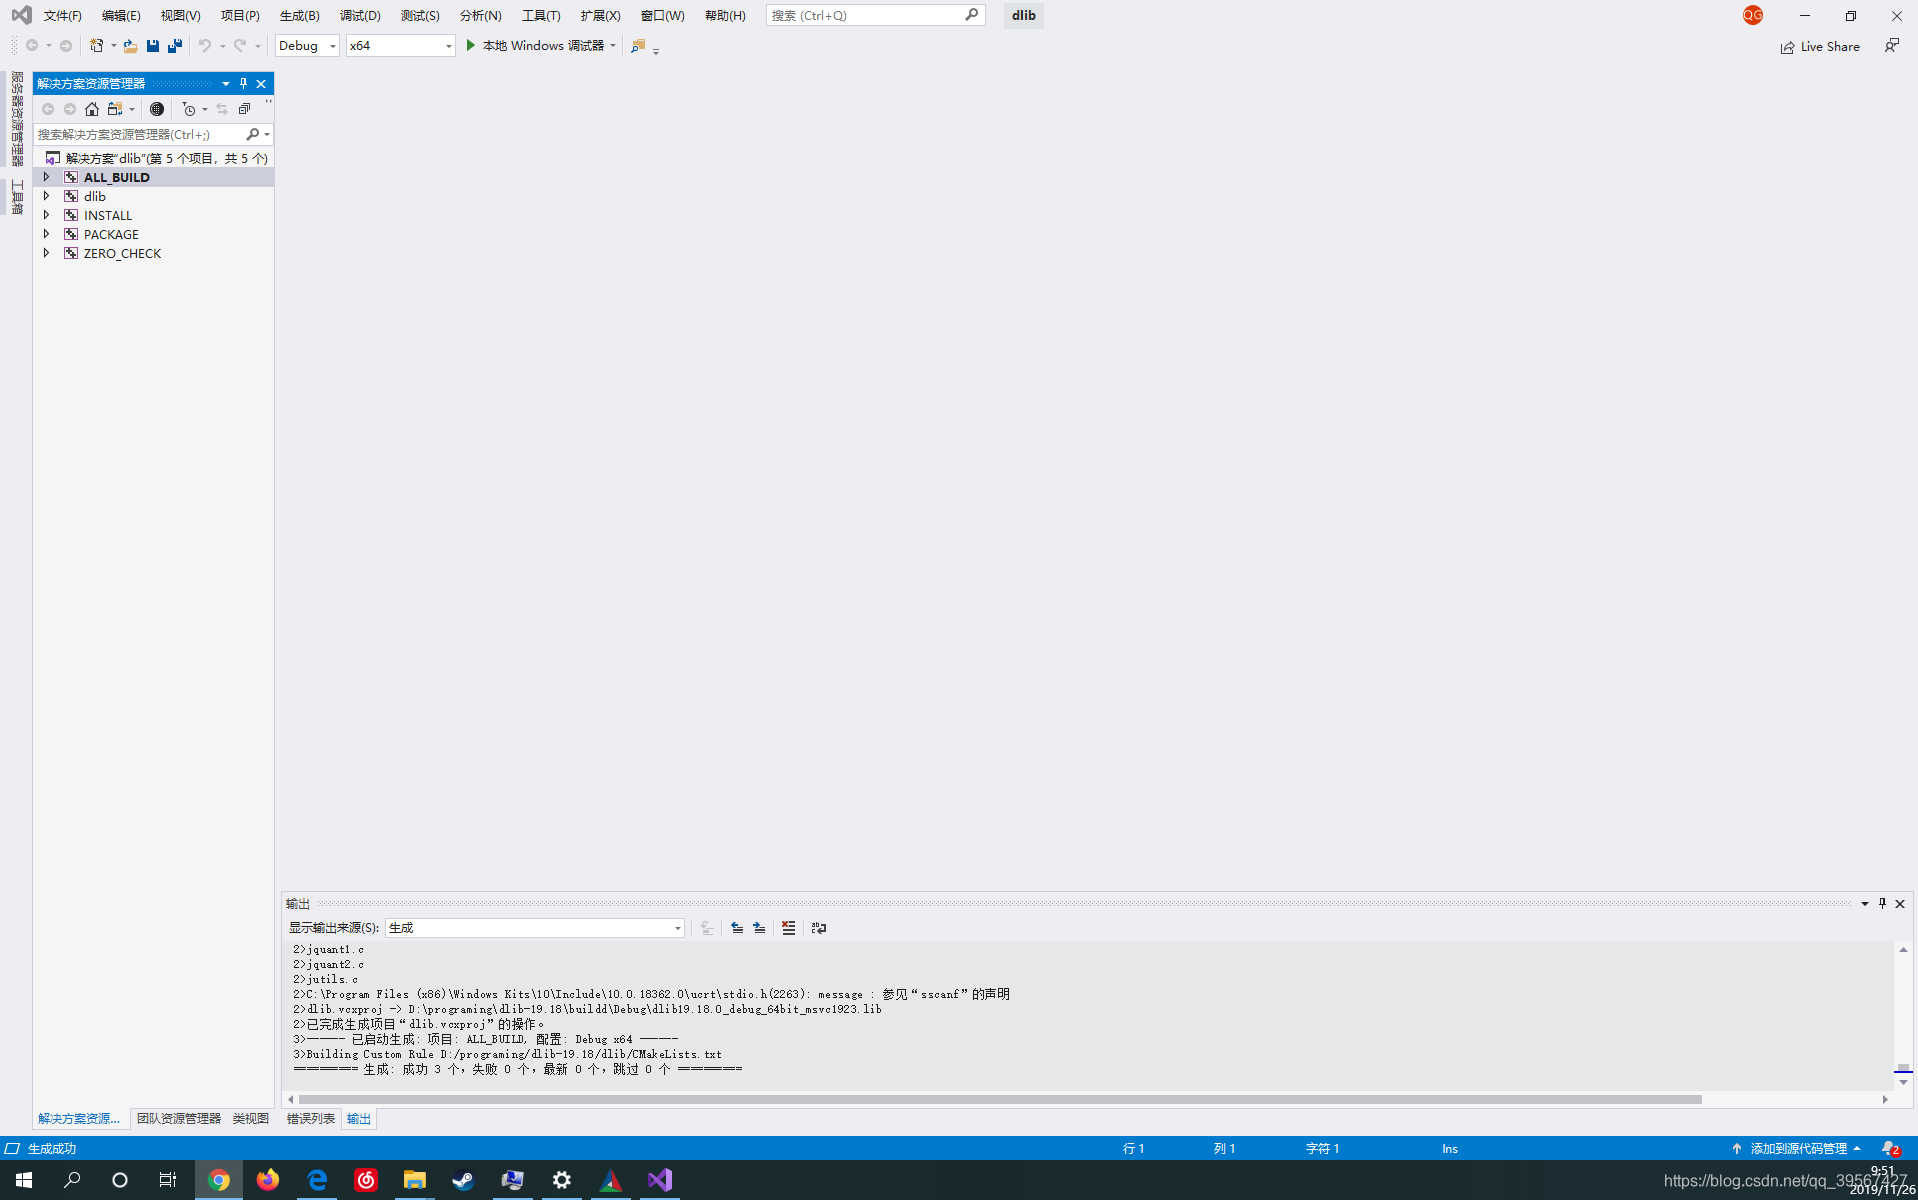
此时在 buildd 下的 Debug 出现 dlib19.18.0_debug_64bit_msvc1923.lib,如下
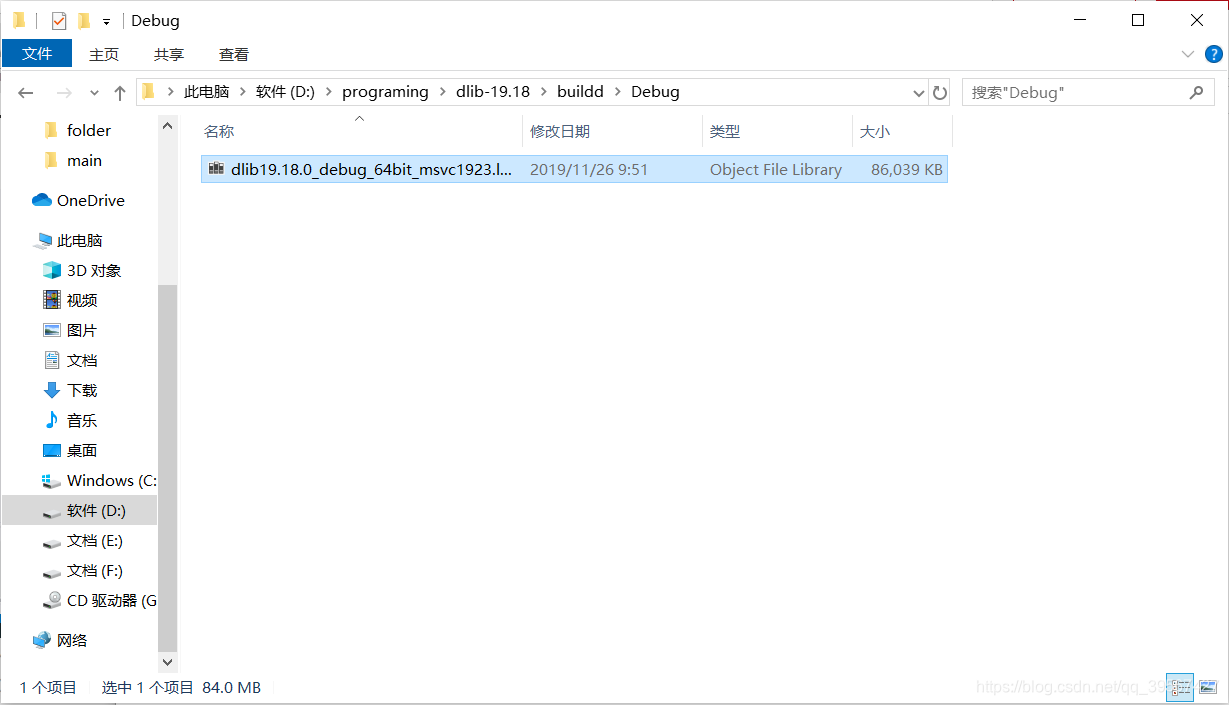
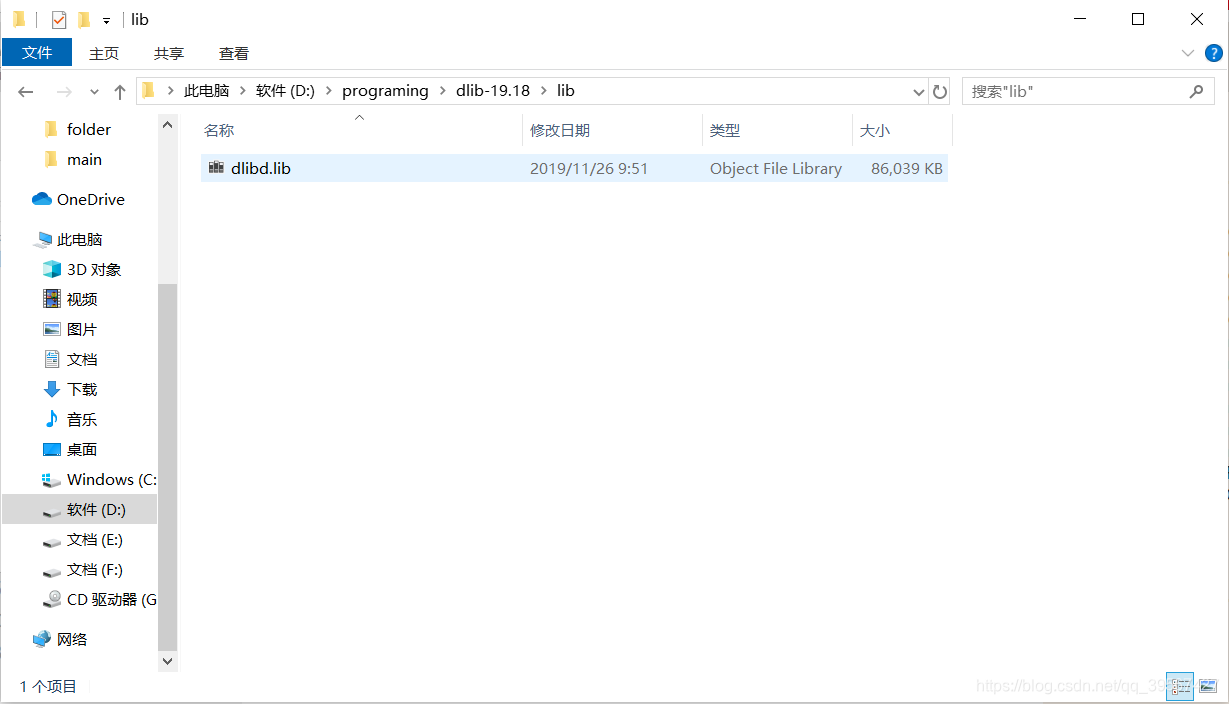
我们在 build 同级目录下创建 lib 文件夹,以方便使用 lib 文件,并将生成的 lib 文件重命名为 dlibd.lib(由于是 Debug,编程习惯命名,如果是 Release 版本,则命名为 dlib.lib)
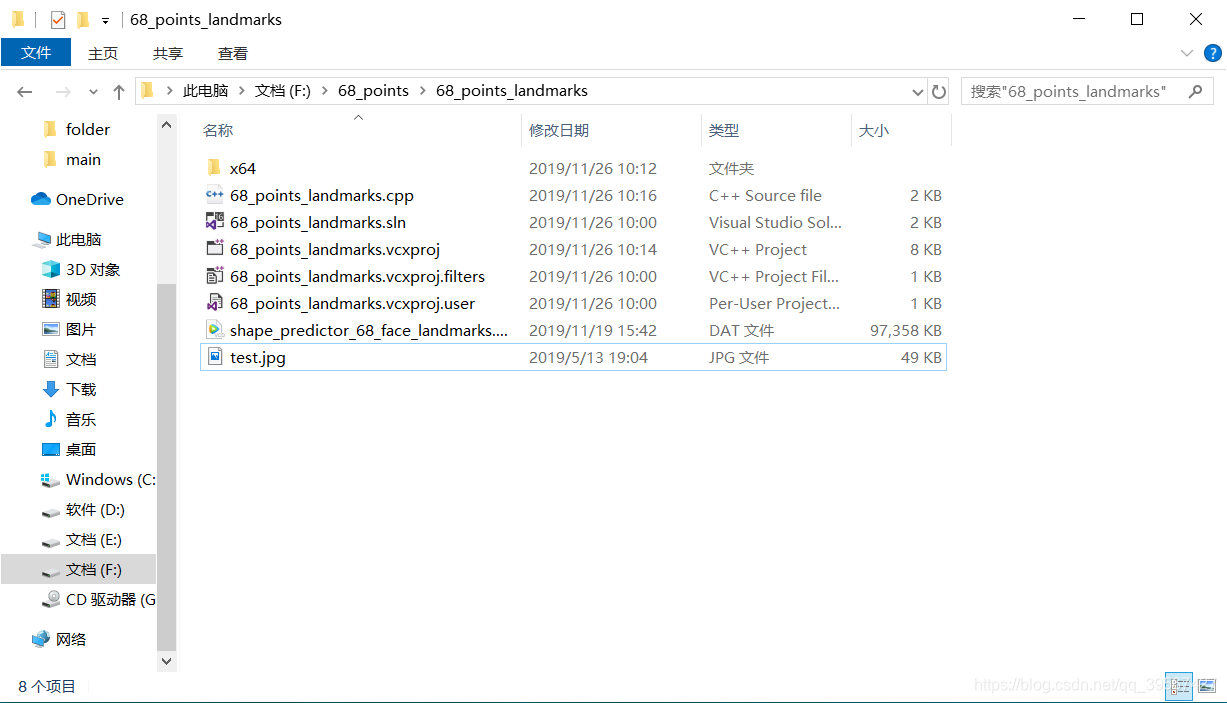
此时我们就可以愉快的书写代码了,在 D:\programing\dlib-19.18\examples 下有许多示例程序,所以我们参照其 face_landmark_detection_ex.cpp 与 Opencv 写了两则代码,创建 VS 工程(选择控制台项目【C++】),工程名为:68_points_landmarks,并在其目录下添加 test.jpg(你要测试的图像)以及 shape_predictor_68_face_landmarks.dat,文件目录如下
 代码如下:
代码如下:
/******************************************/
/*欢迎关注CSDN博主DeepHao ID:qq_39567427**/
/*只声明dilb空间不声明cv空间,因为两个空间***/
/**********具有同名函数,防止混淆***********/
#include <dlib\opencv.h>
#include <opencv2\opencv.hpp>
#include <dlib\image_processing\frontal_face_detector.h>
#include <dlib\image_processing\render_face_detections.h>
#include <dlib\image_processing.h>
#include <dlib\gui_widgets.h>
//声明dlib名称空间
using namespace dlib;
//声明std名称空间
using namespace std;
int main() {
//加载检测器
frontal_face_detector detector = get_frontal_face_detector();
shape_predictor sp;
//将文件中的模型放置再sp中
deserialize("shape_predictor_68_face_landmarks.dat") >> sp;
cv::Mat img;
//读取图片
img = cv::imread("test.jpg");
//将其转化为RGB像素图片
cv_image<bgr_pixel> cimg(img);
//开始进行脸部识别
std::vector<rectangle> faces = detector(cimg);
//发现每一个脸的pos估计 Find the pose of each face
std::vector<full_object_detection> shapes;
//确定脸部的数量
unsigned faceNumber = faces.size();
//将所有脸的区域放入集合之中
for (unsigned i = 0; i < faceNumber; i++)
shapes.push_back(sp(cimg, faces[i]));
if (!shapes.empty()) {
int faceNumber = shapes.size();
for (int j = 0; j < faceNumber; j++)
{
for (int i = 0; i < 68; i++)
{
//用来画特征值的点
cv::circle(img, cvPoint(shapes[j].part(i).x(), shapes[j].part(i).y()), 3, cv::Scalar(0, 0, 255), -1);
//显示特征点数字
cv::putText(img, to_string(i), cvPoint(shapes[0].part(i).x() + 5, shapes[0].part(i).y() + 5), cv::FONT_HERSHEY_COMPLEX, 0.2, cv::Scalar(255, 0, 0));
}
}
}
//显示图片
cv::namedWindow("68_points_landmarks", cv::WINDOW_AUTOSIZE);
cv::imshow("68_points_landmarks", img);
cv::waitKey(0);
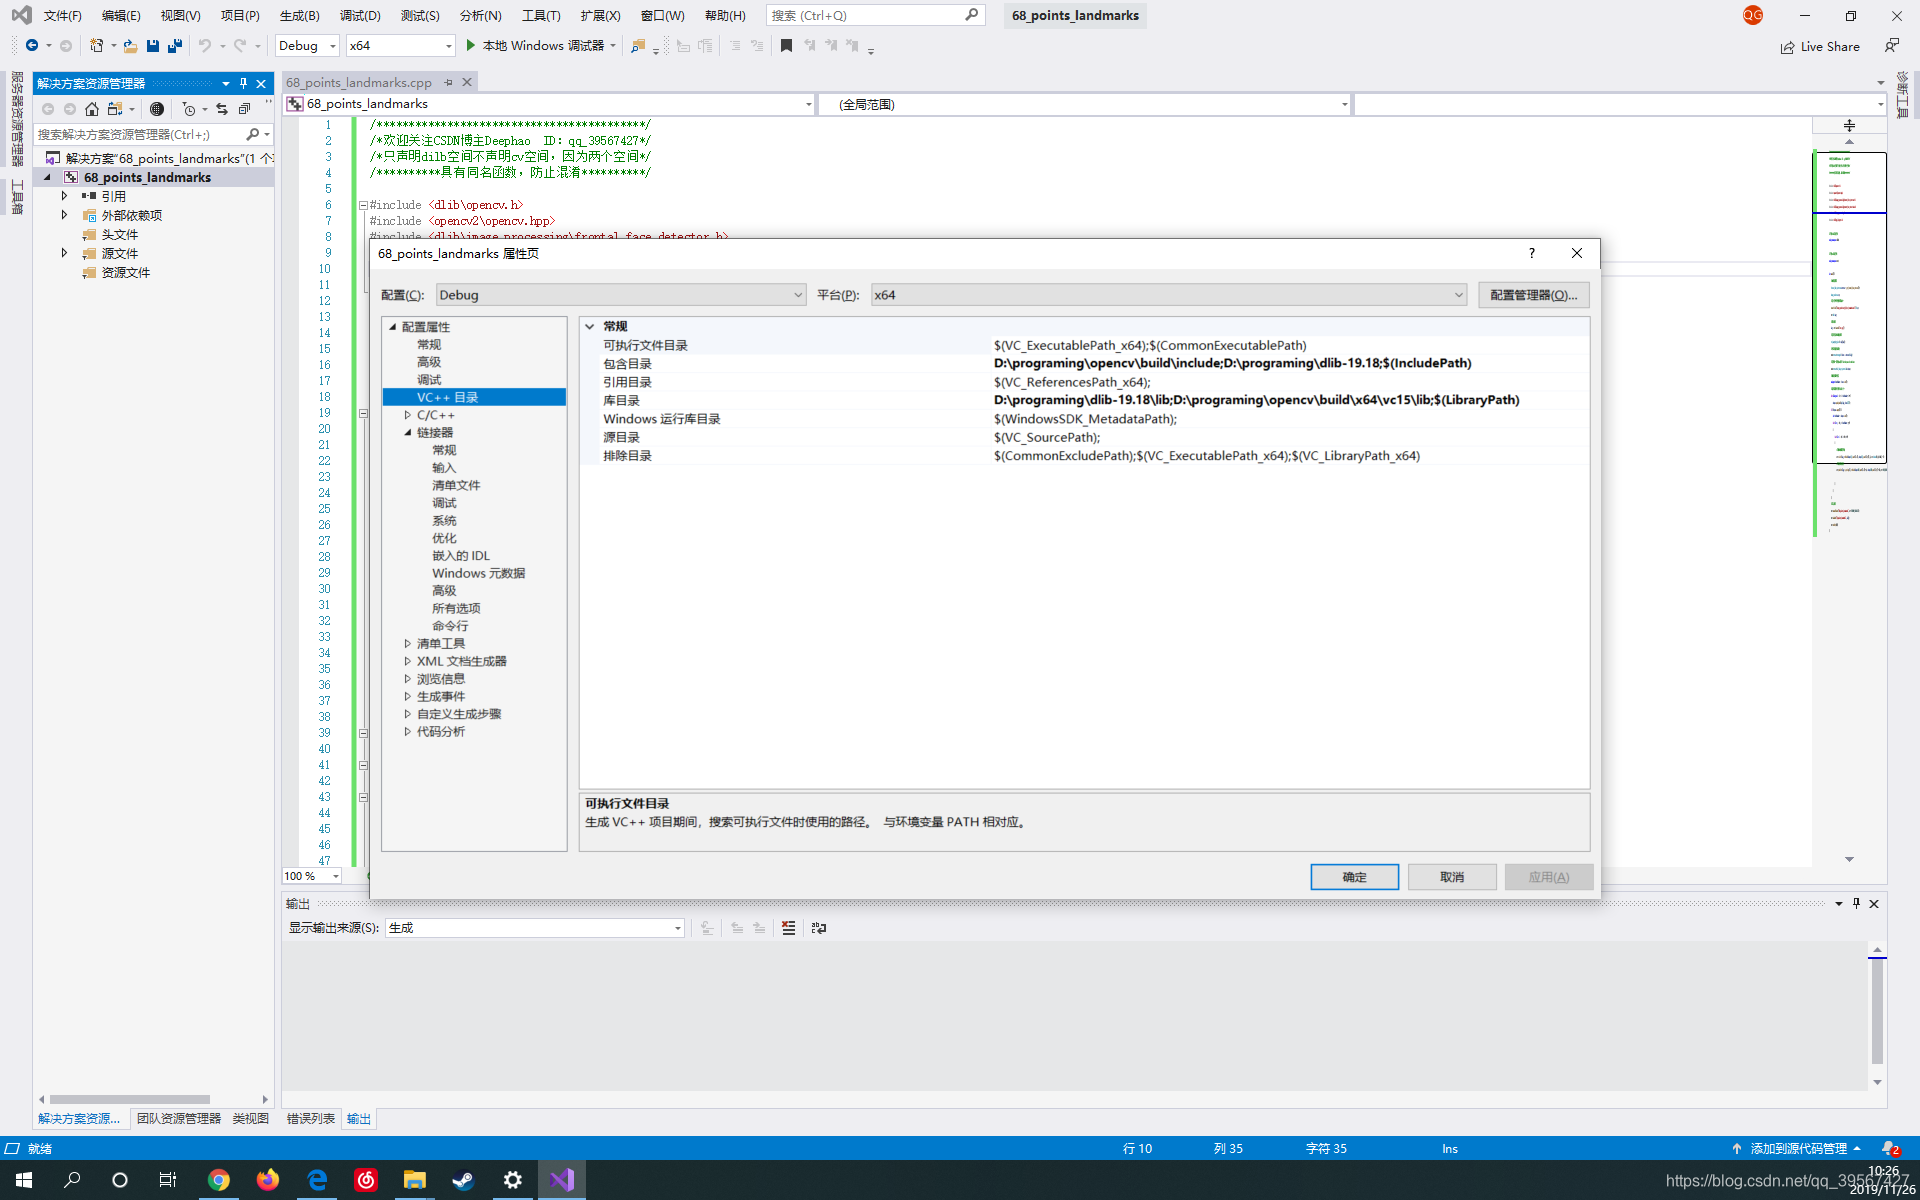
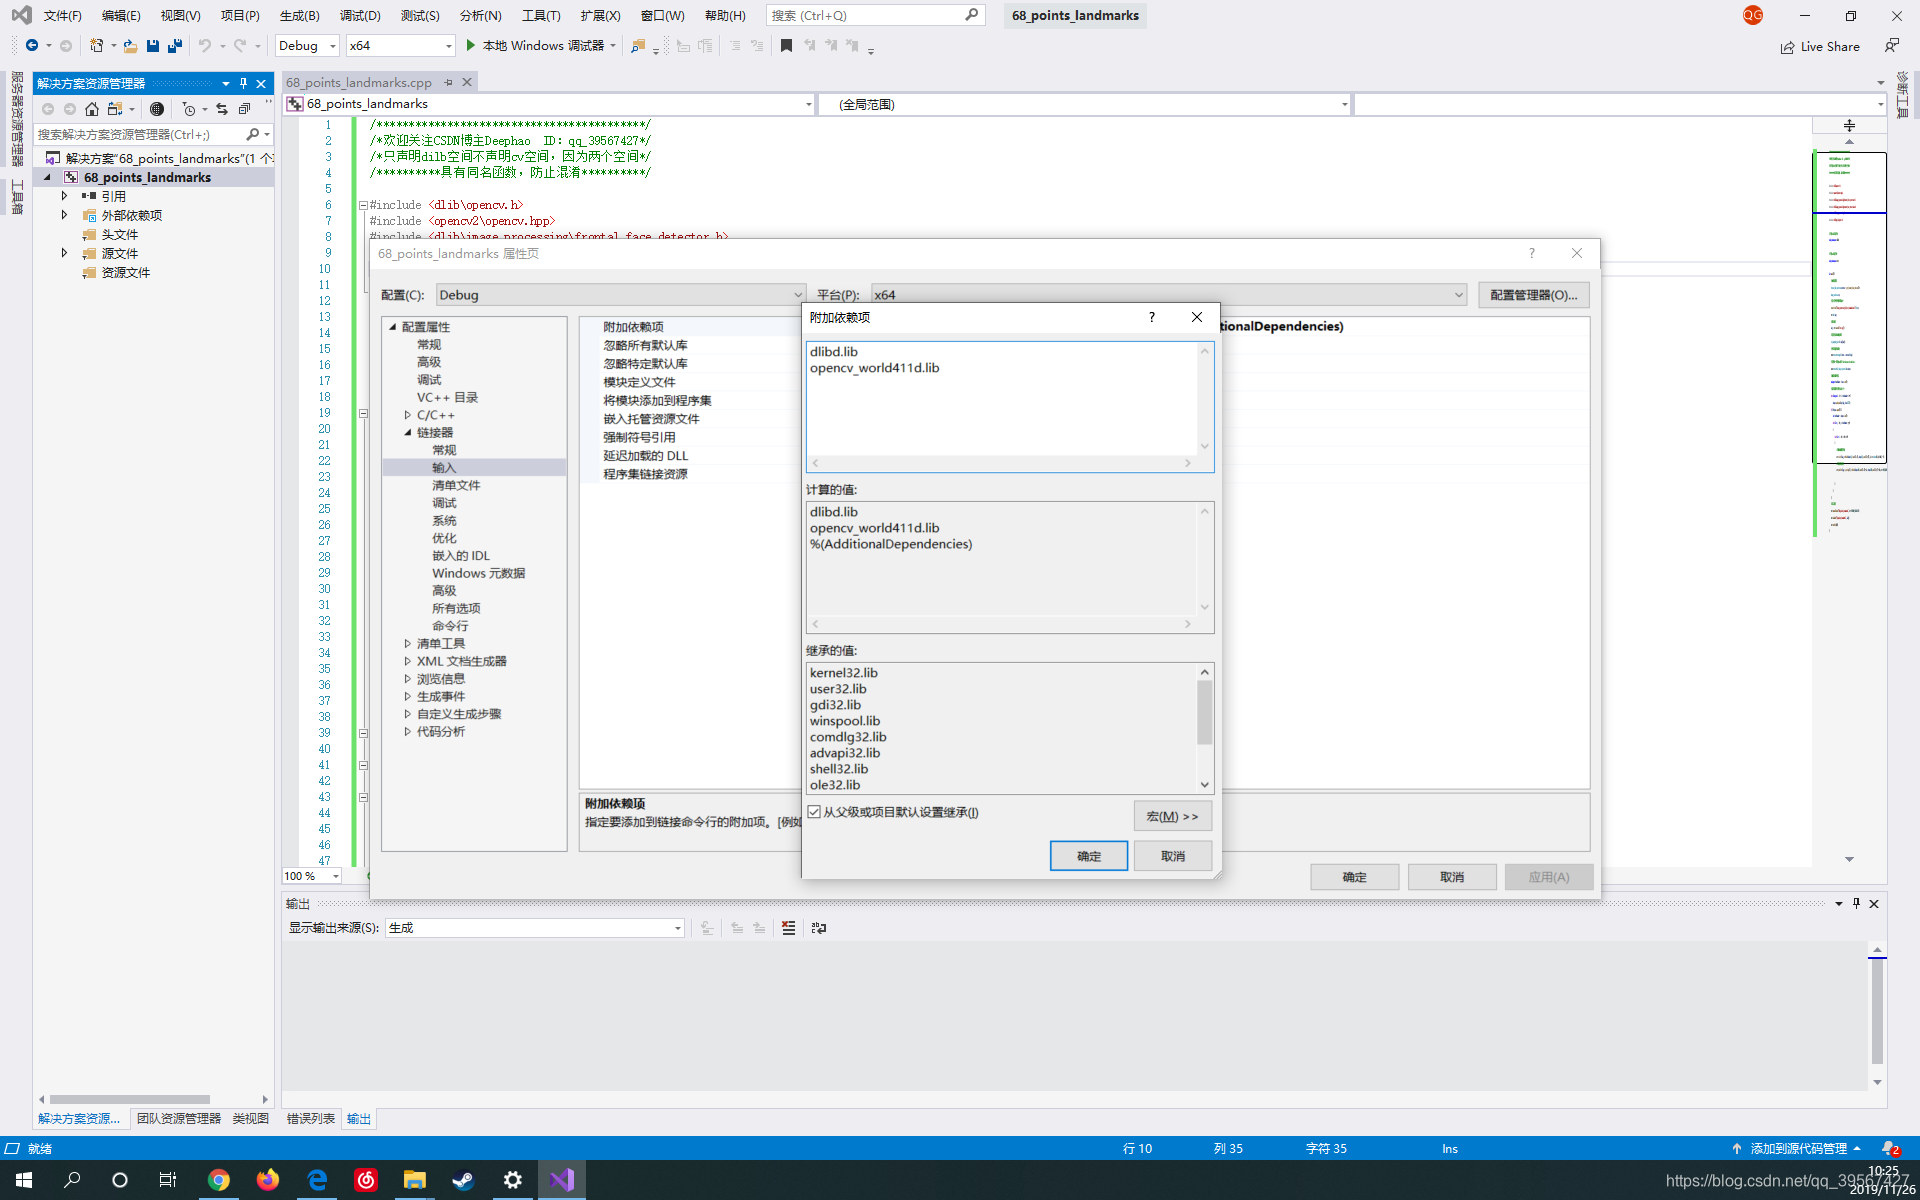
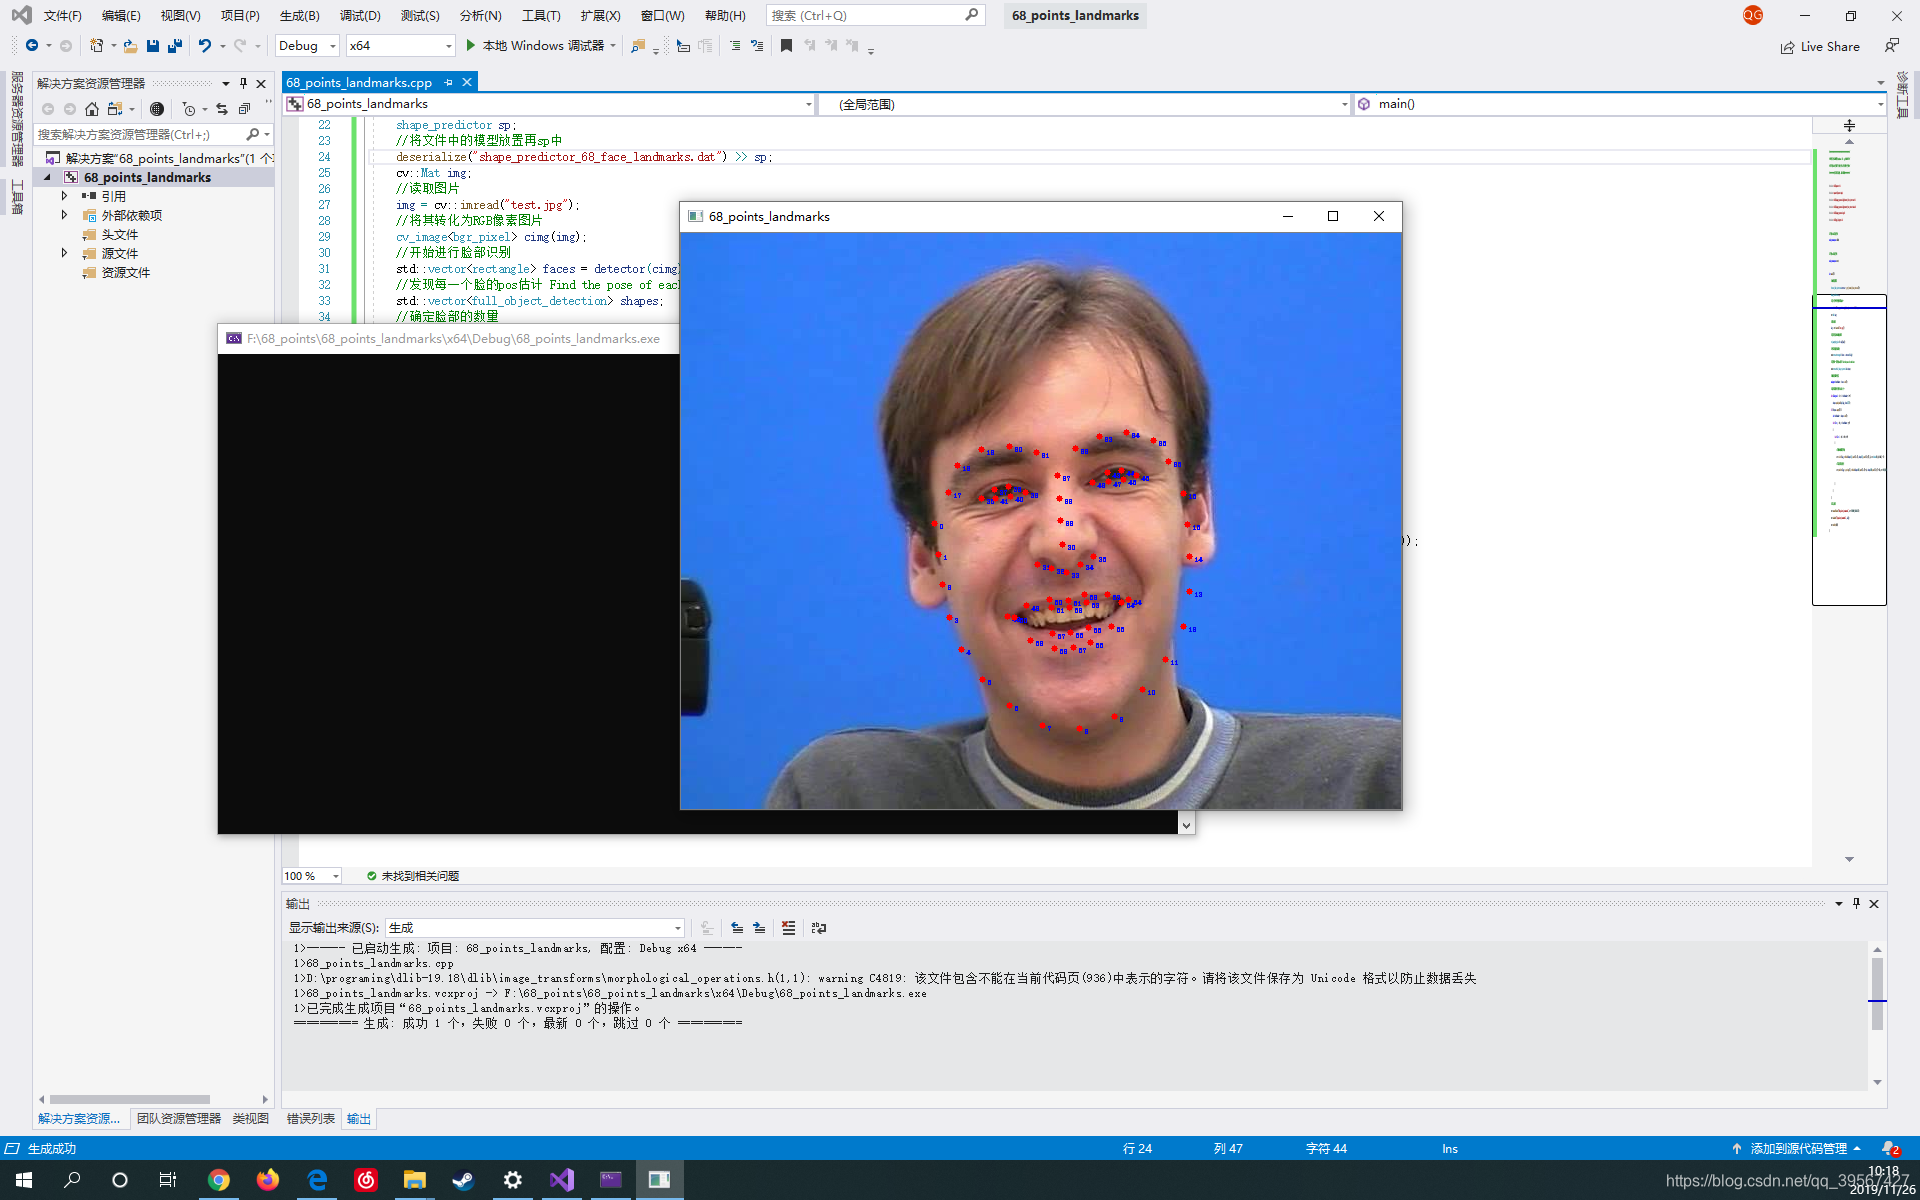
}创建完成后,注意选择配置,我的是 Debug x64 平台,由于导入的目录有 dlib 与 opencv 所以你需要如下工程配置:(Opencv 安装参阅这里)
包含目录:D:\programing\opencv\build\include,D:\programing\dlib-19.18
库目录:D:\programing\dlib-19.18\lib,D:\programing\opencv\build\x64\vc15\lib
链接器输入附加依赖项:dlibd.lib,opencv_world411d.lib
效果如下:
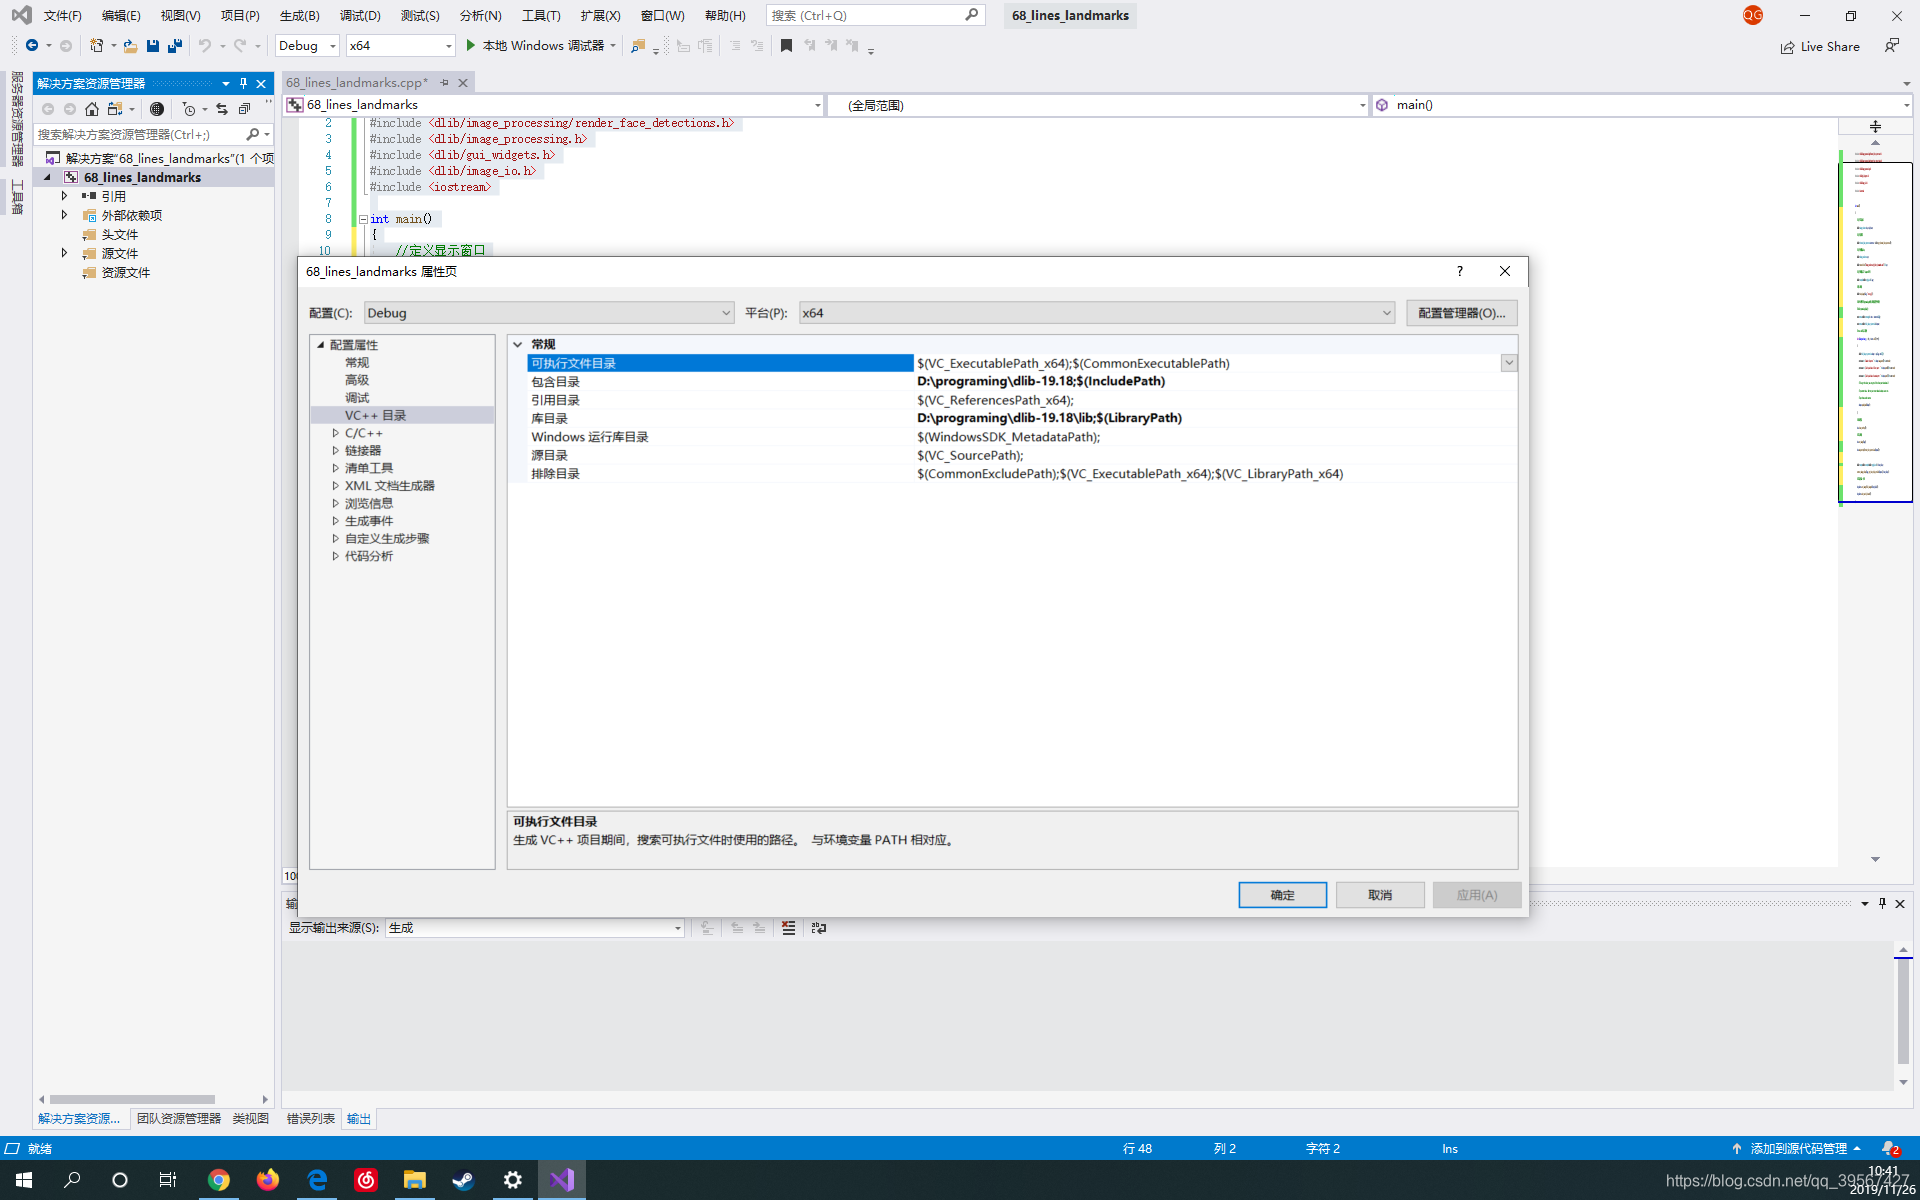
再创建 VS 工程如上,并在其目录下添加 test.jpg(你要测试的图像)以及 shape_predictor_68_face_landmarks.dat,同样注意平台配置(我是 Debug x64),由于只使用了纯 dlib,所以在项目中配置如下:
包含目录:D:\programing\dlib-19.18
库目录:D:\programing\dlib-19.18
链接器附加依赖项:dlibd.lib
代码输入如下:
/******************************************/
/*欢迎关注CSDN博主DeepHao ID:qq_39567427**/
/********只声明dilb空间,因为两个空间********/
/***********具有同名函数,防止混淆***********/
#include <dlib/image_processing/frontal_face_detector.h>
#include <dlib/image_processing/render_face_detections.h>
#include <dlib/image_processing.h>
#include <dlib/gui_widgets.h>
#include <dlib/image_io.h>
#include <iostream>
int main()
{
//定义显示窗口
dlib::image_window win, win_faces;
//定义检测器
dlib::frontal_face_detector detector = dlib::get_frontal_face_detector();
//定义数据输入sp
dlib::shape_predictor sp;
dlib::deserialize("shape_predictor_68_face_landmarks.dat") >> sp;
//定义图像格式,与opencv不同
dlib::array2d<dlib::rgb_pixel> img;
//载入图像
dlib::load_image(img, "test.jpg");
//你可以使用下行pyramid_up来放大图像检测更小的脸
//dlib::pyramid_up(img);
std::vector<dlib::rectangle> dets = detector(img);
std::vector<dlib::full_object_detection> shapes;
//dets.size表示人脸数
for (unsigned long j = 0; j < dets.size(); ++j)
{
dlib::full_object_detection shape = sp(img, dets[j]);
std::cout << "number of parts: " << shape.num_parts() << std::endl;
std::cout << "pixel position of first part: " << shape.part(0) << std::endl;
std::cout << "pixel position of second part: " << shape.part(1) << std::endl;
// You get the idea, you can get all the face part locations if
// you want them. Here we just store them in shapes so we can
// put them on the screen.
shapes.push_back(shape);
}
//清除覆盖
win.clear_overlay();
//显示图像
win.set_image(img);
win.add_overlay(render_face_detections(shapes));
dlib::array<dlib::array2d<dlib::rgb_pixel> > face_chips;
extract_image_chips(img, get_face_chip_details(shapes), face_chips);
//显示脸部,小图
win_faces.set_image(tile_images(face_chips));
win_faces.wait_until_closed();
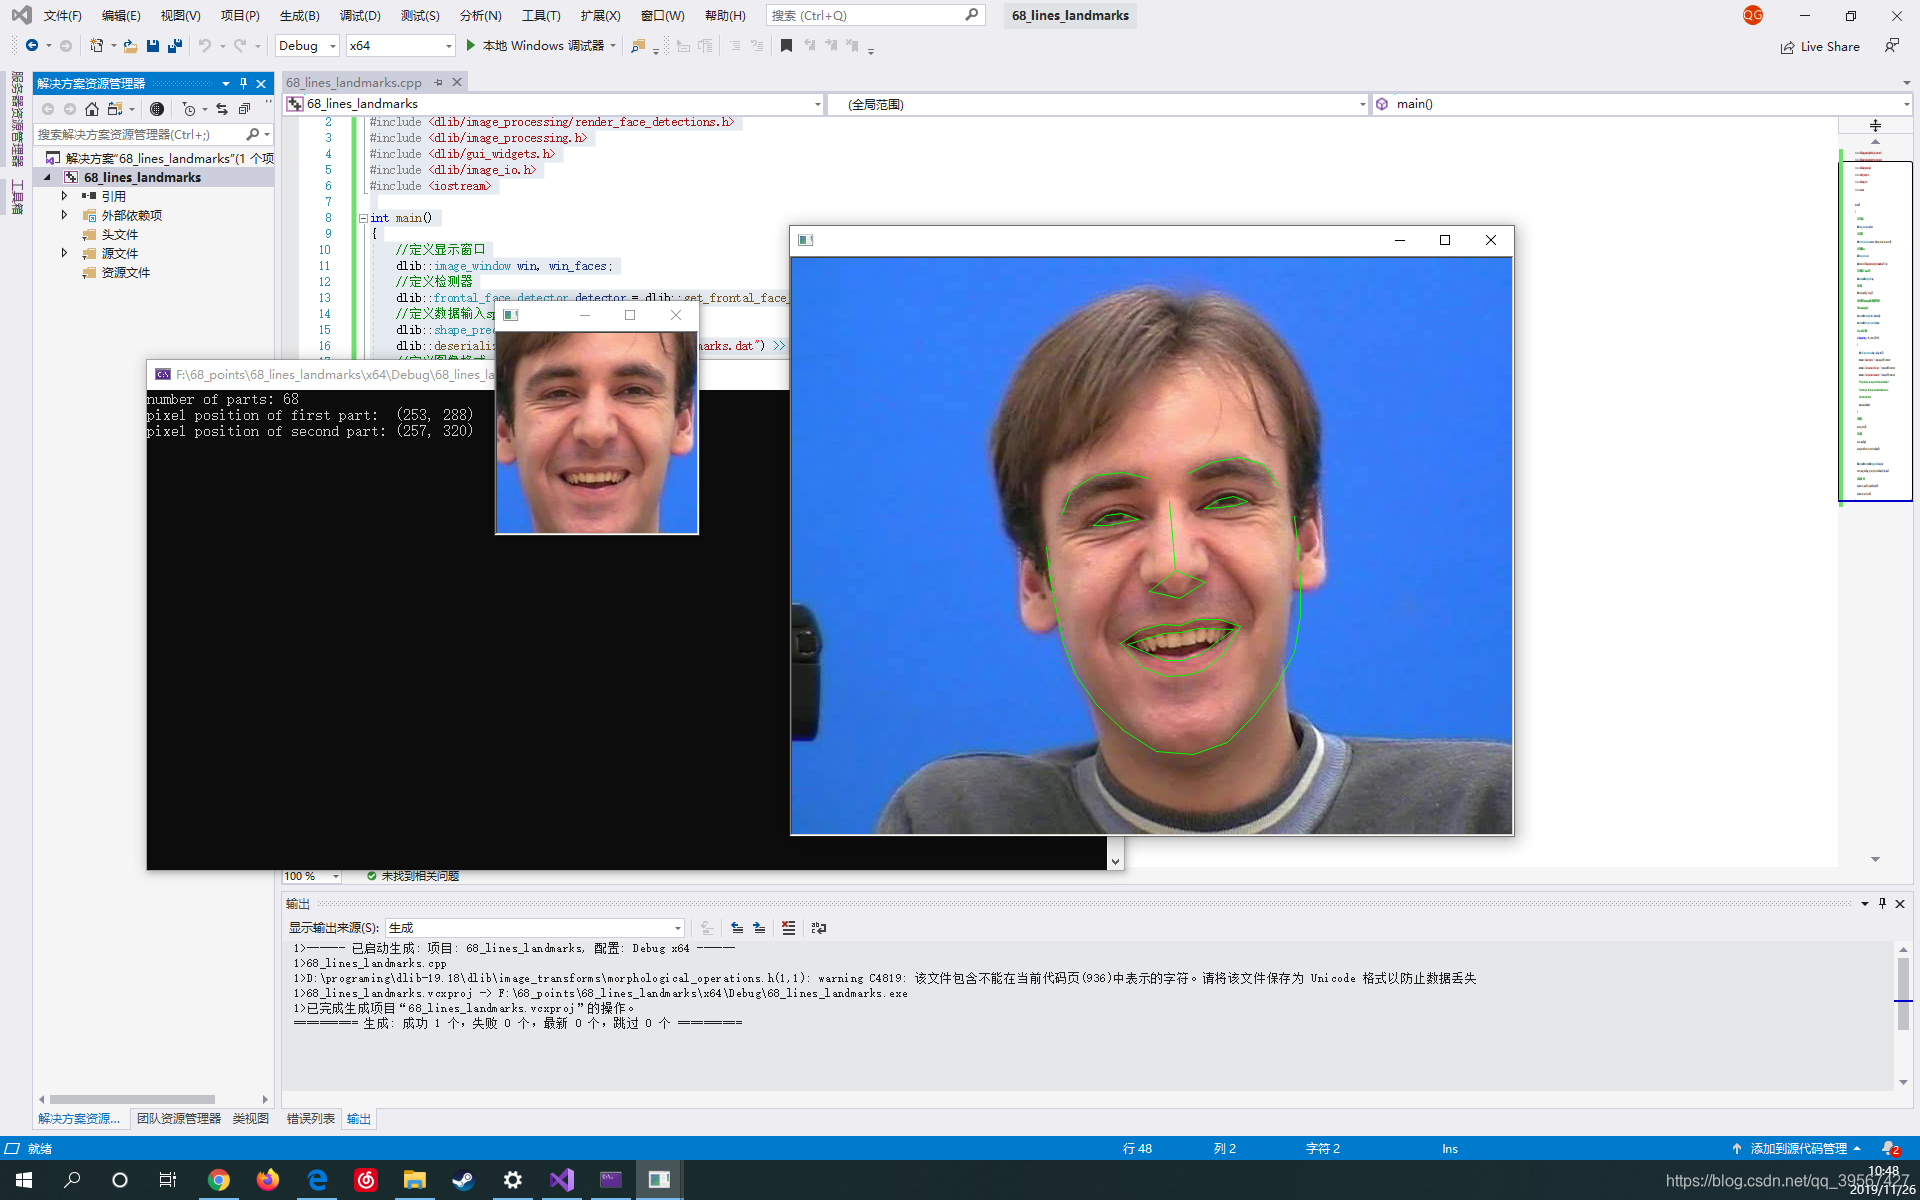
}运行效果:
step 3:
使用 matlab 调用 dlib C++接口进行 68 points landmarks 标定
在 D:\programing\dlib-19.18\dlib\matlab 下具有 matlab 调用 dlib 接口的实例文件,我们可以简读一下:
example_mex_function.cpp 描述了转换的有效值,以及函数的声明方式
VALID INPUT AND OUTPUT ARGUMENTS
        The mex wrapper can handle the following kinds of input and output arguments:
            - Types corresponding to a MATLAB matrix
                - a dlib::matrix containing any kind of scalar value.
                - a dlib::array2d containing any kind of scalar value.
                - a dlib::vector containing any kind of scalar value.
                - a dlib::point
                - matrix_colmajor or fmatrix_colmajor
                  These are just typedefs for matrix containing double or float and using a
                  column major memory layout.  However, they have the special distinction
                  of being fast to use in mex files since they sit directly on top of
                  MATLAB's built in matrices.  That is, while other types of arguments copy
                  a MATLAB object into themselves, the matrix_colmajor and fmatrix_colmajor
                  do no such copy and are effectively zero overhead methods for working on
                  MATLAB's matrices.
译文:
有效的输入和输出参数
        mex包装器可以处理以下类型的输入和输出参数:
            -对应于MATLAB矩阵的类型
                -包含任何标量值的dlib :: matrix。
                -包含任何标量值的dlib :: array2d。
                -包含任何标量值的dlib :: vector。
                -dlib :: point
                -matrix_colmajor或fmatrix_colmajor
                  这些只是包含double或float并使用a的矩阵的typedef
                  列主要内存布局。但是,它们有特殊的区别
                  可以快速在mex文件中使用,因为它们直接位于
                  MATLAB的内置矩阵。也就是说,当其他类型的参数复制时
                  一个MATLAB对象本身,即matrix_colmajor和fmatrix_colmajor
                  没有这样的副本,并且实际上是零开销的工作方法
                  MATLAB的矩阵。
你可以阅读 dlib/matrix.h 来了解matrix的用法,下面我写了一个小程序帮助理解最基本的用法,你可以创建一个 VS 工程运行,记住不要忘了平台配置的 Debug x64等,包括以下配置:
包含目录:D:\programing\dlib-19.18
库目录:D:\programing\dlib-19.18
链接器附加依赖项:dlibd.lib
#include <dlib/matrix.h>
using namespace dlib;
int main()
{
	matrix<double> A;
	A = ones_matrix<double>(3, 4);
	for(int i = 0;i < 3;i++)
		for(int j = 0;j < 4;j++)
			std::cout << A(i, j) << std::endl;
	return 0;
}
/*将会打出12个“1”*/
还有其余的很多文件可以阅读,都具有英文注释,其余不在多说直接上我参阅后编写的源码:
#include "dlib/matrix.h"
#include <dlib/image_processing/frontal_face_detector.h>
#include <dlib/image_processing/render_face_detections.h>
#include <dlib/image_processing.h>
#include <dlib/image_io.h>
#include "call_matlab.h"

using namespace dlib;
using namespace std;

void mex_function(
	const array2d<rgb_pixel >& img,
	matrix<double>& bboxes,
	matrix<double>& shape
)
{
	//开启检测模块
	frontal_face_detector detector = get_frontal_face_detector();

	//轮廓预测器
	shape_predictor sp;
	deserialize("shape_predictor_68_face_landmarks.dat") >> sp;

	//下面一行为放大图片来检测更小人脸,可以加上
	//pyramid_up(img);
	//人脸检测
	std::vector<dlib::rectangle> det = detector(img);
	std::vector<full_object_detection> shapes;

	//人脸数目
	int faces = det.size();
	bboxes = ones_matrix<double>(faces, 4);

	for (int i = 0; i < faces; i++)
	{
		bboxes(i,0)=det[i].left();
		bboxes(i,1)=det[i].top();
		bboxes(i,2)=det[i].width();
		bboxes(i,3)=det[i].height();
		shapes.push_back(sp(img, det[i]));
	}

	//一张图像中存在人脸个数
	cout << "Number of faces detected: " << faces << endl;

	int shape_colum = faces * 68;
	int k = 0;
	shape = ones_matrix<double>(shape_colum, 2);

	if (!shapes.empty())
	{
		for (int j = 0; j < faces; j++)
			for (int i = 0; i < 68; i++, k++)
			{
				shape(k, 0) = shapes[j].part(i).x();
				shape(k, 1) = shapes[j].part(i).y();
			}
	}
	cout << "finish!" << endl;
}
#include "mex_wrapper.cpp"
在 D:\programing\dlib-19.18\dlib\matlab 下创建一个 face_landmarks.cpp 文件,将代码复制进去,并创建一个 build 文件夹,将 CMakeLists.txt 复制出一个副本,修改 CMakeLists.txt 在最后一行加上 add_mex_function(face_landmarks dlib::dlib),删除其余的(或者注释)add_mex_function,效果与文件夹列表如下:
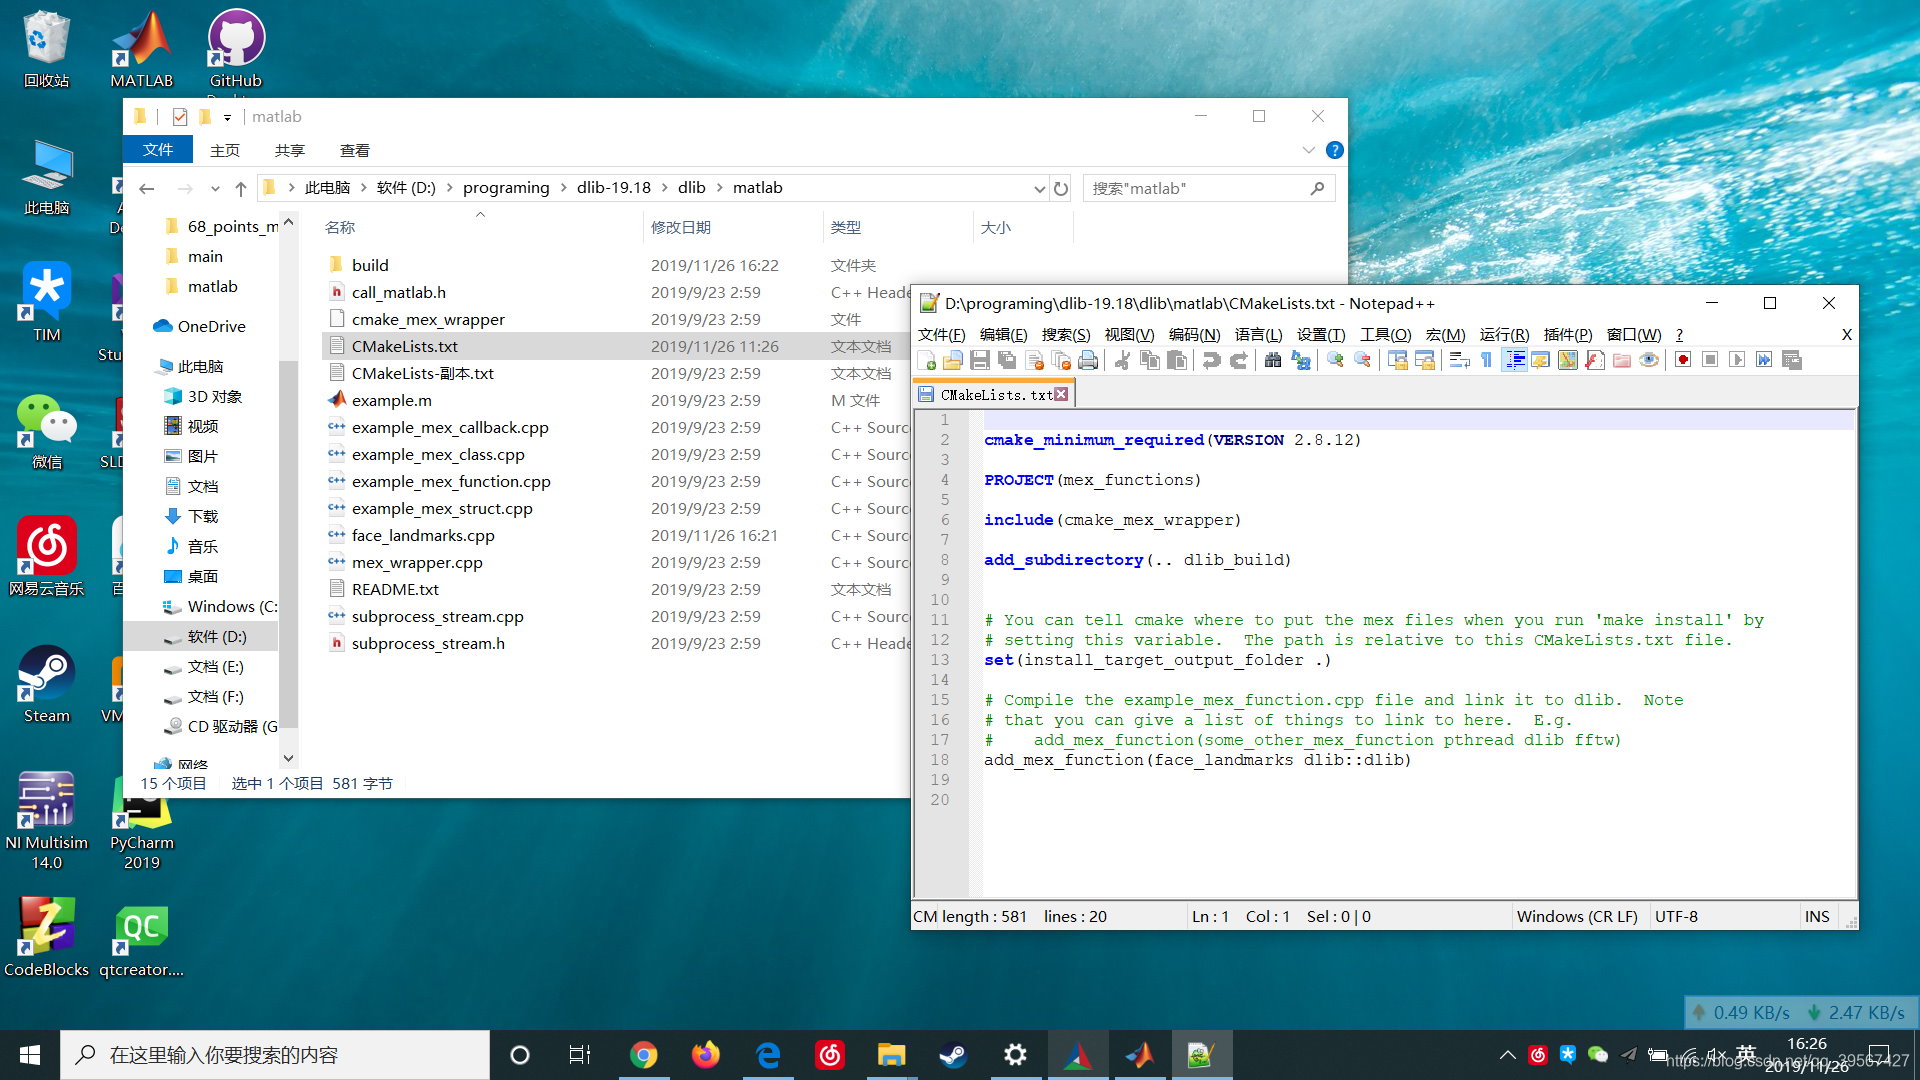
打开 cmake-gui.exe (前面我们都用的 Debug 这次我们选择使用 Release 免得大家担心 Release 用不了,生成 Rlease 的 lib 自行照前解决),选择文件夹,然后finish→Configure→Gnerate→Open Project
平台配置:
Release x64
右键 face_landmarks 属性
链接器->常规: 添加 D:\programing\MATLABR2019a\extern\lib\win64\microsoft 到附加目录库(由于用到 Matlab 的 lib 文件)。
链接器->输入:添加 libut.lib 及 libmat.lib 到附加依赖项
链接器->命令行:添加 /EXPORT:mexFunction(由于导出 mexw64 文件)
配置完成,右键 ALL_BUILD 生成,时间较长,大概三五分钟,喝杯茶吧~,成功后如下:
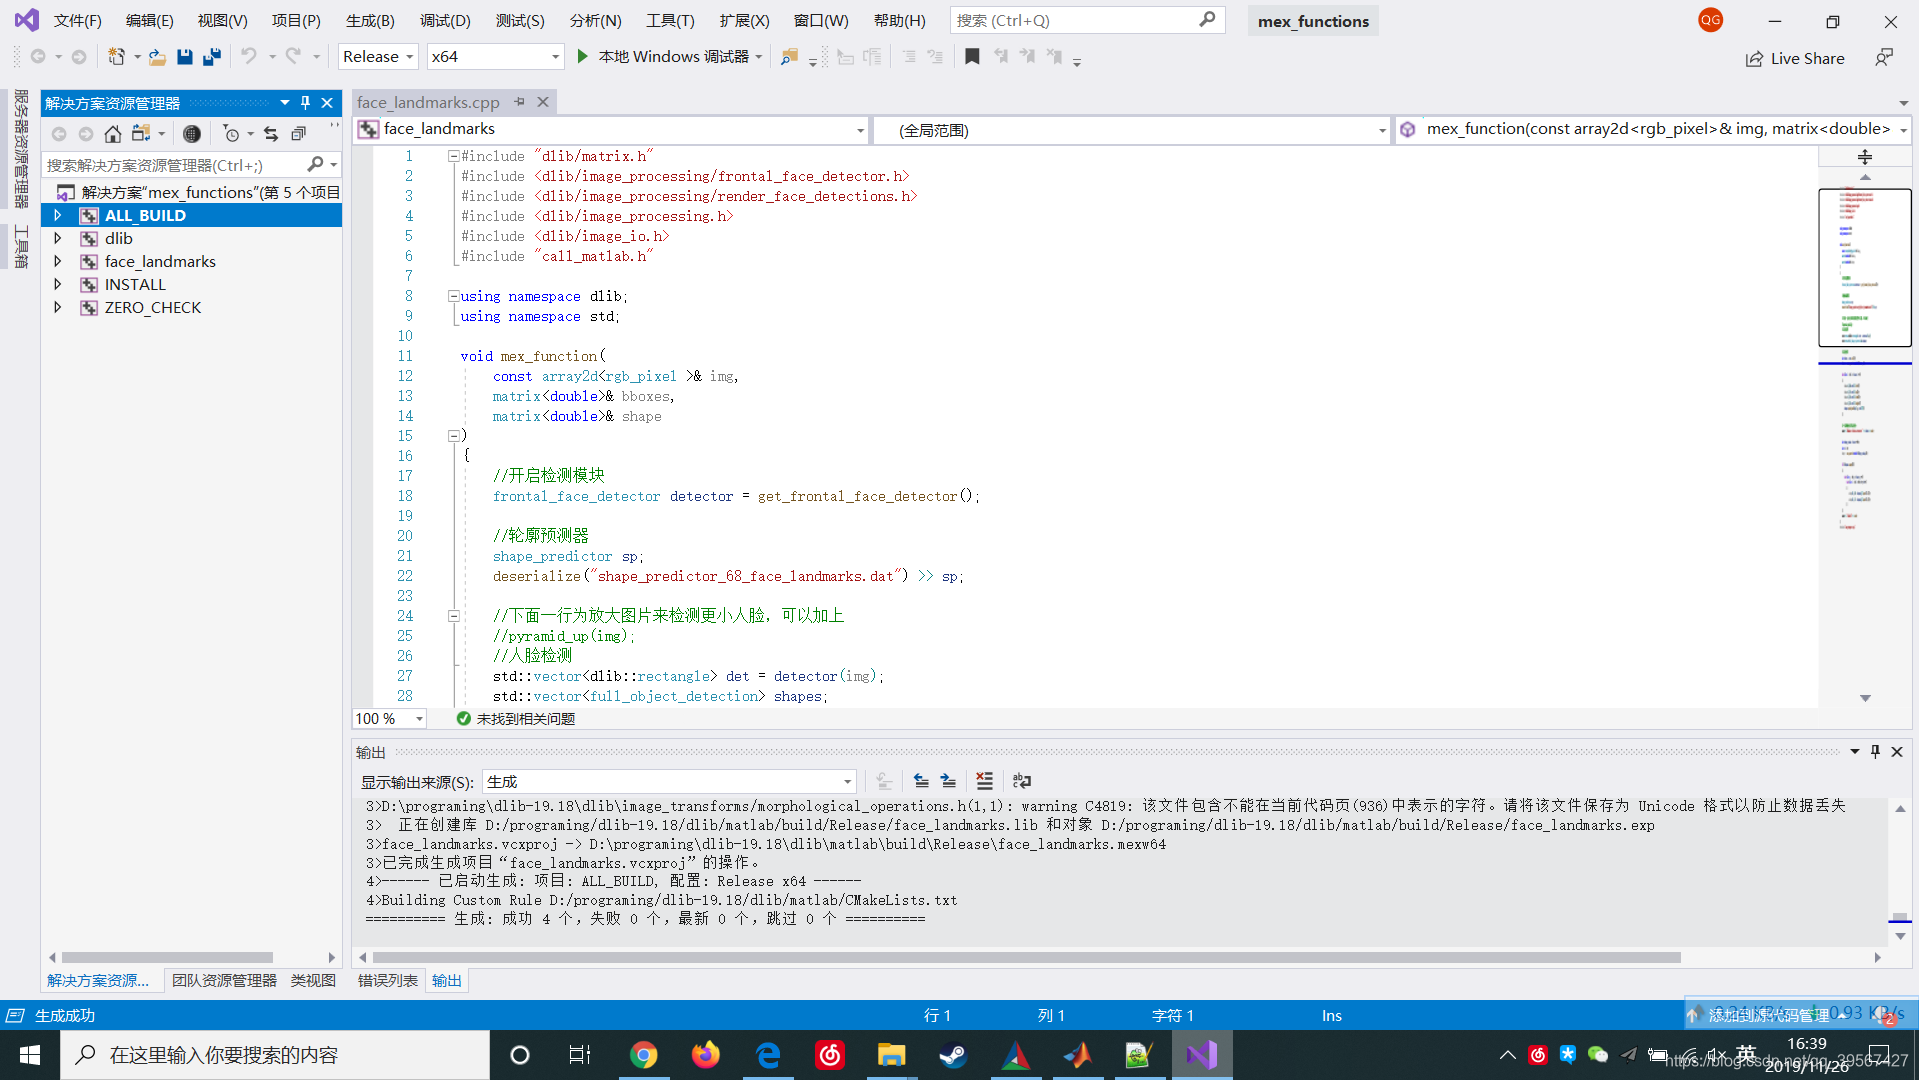
最后在 Release 下有 face_landmarks.mexw64 文件
在一个喜欢的地方创建一个 68_points_matlab 文件夹,文件内容如下,不要忘记将 shape_predictor_68_face_landmarks.dat 与 图片放入同一目录:
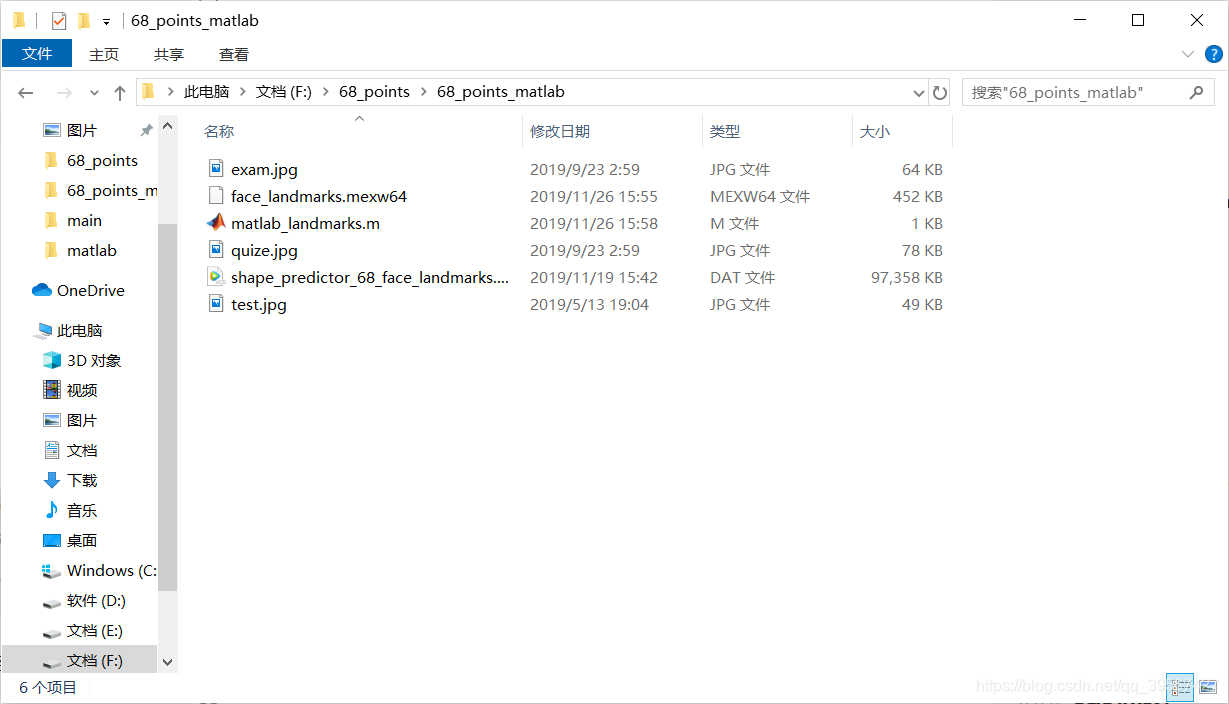
我放了四张图片,其中有的包含不止一张脸,因为编写接口程序验证,改了 多次,所以我多测试了几张,都成功了(相比起来直接用 python,C++ 编写太简单)
matlab_landmarks.m 测试代码如下:
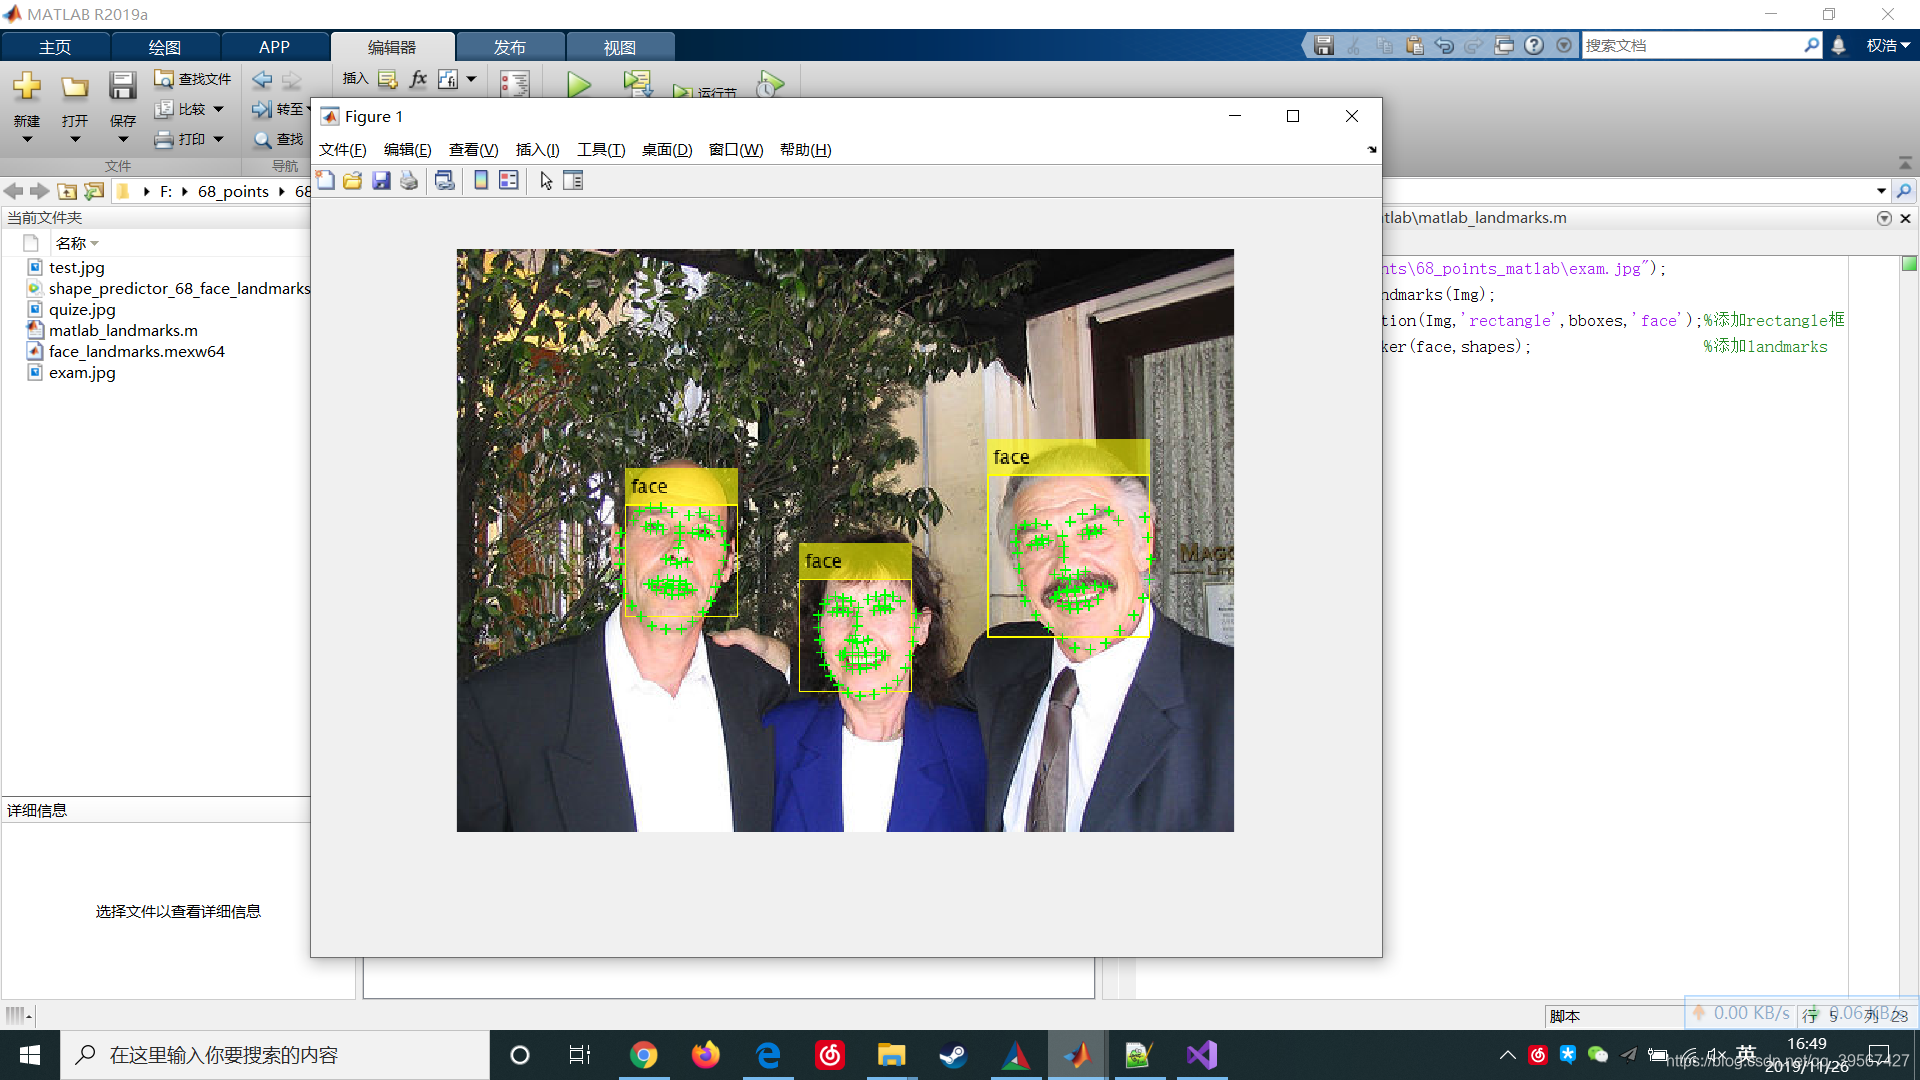
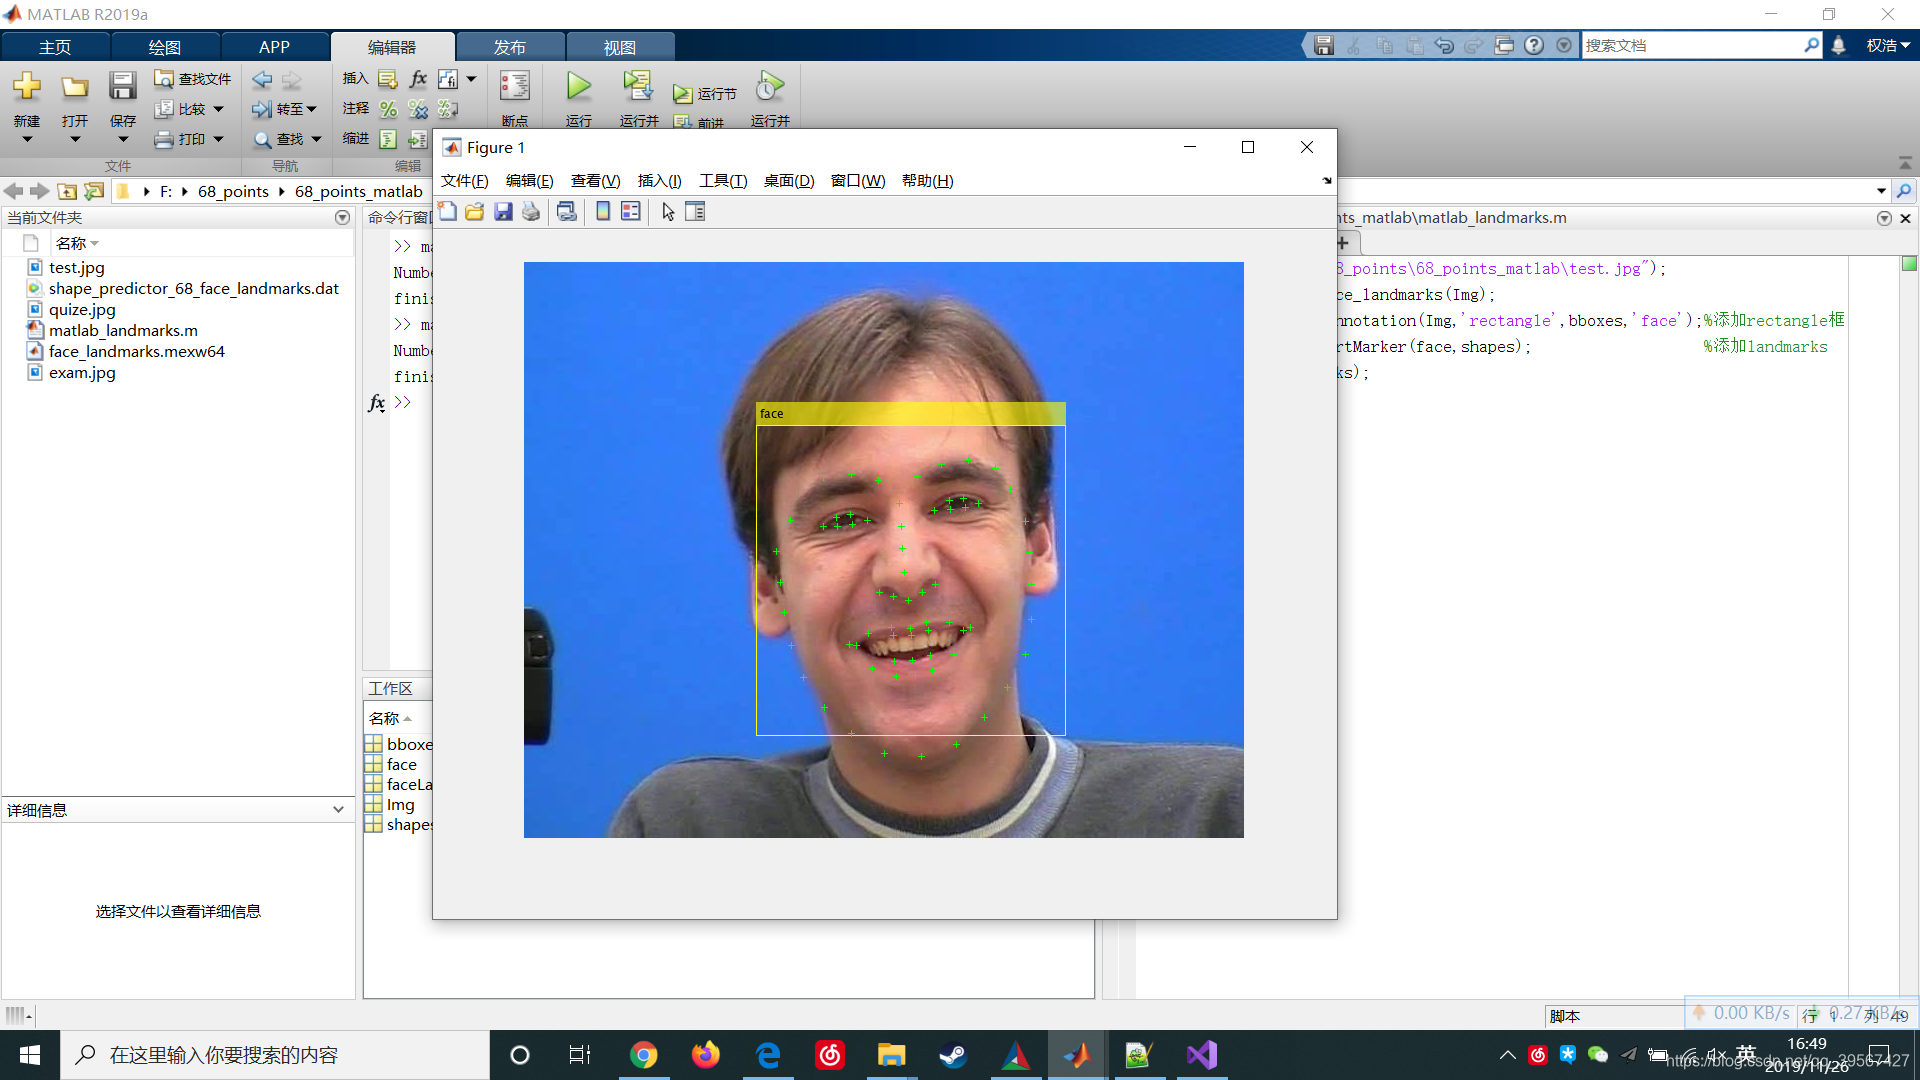
Img = imread("F:\68_points\68_points_matlab\exam.jpg");
[bboxes,shapes]=face_landmarks(Img);
face=insertObjectAnnotation(Img,'rectangle',bboxes,'face');%添加rectangle框
faceLandmarks=insertMarker(face,shapes);                   %添加landmarks
imshow(faceLandmarks);
运行结果如下:
结束:到这里整篇就结束了,希望对你有帮助,感谢观看,至于如何配置 Python 环境,Opencv 环境请参照我其余博客,欢迎关注我的 Git hub:
Git Hub:点击这里
Python 配置:点击这里
Opencv 配置:点击这里


 773
773

 被折叠的 条评论
为什么被折叠?
被折叠的 条评论
为什么被折叠?
 到【灌水乐园】发言


