


下面是用MyEcplise开发工具 为例
使用Ecplise操作步骤雷同于MyEcplise
1.第一步

2.搜索MyBatis
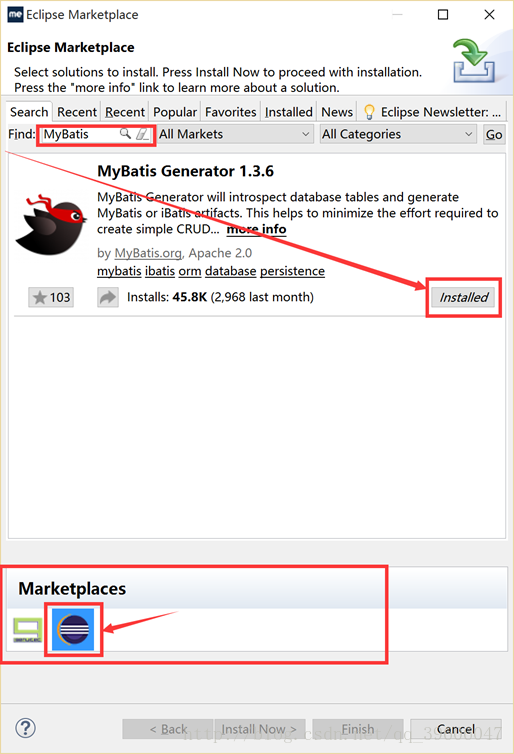
等待装载完成,完成后
3.创建一个web项目
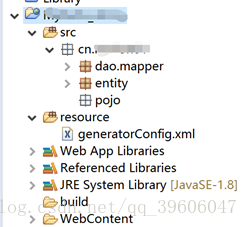
创建包,
创建generatorConfig.xml文件
<?xml version="1.0" encoding="UTF-8"?>
<!DOCTYPE generatorConfiguration PUBLIC"-//mybatis.org//DTD MyBatis GeneratorConfiguration 1.0//EN" "http://mybatis.org/dtd/mybatis-generator-config_1_0.dtd">
<generatorConfiguration >
<context id="context1">
<!-- 取消注释 -->
<!--org.mybatis.generator.config.PropertyRegistry -->
<commentGenerator>
<property name="suppressAllComments"value="true"/>
</commentGenerator>
<!-- 数据库连接 -->
<jdbcConnection connectionURL="jdbc:mysql://localhost:3306/dataBaseName"driverClass="com.mysql.jdbc.Driver" password="123456" userId="1234"/>
<!-- 实体类的目录 -->
<javaModelGenerator targetPackage="实体目录包" targetProject="项目名" />
<!-- 映射文件的目录 -->
<sqlMapGenerator targetPackage="映射文件包.mapper" targetProject="项目名">
<property name="enableSubPackages"value="true" />
</sqlMapGenerator>
<!-- 映射接口的目录
type:表示生成策略,
XMLMAPPER 配置xml
ANNOTATEDMAPPER 配置注解
targetPackage:存放的包
targetProject:项目名
-->
<javaClientGenerator targetPackage="包名" targetProject="项目名称" type="ANNOTATEDMAPPER"/>
<table tableName="表1" enableCountByExample="false"enableSelectByExample="false" enableUpdateByExample="false" enableDeleteByExample="false"></table>
<table tableName="表2" enableCountByExample="false"enableSelectByExample="false" enableUpdateByExample="false" enableDeleteByExample="false"></table>
</context>
</generatorConfiguration>
写好generatorConfig.xml该文件
创建好映射包,实体包

运行,反向工程建立完成


 346
346


 被折叠的 条评论
为什么被折叠?
被折叠的 条评论
为什么被折叠?
 到【灌水乐园】发言


