


 这篇博客介绍了如何利用Mediapipe的Python库进行人脸检测和3D人脸地标的应用。通过示例代码展示了如何处理静态图像,包括人脸检测并标注鼻尖坐标,以及绘制3D人脸地标。 Mediapipe的Python接口安装简单,而C++版本的安装相对复杂。博主计划进一步研究Mediapipe在Windows和Linux上的C++版本安装与使用。
mediapipe python的简单应用
前言
这是mediapipe python库的简单应用,比如人脸检测及3D人脸地标。
一、mediapipe
mediapipe是谷歌于2020年开源的一套支持跨平台机器学习解决方案。
二、mediapipe python库
1.引入库
直接pip下载极其缓慢,被迫使用国内镜像源下载,于实际发布的版本有差异。
pip install mediapipe
2.简单应用
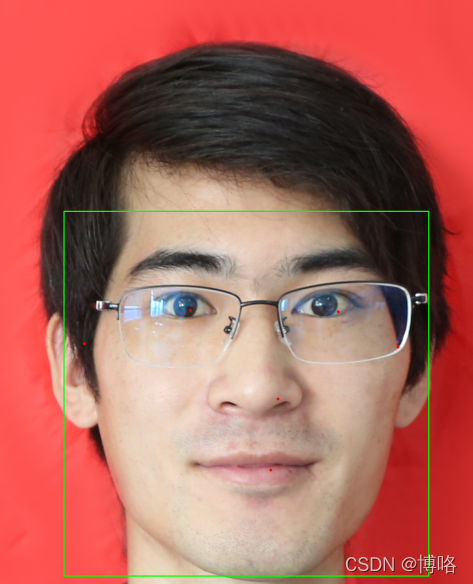
代码如下(人脸检测):
import cv2
import mediapipe as mp
import face_mesh_connections

def face_detection():
    mp_face_detection = mp.solutions.face_detection
    mp_drawing = mp.solutions.drawing_utils

    mp_drawing_styles = mp.solutions.drawing_styles
    mp_face_mesh = mp.solutions.face_mesh
    # 人脸检测
    # 对于静态图像:
    IMAGE_FILES = ["boluo.jpg"]
    with mp_face_detection.FaceDetection(min_detection_confidence=0.5) as face_detection:
        for idx, file in enumerate(IMAGE_FILES):
            image = cv2.imread(file)
            # 将BGR图像转换为RGB,并使用MediaPipe人脸检测进行处理:
            results = face_detection.process(cv2.cvtColor(image, cv2.COLOR_BGR2RGB))

            # 绘制每个人脸的人脸检测
            if not results.detections:
                continue
            annotated_image = image.copy()
            for detection in results.detections:
                print('Nose tip:')
                print(mp_face_detection.get_key_point(
                    detection, mp_face_detection.FaceKeyPoint.NOSE_TIP))
                mp_drawing.draw_detection(annotated_image, detection)
            cv2.imwrite('annotated_image' + str(idx) + '.png', annotated_image)
            cv2.namedWindow("MediaPipe Face Detection", 0)
            cv2.imshow('MediaPipe Face Detection', cv2.flip(annotated_image, 1))
            if cv2.waitKey(0) & 0xFF == 27:
                break
效果如下:
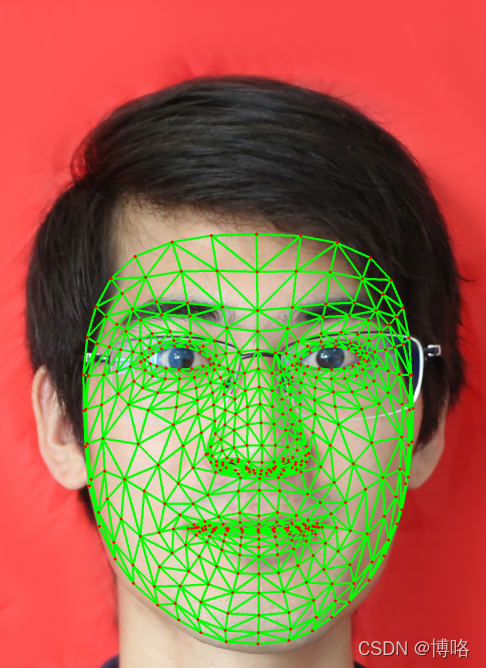
代码如下(3D人脸地标):
def face_mesh():
    mp_drawing = mp.solutions.drawing_utils
    # mp_drawing_styles = mp.solutions.drawing_styles
    mp_face_mesh = mp.solutions.face_mesh
    mp_face_mesh_connection = face_mesh_connections
    # For static images:
    IMAGE_FILES = ["boluo.jpg"]
    drawing_spec = mp_drawing.DrawingSpec(thickness=1, circle_radius=1)
    with mp_face_mesh.FaceMesh(
            static_image_mode=True,
            max_num_faces=1,

            min_detection_confidence=0.5) as face_mesh:
        for idx, file in enumerate(IMAGE_FILES):
            image = cv2.imread(file)
            # Convert the BGR image to RGB before processing.
            results = face_mesh.process(cv2.cvtColor(image, cv2.COLOR_BGR2RGB))

            # Print and draw face mesh landmarks on the image.
            if not results.multi_face_landmarks:
                continue
            annotated_image = image.copy()
            for face_landmarks in results.multi_face_landmarks:
                # print('face_landmarks:', face_landmarks.landmark)
                mp_drawing.draw_landmarks(
                    image=annotated_image,
                    landmark_list=face_landmarks,
                    # landmark_drawing_spec=mp_drawing.DrawingSpec(color=(255, 255, 255)),
                    connections=mp_face_mesh_connection.FACEMESH_TESSELATION,
                    connection_drawing_spec=mp_drawing.DrawingSpec(color=(0, 255, 0), thickness=3)
                )

            cv2.imwrite('face_mesh_image' + str(idx) + '.png', annotated_image)
            cv2.namedWindow("MediaPipe Face Detection", 0)
            cv2.imshow('MediaPipe Face Detection', cv2.flip(annotated_image, 1))
            if cv2.waitKey(0) & 0xFF == 27:
                break
效果如下:
总结
mediapipe python库的安装和简单使用都比较简单,C++等其它版本安装较为复杂。
后期继续琢磨一下mediapipe C++版本在Window和linux的安装和使用。


 1030
1030

 被折叠的 条评论
为什么被折叠?
被折叠的 条评论
为什么被折叠?
 到【灌水乐园】发言


