


spring cloud config
项目环境
1、IDE:idea ,maven
2、操作系统:win10
3、jdk:1.8
4、springboot 2.1.6.RELEASE ,springcloud Greenwich.SR1
介绍
Spring Cloud Config 是 Spring Cloud 微服务体系中的中配置中心,是微服务中不可或缺的一部分,其能够很好地将程序中配置日益增多的各种功能的开关、参数的配置、服务器的地址,配置修改后实时生效,灰度发布,分环境、分集群管理配置等进行全面的集中化管理,有利于系统的配置管理和维护。
在互联网时代,应用都是分布式系统,部署在 N 台服务器上,想要去线上一台台地重启机器肯定不靠谱,并且维护成本也很高,所以配置中心应运而生。配置中心被用作集中管理不同环境( Dev 、 Test 、 Stage 、 Prod )和不同集群配置,以及在修改配置后将实时动态推送到应用上进行刷新。
创建git仓库
springcloud config 要配合git使用,所以首先要创建一个git仓库
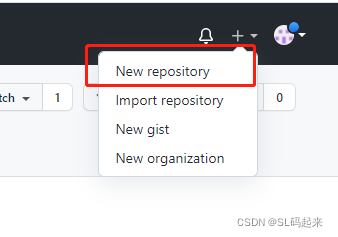
登录GitHub,右上角有个New repository
1、 新建仓库
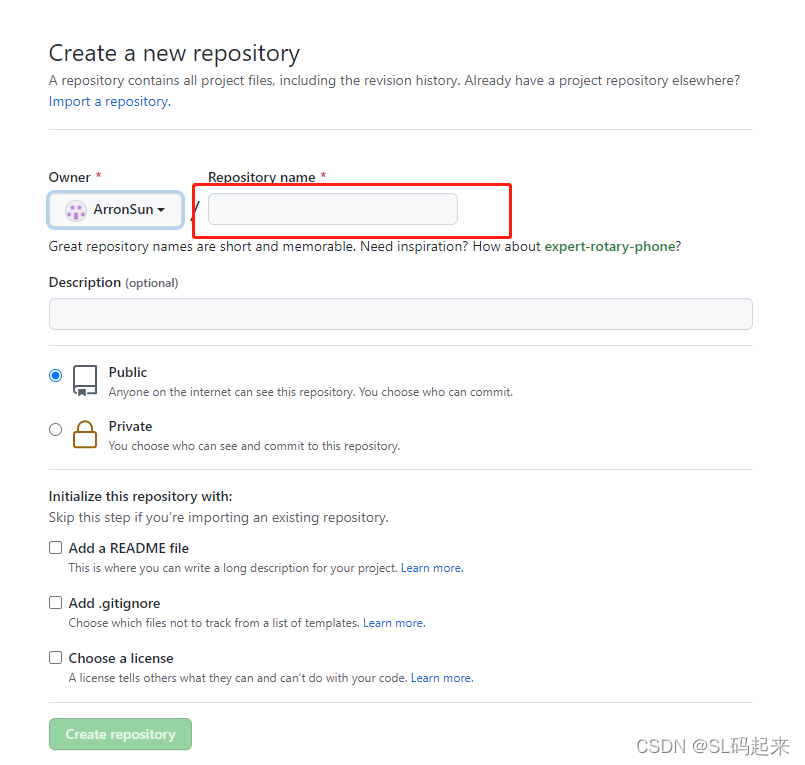
2、输入仓库名
 3、根据GitHub提示提交本地代码
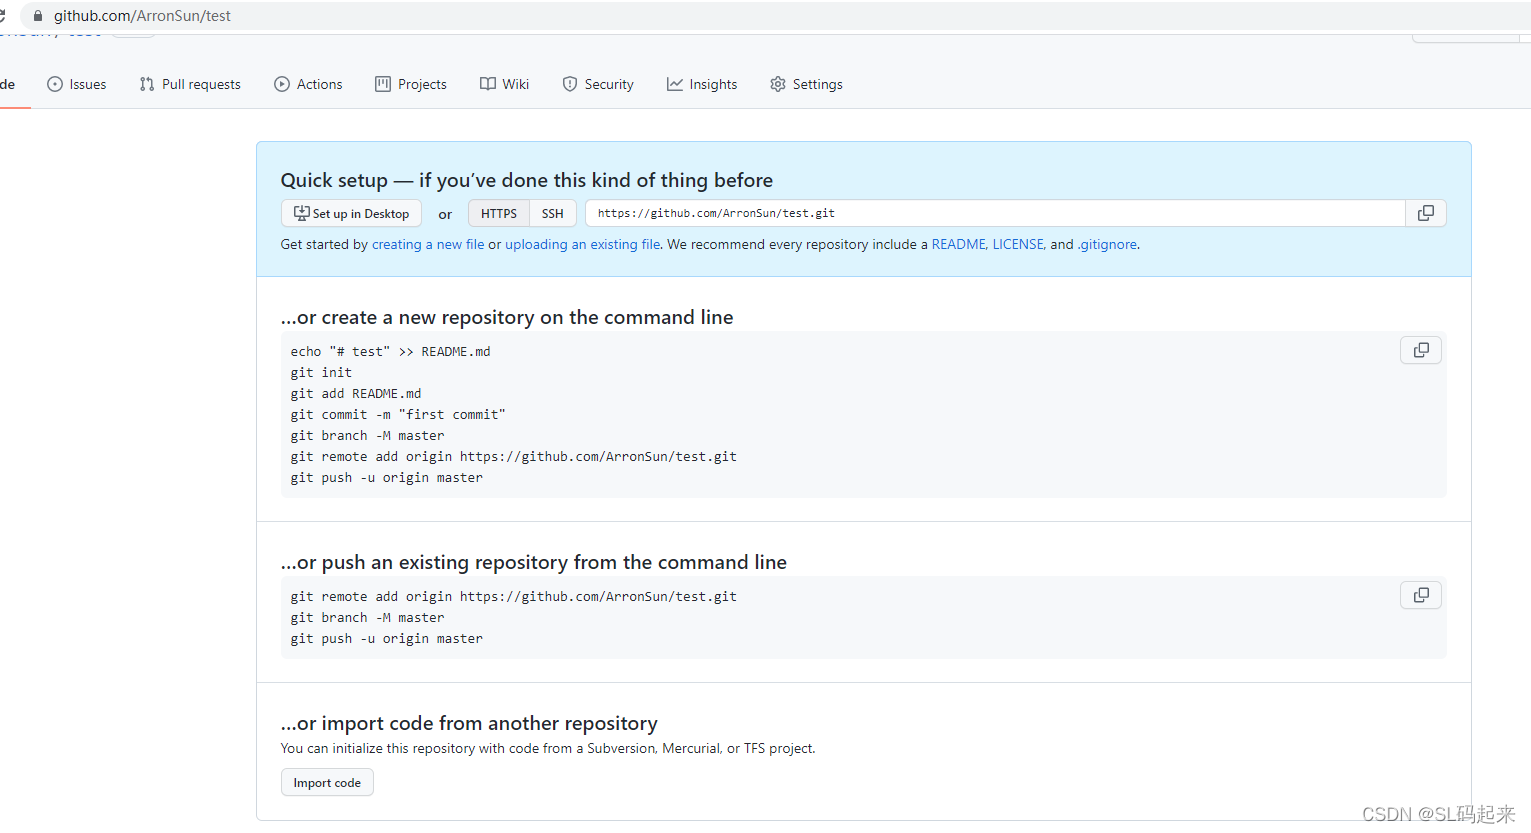 提示:2021.8.13之后GitHub 的操作都是以token的形式for-git-operations
token的获取在Settings /Developer settings/Personal access tokens/ Generate new token
拉取代码要以token形式https://your_token@github.com/ArronSun/micro-services-config.git
我的配置的GitHub地址是https://github.com/ArronSun/micro-services-config.git,在micro-services-config仓库下提交配置文件,
我的配置文件是放到了config文件夹下
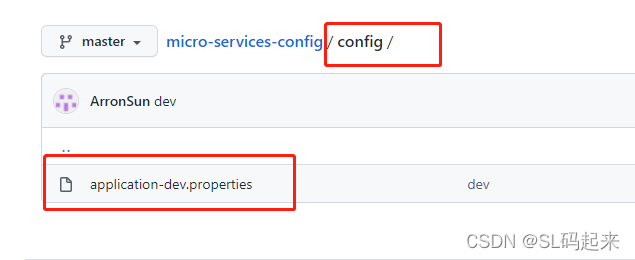
application-dev.properties
site.sunlong.profile=dev
config server
1、创建springboot 基础项目,cloud-config-server,依赖如下
<dependencies>
      <dependency>
          <groupId>org.springframework.cloud</groupId>
          <artifactId>spring-cloud-config-server</artifactId>
      </dependency>
</dependencies>
2、启动类加上EnableConfigServer注解
@EnableConfigServer
@SpringBootApplication
public class CloudConfigServerApplication {
    public static void main(String[] args) {
        SpringApplication.run(CloudConfigServerApplication.class, args);
    }
}
3、配置文件 application.properties
server.port=8101

spring.application.name=cloud-config-server

spring.cloud.config.server.git.uri=https://github.com/ArronSun/micro-services-config.git
spring.cloud.config.server.git.username=ArronSun
#GitHub token
spring.cloud.config.server.git.password=ghp_xxxxxxxxxxxxxxxxxxxxxxxxxxx
# 仓库路径下相对搜索位置,可以配置多个
spring.cloud.config.server.git.search-paths=config
# 连接git 超时时间
spring.cloud.config.server.git.timeout=30
启动CloudConfigServerApplication,访问http://localhost:8101/app/dev/master
// 20211203151258
// http://localhost:8101/app/dev/master

{
  "name": "app",
  "profiles": [
    "dev"
  ],
  "label": "master",
  "version": "71c8e92b2e39bb35b5a1d2d21f1187f8c714ca9f",
  "state": null,
  "propertySources": [
    {
      "name": "https://ghp_xxxxxxxxxxxxxxxxxxxxxxx@github.com/ArronSun/micro-services-config.git/config/application-dev.properties",
      "source": {
        "site.sunlong.profile": "dev"
      }
    }
  ]
}
访问成功后,idea控制台会输出以下内容
2021-12-03 15:16:35.023 INFO 48824 --- [nio-8101-exec-7] o.s.c.c.s.e.NativeEnvironmentRepository : Adding property source: file:/C:/Users/ADMINI~1/AppData/Local/Temp/config-repo-3471101335122200905/config/application-dev.properties
官方给的配置信息和url之间的映射关系:官方地址
/{application}/{profile}[/{label}]
/{application}-{profile}.yml
/{label}/{application}-{profile}.yml
/{application}-{profile}.properties
/{label}/{application}-{profile}.properties
字段解释:
{application}代表应用名
{profile}对应激活的环境,例如:prod、dev、test等
{label}代表git分支名,如果不写默认是master
如果git的配置文件只有一个,应用名是application,这种情况下URL连接中的应用名只要不为空输入任意字符都能访问到这个唯一的配置文件。这种情况只限于应用名是application切只有一个文件。例如:访问http://localhost:8101/configServer/dev/ 也能成功访问
// 20211203185614
// http://localhost:8101/configServer/dev/

{
  "name": "configServer",
  "profiles": [
    "dev"
  ],
  "label": null,
  "version": "71c8e92b2e39bb35b5a1d2d21f1187f8c714ca9f",
  "state": null,
  "propertySources": [
    {
      "name": "https://ghp_xxxxxxxxx@github.com/ArronSun/micro-services-config.git/config/application-dev.properties",
      "source": {
        "site.sunlong.profile": "dev"
      }
    }
  ]
}
至此springcloud config server简单使用就算完成了
config client
新建一个cloud-config-client用于读取GitHub上配置文件
1、创建一个cloud-config-client springboot项目,依赖如下
<dependencies>
        <dependency>
            <groupId>org.springframework.cloud</groupId>
            <artifactId>spring-cloud-config-client</artifactId>
        </dependency>

        <dependency>
            <groupId>org.springframework.boot</groupId>
            <artifactId>spring-boot-starter-web</artifactId>
        </dependency>
    </dependencies>
2、配置文件
application.properties
server.port=8201

spring.application.name=cloud-config-client
bootstrap.properties
#bootstrap.properties 会优先于application.properties加载,

# 分支
spring.cloud.config.label=master
# cloud server 地址
spring.cloud.config.uri=http://localhost:8101
# 要请求那个名称的的远程文件,多个用逗号分隔. 和下面的profile连接,就会访问application-dev.properties
spring.cloud.config.name=application
# profile
spring.cloud.config.profile=dev
application.properties:对应的是用户级的资源配置项
bootstrap.properties:对应的是系统级的资源配置,其优先级更高
3、测试使用
新建一个ConfigInfoProperties.java,对应着GitHub的配置文件
@Configuration
@ConfigurationProperties(prefix = "site.sunlong")
public class ConfigInfoProperties {
    private String profile;

    public String getProfile() {
        return profile;
    }
    public void setProfile(String profile) {
        this.profile = profile;
    }
}
新建一个ConfigClientController类用于测试
@RequestMapping("configClient")
@RestController
public class ConfigClientController {

    @Autowired
    private ConfigInfoProperties configInfoProperties;

    @GetMapping("config")
    public String getConfig(){
        return configInfoProperties.getProfile();
    }

}
启动CloudConfigClientApplication,访问http://localhost:8201/configClient/config
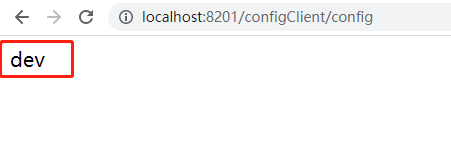
至此,一个简单的sprigcloud config client就完成了。
动态刷新
修改GitHub上的config/application-dev.properties配置文件内容,把site.sunlong.profile的值从dev修改为this is dev profile test,
再次访问config 客户端 http://localhost:8201/configClient/config,发现结果还是dev,数据并没有实时更新,这肯定不是我们想要的结果,我们想要的是GitHub上配置文件修改之后,能够获取到最新的数据。
接下来改造cloud-config-client项目,以实现动态刷新
手动刷新
1、添加actuator监控模块依赖,actuator模块包括了/refresh端点的实现,该端点用于实现客户端应用配置信息的重新获取和刷新
 <dependency>
      <groupId>org.springframework.boot</groupId>
      <artifactId>spring-boot-starter-actuator</artifactId>
  </dependency>
2、修改application.properties配置文件
server.port=8201

spring.application.name=cloud-config-client

# actuator 监控
management.endpoints.web.exposure.include=*
3、修改配置类ConfigInfoProperties,加上注解@RefreshScope
@Configuration
@RefreshScope
//@ConfigurationProperties(prefix = "site.sunlong")
public class ConfigInfoProperties {

    @Value("${site.sunlong.profile}")
    private String profile;

    public String getProfile() {
        return profile;
    }
    public void setProfile(String profile) {
        this.profile = profile;
    }
}
4、测试,重启CloudConfigClientApplication,修改GitHubconfig/application-dev.properties配置文件,把site.sunlong.profile的值修改为this is test profile,访问http://localhost:8201/configClient/config发现配置没变,此时通过postman访问http://localhost:8201/actuator/refresh
再次访问http://localhost:8201/configClient/config,发现配置已修改为最新的

自动刷新
当服务很多的时候,如果忘记或者遗漏服务的话就会造成服务出错,此时就需要自动刷新,只要提交到GitHub,配置就能自动刷新,这要配合spring cloud bus消息总线一起使用。
改造cloud-config-server、cloud-config-client
1、分别添加依赖
		<dependency>
            <groupId>org.springframework.cloud</groupId>
            <artifactId>spring-cloud-starter-bus-amqp</artifactId>
        </dependency>

        <dependency>
            <groupId>org.springframework.boot</groupId>
            <artifactId>spring-boot-starter-actuator</artifactId>
        </dependency>
2、分别修改配置文件application.properties,使用rabbitmq 作为消息中间件,添加监控
rabbitmq自行安装,这篇文章关于rabbitmq安装我觉得还是不错的,最起码解决了我的问题https://blog.csdn.net/hzw19920329/article/details/53156015/
# actuator 监控
management.endpoints.web.exposure.include=*

#rabbitmq 配置
spring.rabbitmq.host=localhost
spring.rabbitmq.username=guest
spring.rabbitmq.password=guest
spring.rabbitmq.port=5672
3、重启cloud-config-server、cloud-config-client 进行测试
先访问http://localhost:8201/configClient/config,让客户端拉取最新的GitHub上的配置文件数据,然后修改GitHub上的配置文件
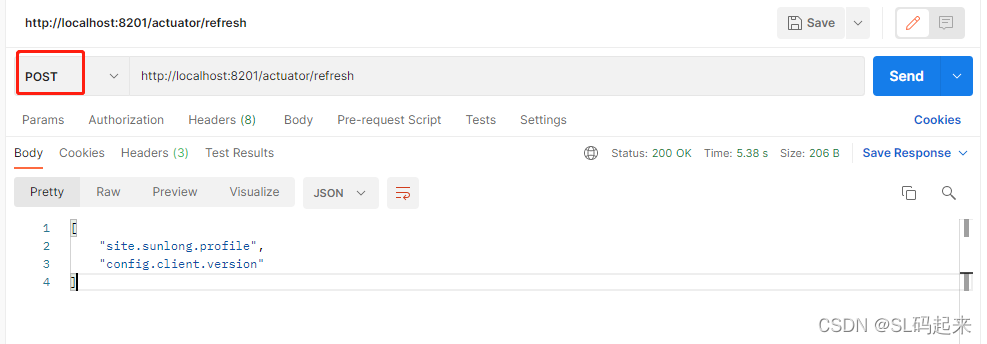
把site.sunlong.profile的值修改为this is test bus,再次访问http://localhost:8201/configClient/config,发现客户端获取的数据没变,通过postman访问配置中心 http://localhost:8101/actuator/bus-refresh
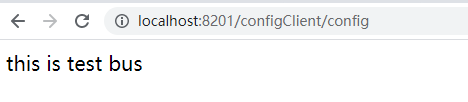
 再次访问http://localhost:8201/configClient/config,发现获取到最新数据了
访问http://localhost:8101/actuator/bus-refresh之后客户端控制台可以看到刷新的GitHub地址、文件以及刷新的keys
2021-12-08 10:14:28.597  INFO 13480 --- [hejPbJTc-kaVA-1] c.c.c.ConfigServicePropertySourceLocator : Fetching config from server at : http://localhost:8101
2021-12-08 10:14:32.469  INFO 13480 --- [hejPbJTc-kaVA-1] c.c.c.ConfigServicePropertySourceLocator : Located environment: name=application, profiles=[dev], label=master, version=c9996fb8e434e18f42c788802cd164a311f9f052, state=null
2021-12-08 10:14:32.470  INFO 13480 --- [hejPbJTc-kaVA-1] b.c.PropertySourceBootstrapConfiguration : Located property source: CompositePropertySource {name='configService', propertySources=[MapPropertySource {name='configClient'}, MapPropertySource {name='https://ghp_xxxxxxxxxxxxxxx@github.com/ArronSun/micro-services-config.git/config/application-dev.properties'}]}
2021-12-08 10:14:32.470  INFO 13480 --- [hejPbJTc-kaVA-1] o.s.boot.SpringApplication               : No active profile set, falling back to default profiles: default
2021-12-08 10:14:32.479  INFO 13480 --- [hejPbJTc-kaVA-1] o.s.boot.SpringApplication               : Started application in 4.408 seconds (JVM running for 981.161)
2021-12-08 10:14:32.544  INFO 13480 --- [hejPbJTc-kaVA-1] o.s.cloud.bus.event.RefreshListener      : Received remote refresh request. Keys refreshed [site.sunlong.profile, config.client.version]
到此结合springcloud bus的动态刷新就完成了。
WebHooks
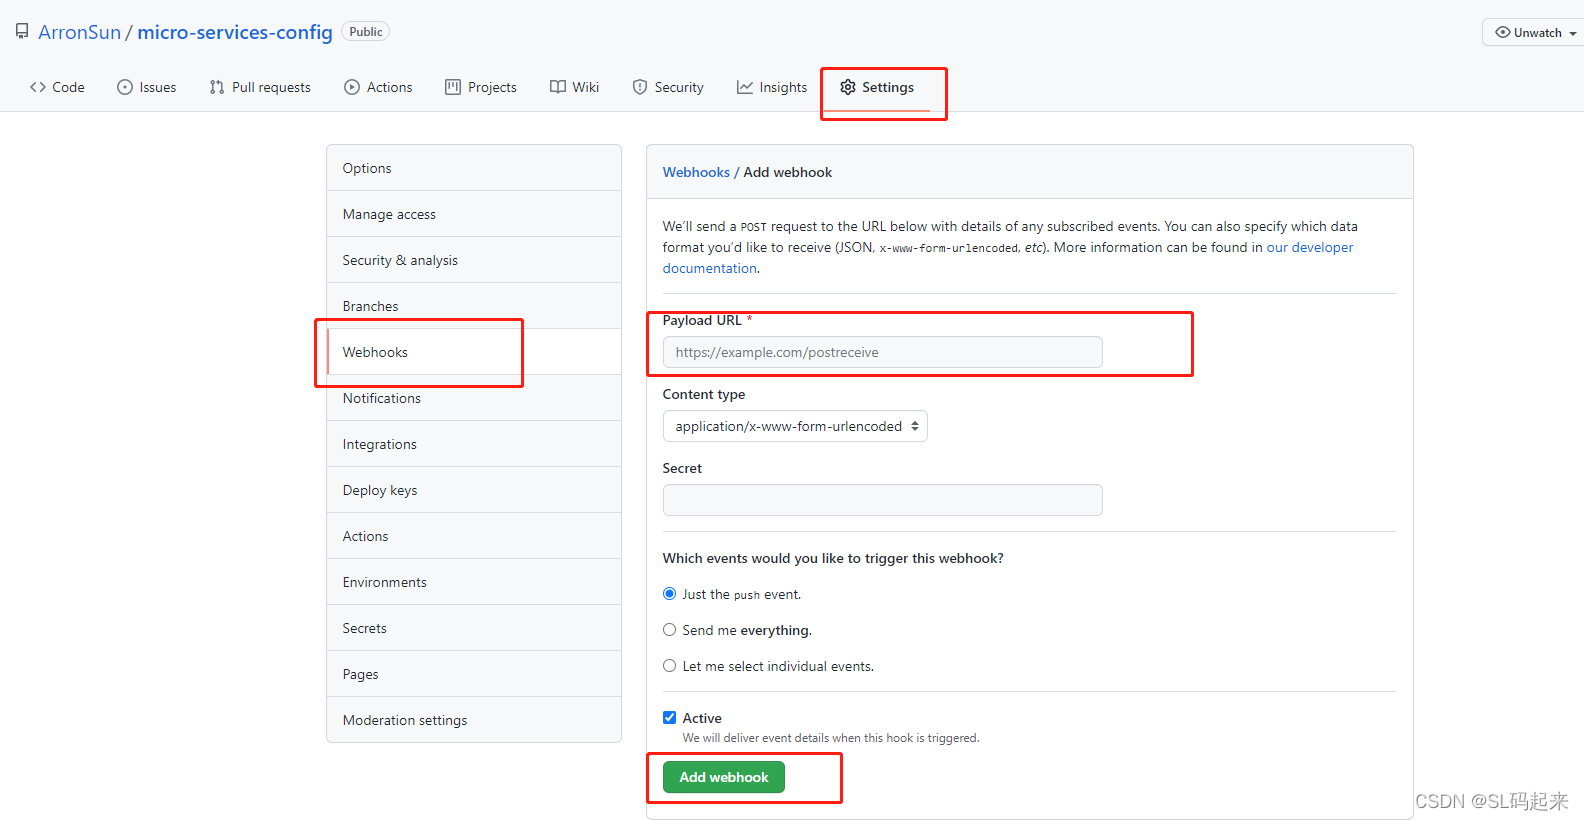
如果每次修改都去手动刷新也不是我们想要的,也不符合我们程序猿的风格,能自动绝不手动。可以在GitHub的WebHooks中配置推送地址,每次有新的push就自动执行刷新操作。
找到配置文件的repository,在setting下面有个webhooks,填写Payload URL推送地址,add webhook即可。这个需要有服务器才能测试,有条件的可以自己尝试一下。
配置中心高可用
当服务很多时,所有服务都从config server获取配置,在项目中config server难免会出现问题,这个时候就需要考虑config server高可用了,就需要config server注册到eureka, 这个时候用户访问的时候不是直接从配置中心获取配置, 而是通过 eureka 中获取配置中心的地址, 再从配置中心获取具体服务的参数就行
继续改造cloud-config-server、cloud-config-client
1、改造cloud-config-server
添加eureka client 依赖
		<dependency>
            <groupId>org.springframework.cloud</groupId>
            <artifactId>spring-cloud-starter-netflix-eureka-client</artifactId>
        </dependency>
修改配置文件application.properties,添加
# 生产者实例名,同一个spring.application.name 名称唯一
eureka.instance.instance-id=cloud-config-server

eureka.client.register-with-eureka=true
# 和eureka服务器通讯的URL
eureka.client.service-url.defaultZone=http://localhost:8001/eureka
# 在地址栏上使用 IP 地址进行显示
eureka.instance.prefer-ip-address=true

# 设置心跳的时间间隔(默认是30秒)
eureka.instance.lease-renewal-interval-in-seconds=5
# eureka server 最后一次收到心跳时等待的时间,超时将会移除client(默认是90秒)
eureka.instance.lease-expiration-duration-in-seconds=3
1、改造cloud-config-client
同样添加eureka client 依赖
		<dependency>
            <groupId>org.springframework.cloud</groupId>
            <artifactId>spring-cloud-starter-netflix-eureka-client</artifactId>
        </dependency>
修改配置文件bootstrap.properties,添加
# 开启通过服务来访问config server
spring.cloud.discovery.enabled=true
# config server 配置中心注册的服务名
spring.cloud.config.discovery.service-id=CLOUD-CONFIG-SERVER

# 和eureka服务器通讯的URL
eureka.client.service-url.defaultZone=http://localhost:8001/eureka
cloud-config-server、cloud-config-client启动类分别加上@EnableEurekaClient注解
测试,启动eureka-server、cloud-config-server、cloud-config-client
访问eureka-sever, http://localhost:8001/,看到cloud-config-server、cloud-config-client就注册成功了

至此springcloud config配置中心的入门操作就完成了。
上篇:springcloud多模块项目一步一步搭建(6)springcloud 网关 zuul
GitHub地址:
https://github.com/ArronSun/micro-services-practice.git
参考书籍:
《重新定义springcloud实战》
《深入理解Spring cloud与微服务构建》
能力一般,水平有限,如有错误,请多指出。


 1203
1203


 被折叠的 条评论
为什么被折叠?
被折叠的 条评论
为什么被折叠?
 到【灌水乐园】发言


