


1、clone code
从github上面下载代码到本地,github地址: [https://github.com/mock-server/mockserver.git](https://github.com/mock-server/mockserver.git)
2、build project
2.1 进入 mockservice中打开cmd
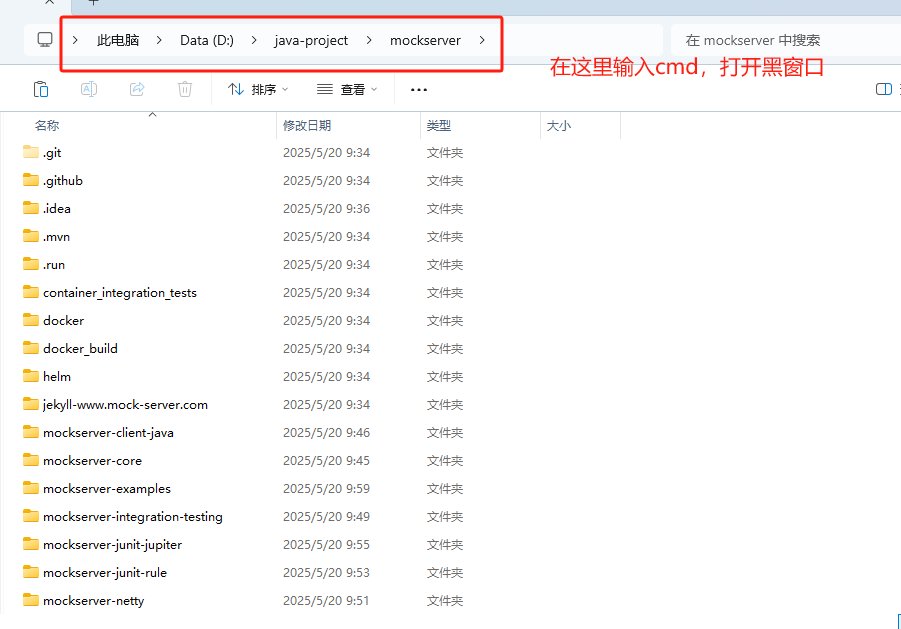
2.2 打包项目
	执行命令:
	先执行   mvn clean
	再执行   mvn package 或者 mvn install
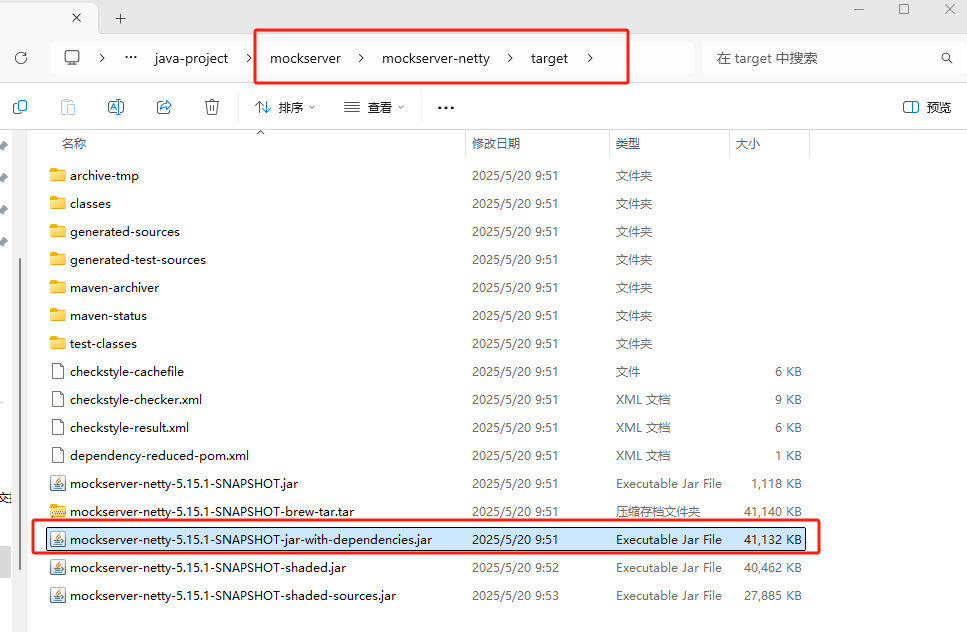
3、找到jar包
3.1 进入mockserver/mockserver-netty/target 目录中,找到 mockserver-netty-5.15.1-SNAPSHOT-jar-with-dependencies.jar 文件
4、执行jar包
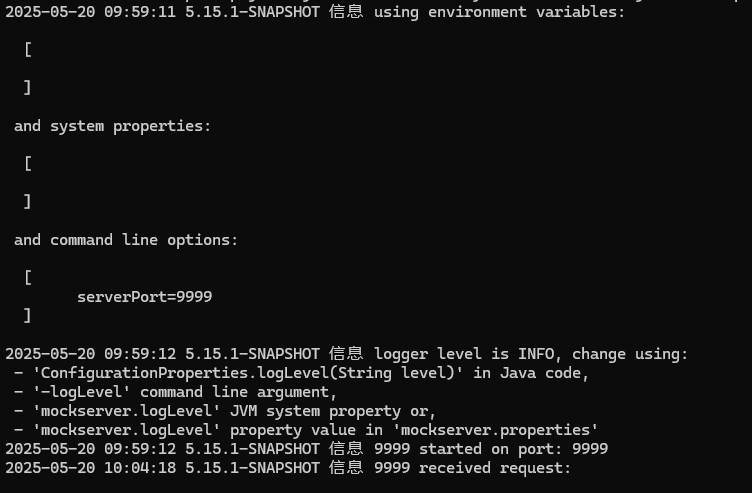
在jar包目录打开cmd,执行命令:
java -jar mockserver-netty-5.15.1-SNAPSHOT-jar-with-dependencies.jar -serverPort 9999
9999表示启动的端口,看到下面这个页面代表启动成功
5、访问 dashboard
地址: localhost:9999/mockserver/dashboar
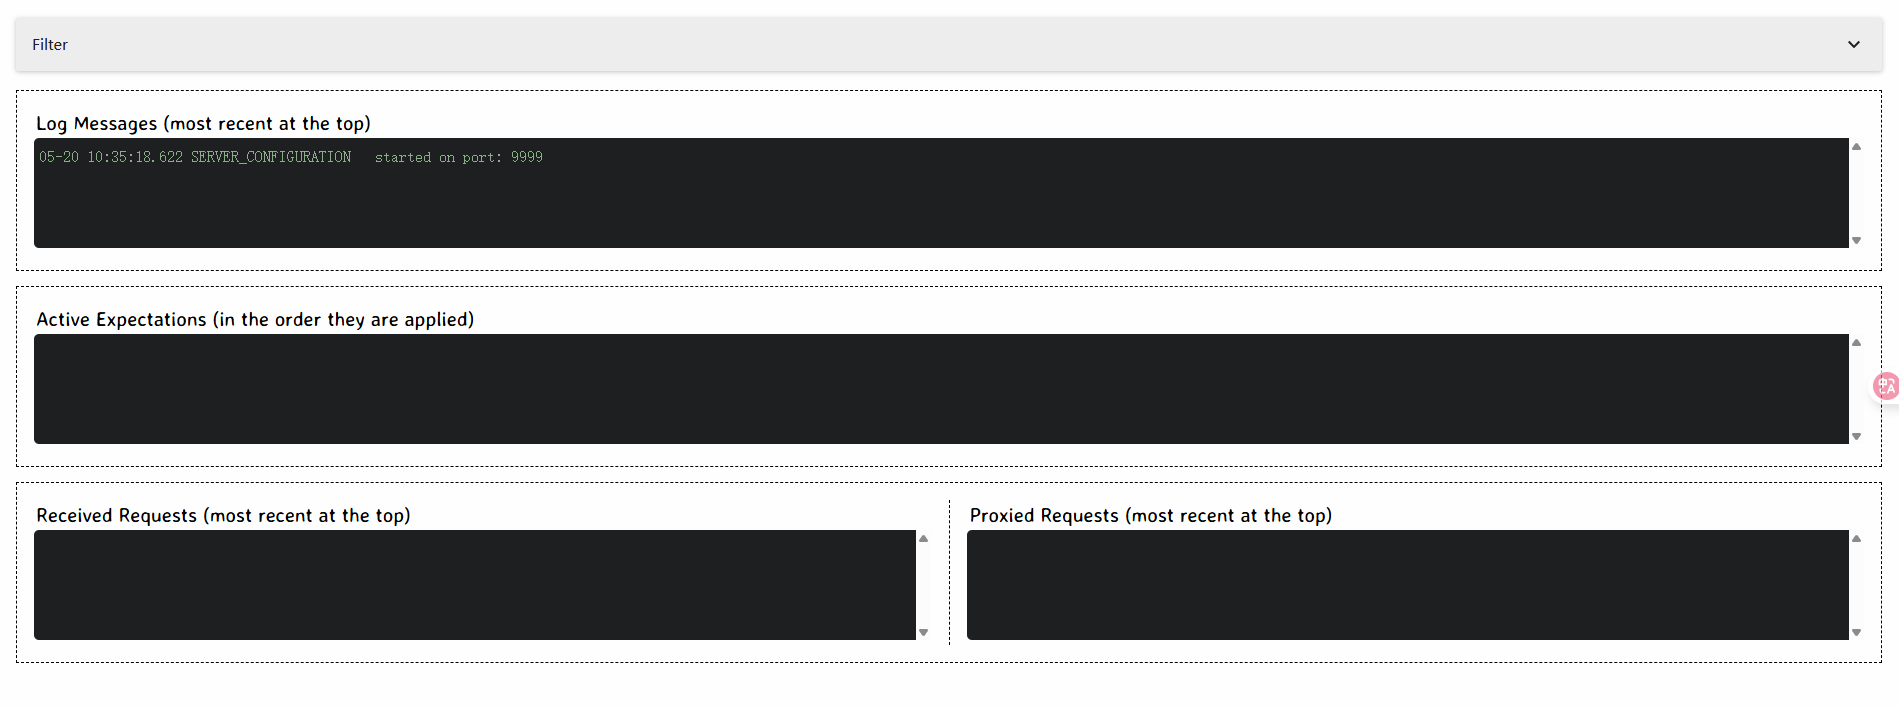
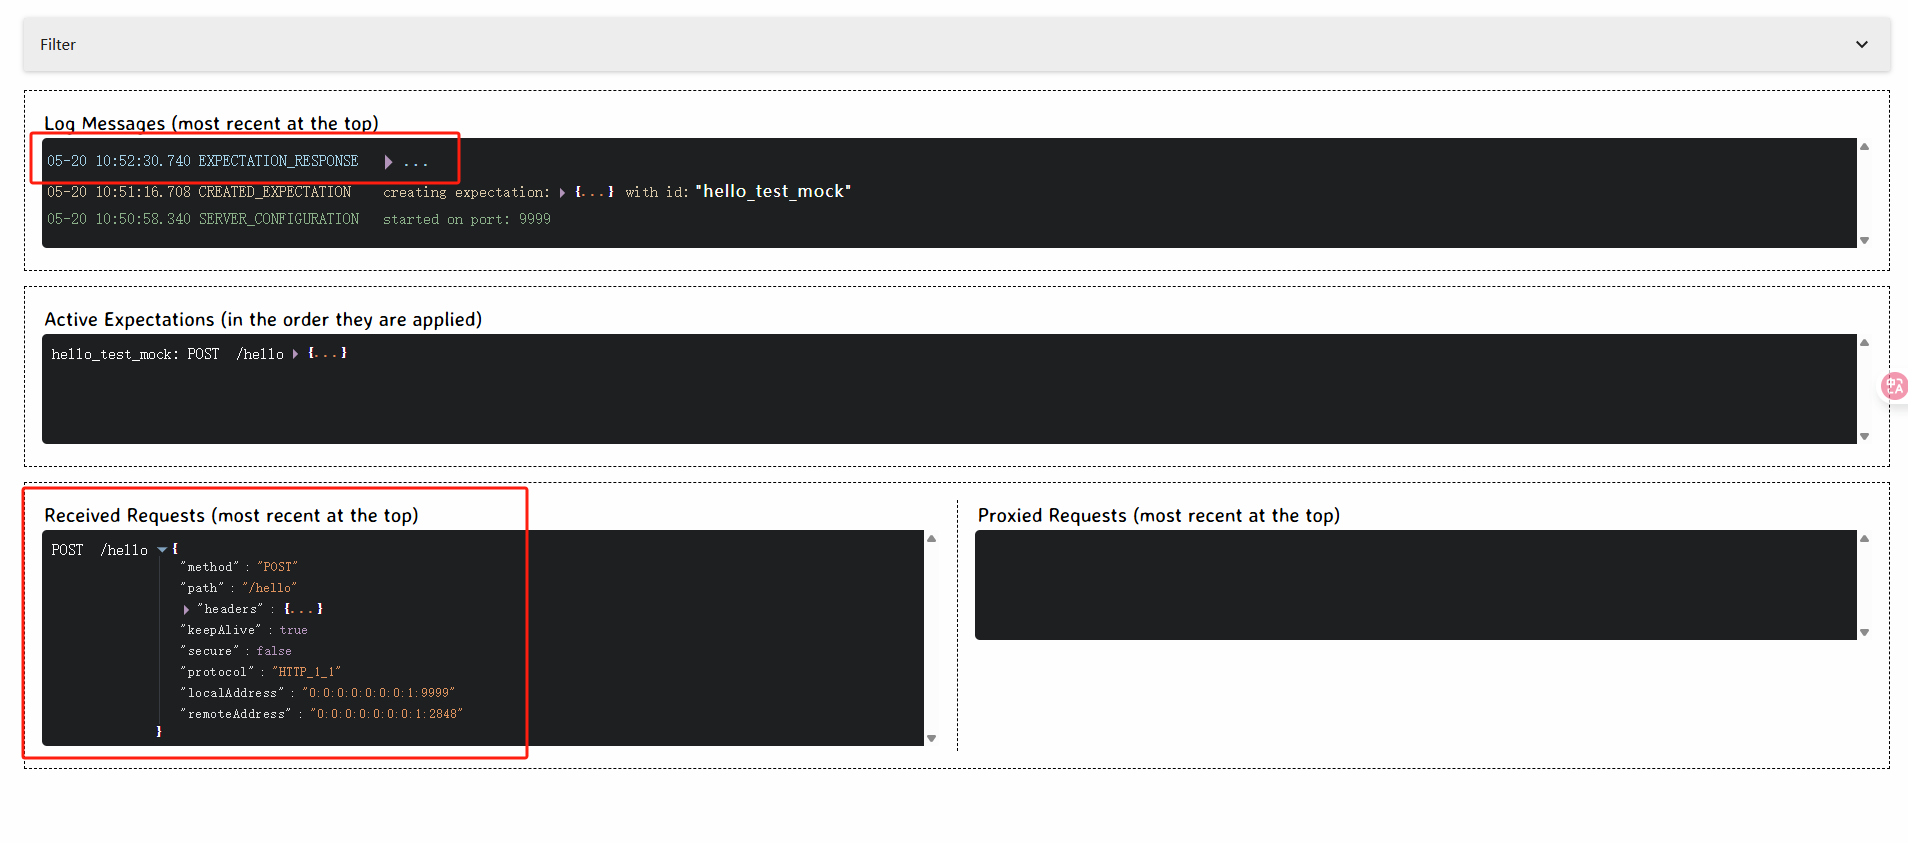
- log messages模块表示请求的日志
- active expectations表示当前已有的模拟接口
- received requests 表示最近访问的请求接口
- proxied requests表示代理的请求
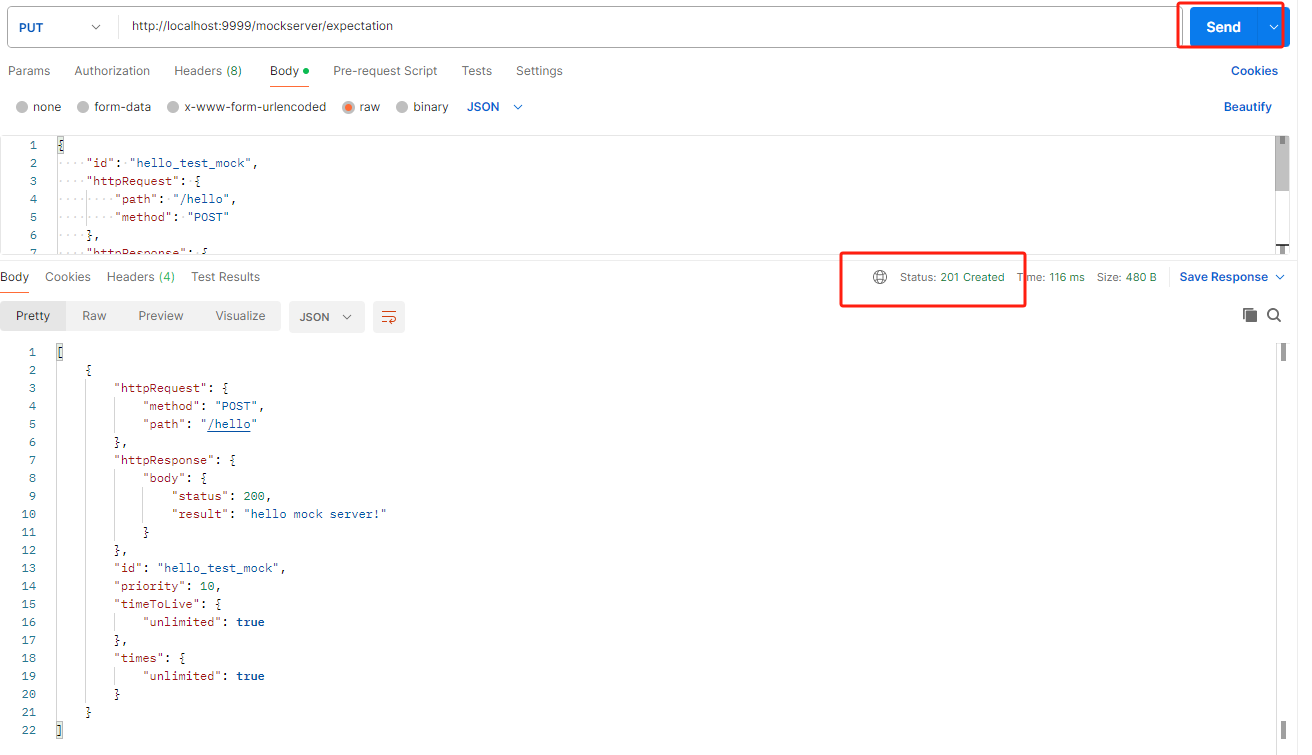
6、往mockserver中插入模拟的接口
在postman中,发送一个put请求
请求地址: http://localhost:9999/mockserver/expectation
请求body json
{
    "id": "hello_test_mock",
    "httpRequest": {
        "path": "/hello",
        "method": "POST"
    },
    "httpResponse": {
        "body": {
            "status": 200,
            "result": "hello mock server!"
        }
    },
    "priority": 10
}
请求体中的参数具体可以在项目里面搜索 curl -X PUT ‘localhost:1080/mockserver/expectation’ 里面有很多例子
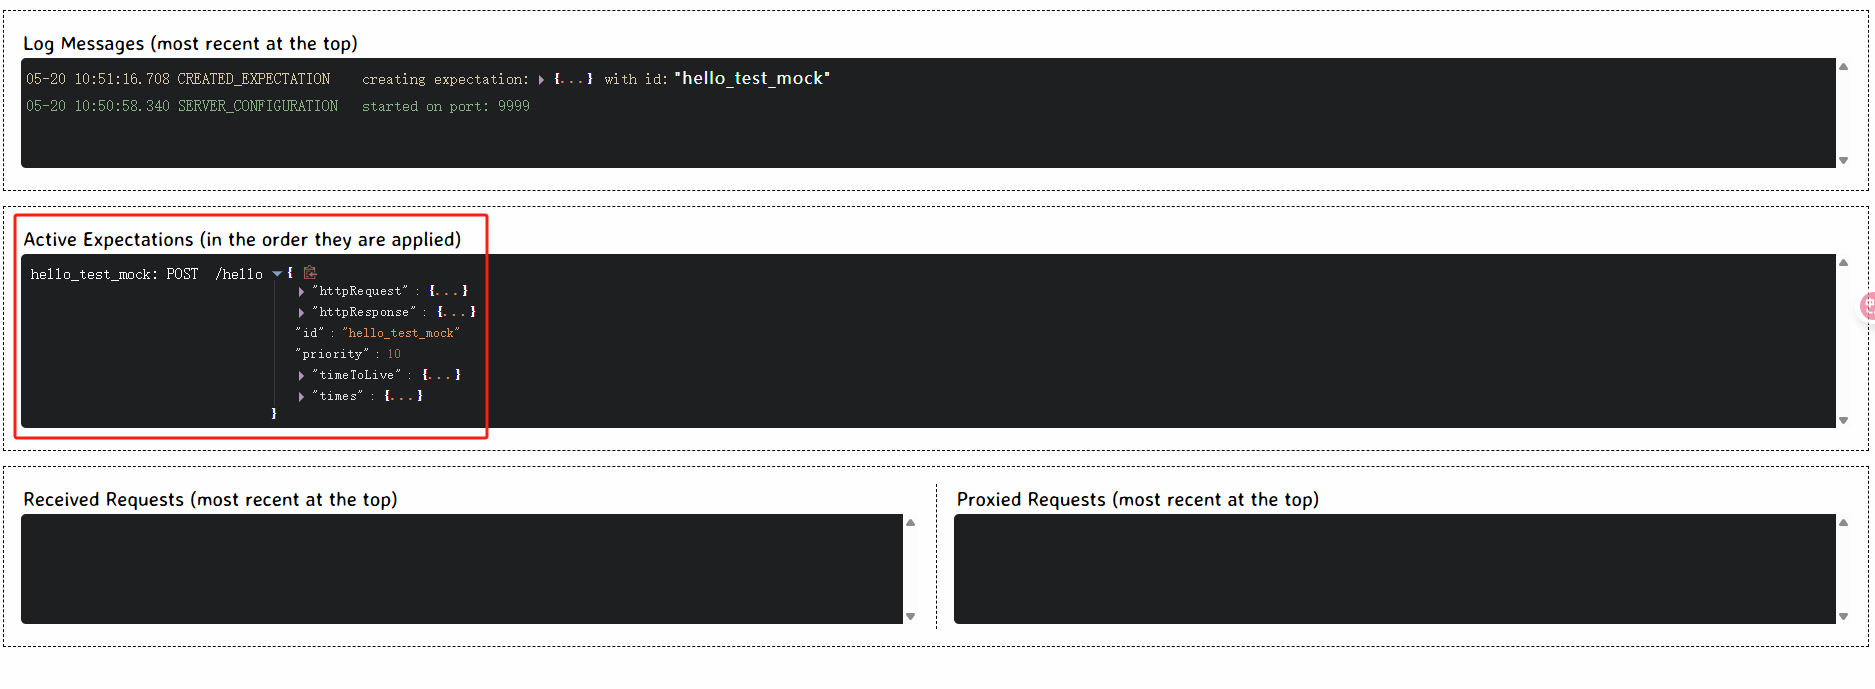
7、验证插入的模拟接口
postman发送一个插入请求
在仪表盘中可以看到已经添加
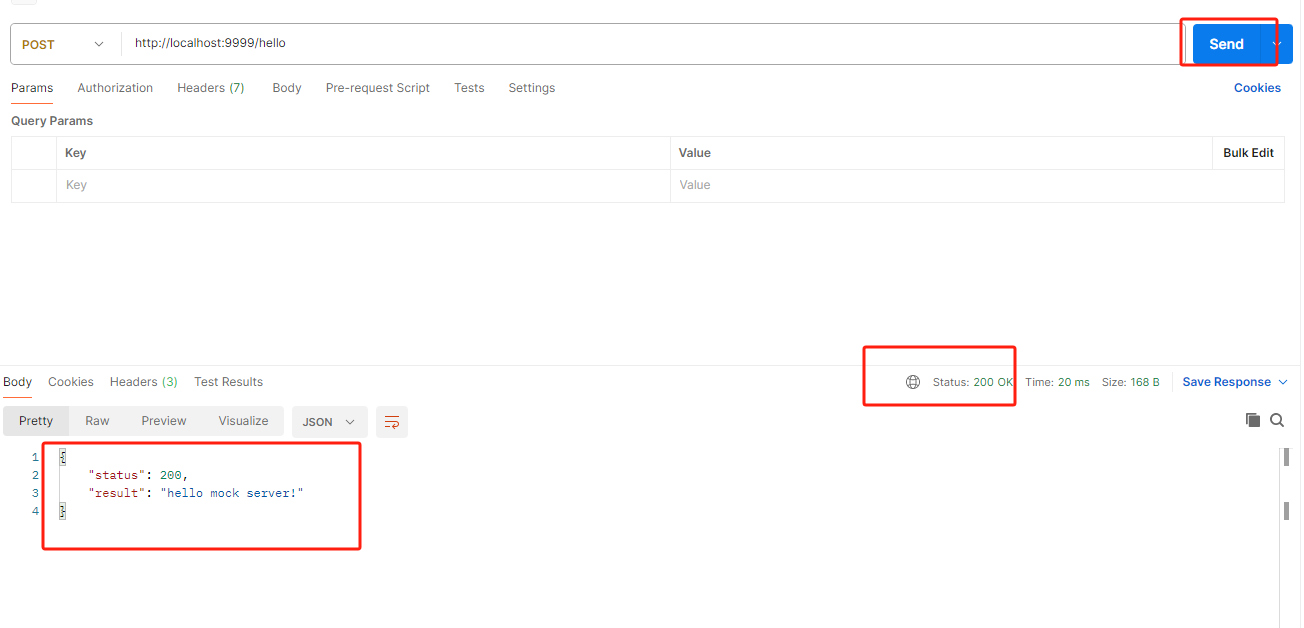
测试请求刚才插入的接口


 1484
1484

 被折叠的 条评论
为什么被折叠?
被折叠的 条评论
为什么被折叠?
 到【灌水乐园】发言


