


一、IOC & DI 概述
1、IOC(Inversion Of Control):其思想是反转资源获取的方向。传统的资源查找方式要求组件向容器发送请求查找资源作为回应,容器适时返回资源。而应用了IOC之后在,则是容器主动地将资源推送给他所管理的组件,组件所要做的仅仅是选择一种合适的方式来接受资源。这种行为也被称为查找的被动形式。
2、DI(Dependency Injection)-----IOC的另一种表述方式:即组件以一些预先定义好的方式(例如:setter方法)接受来自如容器的资源注入。相对于IOC而言,这种表述更为直接
二、配置bean
1、配置形式
1.1、基于xml文件的方式
-ApplicationContext.xml文件
<!--
        配置bean
        class:bean的全类名,通过反射的方式在IOC容器中创建bean、所以要求Bean中必须有无参数的构造函数
        id:表示容器中的bean,id 唯一
     -->
    <bean id="**helloworld**" class="com.ll.spring.beans.HelloWorld">
        <property name="name" value="Spring"></property>
    </bean>
-Main.java
      //1、创建Spring的IOC容器对象
        //ApplicationContext表示IOC容器
        //ClassPathXmlApplicationContext:是ApplicationContext接口的实现类,该实现类从类路径下来加载配置文件
        ApplicationContext ctx = new ClassPathXmlApplicationContext("applicationContext.xml");

        //2、从IOC容器中获取Bean实例
        //利用id定位到IOC容器中的bean
        //HelloWorld helloWorld = ctx.getBean(HelloWorld.class);
        //利用类型返回IOC容器中的Bean,但是要求IOC容器中只能有一个该类型的bean
        HelloWorld helloWorld = (HelloWorld) ctx.getBean("**helloworld**");
-HelloWorld.java
public class HelloWorld {

    private String name;
    public void setName(String name){
        System.out.println("setName ...." + name);
        this.name = name;
    }
    public void hello(){
        System.out.println("hello: " + name);
    }

    public HelloWorld(){        //默认的无参构造类(必须要有)
        System.out.println("HelloWorld's constructor ...");
    }
}
1.2、基于注解的方式(基于注解配置Bean:基于注解来装配Bean的属性)
在classpath中扫描组件
-组件扫描(component scaninig):Spring能够从classpath下自动扫描,侦测和实例化具有特定注解的组件
-特定组件包括
-@Component:基本注解,标识了一个受到Spring管理的组件
-@Respository:标识持久层组件
-@Service:标识服务层(业务层)组件
-@Controller:标识表现层组件
-对于扫描到的组件,Spring有默认的命名策略:使用非限定类名,第一个字母小写,也可以在注解中通过value属性值标识组件。
-当在组件类上使用了特定的注解之后,还需要在Spring的配置文件中声明**context:component-scan**:
-base-package属性指定一个需要扫描的基类包:Spring容器将会扫描到的这个基类包里及其子包中的所有类
-当需要扫描多个包时,可以使用逗号分隔
-如果仅希望扫描特定的类而非基包下的所有类,可以使用resource-parttern属性过滤特定的类,示例:
<context:component-scan base-package="com.ll.spring.beans" resource-pattern="autowire/*.class" />
-context:includ-filter 子节点表示要包含的目标类
-context:exclude-filter 子节点表示要排除在外的目标类
-context:component-scan下可以拥有若干个context:include-filter和context:exclude-filter子节点
    <!--指定IOC容器扫描的包-->
    <!--可以通过resource-pattern指定扫描的资源-->
    <!--<context:component-scan-->
            <!--base-package="com.ll.spring.beans.annotation"-->
            <!--resource-pattern="repository/*.class">-->
    <!--</context:component-scan>-->

    <!--context:exclude-filter 子节点指定排除哪些表达式的组件-->
    <!--context:include-filyer 子节点指定包含哪些表达式的组件,该子节点需要设置use-default-filters="false"-->
    <context:component-scan
            base-package="com.ll.spring.beans.annotation"
            use-default-filters="false">
        <!--<context:exclude-filter type="annotation" expression="org.springframework.stereotype.Repository"></context:exclude-filter>-->
        <!--<context:include-filter type="annotation" expression="org.springframework.stereotype.Repository"></context:include-filter>-->
        <!--<context:exclude-filter type="assignable" expression="com.ll.spring.beans.annotation.repository.UserRepository"></context:exclude-filter>-->
        <context:include-filter type="assignable" expression="com.ll.spring.beans.annotation.repository.UserRepository"></context:include-filter>
    </context:component-scan>
----组件装配
-context:component-scan元素还会自动注册AutowireAnnotationBeanProcessor实例,该实例可以自动装配具有**@Autowired和@Resource、@Inject注解的属性
-@Autowired注解自动装配具有兼容性类型的单个Bean属性
-构造器,普通字段(即使是非public),一切具有参数的方法都可以应用@Autowired注解
-默认情况下,所有使用@Autowire注解的属性都需要被设置,当Spring找不到匹配的Bean装配属性时,会抛出异常;若某一属性允许不被设置,可以设置@Autowired注解的required属性为false
-默认情况下,当IOC容器里存在多个类型兼容的Bean时,通过类型的自动装配将无法工作,此时可以在@Qualifilter**注解提供Bean的名称。Spring允许对方法入参标注@Qualifiter已制定注入Bean的名称
-@Autowired注解也可以应用在数组类型的属性上,此时Spring会把所有匹配的Bean进行自动装配
-@Autowired注解也可以应用在集合属性上,此时Spring读取该集合的类型信息,然后自动装配所有与之兼容的Bean
-@Autowired注解用在java.util.Map上时,若该Map的键值为String,那么Spring将自动装配与之Map值类型兼容的Bean,此时Bean的名称作为键值
2、bean的配置方式:
2.1、通过全类名(反射)
2.2、通过工厂方法(静态工厂方法&实例工厂方法)
2.1.1、静态工厂方法
-调用静态工厂方法创建Bean是将对象创建的过程封装到静态方法中去,当客户端需要对象时,只需要简单地调用静态方法,而不用关心创建对象的细节。
-要声明通过静态方法创建的Bean,需要在Bean的class属性里指定拥有该工厂方法的类,同时在factory-method属性里指定工厂方法的名称。最后,使用****元素为该方法传递方法参数。
StaticCarFactory.java
/**
 * 静态工厂方法:直接调用某一个类的静态方法就可以返回bean的实例
 */
public class StaticCarFactory {

    public static Map<String,Car> cars = new HashMap<String, Car>();

    static{
        cars.put("audi",new Car("audi",300000));
        cars.put("ford",new Car("ford",400000));

    }
    //静态工厂方法
    public static Car getCar(String name){

        return cars.get(name);
    }
}
beans-factory.xml
<!--通过静态工厂方法来配置bean,注意不是配置静态静态工厂方法实例,而是配置bean实例-->
    <!--
        class属性:指向静态工厂方法的全类名
        factory-method:指向静态工厂方法的名字
        constructor-arg:如果工厂方法需要传入参数,则使用此参数传递
    -->
    <bean id="car1" class="com.ll.spring.beans.factory.StaticCarFactory"
        factory-method="getCar">
        <constructor-arg value="audi"></constructor-arg>
    </bean>
2.1.2、实例工厂方法
-将对象的创建过程封装到另外一个对象实例的方法中,当客户端需要请求对象时,只需要简单的调用该实例方法而不需要关心对象的创建细节
-要声明通过实例工厂方法创建的Bean。在bean的factory-bean中指定拥有该工厂方法的Bean; 在factory-menthod属性里面指定该工厂方法的名称; 使用constructor-arg元素为工厂方法传递参数
InstanceCarFactory.java
/**
 * 实例工厂方法:实例工厂的方法,即先需要创建工厂本身,再调用工厂的实例方法来返回bean的实例
 */
public class InstanceCarFactory {

    private Map<String,Car> cars = null;

    public InstanceCarFactory(){
        cars = new HashMap<String, Car>();
        cars.put("audi",new Car("audi",300000));
        cars.put("ford",new Car("ford",400000));
    }

    public Car getCar(String brand){
        return cars.get(brand);
    }

}
beans-factory.xml
   <!--配置工厂的实例-->
    <bean id="carFactory" class="com.ll.spring.beans.factory.InstanceCarFactory"></bean>
    <!--通过实例工厂方法来配置bean-->
    <!--
        factory-bean属性 :指向实例工厂方法的全类名
        factory-method:指向静态工厂方法的名字
        constructor-arg:如果工厂方法需要传递参数,则使用constructor-arg来配置参数
    -->
    <bean id="car2" factory-bean="carFactory" factory-method="getCar">
        <constructor-arg value="ford"></constructor-arg>
    </bean>
2.3、FactoryBean
CarFactoryBean.java
//自定义的FactoryBean需要实现FactoryBean接口
public class CarFactoryBean implements FactoryBean {

    private String brand;
    public void setBrand(String brand) {
        this.brand = brand;
    }
    //返回bean的对象
    public Object getObject() throws Exception {
        return new Car(brand,500000);
    }
    /**
     * 返回bean的类型
     * @return
     */
    public Class<?> getObjectType() {
        return Car.class;
    }
    public boolean isSingleton() {
        return true;
    }
}
beans-factorybean.xml
<!--
        通过FactoryBean来配置Bean的实例,
        class:指向FactoryBean的全类名
        property:配置FactoryBean的属性

        但是实际返回的实例却是FactoryBean的getObject()方法返回的实例!
    -->
    <bean id="car" class="com.ll.spring.beans.factorybean.CarFactoryBean">
        <property name="brand" value="BMW"></property>
    </bean>
3、IOC容器BeanFactory & ApplicationContext概述
3.1、在SpringIOC容器读取Bean配置创建Bean实例之前,必须对它进行实例化。只有在容器实例化之后,才可以从IOC容器里获取Bean的实例并且使用
3.2、Spring提供了两种类型的IOC容器实现
-BeanFactory:IOC容器的基本实现
-ApplicationContext:提供了更多的高级特性,是BeanFactory的子接口
-BeanFactory是Spring框架里面的基础设施,面向Spring本身;ApplicationContext面向使用Spring框架的开发者,几乎所有的应用场合都直接使用ApplicationContext而非底层的BeanFactory
-无论使用何种方式,配置文件时相同
3.3、ApplicationContext
-ApplicationContext的主要实现类:
-ClassPathXMLApplicationContext:从类路径下加载配置文件
-FileSystemXmlApplicationContext:从文件系统中加载配置文件
-ConfigurationApplicationContext扩展于ApplicationContext,新增两个主要方法:refresh()和close(),让ApplicationContext具有启动、刷新和关闭上下文的能力
-ApplicationContext在初始化上下文时就实例化所有单例的bean
-WebApplicationContext是专门为WEB应用而准备的,它允许从相对于WEB根目录的路径中完成初始化工作

4、依赖注入的方式:
4.1、属性注入
-属性注入即通过setter方法注入bean的属性值或依赖的对象
-属性注入使用元素,使用name属性指定Bean的属性名称,value属性或子节点指定属性值
-属性注入是实际应用中最常用的注入方式
<!--通过全类名的方式来配置bean-->
    <bean id="helloworld" class="com.ll.spring.beans.HelloWorld">
        <!--这里的name一定要和该类的setName()方法set后的字符串相同-->
        <property name="name" value="Spring"></property>
    </bean>
4.2、构造器注入
-通过构造方法注入Bean的属性值或者依赖的对象,他保证了Bean实例在实例化后就可以使用
-构造注入在元素声明属性,
中没有name属性
-ApplicationContext.xml
<!--通过构造方法来配置bean的属性-->
    <bean id="car" class="com.ll.spring.beans.Car">
        <constructor-arg value="Audi" index="0"></constructor-arg>
        <constructor-arg value="Shanghai" index="1"></constructor-arg>
        <constructor-arg value="300000" index="2"></constructor-arg>
    </bean>

    <!--使用构造器注入属性值可以指定参数的位置和参数类型以区分重载的构造器-->
    <bean id="car1" class="com.ll.spring.beans.Car">
        <constructor-arg value="Baoma" index="0" type="java.lang.String"></constructor-arg>
        <constructor-arg value="Shanghai" index="1" type="java.lang.String"></constructor-arg>
        <constructor-arg value="240" index="2" type="int"></constructor-arg>
        <!--<constructor-arg type="int">      也可以这样写
            <value>240</value>
        </constructor-arg>-->
    </bean>
-Car.java(其中有两个构造方法,分别带有不同的参数列表)
 public Car(String brand, String corp, double price) {
        this.brand = brand;
        this.corp = corp;
        this.price = price;
    }

    public Car(String brand, String corp, int maxSpeed){
        this.brand = brand;
        this.corp = corp;
        this.maxSpeed = maxSpeed;
    }
在main中就可以调用不同的构造方法:
4.3、工厂方法注入(很少使用,不推荐)
5、注入属性的细节
5.1、字面值
-字面值:可用字符串表示的值,可以通过元素标签或者value属性进行注入
-基本数据类型及其封装类、String等类型都可以采取字面值注入的方式
-若字面值中包含特殊字符,可以使用<![CDATA[]]>把字面值包裹起来
<!--如果字面值包含特殊字符可以使用<![CDATA[]] 包裹起来>-->
        <!--属性值可以使用value子节点注入-->
        <constructor-arg index="1" type="java.lang.String">
            <value><![CDATA[shanghai^]]></value>
        </constructor-arg>
5.2、引用其他bean
-组成应用程序的Bean经常需要相互协作以完成应用程序的功能,要使Bean能够相互访问,就必须在Bean配置文件中对Bean的引用
-在Bean的配置文件中,可以通过元素或者ref属性作为Bean的属性或构造器参数指定对Bean的引用
-也可以在属性构造器里面包含Bean的声明,这样的Bean称为内部Bean
<bean id="person" class="com.ll.spring.beans.Person">
        <property name="name" value="Tom"></property>
        <property name="age" value="24"></property>
        <!--可以使用property 的ref属性来建立bean中的引用关系-->
        <property name="car" ref="car1"></property>
        <!--也可以这样写
           <property name="car">
            <ref bean="car1"></ref>
        </property>-->
        <!--内部bean,不用写id属性值,不能被外部引用,只能在内部使用
        <property name="car">
            <bean class="com.ll.spring.beans.Car">
                <constructor-arg value="Ford"></constructor-arg>
                <constructor-arg value="changan"></constructor-arg>
                <constructor-arg value="200000"></constructor-arg>
            </bean>
        </property>-->
    </bean>
5.3、注入参数详解:null值和级联属性
-可以使用专用的元素标签为Bean的字符串或者其他对象类型注入null值
   <bean id="person2" class="com.ll.spring.beans.Person">
        <constructor-arg value="Alice" type="java.lang.String"></constructor-arg>
        <constructor-arg value="17" type="int"></constructor-arg>
        <!--<constructor-arg ref="car" type="com.ll.spring.beans.Car"></constructor-arg>-->
        <!--测试赋值null-->
        <constructor-arg><null/></constructor-arg>
    </bean>
-和struts、Hibernate等框架一样,Spring支持级联属性的配置
<bean id="person2" class="com.ll.spring.beans.Person">
        <constructor-arg value="Alice" type="java.lang.String"></constructor-arg>
        <constructor-arg value="17" type="int"></constructor-arg>
        <!--<constructor-arg ref="car" type="com.ll.spring.beans.Car"></constructor-arg>-->
        <!--测试赋值null-->
        <!--<constructor-arg><null/></constructor-arg>-->

        <constructor-arg ref="car"></constructor-arg>
        <!--为级联属性赋值 注意,属性需要先初始化之后才能为级联属性赋值,否则会有异常,和Strus2不同-->
        <property name="car.maxSpeed" value="300"></property>
    </bean>
5.4、集合属性
-在Spring中可以通过一组内置的xml标签(例如:,,
 <!--测试如何配置集合属性-->
    <bean id="person3" class="com.ll.spring.beans.collection.Person">
        <property name="name" value="Mike"></property>
        <property name="age" value="27"></property>
        <property name="cars">
            <!--使用<list>标签配置集合属性-->
            <list>
                <ref bean="car"></ref>
                <ref bean="car1"></ref>
                <bean id="car3" class="com.ll.spring.beans.Car">
                    <constructor-arg value="Ford"></constructor-arg>
                    <constructor-arg value="changan"></constructor-arg>
                    <constructor-arg value="200000"></constructor-arg>
                </bean>
            </list>
        </property>
    </bean>
-java.util,Map通过
<!--测试如何配置Map属性-->
    <bean id="newPerson" class="com.ll.spring.beans.collection.NewPerson">
        <property name="name" value="Rose"></property>
        <property name="age" value="18"></property>
        <property name="cars">
            <!--使用map结点及map的entry子节点配置Map类型的的成员变量-->
            <map>
                <entry key="AA" value-ref="car"></entry>
                <entry key="BB" value-ref="car1"></entry>
            </map>
        </property>
    </bean>
-使用定义java.util.Properties,该标签使用多个作为子标签,每个标签必须定义key属性
    <!--配置Property属性值-->
    <bean id="dataSource" class="com.ll.spring.beans.collection.DataSource">
        <property name="properties">
            <!--使用props和prop子节点来配置Property属性值-->
            <props>
                <prop key="user">root</prop>
                <prop key="password">1234</prop>
                <prop key="jdbcUrl">jdbc:mysql:///localhost:3306/test</prop>
                <prop key="driverClass">com.mysql.jdbc.Driver</prop>
            </props>
        </property>
    </bean>
5.5、使用utility scheme定义集合
-使用基本的结合标签定义集合时,不能将集合作为独立的bean定义,导致其他Bean无法引用该集合,所以无法在不同的Bean之间共享集合
-可以使用util schema里的集合标签定义独立的集合Bean,需要注意的是,必须在根元素里添加util schema定义。
  <!--配置单独的结合-->
    <util:list id="cars">
        <ref bean="car"></ref>
        <ref bean="car1"></ref>
    </util:list>
    <bean id="person4" class="com.ll.spring.beans.collection.Person">
        <property name="name" value="Jack"></property>
        <property name="age" value="21"></property>
        <property name="cars" ref="cars"></property>
    </bean>
5.6、使用p命名空间
-为了简化XML文件的配置,越来越多的XML文件采用属性而非子元素配置信息
-Spring从2.5版本开始引入了一个新的p命名空间,可以通过元素属性的方式配置Bean的属性
-使用p,命名空间以后,基于XML的配置方式将进一步简化
    <!--通过p命名空间为bean的属性赋值,需要先导入p命名空间,相对于传统的配置方式更加简洁-->
    <bean id="person5" class="com.ll.spring.beans.collection.Person"
          p:age="30" p:name="Bob" p:cars-ref="cars"></bean>
6、自动装配
Spring IOC容器可以自动装配Bean,需要做的仅仅是在的autowire属性里指定自动装配的模式
-byType(根据类型自动装配):若IOC容器中有多个与目标Bean类型已知的Bean.在这种情况下,Spring将无法判定哪个Bean最合适该属性,所以不能执行自动装配
-byName(根据名称自动装配):必须将目标Bean的名称和属性名设置的完全相同。
-constructor(通过构造器自动装配):当Bean中存在多个构造器的时候,此种自动装方式将会很复杂,所以不推荐使用
    <bean id="address" class="com.ll.spring.beans.autowire.Address"
          p:city="BeiJing" p:street="HuiLongGuan">
    </bean>
    <!--<bean id="address2" class="com.ll.spring.beans.autowire.Address"-->
          <!--p:city="DaLian" p:street="zhongshan">-->
    <!--</bean>-->

    <bean id="car" class="com.ll.spring.beans.autowire.Car"
            p:brand="Audi" p:price="300000">
    </bean>

    <!--<bean id="person" class="com.ll.spring.beans.autowire.Person"-->
            <!--p:name="Tom" p:address-ref="address" p:car-ref="car">-->
    <!--</bean>-->
    <!--
        可以使用autowire属性自动装配的方式,
        byName根据Bean的名字的setter风格的属性名进行自动装配,若没有匹配的,则不装配
        byType根据bean的类型和当前bean的属性的类型进行自动装配.若IOC容器中有一个以上类型匹配,则抛出异常
     -->
    <bean id="person" class="com.ll.spring.beans.autowire.Person"
            p:name="Tom" autowire="byName">
    </bean>
    <bean id="person1" class="com.ll.spring.beans.autowire.Person"
            p:name="Alice" autowire="byType">
    </bean>
XML配置中的Bean自动装配的缺点
-在Bean配置文件里设置autowire属性进行自动装配将会配置Bean的所有属性,然而,若只希望装配个别属性时,autowire属性就不够灵活了
-autowire属性要么根据类型自动装配,要么根据名称自动装配,不能两者兼而有之
-一般情况下,在实际的项目中很少使用自动装配功能,因为和自动装配功能带来的好处比起来,明确清晰的配置文档更有说服力一些
7、bean之间的关系:继承 & 依赖
7.1、继承
-Spring允许继承bean的配置,被继承的bean称为父bean.继承这个父Bean的Bean称为子Bean
-子Bean从父Bean中继承配置,包括Bean的属性配置
-子Bean也可以覆盖从父Bean继承过来的配置
-父Bean可以作为配置模板,也可以作为Bean的实例。若只想把父Bean作为模板,可以设置的abstract属性为true,这样Spring将不会实例化这个Bean
-并不是元素里的所有属性都会被继承,比如:autowire,abstract等
-也可以忽略父Bean的class属性,让子Bean指定自己的类,而共享相同的属性配置,但此时abstract必须设为true
    <!--
        抽象bean:bean的abstract属性为true的bean,这样的bean不能被IOC容器实例化,只能用来被继承配置,
        若某一个bean的class属性没有被指定,则该bean必须是一个抽象bean
    -->
    <bean id="address" class="com.ll.spring.beans.autowire.Address"
            p:city="BeiJing" p:street="WuDaoKou">
    </bean>

    <bean id="address2" class="com.ll.spring.beans.autowire.Address"
            p:city="BeiJing" p:street="DaZhongSi">
    </bean>

    <!--bean配置的继承:使用bean的parent属性指定继承哪个bean的配置-->
    <bean id="address3" parent="address"
            p:street="ChaDianZi">
    </bean>
5.2、依赖bean配置
-**Spring允许用户通过depends-on属性设定Bean前置依赖的Bean,**前置依赖的Bean会在本Bean实例化之前创建好。
-如果前置依赖于多个Bean,则可以通过逗号或空格的方式配置Bean的名称
   <bean id="car" class="com.ll.spring.beans.autowire.Car"
            p:brand="AWM" p:price="300000">
    </bean>

    <!--要求在配置person时必须有一个关联的car! 换句话说person这个bean依赖于car这个bean-->
    <bean id="person" class="com.ll.spring.beans.autowire.Person"
            p:name="Alice" p:address-ref="address2" depends-on="car">
    </bean>
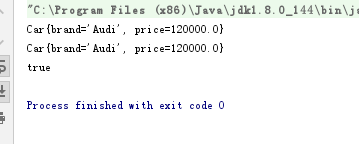
8、bean的作用域:singleton/prototype/WEB环境作用域
-默认的作用域是singleton,单例的
		ApplicationContext ctx = new ClassPathXmlApplicationContext("beans-scope.xml");

        Car car = (Car) ctx.getBean("car");
        System.out.println(car);
        Car car2 = (Car) ctx.getBean("car");
        System.out.println(car2);
        System.out.println(car == car2);
  <bean id="car"
          class="com.ll.spring.beans.autowire.Car">
        <property name="brand" value="Audi"></property>
        <property name="price" value="120000"></property>
    </bean>
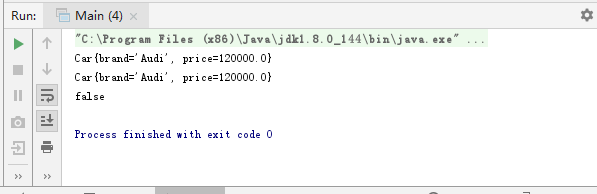
-可以通过更改scop属性改变作用域
 <!--
        使用bean的scope属性来配置bean作用域
        singletone:默认值,容器初始化时创建一个实例,在整个容器的生命周期类只创建这一个bean,单例的
        prototype:原型,容器初始化不创建bean的实例,而在每次请求时都创建一个新的bean的实例并且返回
        还有两个web环境的作用域:session,request用的比较少
    -->
<bean id="car"
          class="com.ll.spring.beans.autowire.Car"
          scope="prototype">
        <property name="brand" value="Audi"></property>
        <property name="price" value="120000"></property>
    </bean>
9、使用外部属性文件
-在配置文件配置bean的时候,有时候需要在bean配置里混入系统部署的细节信息(例如:文件路径,数据源配置信息等).而这些部署细节实际上需要和Bean配置相分离。
-Spring提供了一个PropertyPlaceholderConfigurer的BeanFactory后置处理器,这个处理器允许用户将Bean配置的部分内容外移到属性文件中,可以在Bean配置文件里使用形式为**
v
a
r
∗
∗
的
变
量
,
P
r
o
p
e
r
t
y
P
l
a
c
e
h
o
l
d
e
r
C
o
n
f
i
g
u
r
e
r
从
属
性
文
件
里
加
载
属
性
,
并
使
用
这
些
属
性
来
替
换
变
量
。
−
S
p
r
i
n
g
还
允
许
在
属
性
文
件
中
使
用
{var}**的变量,PropertyPlaceholderConfigurer从属性文件里加载属性,并使用这些属性来替换变量。 -Spring还允许在属性文件中使用
var∗∗的变量,PropertyPlaceholderConfigurer从属性文件里加载属性,并使用这些属性来替换变量。−Spring还允许在属性文件中使用{propName},以实现属性之间的相互引用。
   <!--<bean id="dataSource" class="com.mchange.v2.c3p0.ComboPooledDataSource">-->
        <!--<property name="user" value="root"></property>-->
        <!--<property name="password" value="liuyifan..123"></property>-->
        <!--<property name="driverClass" value="com.mysql.jdbc.Driver"></property>-->
        <!--<property name="jdbcUrl" value="jdbc:mysql:///localhost:3306/test"></property>-->
    <!--</bean>-->

    <!--导入属性配置文件-->
    <context:property-placeholder location="classpath:db.properties" />
    <bean id="dataSource" class="com.mchange.v2.c3p0.ComboPooledDataSource">
        <!--使用外部化属性文件的属性-->
        <property name="user" value="${user}"></property>
        <property name="password" value="${password}"></property>
        <property name="driverClass" value="${driverClass}"></property>
        <property name="jdbcUrl" value="${jdbcUrl}"></property>
    </bean>
10、Spring表达式语言:SpEL
-Spring表达式语言(简称SpEL):是一个支持运行时查询和操作对象图的强大的表达式语言。
-语法类似于EL:SpEL使用#{…}作为定界符,所有在大括号中的字符都将被认定为是SpEL
-SpEL为bean的属性进行动态赋值提供了便利
-通过SpEL可以实现
a. 通过bean的id对bean进行引用
b. 调用方法以及引用对象中的属性
c. 计算表达式的值
d. 正则表达式的匹配
-字面量的表示:
a. 整数
b. 小数
c. 科学计数法
d. String可以使用单引号或者双引号作为字符串的定界符号:
或者
e. Boolean:
-引用Bean、属性和方法
a. 引用其他对象

b. 应用其他对象属性

c. 调用其他方法,可以链式操作


-SpEL支持的运算符号
a. 逻辑运算符号: and ,or, not, |

b. if-else运算符: ?:(temary), ?:(Elvis)

c. if-else变体

d. 正则表达式:matches

-SePL:引入Bean、属性和方法
调用静态方法或静态属性:通过T()调用一个类的静态方法,它将返回一个ClassObject,然后再调相应的方法或者属性:

11、IOC容器中Bean的生命周期
11.1、SpringIOC容器可以管理Bean的生命周期,Spring允许在Bean的生命周期的特定点执行定制的任务。
-SpringIOC容器对Bean的声明周期进行管理的过程:
-通知构造器或工厂方法创建Bean实例
-为Bean的属性值设置和对其他Bean的引用
-调用Bean的初始化方法
-Bean可以使用
-当容器关闭时,调用Bean的销毁方法
-在Bean的声明里设置init-method和destory-method属性,为Bean指定初始化和销毁方法
<bean id="car" class="com.ll.spring.beans.cycle.Car"
        init-method="init" destroy-method="destory">
       <property name="brand" value="Audi"></property>
    </bean>
11.2、创建Bean的后置处理器
-Bean的后置处理器允许在调用初始化方法前后对Bean进行额外处理
-Bean的后置处理器对IOC容器里面的所有Bean实例逐一处理,而非单一实例,其典型应用是:检查Bean属性的正确性或根据特定的标准更改Bean的属性
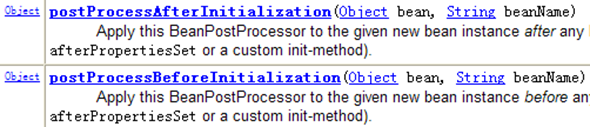
-对Bean的后置处理器而言,需要实现接口BeanPostProcessor,在初识化方法被调用前后,Spring将把每个Bean实例分别传递给上述接口的以下两个方法
-添加了Bean后置处理器后Bean的生命周期如下
-通过构造器或工厂方法创建Bean实例;
-为Bean的属性设置值和对其他Bean的引用
-将Bean实例传递给Bean的后置处理器的postProcessBeforeInitialization方法
-调用Bean的初始化方法
-将Bean的实例传递给Bean后置处理器的postProcessAfterInitialization方法
-Bean可以使用了
-当容器关闭时,调用Bean的销毁方法
beans-cycle.xml
<!--
        配置bean的 后置处理器
        实现BeanProcessor接口,并具体提供两个方法
        Object postProcessBeforeInitialization(Object bean, String beanName): init-method之前调用
        Object postProcessAfterInitialization(Object bean, String beanName):init-method之后调用
        的实现

        bean:bean实例本身
        beanName:IOC容器配置的bean的名字
        返回值:是实际上返回给用户的那个Bean,注意:可以在以上两个方法中修改返回的bean甚至返回一个新的bean
        配置后置处理器的时候不需要配置id,IOC容器会自动识别是一个BeanPostProcessor
     -->
    <bean class="com.ll.spring.beans.cycle.MyBeanPostProcessor"></bean>
MyBeanPostProcessor.java
import org.springframework.beans.BeansException;
import org.springframework.beans.factory.config.BeanPostProcessor;

public class MyBeanPostProcessor implements BeanPostProcessor {
    public Object postProcessBeforeInitialization(Object bean, String beanName) throws BeansException {
        System.out.println("postProcessBeforeInitialization before init: " + beanName + ", " + bean);
        if("car".equals(beanName)){
            //...
        }
        return bean;
    }

    public Object postProcessAfterInitialization(Object bean, String beanName) throws BeansException {
        System.out.println("postProcessAfterInitialization after init: " + beanName + ", " + bean);
        Car car = new Car();
        car.setBrand("BWM");
        return car;
    }
}
12、Spring4.x新特性:泛型依赖注入
-Spring 4.x中可以为子类注入子类对应的泛型类型的成员变量的引入


 1737
1737


 被折叠的 条评论
为什么被折叠?
被折叠的 条评论
为什么被折叠?
 到【灌水乐园】发言


