


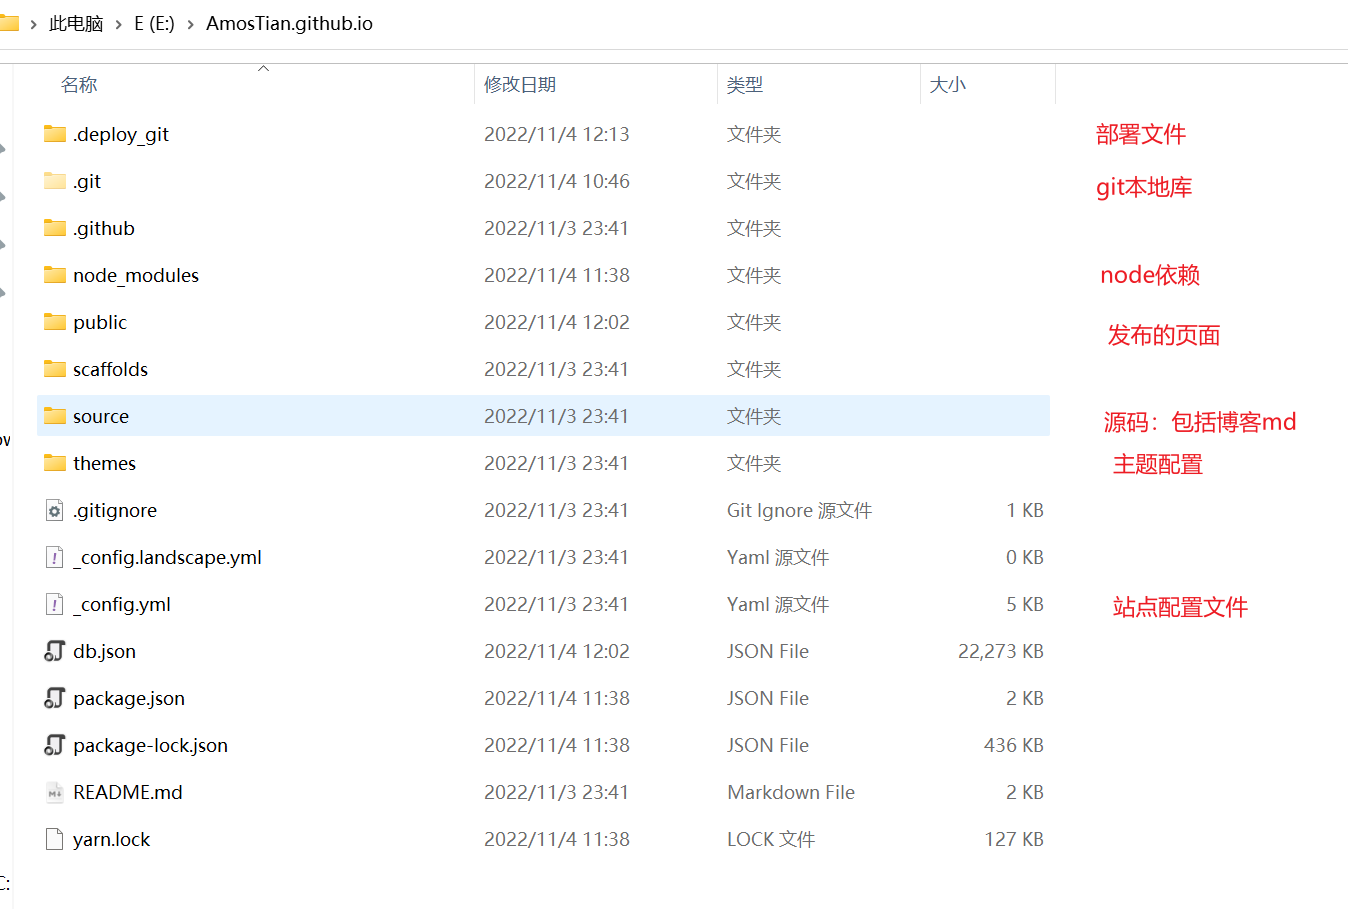
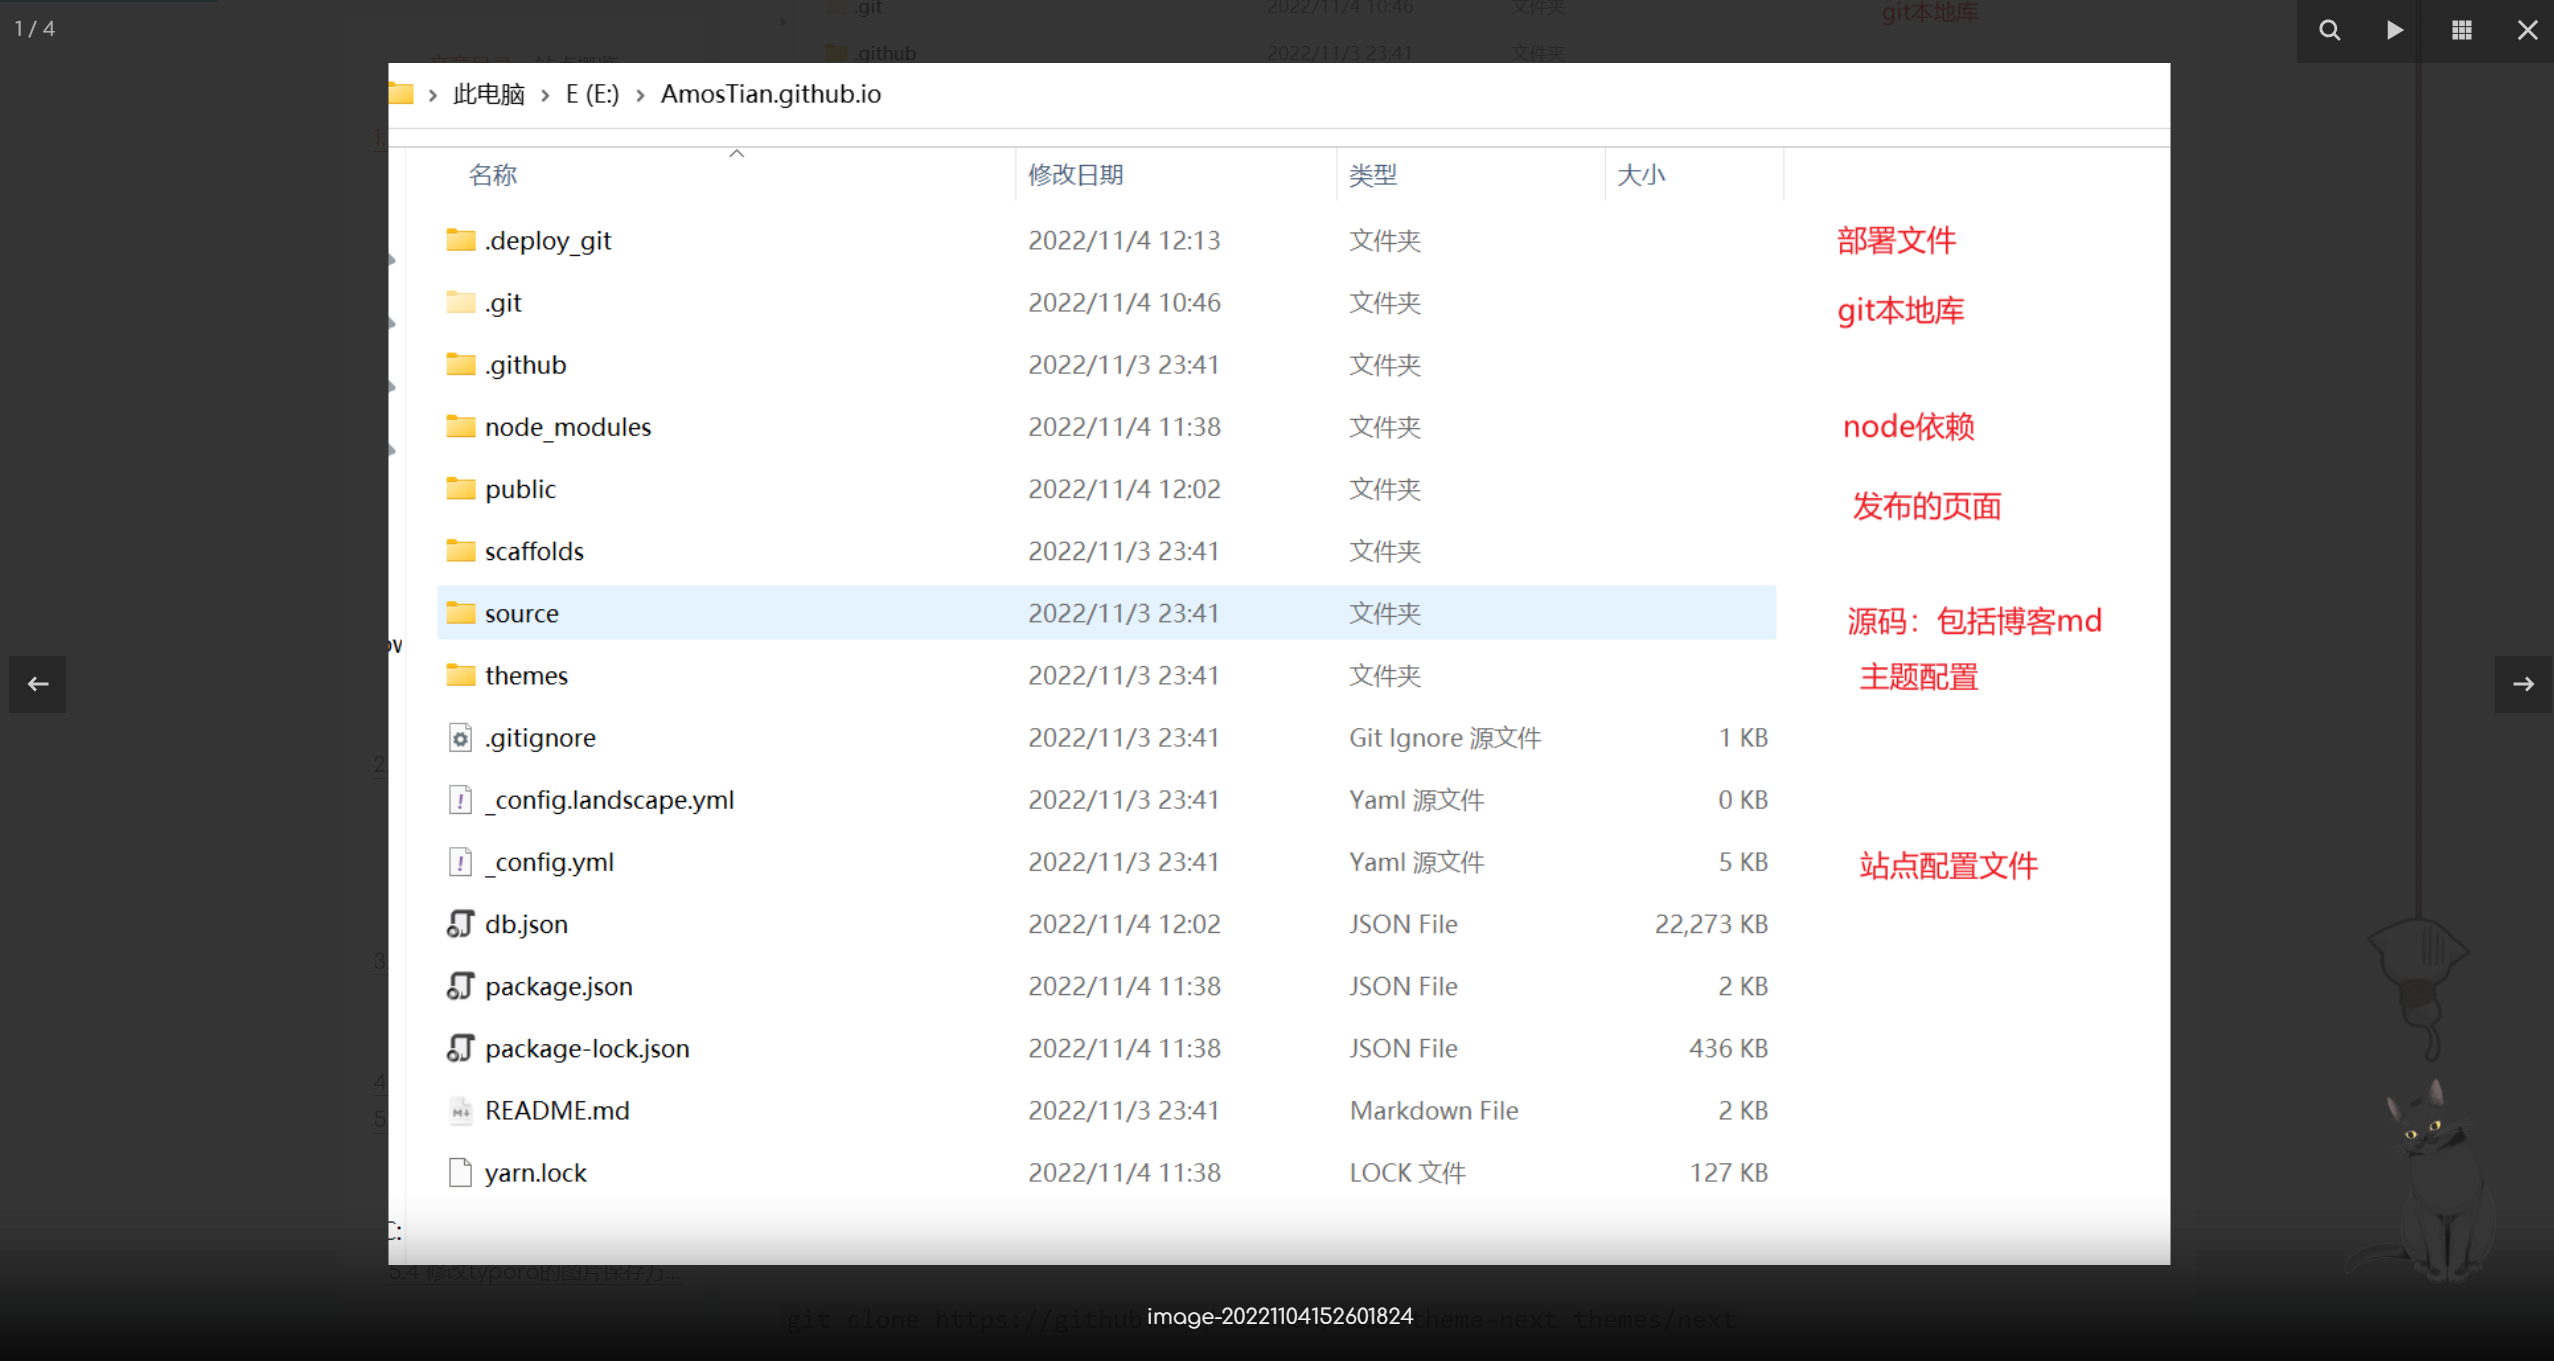
1. 环境准备
1.1 在github创建Git仓库
在github托管的GithubPage,也可以托管到Gitee,但是GiteePage好像有一些限制具体看自己选择
仓库名一定要输入 username.github.io
- 一个账号只能用创建一个同名的博客
1.2 安装Git
1.3 安装node管理工具
nvm在github官网下载,解压后直接运行.exe安装程序
1.3.1 安装node
在命令行中输入 nvm install 版本号 32/64
如:
nvm install 6.10.2 64
1.3.2 设置node的版本
nvm use 6.10.2
1.4 修改镜像源
npm默认的镜像源在国外,安装包时会卡在sill idealTree buildDeps,最好改成国内
npm config set registry https://registry.npm.taobao.org
1.5 安装hexo
npm install hexo-cli -g
1.6 创建本地博客
初始化本地博客仓库
hexo init 你的用户名.github.io
1.7 安装NexT主题
Hexo有两份主要的配置文件,都是
_config.yml
- 一份位于 本地博客目录下,主要包含Hexo本身配置
- 另一份位于主题目录下
xx.github.io/themes/next下
1.7.1 切换到本地博客目录下 xx.github.io 目录下
1.7.2 安装NexT主题
git clone https://github.com/iissnan/hexo-theme-next themes/next
1.7.3 使用 NexT主题
找到本地博客目录下的 _config.yml 将 theme 键值对修改为 theme: next
1.7.4 站点配置文件基本信息修改
title: xxx # 博客的名字,也称站点名称
author: xxx # 作者名字
description: xxx # 对站点的描述,搜索引擎会抓取,可以自定义(这个还是加上比较好)
language: zh-Hans # 语言 简体中文
theme: next # 配置主题
deploy: # 部署相关配置
type: git # 使用 Git 提交
repo: https://github.com/xxx/xxx.github.io.git # 就是存放博客的仓库地址
站点配置文件示例
# Hexo Configuration
## Docs: https://hexo.io/docs/configuration.html
## Source: https://github.com/hexojs/hexo/

# Site 这里的配置,哪项配置反映在哪里,可以参考我的博客
title: xxx # 博客的名字,也称站点名称
subtitle: xxx # 副标题
description: xxx # 对站点的描述,搜索引擎会抓取,可以自定义
author: xxx # 作者名字
language: zh-Hans # 语言 简体中文
timezone:  # 用默认的即可

# URL
# 这项暂时不需要配置,绑定域名后,要创建 sitemap.xml 时再配置该项
## If your site is put in a subdirectory, set url as 'http://yoursite.com/child' and root as '/child/'
url: # http://xxx.com
root: /
permalink: :year/:month/:day/:title/
permalink_defaults:

# Directory
# 目录,不要修改
source_dir: source
public_dir: public
tag_dir: tags
archive_dir: archives
category_dir: categories
code_dir: downloads/code
i18n_dir: :lang
skip_render:

# Writing
# 文章布局、写作格式的定义,不修改
new_post_name: :title.md # File name of new posts
default_layout: post
titlecase: false # Transform title into titlecase
external_link: true # Open external links in new tab
filename_case: 0
render_drafts: false
post_asset_folder: false
relative_link: false
future: true
highlight:
  enable: true
  line_number: true
  auto_detect: false
  tab_replace:

# Category & Tag
default_category: uncategorized
category_map:
tag_map:

# Date / Time format
# 日期 / 时间 格式,不要修改
## Hexo uses Moment.js to parse and display date
## You can customize the date format as defined in
## http://momentjs.com/docs/#/displaying/format/
date_format: MMM D YYYY
time_format: H:mm:ss

# Pagination
# 每页显示文章数,可以自定义
## Set per_page to 0 to disable pagination
per_page: 10
pagination_dir: page

# Extensions
# 配置站点所用主题和插件,这里将默认主题注释,修改为 next
## Plugins: https://hexo.io/plugins/
## Themes: https://hexo.io/themes/
theme: next
#theme: landscape

# 头像
# 注意:是 xxx.github.io/source 下的开始的相对路径,如果 source 文件夹下面没有 uploads 文件夹,那么新建一个。考虑到会博客中用很多图片,在 uploads 文件夹下请分好类,避免混乱
avatar: /uploads/images/avatar.jpg

# Deployment
# 本地博客部署到 github 上要配置这里
## Docs: https://hexo.io/docs/deployment.html
deploy:
  type: git # 使用 Git 提交
  repository: https://github.com/xxx/xxx.github.io.git # 就是存放博客的仓库地址
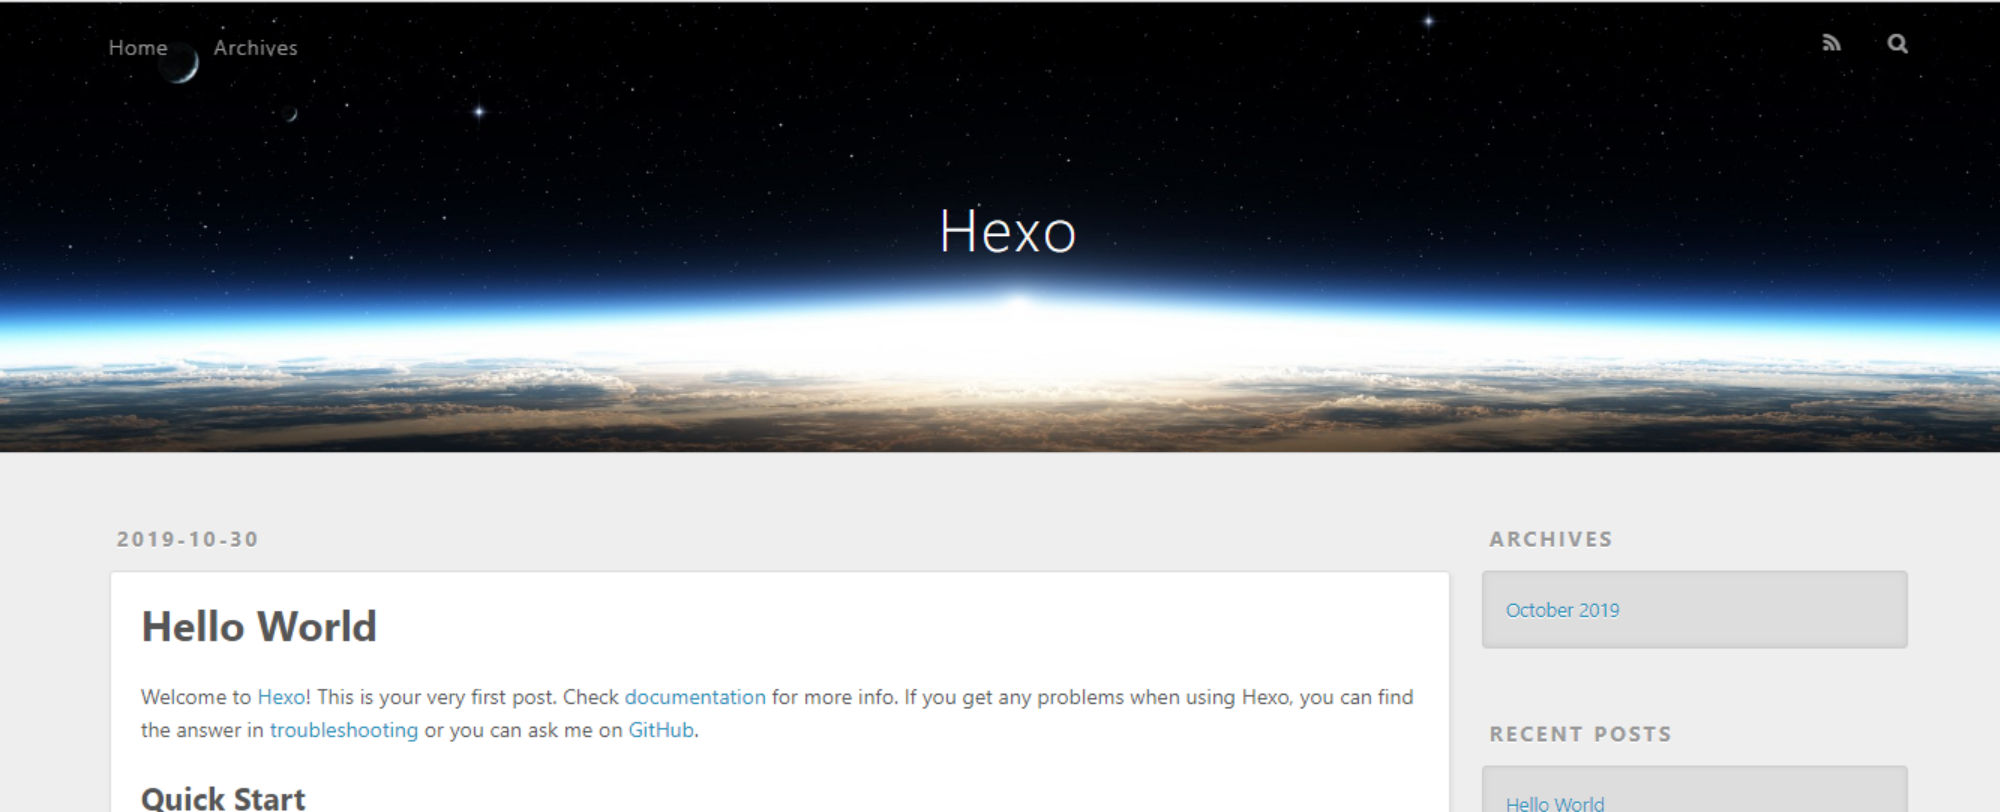
1.7.5 本地测试
- 定位到
xxx.github.io目录 - 输入命令:
hexo s相当于 启动hexo服务预览
启动成功,默认在 http://localhost:4000 就能打开博客
1.7.6 NexT主题个性化
# 挑一些有必要的属性列一下
# 网站的favicon
favicon:
  small: /images/favicon.png
  medium: /images/favicon.png
  apple_touch_icon: /images/favicon.png
  safari_pinned_tab: /images/favicon.png
  #android_manifest: /images/manifest.json
  #ms_browserconfig: /images/browserconfig.xml

# Show multilingual switcher in footer.
language_switcher: true

# 底部栏的配置
footer:
  # Specify the date when the site was setup. If not defined, current year will be used.

  # Icon between year and copyright info.
  # 备选的icon可以在下列网址选择与复制
  icon:
    # Icon name in Font Awesome. See: https://fontawesome.com/v4.7.0/icons/
    # `heart` is recommended with animation in red (#ff0000).
    name: grav
    # If you want to animate the icon, set it to true.
    animated: true #闪动效果
    # Change the color of icon, using Hex Code.
    color: "#808080"

  # If not defined, `author` from Hexo `_config.yml` will be used.
  copyright: AmosTian

  # 是否显示Powered by Hexo & NexT
  powered: false

  # Beian ICP and gongan information for Chinese users. See: http://www.beian.miit.gov.cn, http://www.beian.gov.cn
  beian:
    enable: false
    icp:
    # The digit in the num of gongan beian.
    gongan_id:
    # The full num of gongan beian.
    gongan_num:
    # The icon for gongan beian. See: http://www.beian.gov.cn/portal/download
    gongan_icon_url:

# ---------------------------------------------------------------
# Scheme Settings
# ---------------------------------------------------------------
# 这部分设置nexT的风格
# Schemes
#scheme: Muse
#scheme: Mist
scheme: Pisces
#scheme: Gemini

# Dark Mode
darkmode: false

# ---------------------------------------------------------------
# Menu Settings
# ---------------------------------------------------------------

# Usage: `Key: /link/ || icon`
# Key is the name of menu item. If the translation for this item is available, the translated text will be loaded, otherwise the Key name will be used. Key is case-senstive.
# Value before `||` delimiter is the target link, value after `||` delimiter is the name of Font Awesome icon.
# When running the site in a subdirectory (e.g. yoursite.com/blog), remove the leading slash from link value (/archives -> archives).
# External url should start with http:// or https://
menu:
  home: / || home
  categories: /categories/ || th
  tags: /tags/ || tags
  archives: /archives/ || archive
  #about: /about/ || user
  essay: /categories/随笔// || pied-piper
  # 这个是我自己做的动态简历,会直接跳转到 \public\dynamic-resume\index.html
  # 自定义的js或者css文件需要插入到 \themes\next\source下对应的文件夹中
  # hexo在生成网页时,会将这些文件夹中的文件复制到\public中
  dynamic-resume: /dynamic-resume/ || cog
  #schedule: /schedule/ || calendar
  #sitemap: /sitemap.xml || sitemap
  #commonweal: /404/ || heartbeat

# Enable / Disable menu icons / item badges.
menu_settings:
  icons: true
  badges: true


# ---------------------------------------------------------------
# Sidebar Settings
# See: https://theme-next.org/docs/theme-settings/sidebar
# ---------------------------------------------------------------

sidebar:
  # Sidebar Position.
  position: left
  #position: right

  # Manual define the sidebar width. If commented, will be default for:
  # Muse | Mist: 320
  # Pisces | Gemini: 240
  #width: 300

  # Sidebar Display (only for Muse | Mist), available values:
  #  - post    expand on posts automatically. Default.
  #  - always  expand for all pages automatically.
  #  - hide    expand only when click on the sidebar toggle icon.
  #  - remove  totally remove sidebar including sidebar toggle.
  display: post

  # Sidebar padding in pixels.
  padding: 18
  # Sidebar offset from top menubar in pixels (only for Pisces | Gemini).
  offset: 12
  # Enable sidebar on narrow view (only for Muse | Mist).
  onmobile: false

# Sidebar Avatar
avatar:
  # Replace the default image and set the url here.
  url: /images/avatar.png
  # If true, the avatar will be dispalyed in circle.
  rounded: true
  opacity: 1
  # If true, the avatar will be rotated with the cursor.
  rotated: false

# Posts / Categories / Tags in sidebar.
site_state: true

# Social Links
# Usage: `Key: permalink || icon`
# Key is the link label showing to end users.
# Value before `||` delimiter is the target permalink, value after `||` delimiter is the name of Font Awesome icon.
social:
  GitHub: https://github.com/AmosTian || github
  CSDN: https://blog.csdn.net/qq_40479037?type=blog || crosshairs
  E-Mail: mailto:17636679561@163.com || envelope
  #Weibo: https://weibo.com/yourname || weibo
  #Google: https://plus.google.com/yourname || google
  #Twitter: https://twitter.com/yourname || twitter
  #FB Page: https://www.facebook.com/yourname || facebook
  #StackOverflow: https://stackoverflow.com/yourname || stack-overflow
  #YouTube: https://youtube.com/yourname || youtube
  #Instagram: https://instagram.com/yourname || instagram
  #Skype: skype:yourname?call|chat || skype

# Table of Contents in the Sidebar
# Front-matter variable (unsupport wrap expand_all).
toc: #目录配置
  enable: true #是否自动生成目录
  # Automatically add list number to toc.
  number: false #目录自动编号
  # If true, all words will placed on next lines if header width longer then sidebar width.
  wrap: false #标题过长是否换行
  # If true, all level of TOC in a post will be displayed, rather than the activated part of it.
  expand_all: true
  # Maximum heading depth of generated toc.
  max_depth: 6 #最大标题深度

# ---------------------------------------------------------------
# Post Settings
# See: https://theme-next.org/docs/theme-settings/posts
# ---------------------------------------------------------------

# Automatically excerpt description in homepage as preamble text.
excerpt_description: true #自动截取more

# Read more button
# If true, the read more button will be displayed in excerpt section.
read_more_btn: true #添加阅读更多按钮

# Post meta display settings
post_meta:
  item_text: true
  created_at: true
  updated_at:
    enable: true
    another_day: true
  categories: true
# 文章结尾标志
passage_end_tag:
  enabled: true

# ---------------------------------------------------------------
# Misc Theme Settings
# ---------------------------------------------------------------

# Set the text alignment in posts / pages.
text_align:
  # Available values: start | end | left | right | center | justify | justify-all | match-parent
  desktop: justify
  mobile: justify

# Reduce padding / margin indents on devices with narrow width.
mobile_layout_economy: false

# Android Chrome header panel color ($brand-bg / $headband-bg => $black-deep).
android_chrome_color: "#222"

# Custom Logo (Do not support scheme Mist)
custom_logo: #/uploads/custom-logo.jpg

#代码块
codeblock:
  # Code Highlight theme
  # Available values: normal | night | night eighties | night blue | night bright | solarized | solarized dark | galactic
  # See: https://github.com/chriskempson/tomorrow-theme
  highlight_theme: normal
  # Add copy button on codeblock
  copy_button:
    enable: true
    # Show text copy result.
    show_result: true
    # Available values: default | flat | mac
    style: mac

back2top:
  enable: true
  # Back to top in sidebar.
  sidebar: false
  # Scroll percent label in b2t button.
  scrollpercent: true

# Reading progress bar
reading_progress:
  enable: true #顶部显示阅读进度
  # Available values: top | bottom
  position: top
  color: "#37c6c0"
  height: 3px

# Bookmark Support
bookmark:
  enable: false
  # Customize the color of the bookmark.
  color: "#222"
  # If auto, save the reading progress when closing the page or clicking the bookmark-icon.
  # If manual, only save it by clicking the bookmark-icon.
  save: auto

# `Follow me on GitHub` banner in the top-right corner.
github_banner:
  enable: true
  permalink: https://github.com/AmosTian
  title: Follow me on GitHub


# ---------------------------------------------------------------
# Font Settings
# See: https://theme-next.org/docs/theme-settings/#Fonts-Customization
# ---------------------------------------------------------------
# Find fonts on Google Fonts (https://www.google.com/fonts)
# All fonts set here will have the following styles:
#   light | light italic | normal | normal italic | bold | bold italic
# Be aware that setting too much fonts will cause site running slowly
# ---------------------------------------------------------------
# To avoid space between header and sidebar in scheme Pisces / Gemini, Web Safe fonts are recommended for `global` (and `title`):
# Arial | Tahoma | Helvetica | Times New Roman | Courier New | Verdana | Georgia | Palatino | Garamond | Comic Sans MS | Trebuchet MS
# ---------------------------------------------------------------

font:
  enable: true

  # Uri of fonts host, e.g. https://fonts.googleapis.com (Default).
  host: https://fonts.googleapis.com

  # Font options:
  # `external: true` will load this font family from `host` above.
  # `family: Times New Roman`. Without any quotes.
  # `size: x.x`. Use `em` as unit. Default: 1 (16px)

  # Global font settings used for all elements inside <body>.
  global:
    external: false
    family: Comfortaa
    size:

  # Font settings for site title (.site-title).
  title: #网站抬头
    external: true
    family: Comfortaa
    size:

  # Font settings for headlines (<h1> to <h6>).
  headings: #标题字体
    external: true
    family: Ma Shan Zheng
    size:

  # Font settings for posts (.post-body).
  posts: #文章字体
    external: false
    family: ZCOOL KuaiLe

  # Font settings for <code> and code blocks.
  codes:
    external: false
    family: consolas


# ---------------------------------------------------------------
# Statistics and Analytics
# See: https://theme-next.org/docs/third-party-services/statistics-and-analytics
# ---------------------------------------------------------------
# 统计
# Show Views / Visitors of the website / page with busuanzi.
# Get more information on http://ibruce.info/2015/04/04/busuanzi
busuanzi_count:
  enable: false
  total_visitors: true
  total_visitors_icon: user
  total_views: true
  total_views_icon: eye
  post_views: true
  post_views_icon: eye

# Post wordcount display settings
# Dependencies: https://github.com/theme-next/hexo-symbols-count-time
symbols_count_time:
  separated_meta: true #分隔符|
  item_text_post: true #是否统计站点总字数
  item_text_total: true #是否同级文章总字数
  awl: 2 #平均每个字符的长度
  wpm: 150 #words per minute
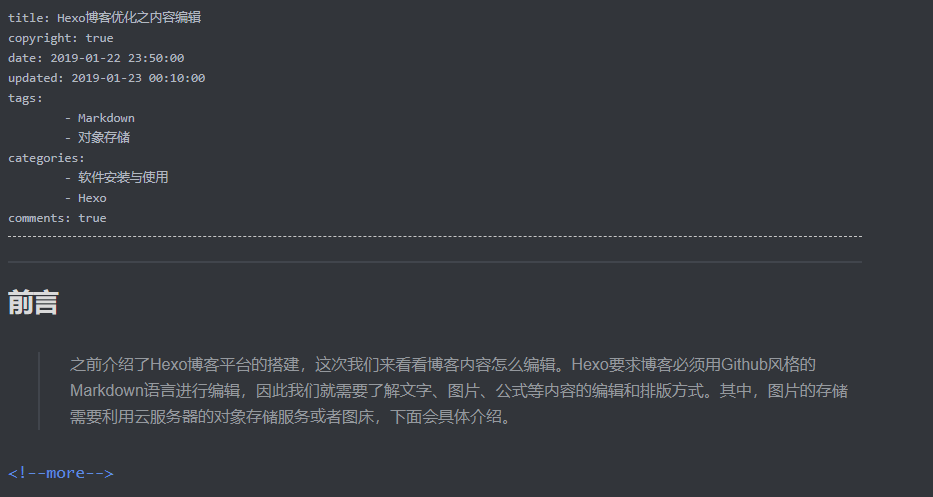
1.7.7 创建分类与标签
-
命令行定位到
xxx.github.io目录,输入hexo new page categories这样在
\source目录下创建新建对应的目录,找到目录对应的index.md文件title: 分类 date: 2022-02-22 08:05:53 type: "categories" -
命令行定位到
xxx.github.io目录,输入hexo new page "tags",这样在source目录下新建对应的目录title: 标签 date: 2022-02-22 08:05:42 type: "tags"
上述两个操作相当于创建了给所有博客添加了两个分类依据 categories 以及 tags ,用于文章的归类管理
某一篇文章要归类或者打标签,只需要在抬头配置对应属性即可,如本篇文章所述:
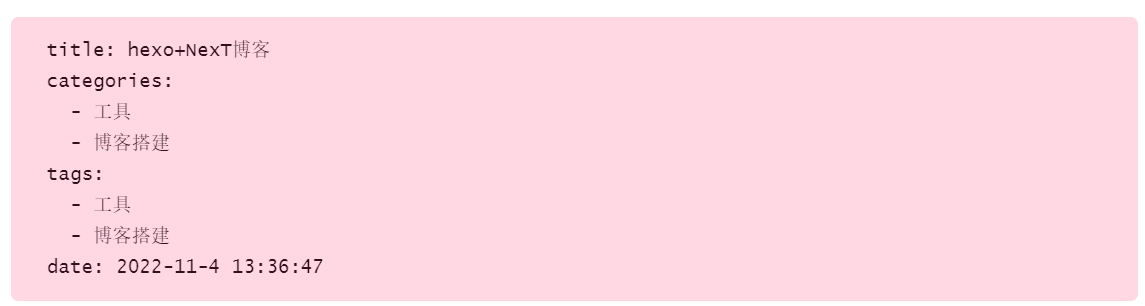
这两个页面是NexT自动维护的,只要文章按照规矩来就不会报错
2. 写文章与上传
2.1 写文章
2.2 本地运行测试
命令行定位到 xxx.github.io 目录中,输入命令 hexo s
2.3 在浏览器中查看效果
在浏览器地址栏输入 http://localhost:4000 访问本地博客
2.4 安装自动部署发布工具
为了自动部署到 GithubPage,这里我们需要 hexo-deployer-git 工具,将 md文件 转化为 静态网页文件 ,并保存在 /public 文件夹中,文件夹上传到 github的相应仓库 xxx.github.io ,等待github部署完成之后,就可以访问 http://xxx.github.io 查看部署完成的博客了
hexo clean #清楚缓存,网页正常情况可以忽略这条命令
hexo g #生成静态网页
hexo d #开始部署
3. 文章链接
Hexo默认使用的文章链接是
year/:month/:day/:title/
但分享之后会使一堆转义字符,而且一旦修改文章发布日期或者标题,则立马失效,所以需要生成真正的永久链接
abbrlink 工具 https://github.com/rozbo/hexo-abbrlink
3.1 安装abbrlink插件
在博客根目录安装插件
npm install hexo-abbrlink --save
3.2 编辑站点配置文件
# 默认的永久链接
permalink: :year/:month/:day/:title/

# 使用abbrlink
permalink: posts/:abbrlink/
abbrlink:
  alg: crc32 #support crc16(default) and crc32 # 链接生成算法
  rep: dec   #support dec(default) and hex #十进制/十六进制
设置的示例:
crc16 & hex
https://post.zz173.com/posts/66c8.html

crc16 & dec
https://post.zz173.com/posts/65535.html'

crc32 & hex
https://post.zz173.com/posts/8ddf18fb.html

crc32 & dec
https://post.zz173.com/posts/1690090958.html
4. 自动化构建
5. 图片问题
5.1 安装插件
npm install hexo-asset-image --save
5.2 站点配置文件修改 post_asset_folder 为 true
5.3 打开替换内容
/node_modules/hexo-asset-image/index.js
替换为以下内容
'use strict';
var cheerio = require('cheerio');

// http://stackoverflow.com/questions/14480345/how-to-get-the-nth-occurrence-in-a-string
function getPosition(str, m, i) {
  return str.split(m, i).join(m).length;
}

var version = String(hexo.version).split('.');
hexo.extend.filter.register('after_post_render', function(data){
  var config = hexo.config;
  if(config.post_asset_folder){
        var link = data.permalink;
    if(version.length > 0 && Number(version[0]) == 3)
       var beginPos = getPosition(link, '/', 1) + 1;
    else
       var beginPos = getPosition(link, '/', 3) + 1;
    // In hexo 3.1.1, the permalink of "about" page is like ".../about/index.html".
    var endPos = link.lastIndexOf('/') + 1;
    link = link.substring(beginPos, endPos);

    var toprocess = ['excerpt', 'more', 'content'];
    for(var i = 0; i < toprocess.length; i++){
      var key = toprocess[i];

      var $ = cheerio.load(data[key], {
        ignoreWhitespace: false,
        xmlMode: false,
        lowerCaseTags: false,
        decodeEntities: false
      });

      $('img').each(function(){
        if ($(this).attr('src')){
            // For windows style path, we replace '\' to '/'.
            var src = $(this).attr('src').replace('\\', '/');
            if(!/http[s]*.*|\/\/.*/.test(src) &&
               !/^\s*\//.test(src)) {
              // For "about" page, the first part of "src" can't be removed.
              // In addition, to support multi-level local directory.
              var linkArray = link.split('/').filter(function(elem){
                return elem != '';
              });
              var srcArray = src.split('/').filter(function(elem){
                return elem != '' && elem != '.';
              });
              if(srcArray.length > 1)
                srcArray.shift();
              src = srcArray.join('/');
              $(this).attr('src', config.root + link + src);
              console.info&&console.info("update link as:-->"+config.root + link + src);
            }
        }else{
            console.info&&console.info("no src attr, skipped...");
            console.info&&console.info($(this));
        }
      });
      data[key] = $.html();
    }
  }
});
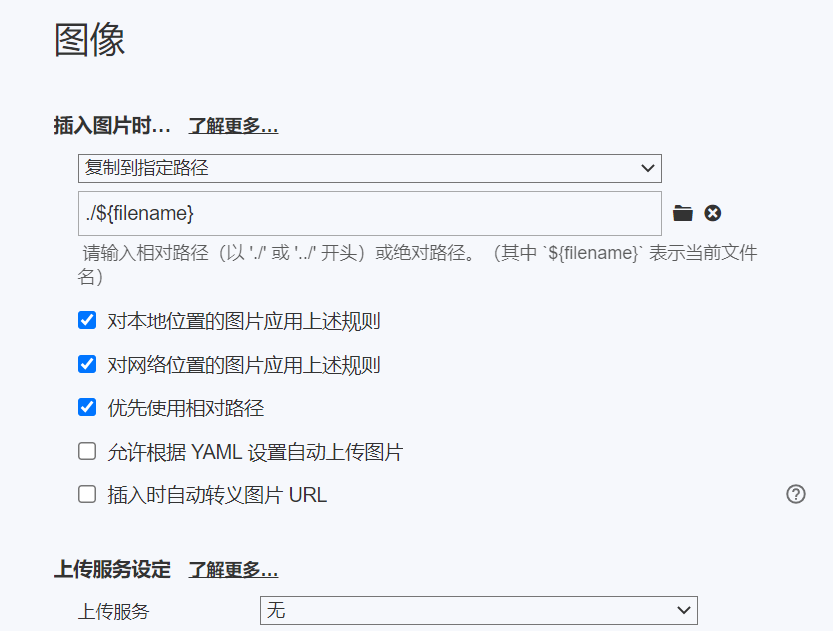
5.4 修改typora的图片保存方式
一定要记得修改为相对路径,否则无法正常显示图片
6. 点击图片放大
效果如图:
6.1 切换到lib目录
cd xxx.github.io\themes\next\source\lib
6.2 下载插件
git clone https://github.com/theme-next/theme-next-fancybox3 fancybox
6.3 更换主题配置文件
fancybox: true
7. 数学公式
7.1 hexo转化错误
Hexo默认使用 hexo-render-marked 引擎渲染网页(将一些特殊的makrdown语法转化为html标签),如markdown中的 _ 代表斜体,会被渲染引擎处理为 <em>
MathJax引擎在渲染数学公式的时候就会出错。例如, x i x_i xi在开始被渲染的时候,处理为 x ‘ < e m > ‘ i ‘ < / e m > ‘ x`<em>`i`</em>` x‘<em>‘i‘</em>‘,这样MathJax引擎就认为该公式有语法错误,因为不会渲染。
类似的语义冲突的符号还有 * ,{,},\\
7.2 解决方法
Hexo渲染主题的两个重要因素:mathjax和kramed,前者是数学公式渲染引擎,后者是Hexo的markdown渲染引擎,hexo默认渲染引擎是marked,但是它不支持mathjax,因此需要替换为 kramed 引擎。
7.2.1 Hexo添加数学公式解析插件mathjax
-
如果hexo安装有
hexo-math,需要先卸载它npm uninstall hexo-math --save -
安装
mathjaxnpm install hexo-renderer-mathjax --save -
hexo主题开启mathjax
进入主题目录,编辑
_config.yml,开启mathjax# MathJax Support mathjax: enable: true per_page: true -
在博客文章的开头加入
mathjax: true即可使用mathjax
7.2.2 hexo渲染引擎切换为 kramed
-
卸载 marked 引擎
npm uninstall hexo-renderer-marked --save -
安装kramed引擎
npm install hexo-renderer-kramed --save -
修改引擎bug
修改文件
node_modules\kramed\lib\rules\inline.js中escape和em两行// escape: /^\\([\\`*{}\[\]()#$+\-.!_>])/, escape: /^\\([`*\[\]()#$+\-.!_>])/, // em: /^\b_((?:__|[\s\S])+?)_\b|^\*((?:\*\*|[\s\S])+?)\*(?!\*)/, em: /^\*((?:\*\*|[\s\S])+?)\*(?!\*)/, -
重启hexo
hexo clean && hexo g -d
8. mermaid
8.1 安装hexo插件
在博客的根目录下,安装 hexo-filter-mermaid-diagrams 插件
$ npm install hexo-filter-mermaid-diagrams --save
8.2 NexT启用Mermaid
打开NexT主题的 _config.xml 配置文件,找到 mermaid 的配置项,设置 enable: true
# Mermaid tag
mermaid:
  enable: true
  # Available themes: default | dark | forest | neutral
  theme:
   	light: default
    dark: dark
9. 文章置顶
9.1 使用
Hexo 只提供了按发布日期的排序,所以需要修改依赖文件,在每篇文章的配置项设置 top: 数字 赋权(升序)
9.2 修改
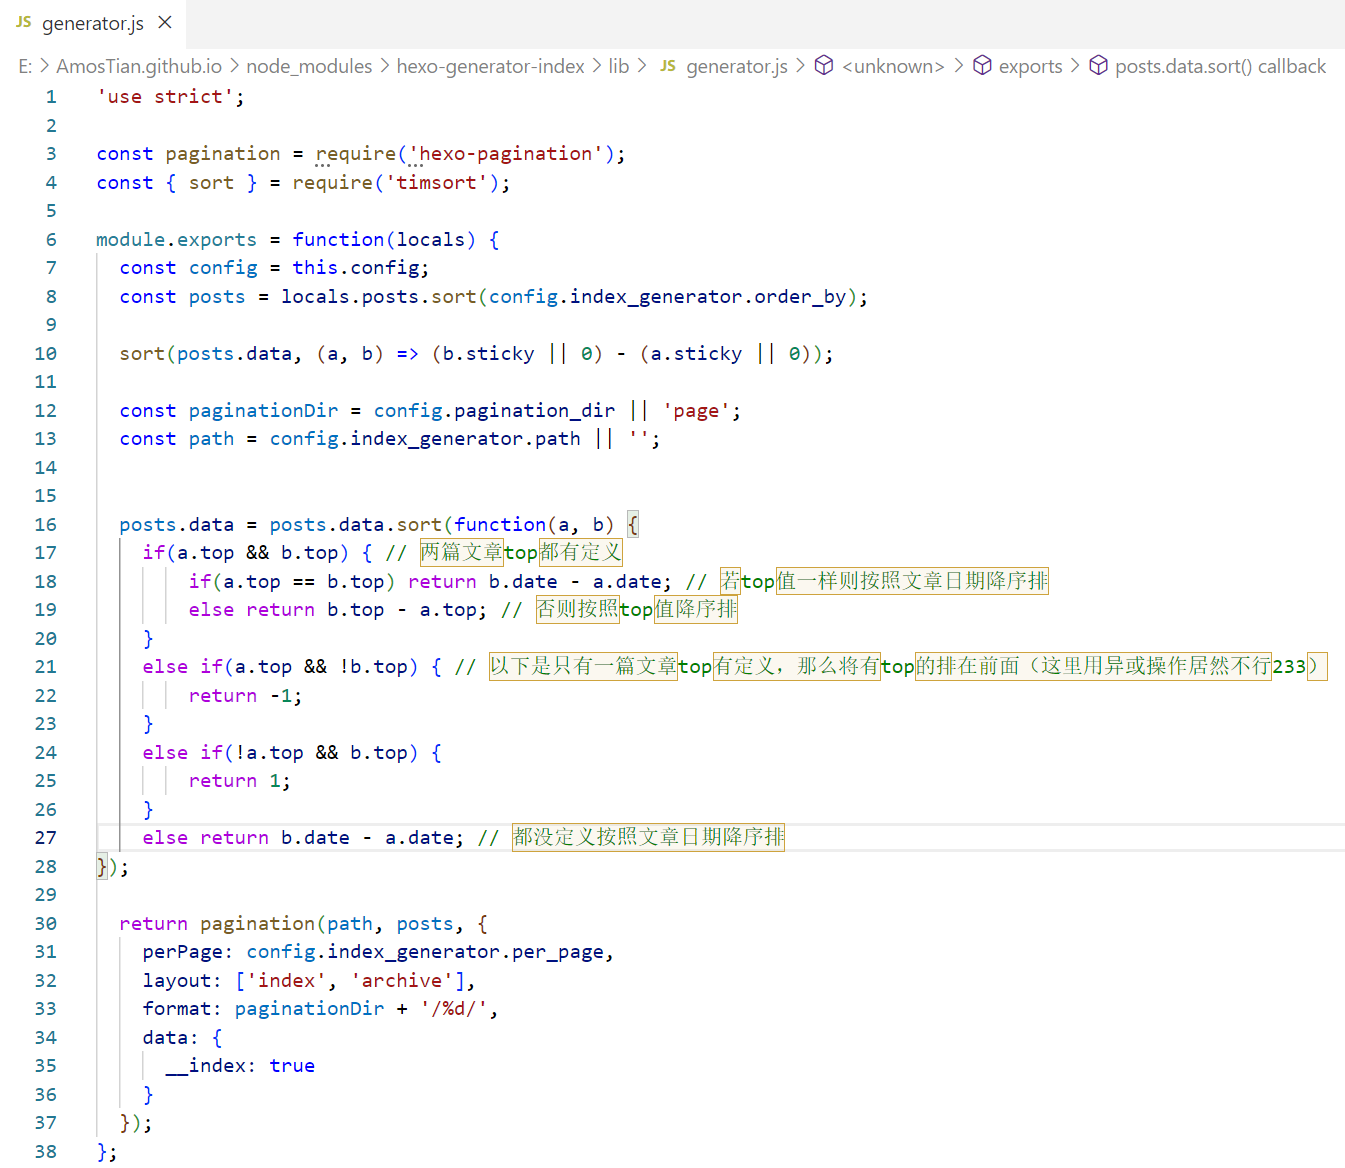
在 node_modules/hexo-generator-index/lib/generator.js 目录下新增
posts.data = posts.data.sort(function(a, b) {
    if(a.top && b.top) { // 两篇文章top都有定义
        if(a.top == b.top) return b.date - a.date; // 若top值一样则按照文章日期降序排
        else return b.top - a.top; // 否则按照top值降序排
    }
    else if(a.top && !b.top) { // 以下是只有一篇文章top有定义,那么将有top的排在前面(这里用异或操作居然不行233)
        return -1;
    }
    else if(!a.top && b.top) {
        return 1;
    }
    else return b.date - a.date; // 都没定义按照文章日期降序排
});
如图:
10. Hexo添加helper-live2d动态模型插件
10.1 安装模块
在hexo根目录执行命令
# npm install --save hexo-helper-live2d
10.2 下载模型
需要哪个模型就安装哪个
# npm install live2d-widget-model-hibiki
10.3 配置
在主题配置文件或者博客配置文件的 _config.xml 都可以
如:
# Live2D
## https://github.com/EYHN/hexo-helper-live2d
## https://l2dwidget.js.org/docs/class/src/index.js~L2Dwidget.html#instance-method-init
live2d:
  enable: true
  #enable: false
  scriptFrom: local # 默认
  pluginRootPath: live2dw/ # 插件在站点上的根目录(相对路径)
  pluginJsPath: lib/ # 脚本文件相对与插件根目录路径
  pluginModelPath: assets/ # 模型文件相对与插件根目录路径
  # scriptFrom: jsdelivr # jsdelivr CDN
  # scriptFrom: unpkg # unpkg CDN
  # scriptFrom: https://cdn.jsdelivr.net/npm/live2d-widget@3.x/lib/L2Dwidget.min.js # 你的自定义 url
  tagMode: false # 标签模式, 是否仅替换 live2d tag标签而非插入到所有页面中
  debug: false # 调试, 是否在控制台输出日志
  model:
    use: live2d-widget-model-hibiki
    # use: live2d-widget-model-wanko # npm-module package name
    # use: wanko # 博客根目录/live2d_models/ 下的目录名
    # use: ./wives/wanko # 相对于博客根目录的路径
    # use: https://cdn.jsdelivr.net/npm/live2d-widget-model-wanko@1.0.5/assets/wanko.model.json # 你的自定义 url
  display:
    position: right
    width: 145
    height: 315
  mobile:
    show: true # 是否在移动设备上显示
    scale: 0.5 # 移动设备上的缩放
  react:
    opacityDefault: 0.7
    opacityOnHover: 0.8
11. 压缩静态资源
11.1 gulp
11.1.1 全局安装gulp
npm install glup -g
gulp -v #查看版本
11.1.2 在站点目录下安装
npm install gulp-minify-css --save
11.1.3 安装gulp插件
npm install gulp --save
npm install gulp-minify-css --save
npm install gulp-uglify --save
npm install gulp-htmlmin --save
npm install gulp-htmlclean --save
npm install gulp-imagemin --save
# 解决【Gulp打包问题】 GulpUglifyError: unable to minify JavaScript
# 解决 gulp-uglify 压缩JavaScript 不兼容 es5 语法的问题
npm install babel-core@6.26.3 --save
npm install gulp-babel@7.0.1 --save
npm install babel-preset-es2015@6.24.1 --save
# gulp-babel 取消严格模式方法("use strict")
npm install babel-plugin-transform-remove-strict-mode --save
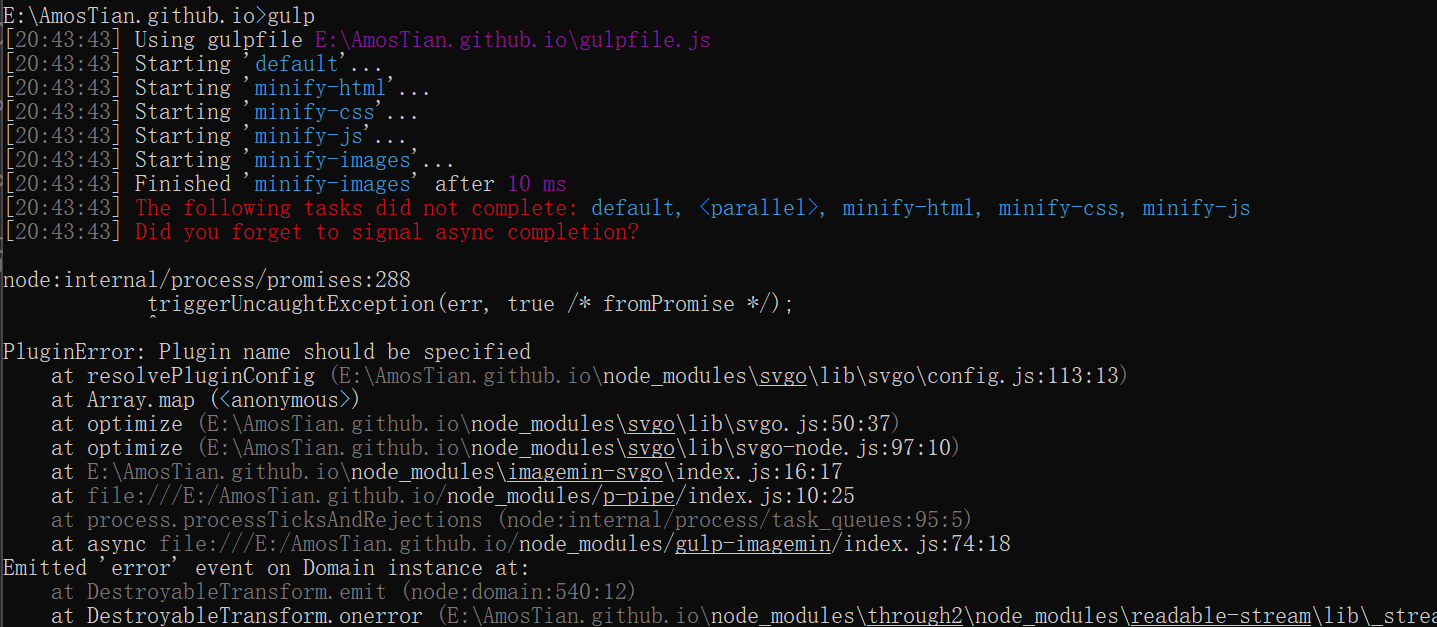
11.1.4 创建 gulp.js 文件
在 Hexo 站点下创建 gulpfile.js 文件
相关问题与解决参考:
imagemin.jpegtran is not a function
注意:
- 图片压缩:由于我使用了图片插件
hexo-asset-image,所以不适合用这种方式压缩,仅做记录
import gulp from 'gulp';
import minifycss from 'gulp-minify-css';
import uglify from 'gulp-uglify';
import htmlmin from 'gulp-htmlmin';
import htmlclean from 'gulp-htmlclean';
import imagemin from 'gulp-imagemin';
import babel from 'gulp-babel';
import imageminGifsicle from 'imagemin-gifsicle';
import mozjpeg from 'imagemin-mozjpeg';
import optipng from 'imagemin-optipng';
import svgo from 'imagemin-svgo';

// 压缩css文件
gulp.task('minify-css', function (done) {
    return gulp.src('./public/**/*.css')
        .pipe(minifycss())
        .pipe(gulp.dest('./public'));
    done();
});

// 压缩html文件
gulp.task('minify-html', function (done) {
    return gulp.src('./public/**/*.html')
        .pipe(htmlclean())
        .pipe(htmlmin({
            removeComments: true,
            minifyJS: true,
            minifyCSS: true,
            minifyURLs: true,
        }))
        .pipe(gulp.dest('./public'));
    done();
});

// 压缩js文件
gulp.task('minify-js', function (done) {
    return gulp.src(['./public/**/*.js', '!./public/**/*.min.js'])
        .pipe(babel({
            //将ES6代码转译为可执行的JS代码
            presets: ['es2015'] // es5检查机制
        }))
        .pipe(uglify())
        .pipe(gulp.dest('./public'));
    done();
});

// 压缩 public/images 目录内图片(Version<3)
// gulp.task('minify-images', function () {
//     gulp.src('./public/images/**/*.*')
//         .pipe(imagemin({
//             optimizationLevel: 5, //类型:Number  默认:3  取值范围:0-7(优化等级)
//             progressive: true, //类型:Boolean 默认:false 无损压缩jpg图片
//             interlaced: false, //类型:Boolean 默认:false 隔行扫描gif进行渲染
//             multipass: false, //类型:Boolean 默认:false 多次优化svg直到完全优化
//         }))
//         .pipe(gulp.dest('./public/images'));
// });

// 压缩 public/images 目录内图片(Version>3)
gulp.task('minify-images', function (done) {
    gulp.src('./public/images/**/*.*')
        .pipe(imagemin([
            imageminGifsicle({interlaced: true}),
            mozjpeg({progressive: true}),
            optipng({optimizationLevel: 5}),
            svgo({
                plugins: [
                    {removeViewBox: true},
                    {cleanupIDs: false}
                ]
            })
        ]))
        .pipe(gulp.dest('./public/images'));
    done();
});

//4.0以前的写法
//gulp.task('default', [
//  'minify-html', 'minify-css', 'minify-js', 'minify-images'
//]);
//4.0以后的写法
// 执行 gulp 命令时执行的任务
gulp.task('default', gulp.series(gulp.parallel('minify-html', 'minify-css', 'minify-js', 'minify-images')), function (cb) {
    console.log("----------gulp Finished----------");
    // Do something after a, b, and c are finished.
    cb();
});
11.1.4 创建 .babelrc 文件
{
    'presets': ['es2015'],
    "plugins": ["transform-remove-strict-mode"]
}
目前问题:
11.2 hexo-neat
我们利用Hexo生成的博客文件中存在大量的空格和空行,从而使得博客资源中有很多不必要的内存消耗,使得网站加载变慢,所以可以利用neat进行博文压缩,
已知 BUG:
- 压缩 md 文件会使 markdown 语法的代码块消失
- 会删除全角空格
首先安装:
npm install hexo-neat --save
为了在开启hexo-neat的同时,不要将我们的动态配置压缩了,可在站点配置文件中加入:
# hexo-neat
# 博文压缩
neat_enable: true
# 压缩html
neat_html:
  enable: true
  exclude:
# 压缩css
neat_css:
  enable: true
  exclude:
    - '**/*.min.css'
# 压缩js
neat_js:
  enable: true
  mangle: true
  output:
  compress:
  exclude:
    - '**/*.min.js'
    - '**/jquery.fancybox.pack.js'
    - '**/index.js'
    - '**/clicklove.js'
    - '**/fireworks.js'
在 hexo g 时自动调用

12. NexT主题优化
12.1 简单配置(主题配置文件)
12.1.1 主题选择
Next提供了四中主题风格scheme,可以在主题配置文件blog/themes/next/_config.yml文件中进行选择,分别是Muse、Mist、Pisces、Gemini:
12.1.2 添加博客自定义图标
博客网站的图标可以是一些矢量图标,然后选择或者创建相应大小的图标文件,放置在 blog/themes/next/sources/images 目录下,并在主题配置文件中进行配置
favicon:
  small: /images/16x16.png
  medium: /images/32x32.png
  apple_touch_icon: /images/128x128.png
  safari_pinned_tab: /images/logo2.svg
12.1.3 修改标签样式
博客底部的标签样式默认为#tag,我们可以将其改成:
只需要修改模板 /themes/next/layout/_macro/post.swig,搜索 rel="tag"># ,将 # 换成 <i class="fa fa-tag"></i>
12.1.4 文章结束标志

在路径 \themes\next\layout\_macro 中新建 passage-end-tag.swig 文件,并添加以下内容
<div>
    {% if not is_index %}
        <div style="text-align:center;color: #ccc;font-size:14px;">-------------本文结束<i class="fa fa-paw"></i>感谢您的阅读-------------</div>
    {% endif %}
</div>
接着打开\themes\next\layout\_macro\post.swig文件,在post-body 之后(END POST BODY), post-footer 之前添加如代码:
<div>
  {% if not is_index %}
    {% include 'passage-end-tag.swig' %}
  {% endif %}
</div>
然后打开主题配置文件(_config.yml),在末尾添加:
# 文章末尾添加“本文结束”标记
passage_end_tag:
  enabled: true
12.1.5 侧边栏设置
设置主题配置文件,其中 social 表示社交信息,我们可以填入我们相关的链接,格式为 链接名:链接地址 || 链接图标 ,其中链接图标必须是FontAwesome网站中存在的图标名
# Posts / Categories / Tags in sidebar.
site_state: true # 是否在侧边栏加入日志、分类、标签等跳转链接

# Social Links
# Usage: `Key: permalink || icon`
# Key is the link label showing to end users.
# Value before `||` delimeter is the target permalink.
# Value after `||` delimeter is the name of FontAwesome icon. If icon (with or without delimeter) is not specified, globe icon will be loaded.
social:
  GitHub: https://github.com/nightmaredimple || github #
  CSDN: https://blog.csdn.net/nightmare_dimple || crosshairs
  #E-Mail: mailto:yourname@gmail.com || envelope
  #Weibo: https://weibo.com/yourname || weibo
  #Google: https://plus.google.com/yourname || google
  #Twitter: https://twitter.com/yourname || twitter
  #FB Page: https://www.facebook.com/yourname || facebook
  #VK Group: https://vk.com/yourname || vk
  #StackOverflow: https://stackoverflow.com/yourname || stack-overflow
  #YouTube: https://youtube.com/yourname || youtube
  #Instagram: https://instagram.com/yourname || instagram
  #Skype: skype:yourname?call|chat || skype

social_icons:
  enable: true #是否显示社交图标
  icons_only: false #是否仅显示社交图标
  transition: true

# Follow me on GitHub banner in right-top corner.
# Usage: `permalink || title`
# Value before `||` delimeter is the target permalink.
# Value after `||` delimeter is the title and aria-label name.
github_banner: https://github.com/nightmaredimple || Follow me on GitHub #添加右上角github绑带

# Blog rolls
links_icon: link
links_title: Links
links_layout: block
#links_layout: inline
#links:
  #Title: http://example.com

# Sidebar Avatar
avatar: #头像设置
  # in theme directory(source/images): /images/avatar.gif
  # in site  directory(source/uploads): /uploads/avatar.gif
  # You can also use other linking images.
  url: /images/author.jpg
  # If true, the avatar would be dispalyed in circle.
  rounded: true
  # The value of opacity should be choose from 0 to 1 to set the opacity of the avatar.
  opacity: 1
  # If true, the avatar would be rotated with the cursor.
  rotated: true

# Table Of Contents in the Sidebar
toc:
  enable: true #是否自动生成目录
  # Automatically add list number to toc.
  number: false #目录是否自动产生编号
  # If true, all words will placed on next lines if header width longer then sidebar width.
  wrap: false #标题过长是否换行
  # Maximum heading depth of generated toc. You can set it in one post through `toc_max_depth` var.
  max_depth: 6 #最大标题深度

sidebar:
  # Sidebar Position, available values: left | right (only for Pisces | Gemini).
  position: left #侧边栏位置
  #position: right

  # Manual define the sidebar width.
  # If commented, will be default for:
  # Muse | Mist: 320
  # Pisces | Gemini: 240
  #width: 300

  # Sidebar Display, available values (only for Muse | Mist):
  #  - post    expand on posts automatically. Default.
  #  - always  expand for all pages automatically
  #  - hide    expand only when click on the sidebar toggle icon.
  #  - remove  Totally remove sidebar including sidebar toggle.
  display: post
  #display: always
  #display: hide
  #display: remove

  # Sidebar offset from top menubar in pixels (only for Pisces | Gemini).
  offset: 12 #侧边栏相对主菜单像素距离
  # Back to top in sidebar.
  b2t: true #是否提供一键置顶
  # Scroll percent label in b2t button.
  scrollpercent: true #是否显示当前阅读进度
  # Enable sidebar on narrow view (only for Muse | Mist).
  onmobile: false #手机上是否显示侧边栏
12.1.6 添加文章版权信息
要想开启博客的版权功能,需要设置主题配置文件:
creative_commons:
  license: by-nc-sa
  sidebar: true
  post: true
12.1.7 设置博客底部布局
footer:
  # Specify the date when the site was setup.
  # If not defined, current year will be used.
  since: 2019 #建站时间

  # Icon between year and copyright info.
  icon:
    # Icon name in fontawesome, see: https://fontawesome.com/v4.7.0/icons/
    # `heart` is recommended with animation in red (#ff0000).
    name: heart  #作者图标(默认是author人像)
    # If you want to animate the icon, set it to true.
    animated: true #图标是否闪动
    # Change the color of icon, using Hex Code.
    color: "#808080" #图标颜色

  # If not defined, `author` from Hexo main config will be used.
  copyright: 黄飘 #别填bool型,最后显示的东西是copyright || author,即左边没有设置的话就显示作者
  # -------------------------------------------------------------
  powered:
    # Hexo link (Powered by Hexo).
    enable: false #是否显示 Powered by hexo
    # Version info of Hexo after Hexo link (vX.X.X).
    version: false #是否显示Hexo版本

  theme:
    # Theme & scheme info link (Theme - NexT.scheme).
    enable: false #是否显示主题信息
    # Version info of NexT after scheme info (vX.X.X).
    version: false #是否显示主题版本
  # -------------------------------------------------------------
  # Beian icp information for Chinese users. In China, every legal website should have a beian icp in website footer.
  # http://www.miitbeian.gov.cn
  beian:
    enable: false #是否显示网站备案信息
    icp:

  # -------------------------------------------------------------
  # Any custom text can be defined here.
  #custom_text: Hosted by <a href="https://pages.coding.me" class="theme-link" rel="noopener" target="_blank">Coding Pages</a>
12.1.8 设置博客摘要显示
对于摘要显示,首先我们需要开启摘要功能,修改主题配置文件:
# Automatically scroll page to section which is under <!-- more --> mark.
scroll_to_more: true #选取博客正文<!--more-->前的内容

# Automatically saving scroll position on each post/page in cookies.
save_scroll: false

# Automatically excerpt description in homepage as preamble text.
excerpt_description: true #自动截取摘要

# Automatically Excerpt. Not recommend.
# Use <!-- more --> in the post to control excerpt accurately.
auto_excerpt:
  enable: false #自动截取一定程度的摘要
  length: 150

# Read more button
# If true, the read more button would be displayed in excerpt section.
read_more_btn: true #显示阅读全文按钮
12.1.9 修改文章链接样式

修改文件 themes\next\source\css\_common\components\post\post.styl,在末尾添加如下css样式,:
// 文章内链接文本样式
.post-body p a{
  color: #0593d3;
  border-bottom: none;
  border-bottom: 1px solid #0593d3;
  &:hover {
    color: #fc6423;
    border-bottom: none;
    border-bottom: 1px solid #fc6423;
  }
}
12.1.10 修改分类层级显示
-
修改
post.swig\hexo-theme\next\layout\_macro\post.swig查找
{{ __('symbol.comma') }}改为
{{('>') }} -
修改
custom.styl\themes\next\source\css\_common\components\pages.category-list ul { list-style: none; li:before { content: '>>'; } }
12.1.11 更改标签云颜色
/blog/themes/next/layout/page.swig
{{ tagcloud({
        min_font   : theme.tagcloud.min,
        max_font   : theme.tagcloud.max,
        amount     : theme.tagcloud.amount,
        color      : true,
        start_color: '#9733EE',
        end_color  : '#FF512F'
    })
}}
hexo 颜色配置:https://hexo.io/zh-cn/docs/helpers.html#tagcloud
12.2 添加懒加载
lazylod可以在用户不查看的时候,不加载相关部分,从而提升网站加载速度:
在themes/next/下执行
git clone https://github.com/theme-next/theme-next-jquery-lazyload source/lib/jquery_lazyload
然后配置博客文件:
lazyload: true
12.3 网站动态元素延时加载
我们的网站添加了许多动态元素之后,加载速度会变慢,所以可以先不加载动态元素,等静态元素加载完之后再加载动态元素,这样就加速了网站的登入。可设置主题文件:
# Use velocity to animate everything.
motion:
  enable: false
  async: false
  transition:
    # Transition variants:
    # fadeIn | fadeOut | flipXIn | flipXOut | flipYIn | flipYOut | flipBounceXIn | flipBounceXOut | flipBounceYIn | flipBounceYOut
    # swoopIn | swoopOut | whirlIn | whirlOut | shrinkIn | shrinkOut | expandIn | expandOut
    # bounceIn | bounceOut | bounceUpIn | bounceUpOut | bounceDownIn | bounceDownOut | bounceLeftIn | bounceLeftOut | bounceRightIn | bounceRightOut
    # slideUpIn | slideUpOut | slideDownIn | slideDownOut | slideLeftIn | slideLeftOut | slideRightIn | slideRightOut
    # slideUpBigIn | slideUpBigOut | slideDownBigIn | slideDownBigOut | slideLeftBigIn | slideLeftBigOut | slideRightBigIn | slideRightBigOut
    # perspectiveUpIn | perspectiveUpOut | perspectiveDownIn | perspectiveDownOut | perspectiveLeftIn | perspectiveLeftOut | perspectiveRightIn | perspectiveRightOut
    post_block: fadeIn
    post_header: slideDownIn
    post_body: slideDownIn
    coll_header: slideLeftIn
    # Only for Pisces | Gemini.
    sidebar: slideUpIn
12.4 添加站内静态搜索
Next集成了站内搜索功能,可先安装依赖:
npm install hexo-generator-searchdb --save
然后设置主题配置文件:
# Local search
# Dependencies: https://github.com/theme-next/hexo-generator-searchdb
local_search:
  enable: true
  # if auto, trigger search by changing input
  # if manual, trigger search by pressing enter key or search button
  trigger: auto
  # show top n results per article, show all results by setting to -1
  top_n_per_article: 3
  # unescape html strings to the readable one
  unescape: false
12.5. 侧边栏目录
12.5.1 显示侧边目录
主题文件配置文件
sidebar:
  # Sidebar Position.
  position: left
  #position: right

  # Manual define the sidebar width. If commented, will be default for:
  # Muse | Mist: 320
  # Pisces | Gemini: 240
  #width: 300

  # Sidebar Display (only for Muse | Mist), available values:
  #  - post    expand on posts automatically. Default.
  #  - always  expand for all pages automatically.
  #  - hide    expand only when click on the sidebar toggle icon.
  #  - remove  totally remove sidebar including sidebar toggle.
  display: post

  # Sidebar padding in pixels.
  padding: 18
  # Sidebar offset from top menubar in pixels (only for Pisces | Gemini).
  offset: 12
  # Enable sidebar on narrow view (only for Muse | Mist).
  onmobile: false
12.5.2 中文目录不跳转
https://github.com/theme-next/hexo-theme-next/pull/1540/commits/ec521c927dc10255977324284c1c667f2e220da7
主题目录:

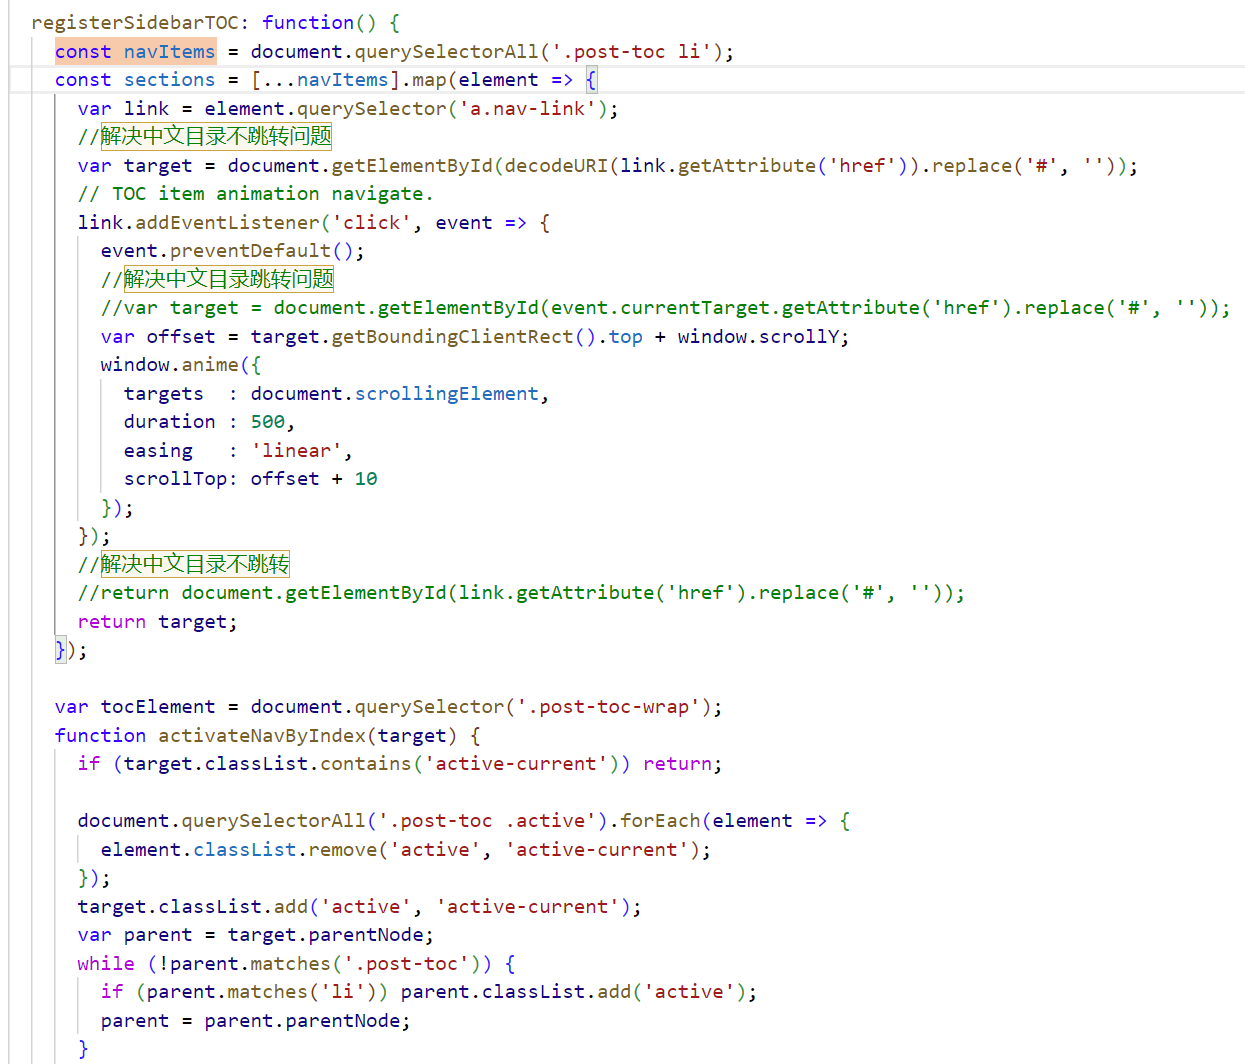
const navItems = document.querySelectorAll('.post-toc li');
    const sections = [...navItems].map(element => {
      var link = element.querySelector('a.nav-link');
      //解决中文目录不跳转问题
      var target = document.getElementById(decodeURI(link.getAttribute('href')).replace('#', ''));
      // TOC item animation navigate.
      link.addEventListener('click', event => {
        event.preventDefault();
        //解决中文目录跳转问题
        //var target = document.getElementById(event.currentTarget.getAttribute('href').replace('#', ''));
        var offset = target.getBoundingClientRect().top + window.scrollY;
        window.anime({
          targets  : document.scrollingElement,
          duration : 500,
          easing   : 'linear',
          scrollTop: offset + 10
        });
      });
      //解决中文目录不跳转
      //return document.getElementById(link.getAttribute('href').replace('#', ''));
      return target;
    });
12.6 统计功能
-
安装插件,在hexo根目录下执行
npm install hexo-wordcount --save -
在主题配置文件
_coinfig.xml下搜索Post wordcount,并配置以下参数:wordcount:字数统计min2read:阅读时长统计totalcount:总子树统计
12.7 鼠标点击特效
-
在
/themes/next/source/js/src下新建文件 clicklove.js ,接着把下面的代码拷贝粘贴到 clicklove.js 文件中:!function(e,t,a){function n(){c(".heart{width: 10px;height: 10px;position: fixed;background: #f00;transform: rotate(45deg);-webkit-transform: rotate(45deg);-moz-transform: rotate(45deg);}.heart:after,.heart:before{content: '';width: inherit;height: inherit;background: inherit;border-radius: 50%;-webkit-border-radius: 50%;-moz-border-radius: 50%;position: fixed;}.heart:after{top: -5px;}.heart:before{left: -5px;}"),o(),r()}function r(){for(var e=0;e<d.length;e++)d[e].alpha<=0?(t.body.removeChild(d[e].el),d.splice(e,1)):(d[e].y--,d[e].scale+=.004,d[e].alpha-=.013,d[e].el.style.cssText="left:"+d[e].x+"px;top:"+d[e].y+"px;opacity:"+d[e].alpha+";transform:scale("+d[e].scale+","+d[e].scale+") rotate(45deg);background:"+d[e].color+";z-index:99999");requestAnimationFrame(r)}function o(){var t="function"==typeof e.onclick&&e.onclick;e.onclick=function(e){t&&t(),i(e)}}function i(e){var a=t.createElement("div");a.className="heart",d.push({el:a,x:e.clientX-5,y:e.clientY-5,scale:1,alpha:1,color:s()}),t.body.appendChild(a)}function c(e){var a=t.createElement("style");a.type="text/css";try{a.appendChild(t.createTextNode(e))}catch(t){a.styleSheet.cssText=e}t.getElementsByTagName("head")[0].appendChild(a)}function s(){return"rgb("+~~(255*Math.random())+","+~~(255*Math.random())+","+~~(255*Math.random())+")"}var d=[];e.requestAnimationFrame=function(){return e.requestAnimationFrame||e.webkitRequestAnimationFrame||e.mozRequestAnimationFrame||e.oRequestAnimationFrame||e.msRequestAnimationFrame||function(e){setTimeout(e,1e3/60)}}(),n()}(window,document); -
在
\themes\next\layout\_layout.swig文件末尾添加<!-- 页面点击小红心 --> <script type="text/javascript" src="/js/src/clicklove.js"></script>
-
跟那个红心是差不多的,首先在
themes/next/source/js/src里面建一个叫fireworks.js的文件,代码如下:"use strict";function updateCoords(e){pointerX=(e.clientX||e.touches[0].clientX)-canvasEl.getBoundingClientRect().left,pointerY=e.clientY||e.touches[0].clientY-canvasEl.getBoundingClientRect().top}function setParticuleDirection(e){var t=anime.random(0,360)*Math.PI/180,a=anime.random(50,180),n=[-1,1][anime.random(0,1)]*a;return{x:e.x+n*Math.cos(t),y:e.y+n*Math.sin(t)}}function createParticule(e,t){var a={};return a.x=e,a.y=t,a.color=colors[anime.random(0,colors.length-1)],a.radius=anime.random(16,32),a.endPos=setParticuleDirection(a),a.draw=function(){ctx.beginPath(),ctx.arc(a.x,a.y,a.radius,0,2*Math.PI,!0),ctx.fillStyle=a.color,ctx.fill()},a}function createCircle(e,t){var a={};return a.x=e,a.y=t,a.color="#F00",a.radius=0.1,a.alpha=0.5,a.lineWidth=6,a.draw=function(){ctx.globalAlpha=a.alpha,ctx.beginPath(),ctx.arc(a.x,a.y,a.radius,0,2*Math.PI,!0),ctx.lineWidth=a.lineWidth,ctx.strokeStyle=a.color,ctx.stroke(),ctx.globalAlpha=1},a}function renderParticule(e){for(var t=0;t<e.animatables.length;t++){e.animatables[t].target.draw()}}function animateParticules(e,t){for(var a=createCircle(e,t),n=[],i=0;i<numberOfParticules;i++){n.push(createParticule(e,t))}anime.timeline().add({targets:n,x:function(e){return e.endPos.x},y:function(e){return e.endPos.y},radius:0.1,duration:anime.random(1200,1800),easing:"easeOutExpo",update:renderParticule}).add({targets:a,radius:anime.random(80,160),lineWidth:0,alpha:{value:0,easing:"linear",duration:anime.random(600,800)},duration:anime.random(1200,1800),easing:"easeOutExpo",update:renderParticule,offset:0})}function debounce(e,t){var a;return function(){var n=this,i=arguments;clearTimeout(a),a=setTimeout(function(){e.apply(n,i)},t)}}var canvasEl=document.querySelector(".fireworks");if(canvasEl){var ctx=canvasEl.getContext("2d"),numberOfParticules=30,pointerX=0,pointerY=0,tap="mousedown",colors=["#FF1461","#18FF92","#5A87FF","#FBF38C"],setCanvasSize=debounce(function(){canvasEl.width=2*window.innerWidth,canvasEl.height=2*window.innerHeight,canvasEl.style.width=window.innerWidth+"px",canvasEl.style.height=window.innerHeight+"px",canvasEl.getContext("2d").scale(2,2)},500),render=anime({duration:1/0,update:function(){ctx.clearRect(0,0,canvasEl.width,canvasEl.height)}});document.addEventListener(tap,function(e){"sidebar"!==e.target.id&&"toggle-sidebar"!==e.target.id&&"A"!==e.target.nodeName&&"IMG"!==e.target.nodeName&&(render.play(),updateCoords(e),animateParticules(pointerX,pointerY))},!1),setCanvasSize(),window.addEventListener("resize",setCanvasSize,!1)}"use strict";function updateCoords(e){pointerX=(e.clientX||e.touches[0].clientX)-canvasEl.getBoundingClientRect().left,pointerY=e.clientY||e.touches[0].clientY-canvasEl.getBoundingClientRect().top}function setParticuleDirection(e){var t=anime.random(0,360)*Math.PI/180,a=anime.random(50,180),n=[-1,1][anime.random(0,1)]*a;return{x:e.x+n*Math.cos(t),y:e.y+n*Math.sin(t)}}function createParticule(e,t){var a={};return a.x=e,a.y=t,a.color=colors[anime.random(0,colors.length-1)],a.radius=anime.random(16,32),a.endPos=setParticuleDirection(a),a.draw=function(){ctx.beginPath(),ctx.arc(a.x,a.y,a.radius,0,2*Math.PI,!0),ctx.fillStyle=a.color,ctx.fill()},a}function createCircle(e,t){var a={};return a.x=e,a.y=t,a.color="#F00",a.radius=0.1,a.alpha=0.5,a.lineWidth=6,a.draw=function(){ctx.globalAlpha=a.alpha,ctx.beginPath(),ctx.arc(a.x,a.y,a.radius,0,2*Math.PI,!0),ctx.lineWidth=a.lineWidth,ctx.strokeStyle=a.color,ctx.stroke(),ctx.globalAlpha=1},a}function renderParticule(e){for(var t=0;t<e.animatables.length;t++){e.animatables[t].target.draw()}}function animateParticules(e,t){for(var a=createCircle(e,t),n=[],i=0;i<numberOfParticules;i++){n.push(createParticule(e,t))}anime.timeline().add({targets:n,x:function(e){return e.endPos.x},y:function(e){return e.endPos.y},radius:0.1,duration:anime.random(1200,1800),easing:"easeOutExpo",update:renderParticule}).add({targets:a,radius:anime.random(80,160),lineWidth:0,alpha:{value:0,easing:"linear",duration:anime.random(600,800)},duration:anime.random(1200,1800),easing:"easeOutExpo",update:renderParticule,offset:0})}function debounce(e,t){var a;return function(){var n=this,i=arguments;clearTimeout(a),a=setTimeout(function(){e.apply(n,i)},t)}}var canvasEl=document.querySelector(".fireworks");if(canvasEl){var ctx=canvasEl.getContext("2d"),numberOfParticules=30,pointerX=0,pointerY=0,tap="mousedown",colors=["#FF1461","#18FF92","#5A87FF","#FBF38C"],setCanvasSize=debounce(function(){canvasEl.width=2*window.innerWidth,canvasEl.height=2*window.innerHeight,canvasEl.style.width=window.innerWidth+"px",canvasEl.style.height=window.innerHeight+"px",canvasEl.getContext("2d").scale(2,2)},500),render=anime({duration:1/0,update:function(){ctx.clearRect(0,0,canvasEl.width,canvasEl.height)}});document.addEventListener(tap,function(e){"sidebar"!==e.target.id&&"toggle-sidebar"!==e.target.id&&"A"!==e.target.nodeName&&"IMG"!==e.target.nodeName&&(render.play(),updateCoords(e),animateParticules(pointerX,pointerY))},!1),setCanvasSize(),window.addEventListener("resize",setCanvasSize,!1)}; -
打开
themes/next/layout/_layout.swig,在</body>上面写下如下代码:{% if theme.fireworks %} <canvas class="fireworks" style="position: fixed;left: 0;top: 0;z-index: 1; pointer-events: none;" ></canvas> <script type="text/javascript" src="//cdn.bootcss.com/animejs/2.2.0/anime.min.js"></script> <script type="text/javascript" src="/js/src/fireworks.js"></script> {% endif %} -
打开主题配置文件,在里面最后写下:
# Fireworks
fireworks: true
12.8 添加动态背景
转载:http://yearito.cn/posts/hexo-theme-beautify.html
12.8.1 粒子漂浮聚合
上面这种只是其中一种动态背景,新版的Next主题集成了该功能,
在根目录下克隆依赖
git clone https://github.com/theme-next/theme-next-canvas-nest themes/next/source/lib/canvas-nest
只需要在主题配置中设置如下即可
# Canvas-nest
# Dependencies: https://github.com/theme-next/theme-next-canvas-nest
canvas_nest: # 网络背景
  enable: true
  onmobile: true # display on mobile or not
  color: '0,0,0' # RGB values, use ',' to separate
  opacity: 0.5 # the opacity of line: 0~1
  zIndex: -1 # z-index property of the background
  count: 150 # the number of lines

# JavaScript 3D library.
# Dependencies: https://github.com/theme-next/theme-next-three
# three_waves
three_waves: false
# canvas_lines
canvas_lines: false
# canvas_sphere
canvas_sphere: false

# Canvas-ribbon
# Dependencies: https://github.com/theme-next/theme-next-canvas-ribbon
# size: The width of the ribbon.
# alpha: The transparency of the ribbon.
# zIndex: The display level of the ribbon.
canvas_ribbon:
  enable: false
  size: 300
  alpha: 0.6
  zIndex: -1
12.8.2 Three三维效果
在安装依赖根目录下
$ git clone https://github.com/theme-next/theme-next-three themes/next/source/lib/three
然后在主题配置文件中设置开启对应的动效选项即可。
# JavaScript 3D library.
# Dependencies: https://github.com/theme-next/theme-next-three
# three_waves
three_waves: true
# canvas_lines
canvas_lines: false
# canvas_sphere
canvas_sphere: false
12.8.3 随机三角丝带
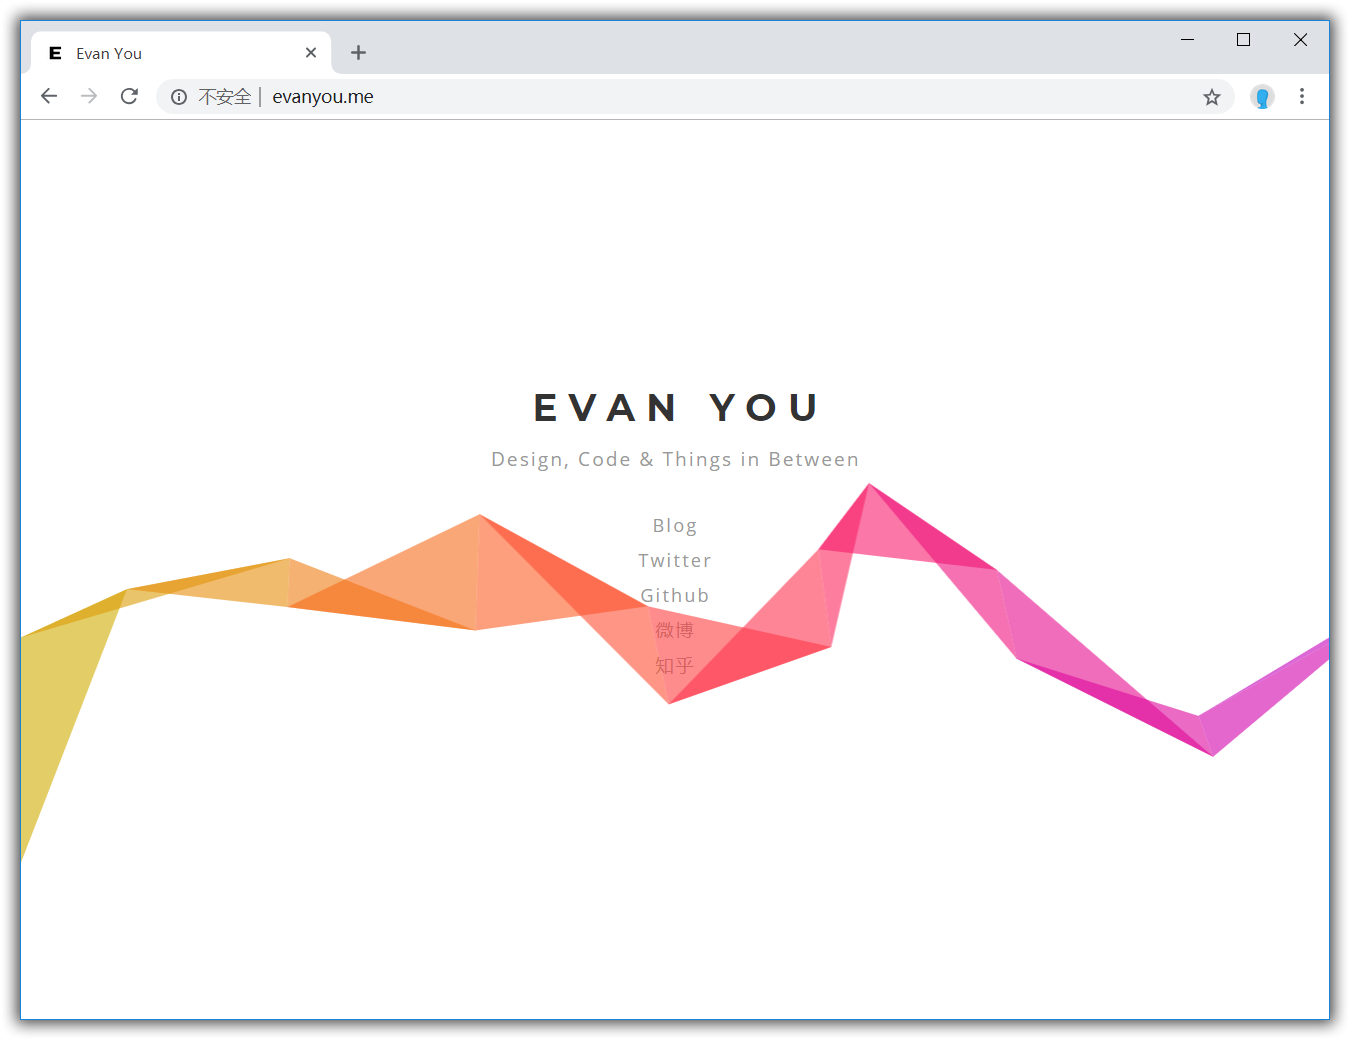
点击下方按钮下载相应的脚本,并置于 themes\next\source\js\ 目录下:
if (document.getElementById('evanyou')) {
  var c = document.getElementById('evanyou'),
    x = c.getContext('2d'),
    pr = window.devicePixelRatio || 1,
    w = window.innerWidth,
    h = window.innerHeight,
    f = 90,
    q,
    m = Math,
    r = 0,
    u = m.PI * 2,
    v = m.cos,
    z = m.random
  c.width = w * pr
  c.height = h * pr
  x.scale(pr, pr)
  x.globalAlpha = 0.6
  function evanyou () {
    x.clearRect(0, 0, w, h)
    q = [{ x: 0, y: h * .7 + f }, { x: 0, y: h * .7 - f }]
    while (q[1].x < w + f) d(q[0], q[1])
  }
  function d (i, j) {
    x.beginPath()
    x.moveTo(i.x, i.y)
    x.lineTo(j.x, j.y)
    var k = j.x + (z() * 2 - 0.25) * f,
      n = y(j.y)
    x.lineTo(k, n)
    x.closePath()
    r -= u / -50
    x.fillStyle = '#' + (v(r) * 127 + 128 << 16 | v(r + u / 3) * 127 + 128 << 8 | v(r + u / 3 * 2) * 127 + 128).toString(16)
    x.fill()
    q[0] = q[1]
    q[1] = { x: k, y: n }
  }
  function y (p) {
    var t = p + (z() * 2 - 1.1) * f
    return (t > h || t < 0) ? y(p) : t
  }
  document.onclick = evanyou
  document.ontouchstart = evanyou
  evanyou()
}
在主题自定义布局文件中添加以下代码:
themes\next\layout\_custom\custom.swig
{# 随机三角丝带背景 #}
{% if theme.evanyou %}
  <canvas id="evanyou"></canvas>
  <style>
    #evanyou {
      position: fixed;
      width: 100%;
      height: 100%;
      top: 0;
      left: 0;
      z-index: -1;
    }
  </style>
  <script src="/js/evan-you.js"></script>
{% endif %}
如果 custom.swig 文件不存在,需要手动新建并在布局页面中 body 末尾引入:
themes\next\layout\_layout.swig
     ...
      {% include '_third-party/exturl.swig' %}
      {% include '_third-party/bookmark.swig' %}
      {% include '_third-party/copy-code.swig' %}

+     {% include '_custom/custom.swig' %}
    </body>
  </html>
在主题配置文件中添加以下代码:
# colorful trilateral riband background
evanyou: true
12.9 回到顶部
原理很简单,将 back-to-top 按钮添加图片背景,并添加 CSS3 动效即可。
首先,找到自己喜欢的图片素材放到 source\images\ 目录下。
你可以点击下方按钮下载本站所使用的小猫上吊素材( 小猫咪这么可爱,当然要多放点孜然啦…)

然后在自定义样式文件中添加如下代码:
themes\next\source\css\_custom\custom.styl
//自定义回到顶部样式
.back-to-top {
  right: 60px;
  width: 70px;  //图片素材宽度
  height: 900px;  //图片素材高度
  top: -900px;
  bottom: unset;
  transition: all .5s ease-in-out;
  background: url("/images/scroll.png");

  //隐藏箭头图标
  > i {
    display: none;
  }

  &.back-to-top-on {
    bottom: unset;
    top: 100vh < (900px + 200px) ? calc( 100vh - 900px - 200px ) : 0px;
  }
}
刷新浏览器即可预览效果。
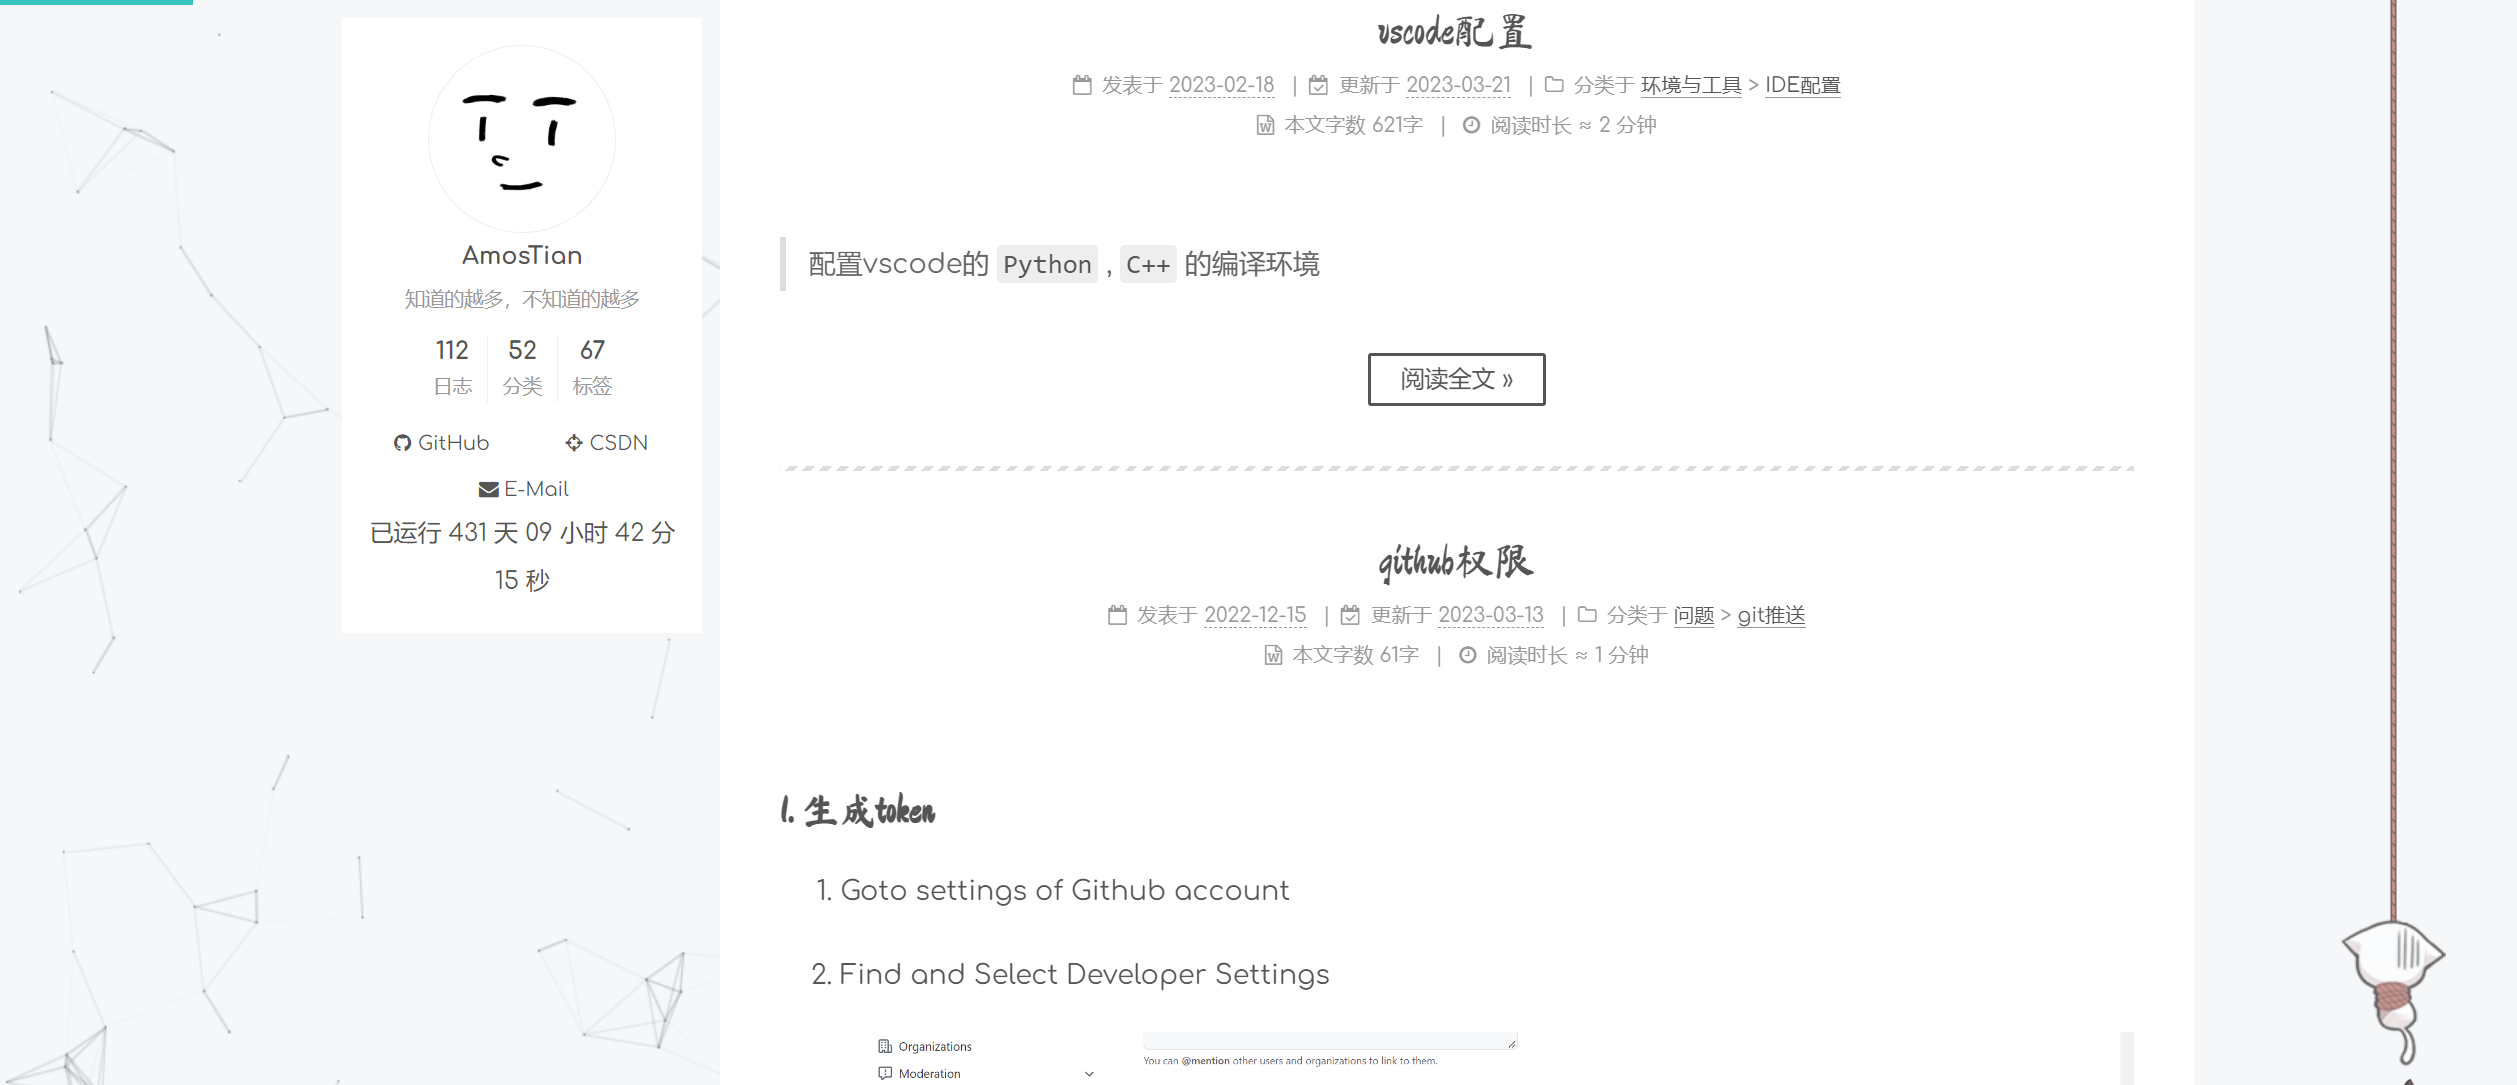
12.10 加入已运行时间
/blog/themes/next/layout/_custom/sidebar.swig
<div id="days"></div>
<script>
function show_date_time(){
    window.setTimeout("show_date_time()", 1000);
    BirthDay=new Date("01/27/2022 15:13:14");
    today=new Date();
    timeold=(today.getTime()-BirthDay.getTime());
    sectimeold=timeold/1000
    secondsold=Math.floor(sectimeold);
    msPerDay=24*60*60*1000
    e_daysold=timeold/msPerDay
    daysold=Math.floor(e_daysold);
    e_hrsold=(e_daysold-daysold)*24;
    hrsold=setzero(Math.floor(e_hrsold));
    e_minsold=(e_hrsold-hrsold)*60;
    minsold=setzero(Math.floor((e_hrsold-hrsold)*60));
    seconds=setzero(Math.floor((e_minsold-minsold)*60));
    document.getElementById('days').innerHTML="已运行 "+daysold+" 天 "+hrsold+" 小时 "+minsold+" 分 "+seconds+" 秒";
}
function setzero(i) {
    if (i<10) {
        i="0" + i
    };
    return i;
}
show_date_time();
</script>
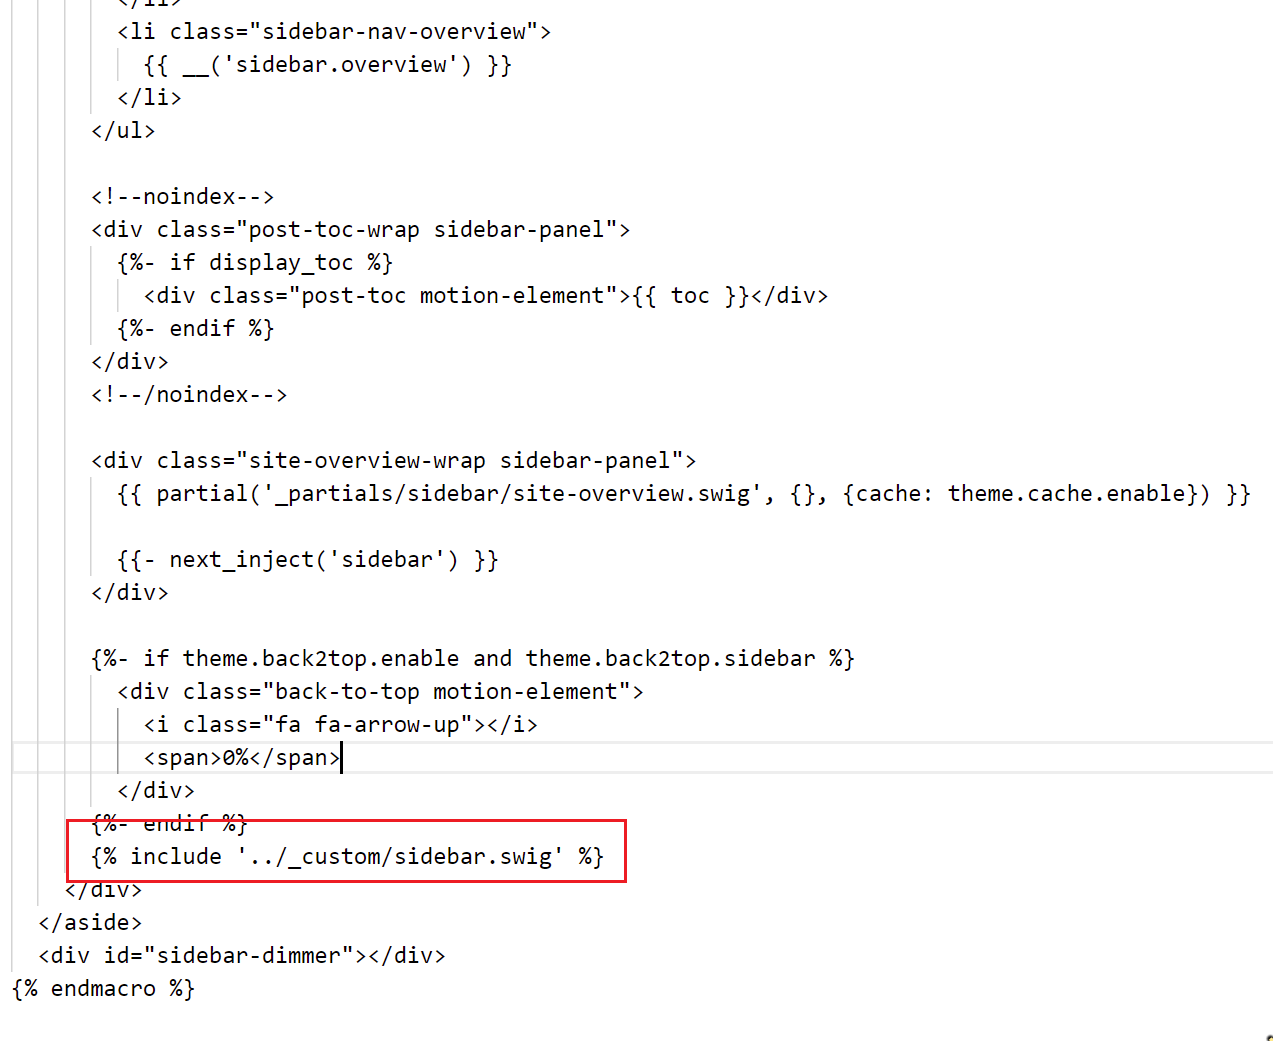
上面 Date 的值记得改为你自己的,且按上面格式,然后修改:/blog/themes/next/layout/_macro/sidebar.swig
{% include '../_custom/sidebar.swig' %}
百度收录
https://ziyuan.baidu.com/college/articleinfo?id=1003
域名映射
个人博客支持https https://www.codepeople.cn/2019/01/11/GitHub-Https-config/
https://www.jianshu.com/p/4ef35521fee9


 1531
1531

 被折叠的 条评论
为什么被折叠?
被折叠的 条评论
为什么被折叠?
 到【灌水乐园】发言


