


 本文探讨了SIFT特征提取与角点检测在三维测量等应用中的优化策略,介绍了Shi-Tomasi角点检测函数的应用,并讨论了如何将其结果转换为SIFT特征描述子,以及使用RANSCA算法剔除误匹配点的方法。
在进行SIFT特征提取时,由于会提取数量较多的尺度空间特征点,会导致特征向量提取和特征点匹配环节的用时较长。在三维测量等应用条件下,角点是进行测量的关键点,因此采用Shi-Tomasi或Harris角点检测提取关键的特征点,可以减少冗余无效的特征点,提升运算的实时性。接下来介绍在编程时遇到的两个问题:
1.如何用角点提取结果生成特征描述子
Shi-Tomasi角点检测函数如下:
goodFeaturesToTrack(Left_Corner_graysrcImage,//输入图像
		Left_Corners,//检测到的角点的输出向量
		g_maxCornerNumber,//角点的最大数量
		qualityLevel,//角点检测可接受的最小特征值
		minDistance,//角点之间的最小距离
		Mat(),//感兴趣区域
		blockSize,//计算导数自相关矩阵时指定的邻域范围
		false,//不使用Harris角点检测
		k);//权重系数
可以看到角点提取的结果是
vector<Point2f>
这一类型的动态数组,而SIFT特征匹配的特征点输入是KeyPoint类
 CV_WRAP KeyPoint();
    /**
    @param _pt x & y coordinates of the keypoint
    @param _size keypoint diameter
    @param _angle keypoint orientation
    @param _response keypoint detector response on the keypoint (that is, strength of the keypoint)
    @param _octave pyramid octave in which the keypoint has been detected
    @param _class_id object id
     */
因此需要进行转换。但是,若使用KeyPoint::convert()进行转换或直接使用detectandcompute()函数,转换出来的特征点仅有一个Point2f类型的成员变量pt即坐标信息被输入,很多重要的参数,如主方向、尺度空间信息没有输入。因此用先detect后compute的方法或者使用父类Features2D下的另一个成员函数detectandcompute(),进行特征检测的结果都不具备旋转不变性,只能应用于双目对齐后的左右视图,现详细分析detectandcompute()函数:
1.1 detectandcompute()函数
函数的参数如下:
CV_WRAP virtual void detectAndCompute( InputArray image, InputArray mask,
                                           CV_OUT std::vector<KeyPoint>& keypoints,
                                           OutputArray descriptors,
                                           bool useProvidedKeypoints=false );
最后一个参数布尔变量useProvidedKeypoints是用于判定是否使用其他检测方法检测出的特征点信息进行输入,若为false则代表使用SIFT特征检测的结果作为输入,若为true则代表采用外源输入。下面这一部分是useProvidedKeypoints为true即采用外源输入的代码:
 if( useProvidedKeypoints )
    {
        firstOctave = 0;
        int maxOctave = INT_MIN;
        for( size_t i = 0; i < keypoints.size(); i++ )
        {
            int octave, layer;
            float scale;
            unpackOctave(keypoints[i], octave, layer, scale);
            firstOctave = std::min(firstOctave, octave);
            maxOctave = std::max(maxOctave, octave);
            actualNLayers = std::max(actualNLayers, layer-2);
        }

        firstOctave = std::min(firstOctave, 0);
        CV_Assert( firstOctave >= -1 && actualNLayers <= nOctaveLayers );
        actualNOctaves = maxOctave - firstOctave + 1;
    }
可以看到特征点位置参数在内部进行了赋值。(可以自行查看源代码)
因此我们也可以采用detectandcompute函数进行特征描述子计算。
2.如何用RANSCA算法剔除误匹配点
这部分直接上代码,采用的是用findHomography函数计算单应性矩阵,然后将左图特征点单应性变换到右图上,与右图上的特征点计算误差距离。若距离大于一定阈值则剔除。
//【10】计算单应性矩阵H,用RANSCA剔除误匹配点
	vector<Point2f> Left_Matches, Right_Matches;
	int Match_Points_Num = matches.size();
	for (int i = 0; i < Match_Points_Num; i++)//将得到的左右匹配结果点分别存入动态数组
	{
		Left_Matches.push_back(Left_Keypoints[matches[i].queryIdx].pt);
		Right_Matches.push_back(Right_Keypoints[matches[i].trainIdx].pt);
	}
	Mat H = findHomography(Left_Matches, Right_Matches, CV_RANSAC);
	vector<char> mask(Left_Matches.size());
	vector<Point2f> Left_Matches_Aftertrans;
	perspectiveTransform(Left_Matches, Left_Matches_Aftertrans, H);

	for (int i = 0; i < Right_Matches.size(); i++)//剔除误差范数大于5的点
	{
		if (norm(Right_Matches[i] - Left_Matches_Aftertrans[i]) <= 5)
		{
			mask[i] = 1;
		}
	}
	Mat img_matches;
	drawMatches(Left_Corner_srcImage, Left_Keypoints, Right_Corner_srcImage,Right_Keypoints,
		matches, img_matches, Scalar::all(-1), Scalar::all(-1), mask, DrawMatchesFlags::DEFAULT);
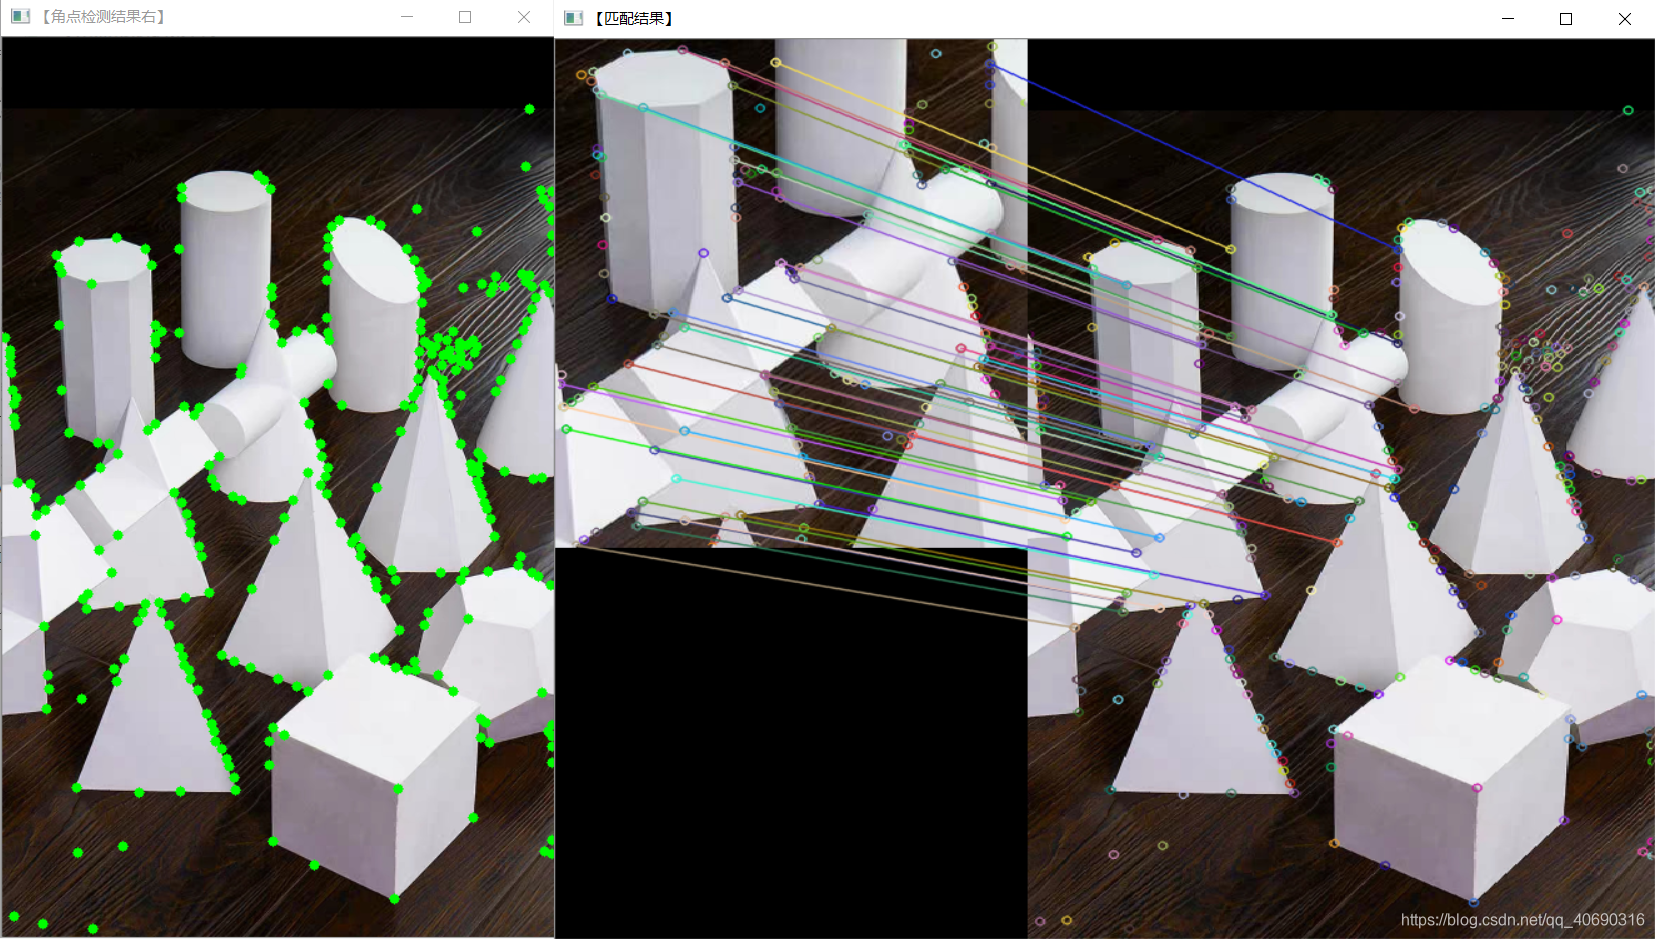
匹配结果:
该工程的代码可以在我的github主页上看到:
https://github.com/Yaoevol/Detect_and_Match


 859
859

 被折叠的 条评论
为什么被折叠?
被折叠的 条评论
为什么被折叠?
 到【灌水乐园】发言


