


uview>tabbar组件
1、在pages.json中正常定义tabbar逻辑和字段,只需配置tabBar字段list中的pagePath(需以"/"开头)属性即可
"tabBar": { // 设置底部 tab 的表现
		"color": "#333333",
		"selectedColor": "#fa2c19",
		"borderStyle": "black",
		"backgroundColor": "#fff",
		"list": [{
				"pagePath": "pages/index/index"
			}, {
				"pagePath": "pages/category/category"
			}, {
				"pagePath": "pages/found/found"
			}, {
				"pagePath": "pages/cart/cart"
			}, {
				"pagePath": "pages/mine/mine"
			}
		]
	}
2、在各个tabbar页面引入u-tabbar组件,组件会默认自动通过uni.hideTabBar()隐藏系统tabbar
<!--> 在每个tabbar页面都引入u-tabbar组件,示例:index.vue页面-->
</template>
	<view>
		<u-tabbar :list="footerTabbar" :mid-button="true"></u-tabbar>
	</view>
</template>
<script>
	export default {
		data() {
			return {
				footerTabbar: this.$store.state.footerTabbar,//这样可以做到修改某一个页面的u-tabbar数据,其他页面的u-tabbar也能同步更新
			}
		}
	}
</script>
3、vuex:通过vuex引用同一份tabbar组件的list参数,这样可以做到修改某一个页面的u-tabbar数据,其他页面的u-tabbar也能同步更新
组件内部会自动处理各种跳转的逻辑,同时需要注意以下两点:
要在list参数中配置pagePath路径,此路径为pages.json中定义的tabbar字段的路径
此种方式,无需通过v-model绑定活动项,内部会自动进行判断和跳转
import Vue from 'vue'
import Vuex from 'vuex'
Vue.use(Vuex)
const store = new Vuex.Store({
	state: {
		footerTabbar: [{
				iconPath: require('@/static/tabBar/tab_01.png'),
				selectedIconPath: require('@/static/tabBar/tab_02.png'),
				text: '首页',
				customIcon: false,
				pagePath: '/pages/index/index'
			},
			{
				iconPath: require('@/static/tabBar/tab_03.png'),
				selectedIconPath: require('@/static/tabBar/tab_04.png'),
				text: '分类',
				customIcon: false,
				pagePath: '/pages/category/category'
			},
			{
				iconPath: require('@/static/tabBar/tab_05.png'),
				selectedIconPath: require('@/static/tabBar/tab_06.png'),
				text: '发现',
				midButton: true,
				customIcon: false,
				pagePath: '/pages/found/found',
			},
			{
				iconPath: require('@/static/tabBar/tab_07.png'),
				selectedIconPath: require('@/static/tabBar/tab_08.png'),
				text: '购物车',
				customIcon: false,
				pagePath: '/pages/cart/cart',
			},
			{
				iconPath: require('@/static/tabBar/tab_09.png'),
				selectedIconPath: require('@/static/tabBar/tab_10.png'),
				text: '我的',
				customIcon: false,
				pagePath: '/pages/mine/mine',
			},
		],
	},
	mutations: {},
	actions: {}
})
export default store
4、main.js中引入store
import store from '@/utils/store.js'
const app = new Vue({
	...App,
	store
})
app.$mount()
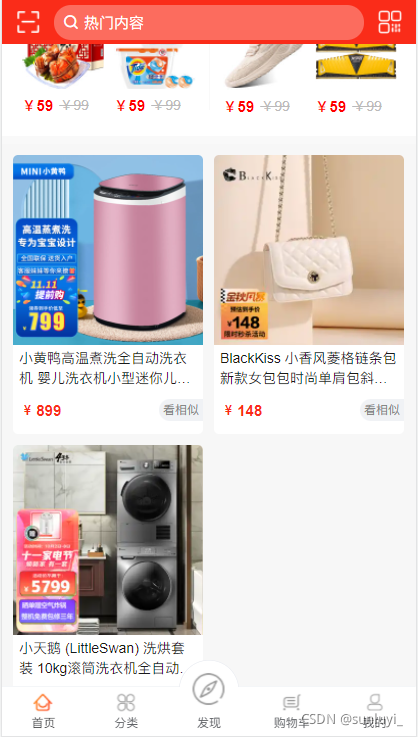
效果图如下:


 577
577

 被折叠的 条评论
为什么被折叠?
被折叠的 条评论
为什么被折叠?
 到【灌水乐园】发言


