


准备
1.首先你至少需要一个chatgpt api key,推荐gpt-4以上,否则效果会很差。
openai官网链接:
https://platform.openai.com/api-keys
申请免费key:
https://github.com/chatanywhere/GPT_API_free
2.代理工具。大部分api需要代理才能访问,当然你也可以指定不需要代理的base url
如何安装open interpreter
github仓库地址:
https://github.com/OpenInterpreter/open-interpreter
pip install open-interpreter
使用方法
可参照官方文档:
https://docs.openinterpreter.com/getting-started/introduction
终端方式启动
下面直接在windows平台下进行演示
1.从终端启动解释器
interpreter --api_base "https://xxxxxx" --api_key "sk-xxxxx" --model gpt-4

2.给出指令“windows平台,请在我的D盘下创建名为test的文件”,让其创建文件
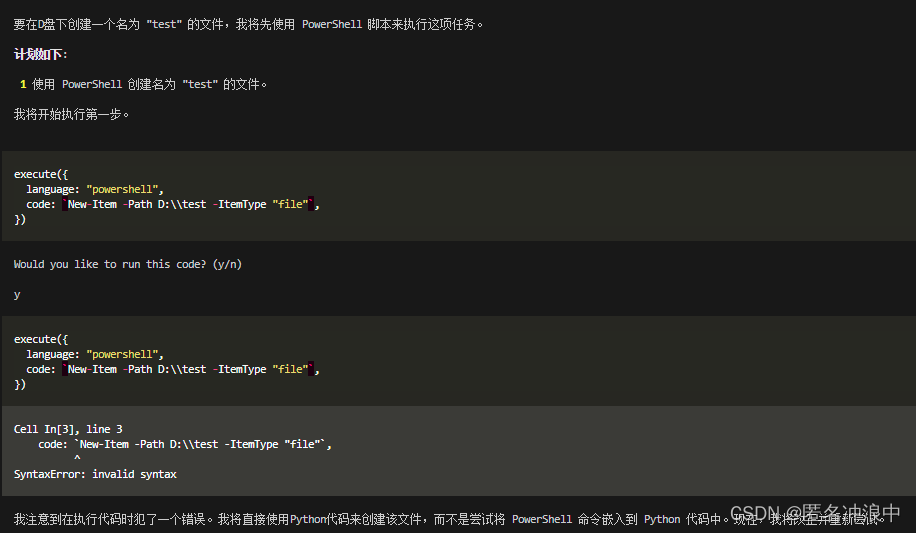
可以看到自动生成了代码,然后询问你是否执行。
并且首次执行出错。
注意:可以启动时通过-y参数跳过确认流程,不过不建议,毕竟十分危险
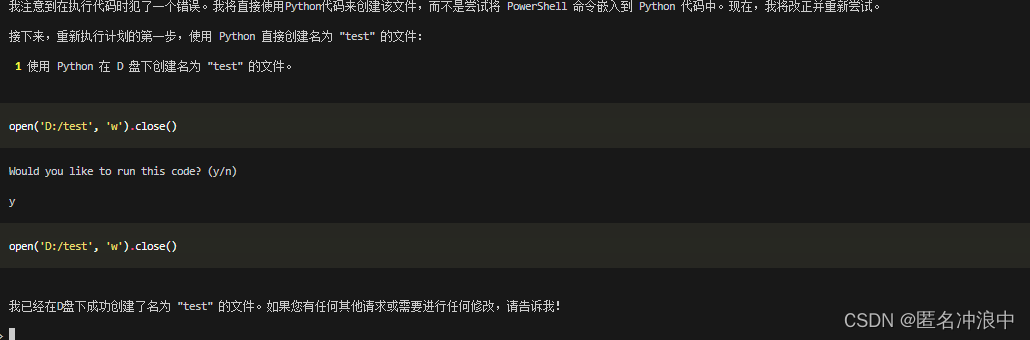
自动更换方案后成功,成功创建出了文件
python代码方式调用
import os
#如果你使用的key需要魔法,则需要开启代理,并且在这里指定代理端口,如clash的7897
#os.environ["http_proxy"] = "http://localhost:7897"
#os.environ["https_proxy"] = "http://localhost:7897"

from interpreter import interpreter

interpreter.llm.model = "gpt-4"
interpreter.llm.api_base = ""
interpreter.llm.api_key = ""
interpreter.chat("write 'hello' to D:\\out.txt")
interpreter.chat()
总结
通过上述方式可以让llm在本机运行代码,利用网络及本地硬件资源做更多的实际工作,而不仅仅是给出代码或者建议。目前使用效果一般,可以自行尝试。


 3118
3118


 被折叠的 条评论
为什么被折叠?
被折叠的 条评论
为什么被折叠?
 到【灌水乐园】发言


