


VUE项目实现Google 第三方登录
目录
一、Google开发者平台配置
Google Cloud: https://console.cloud.google.com/
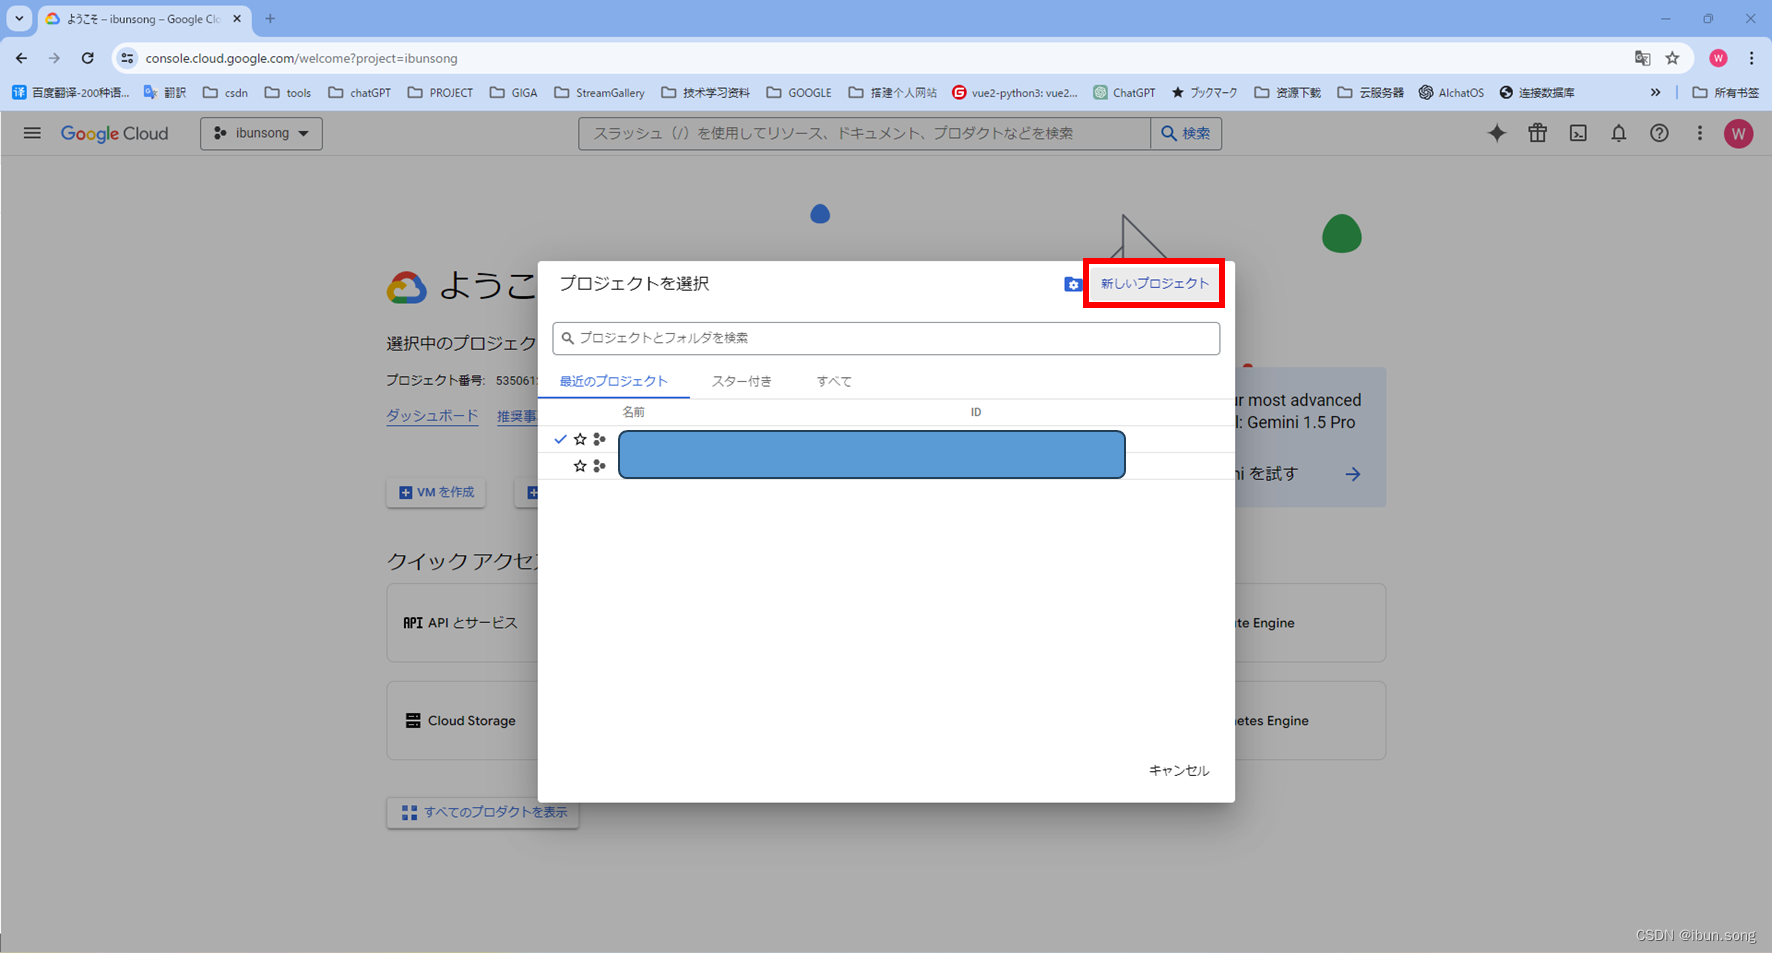
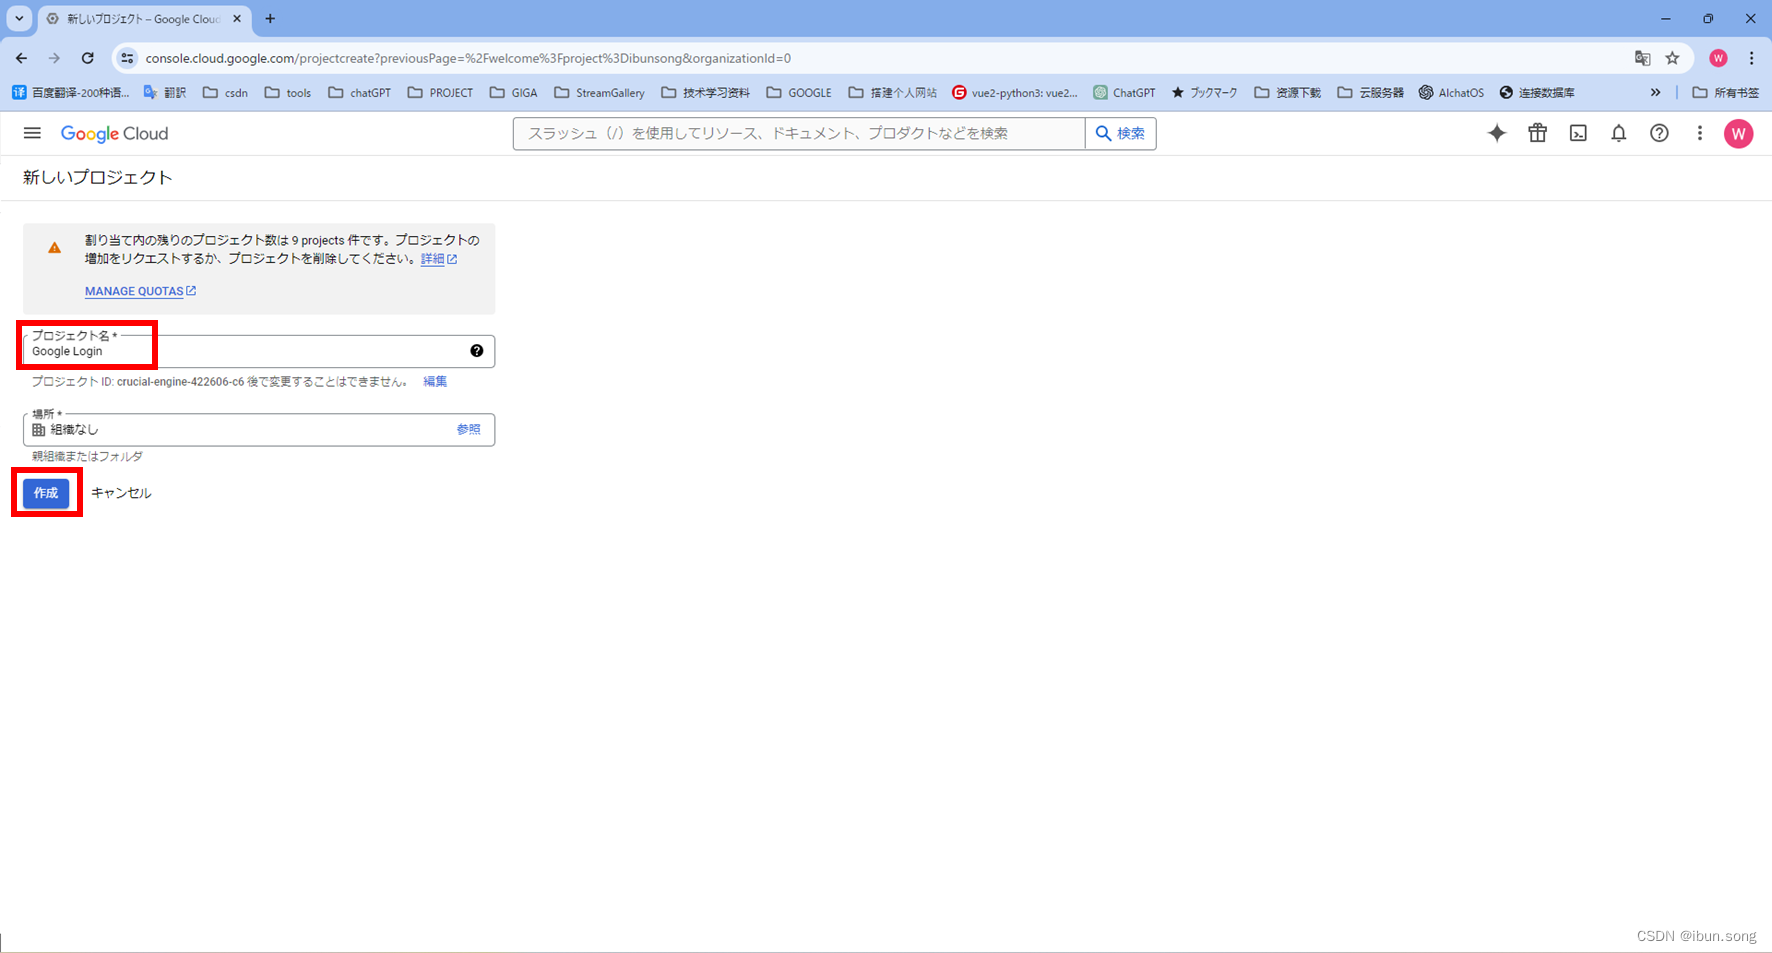
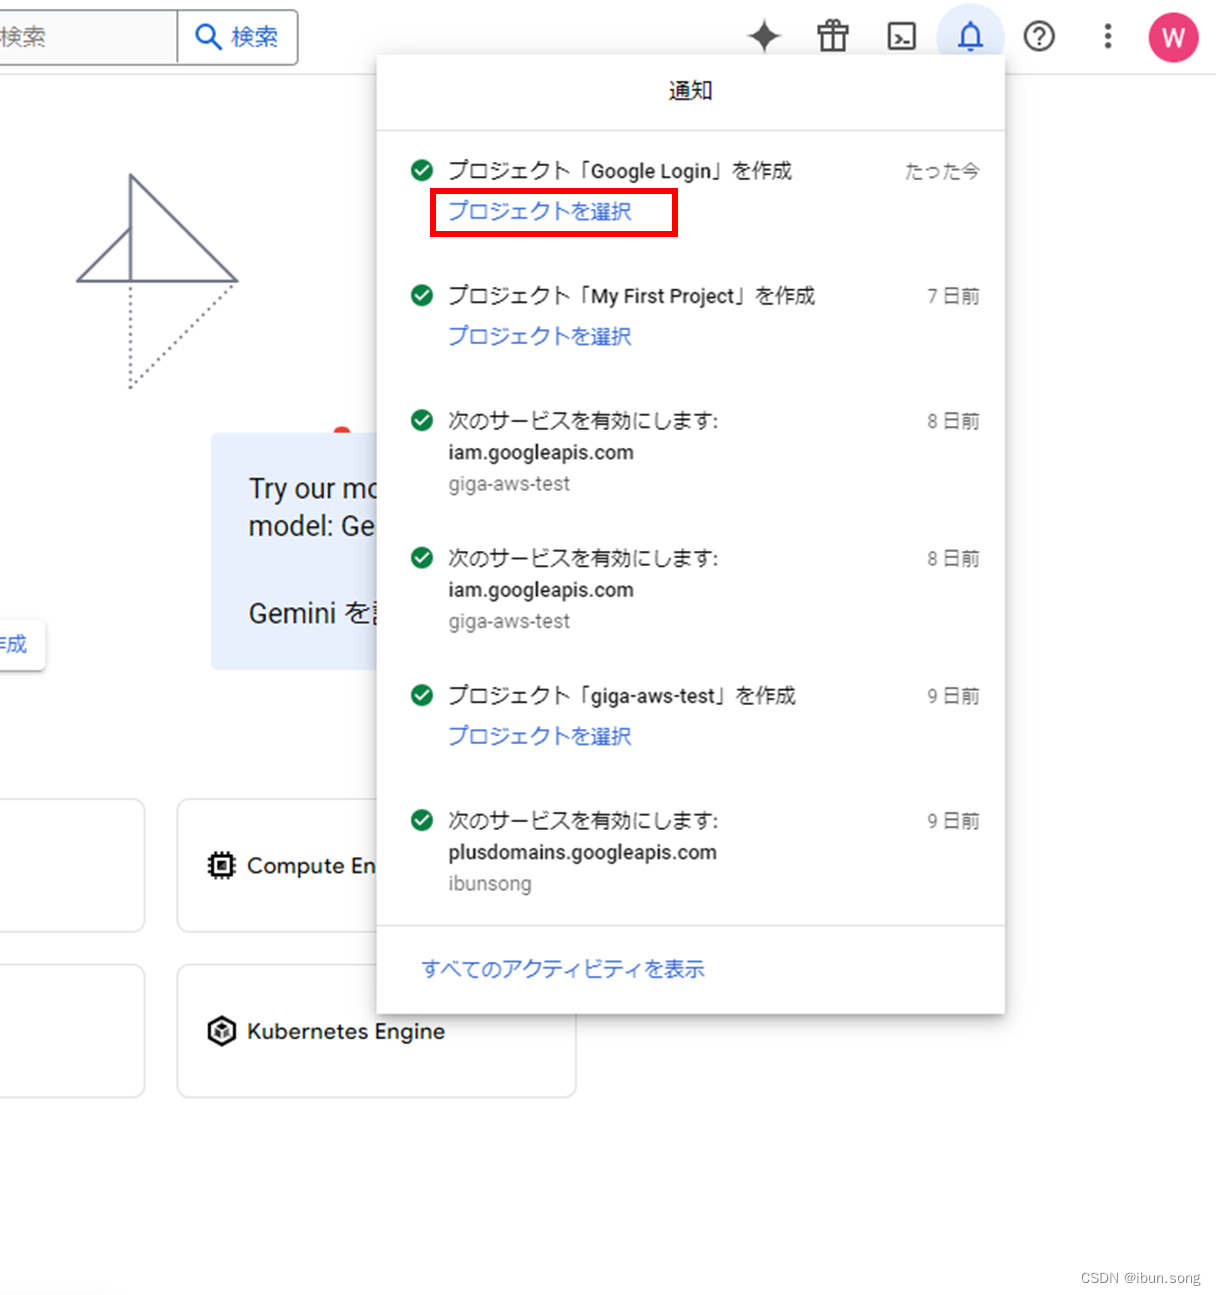
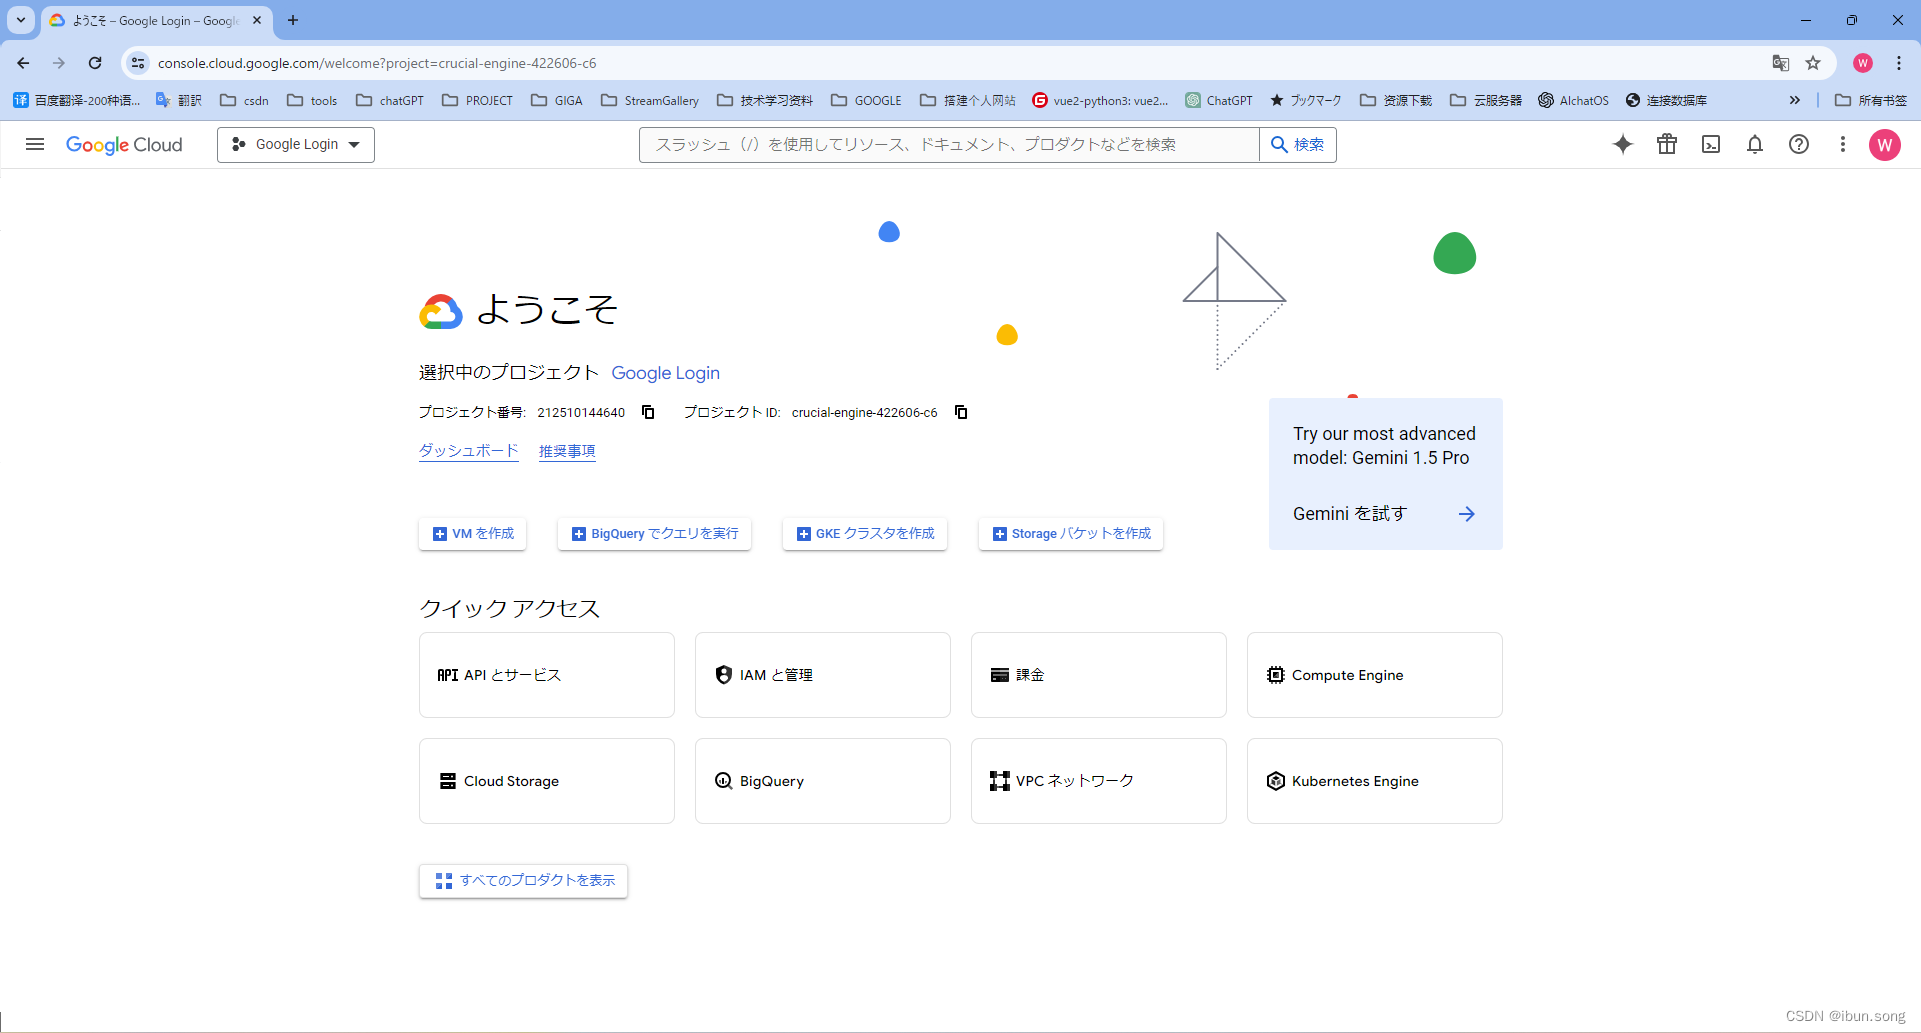
1. 新建项目

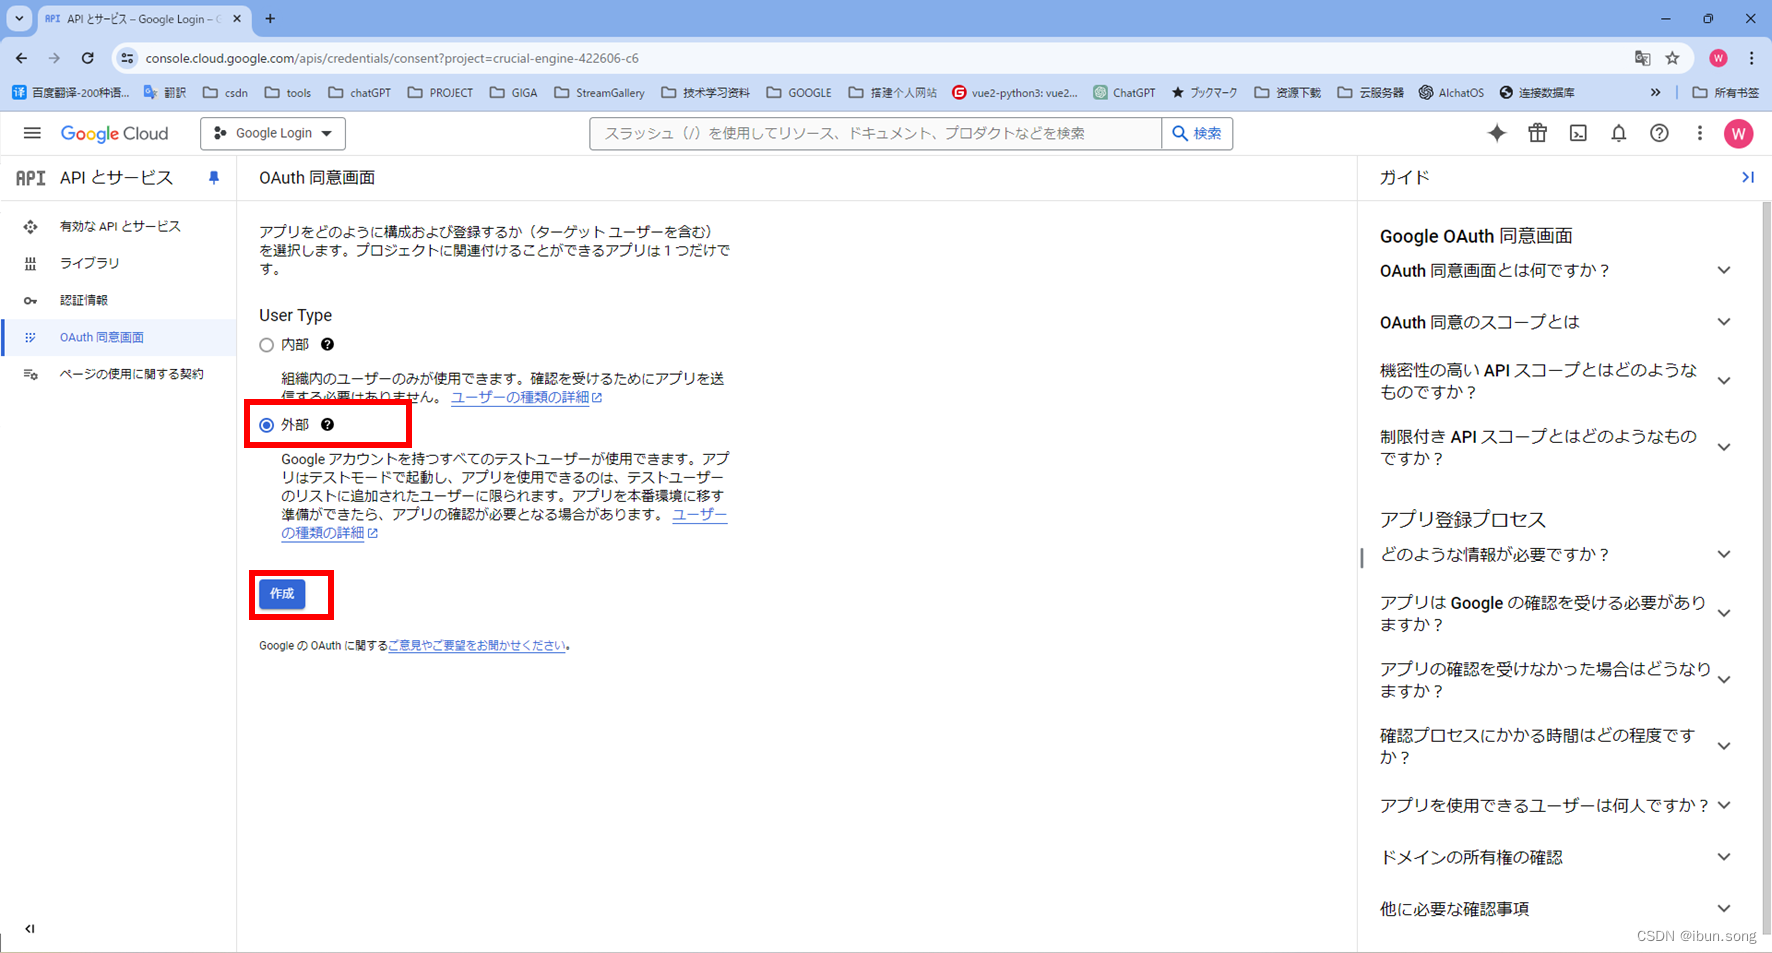
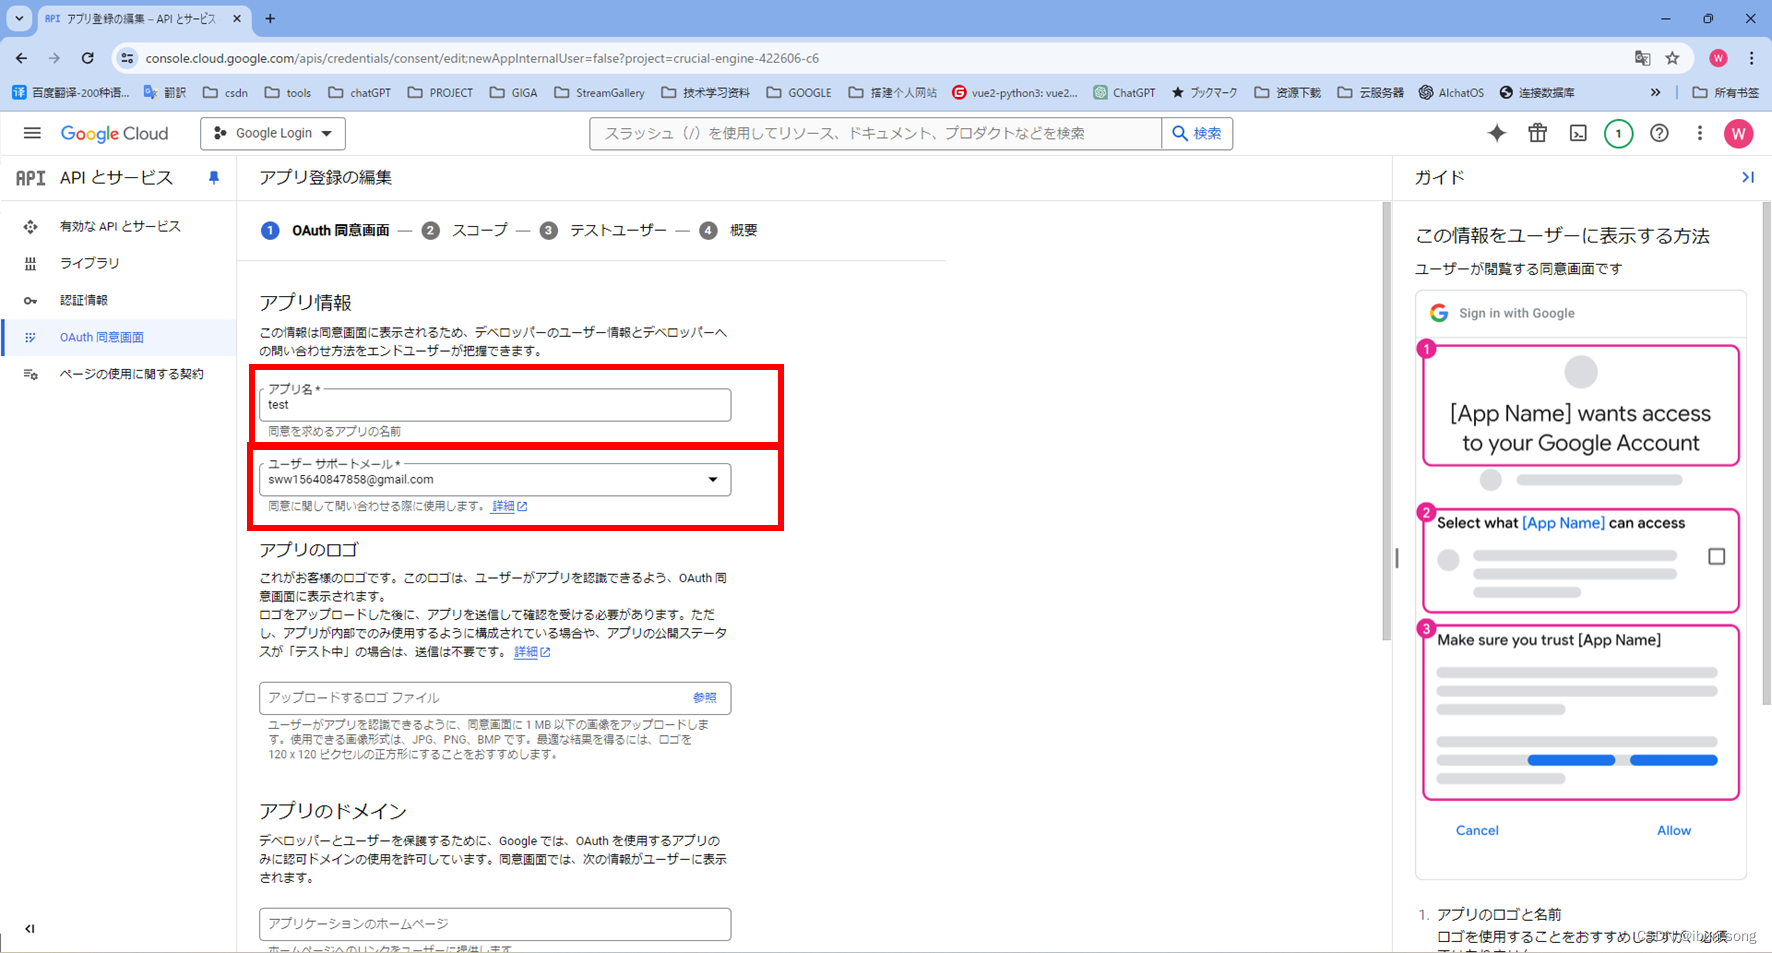
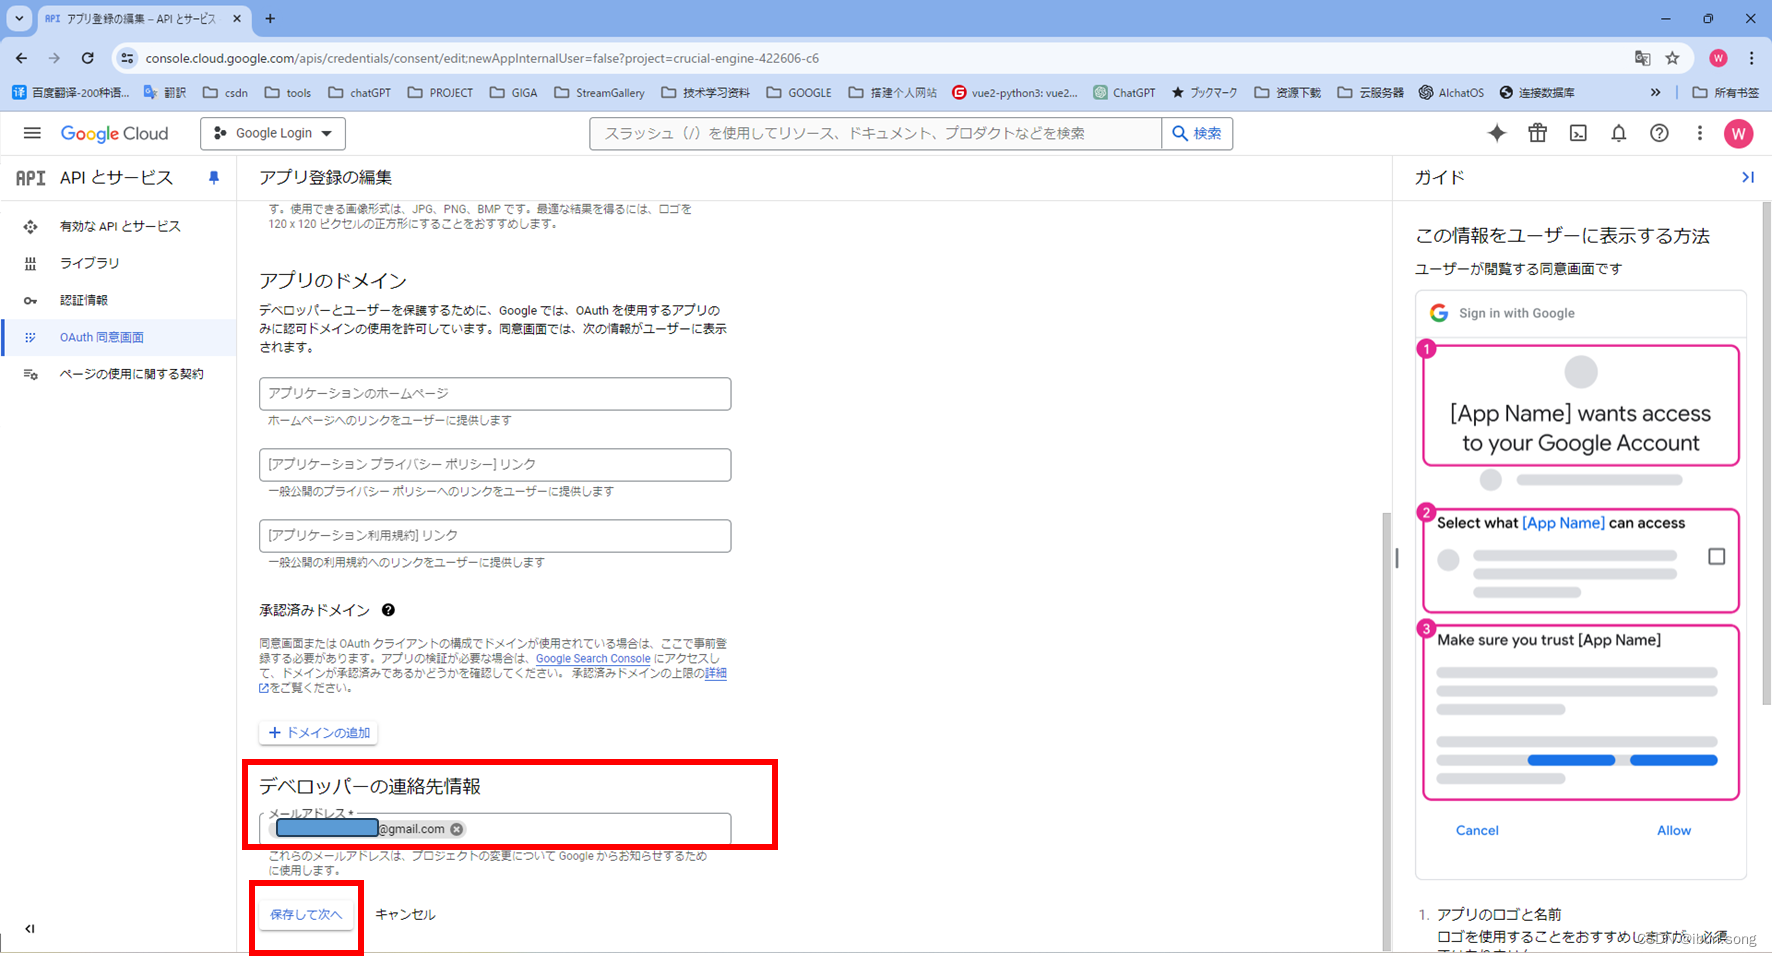
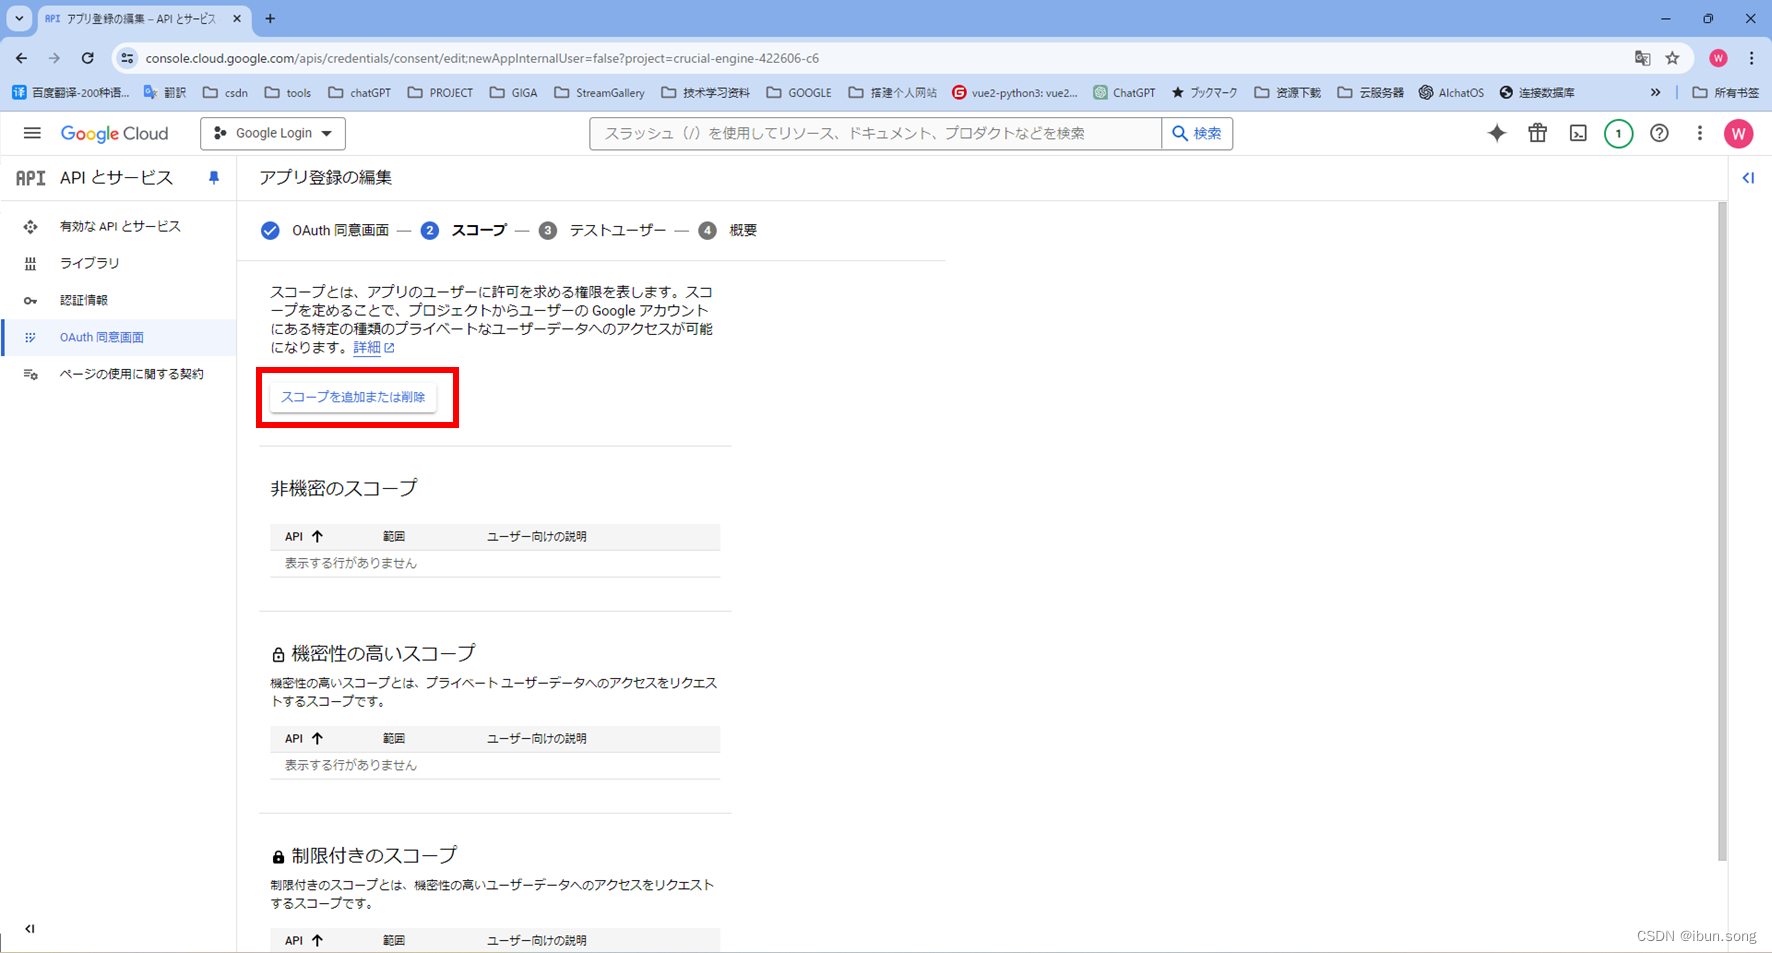
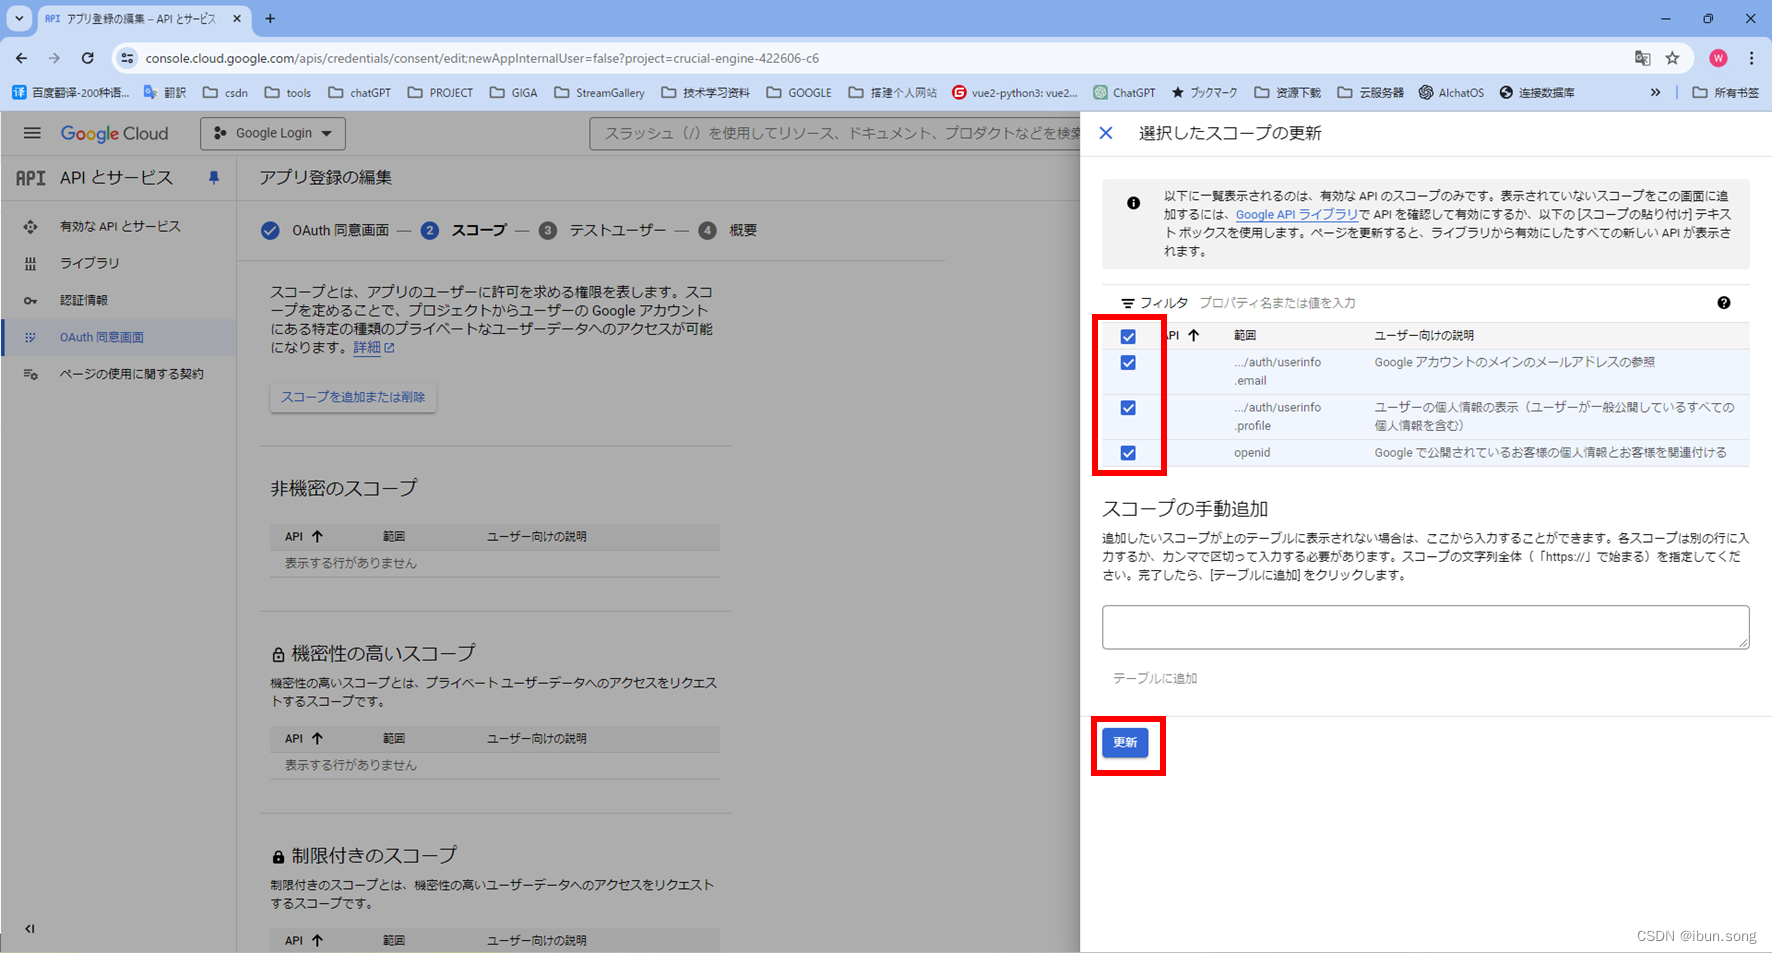
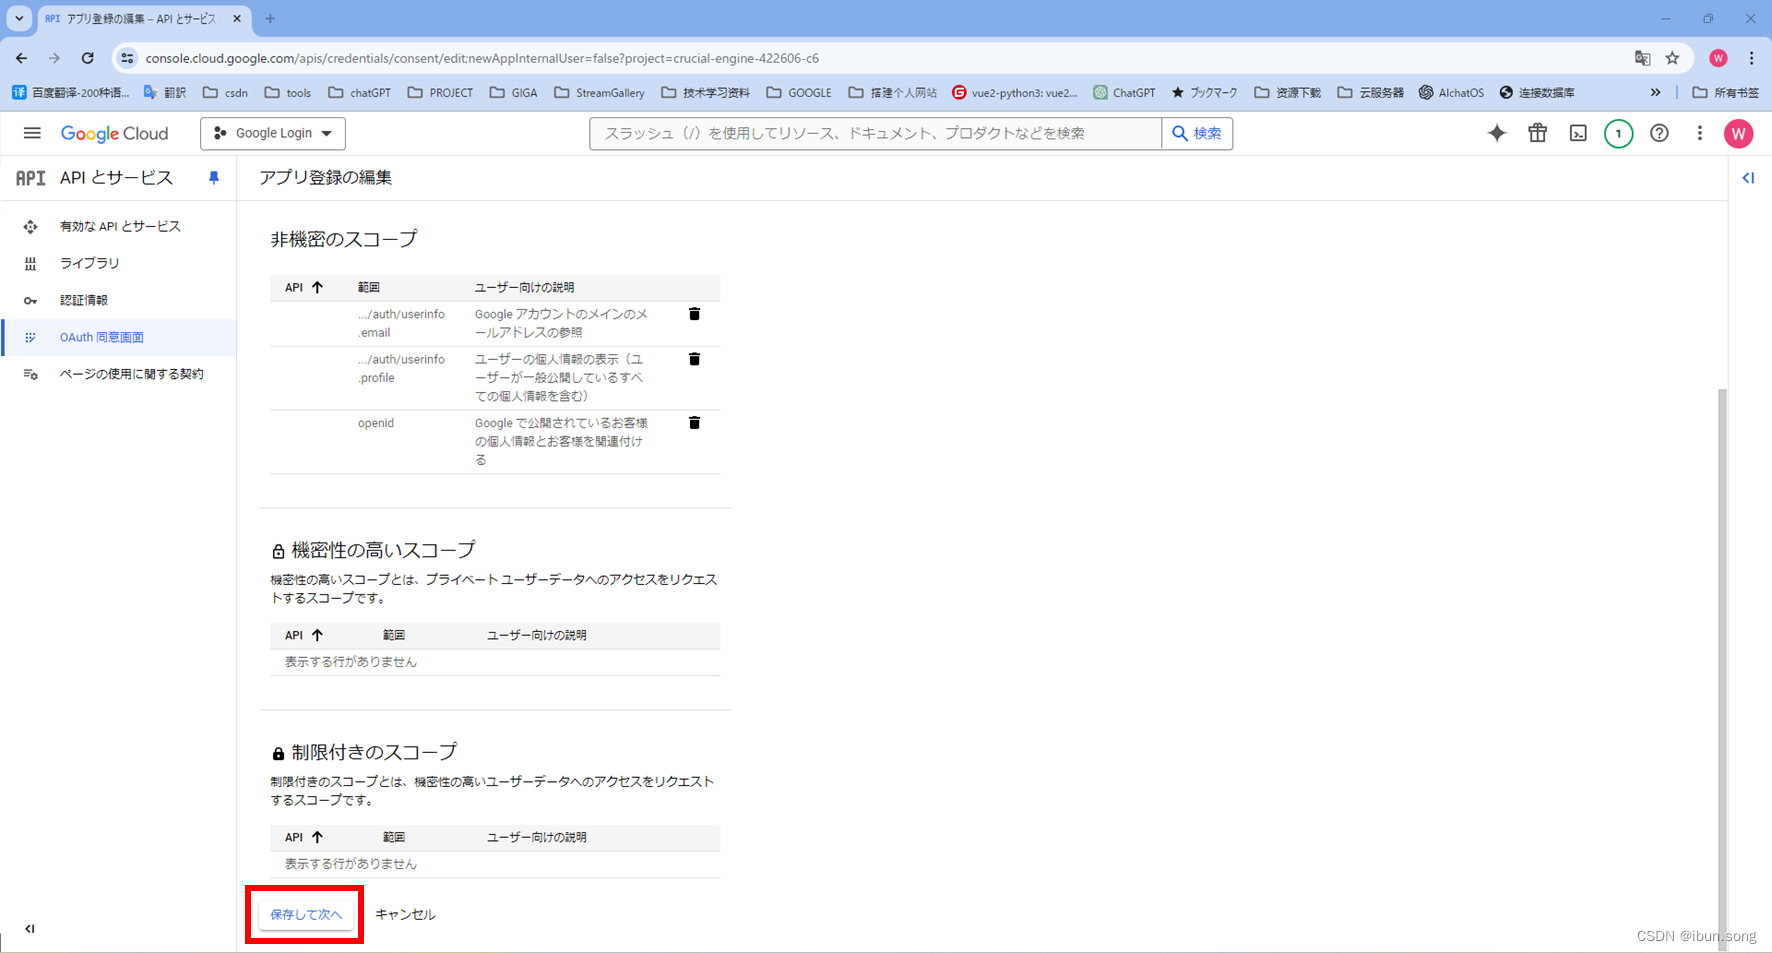
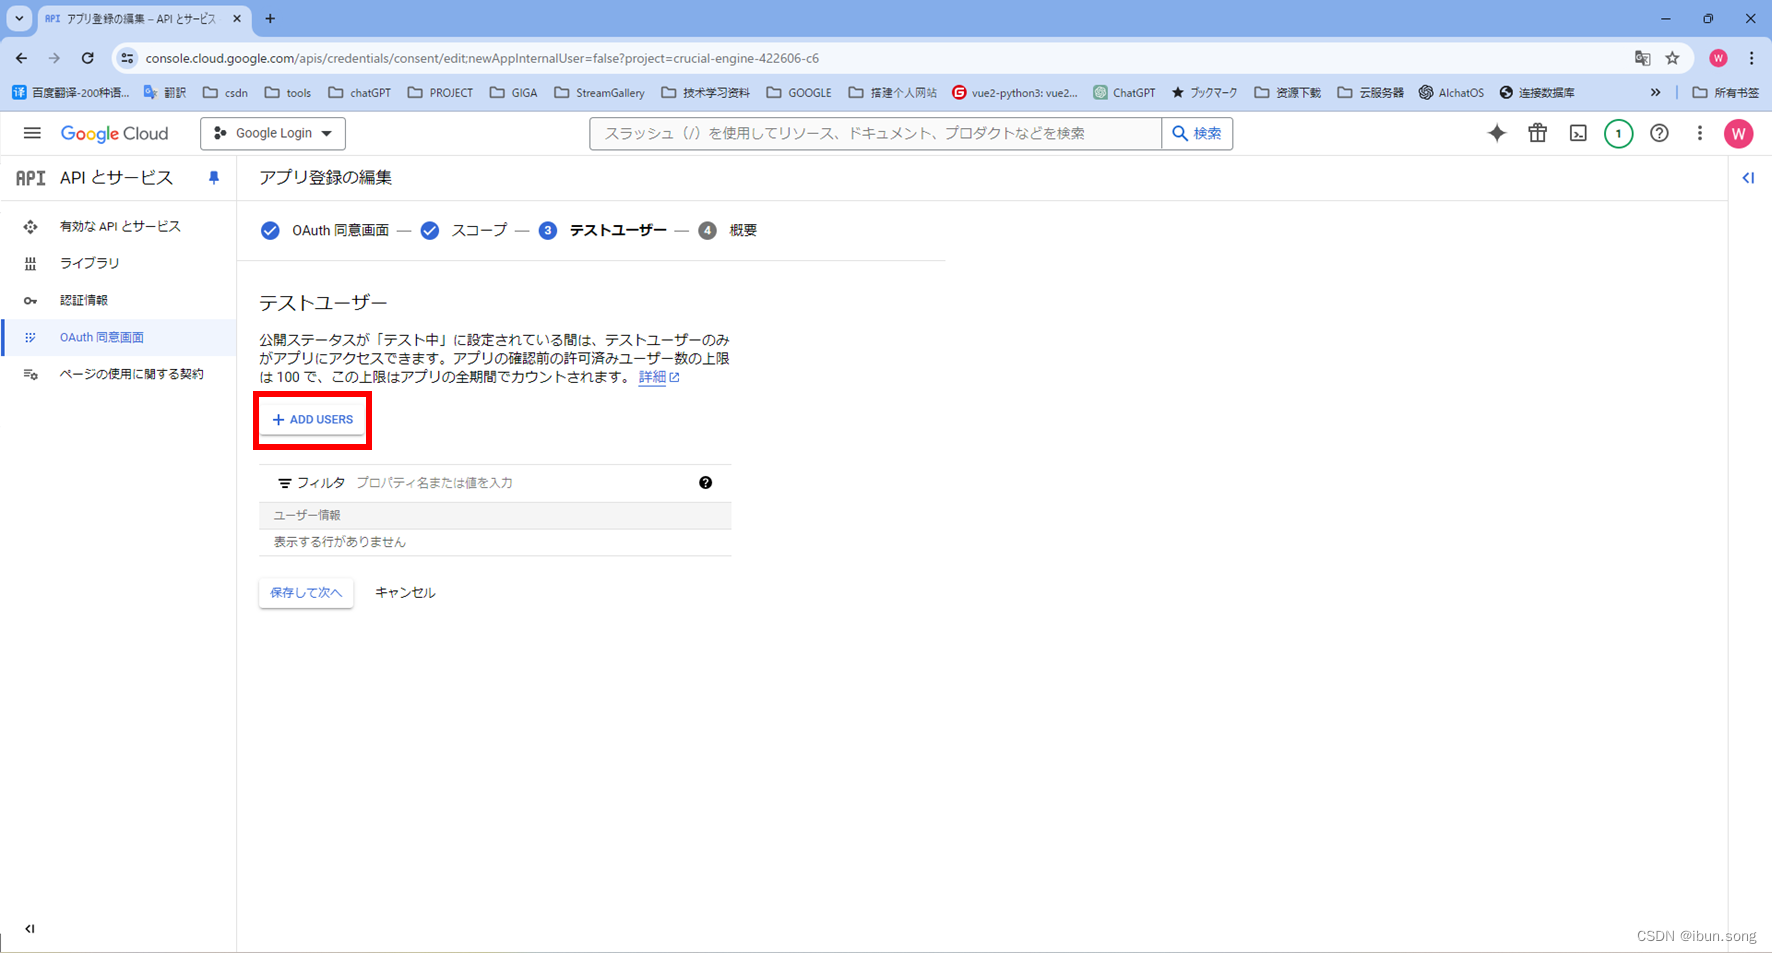
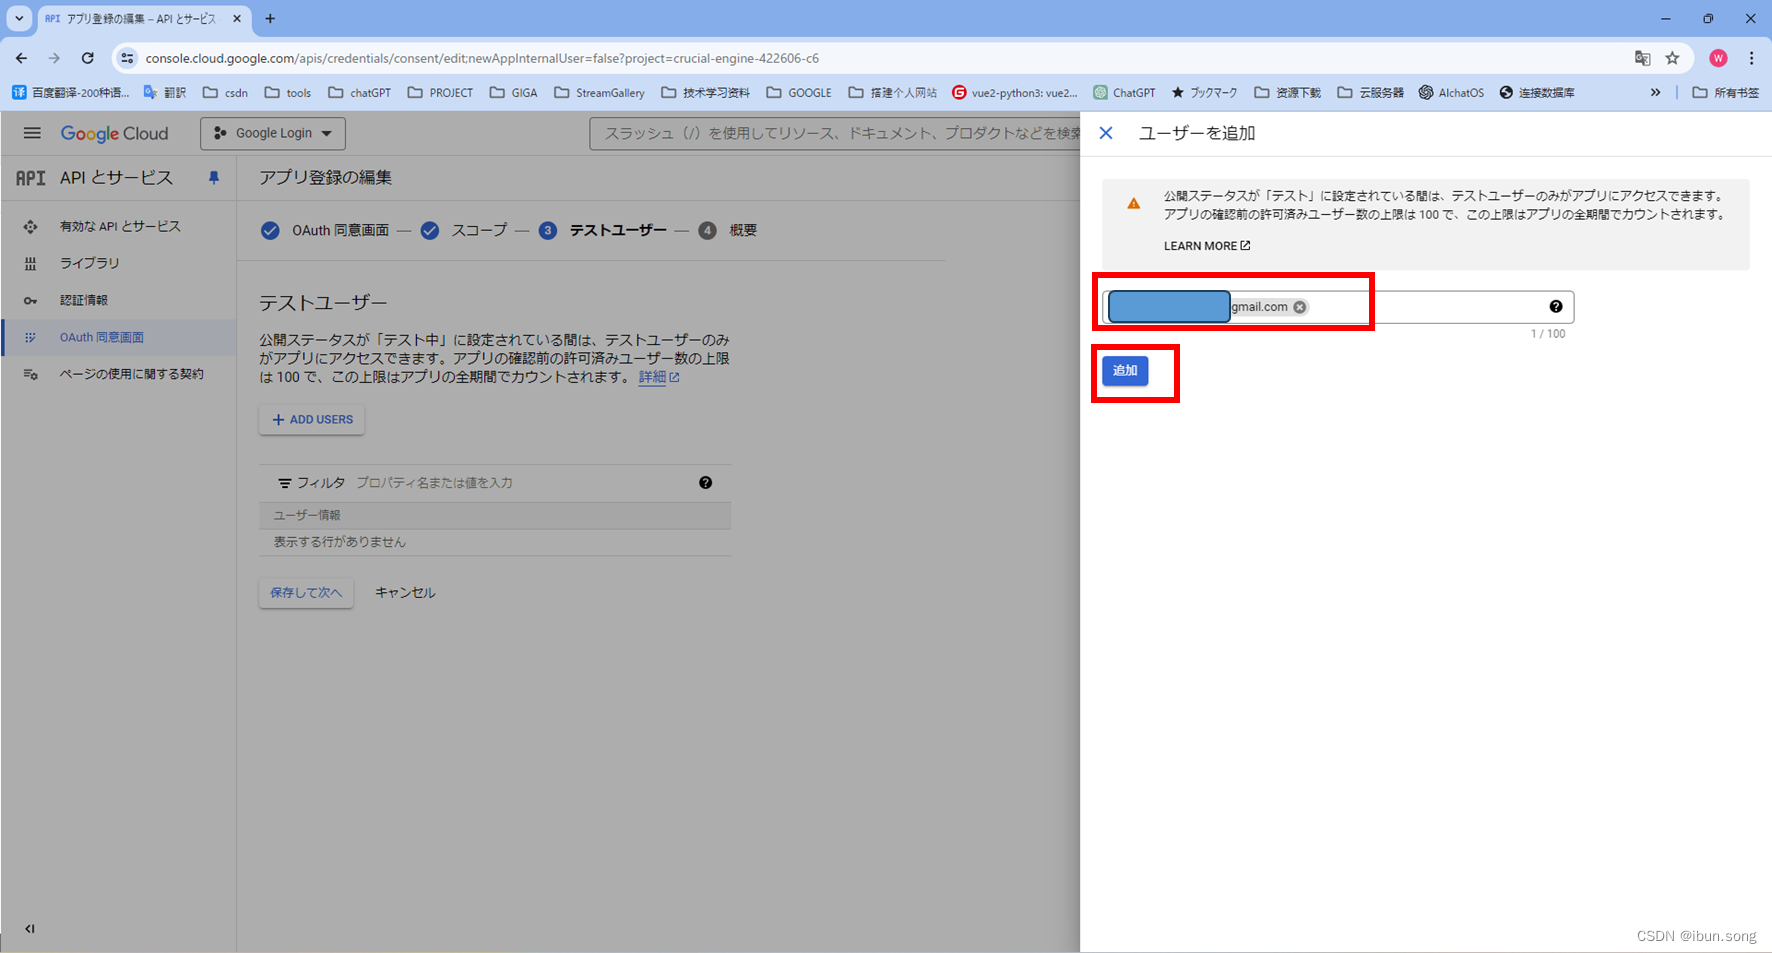
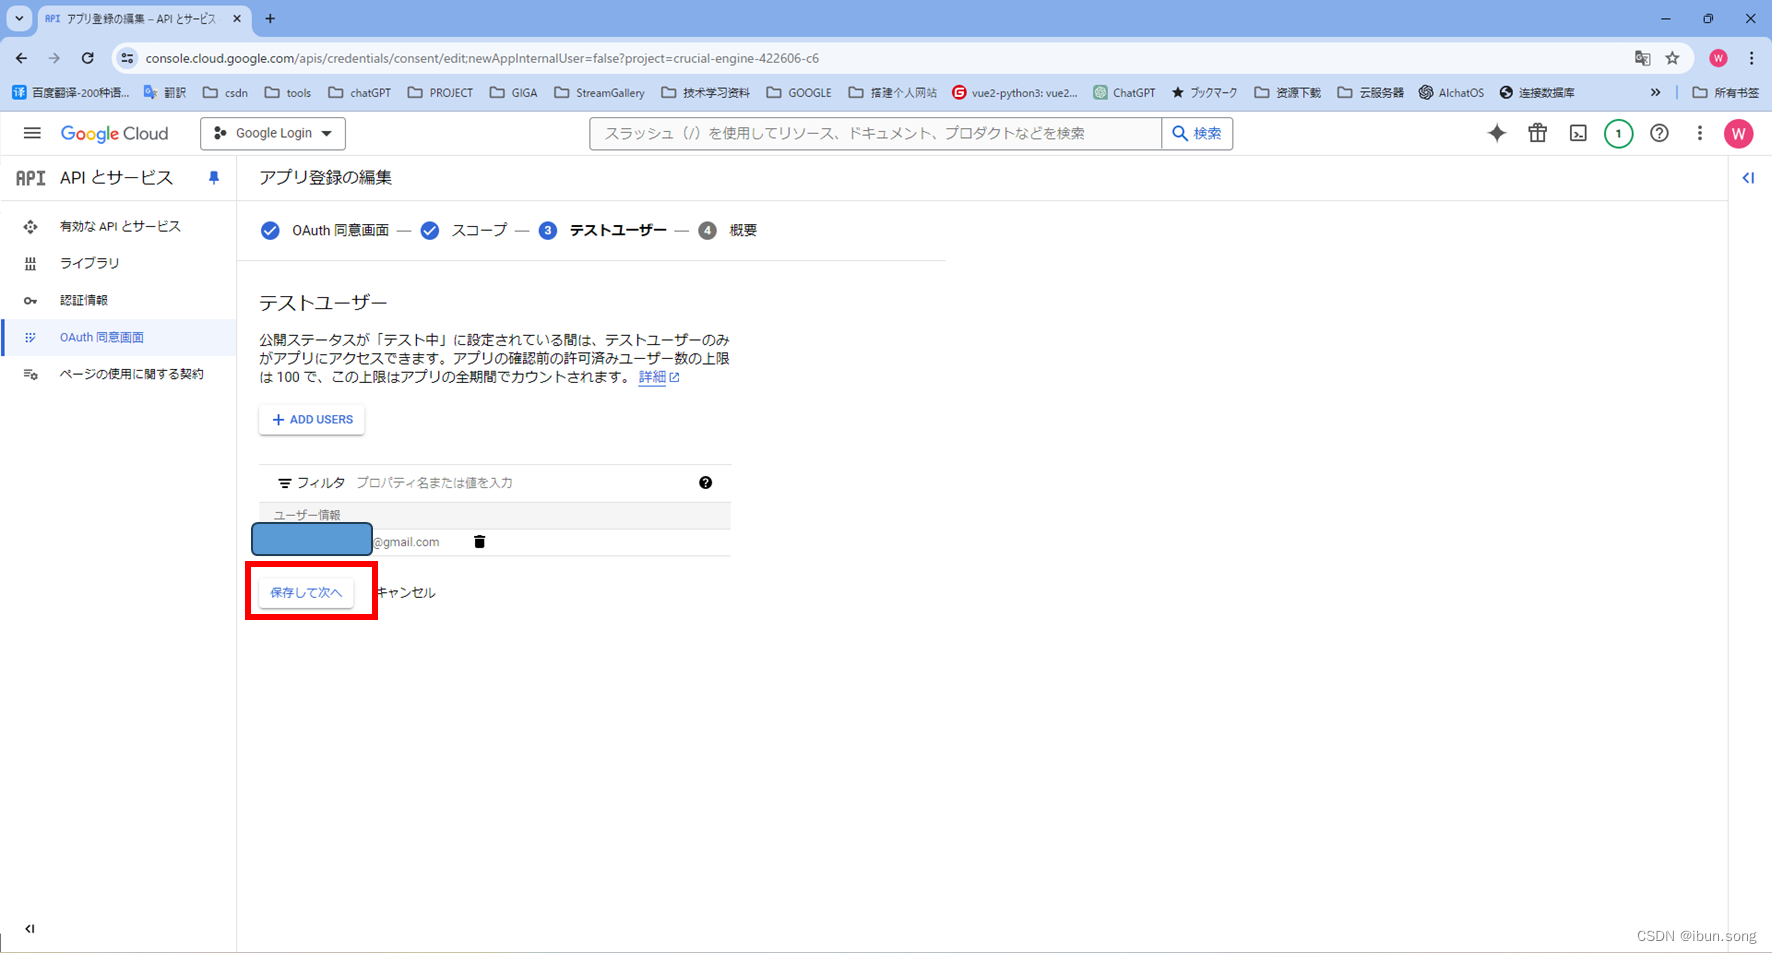
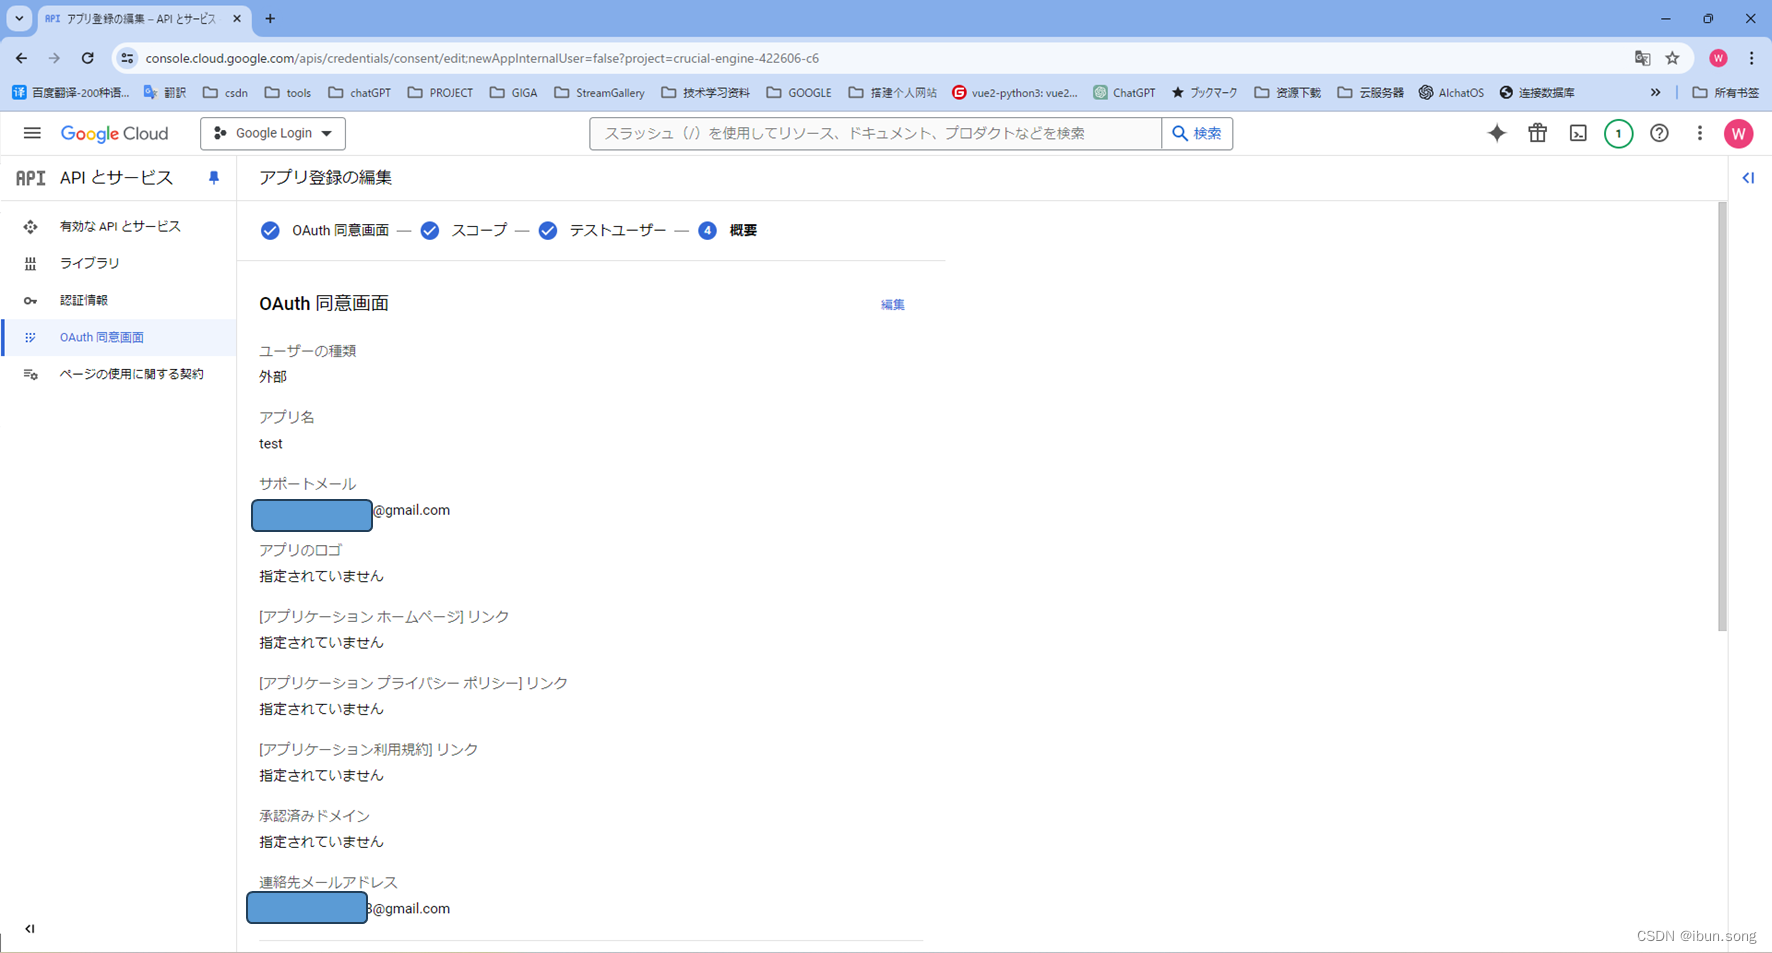
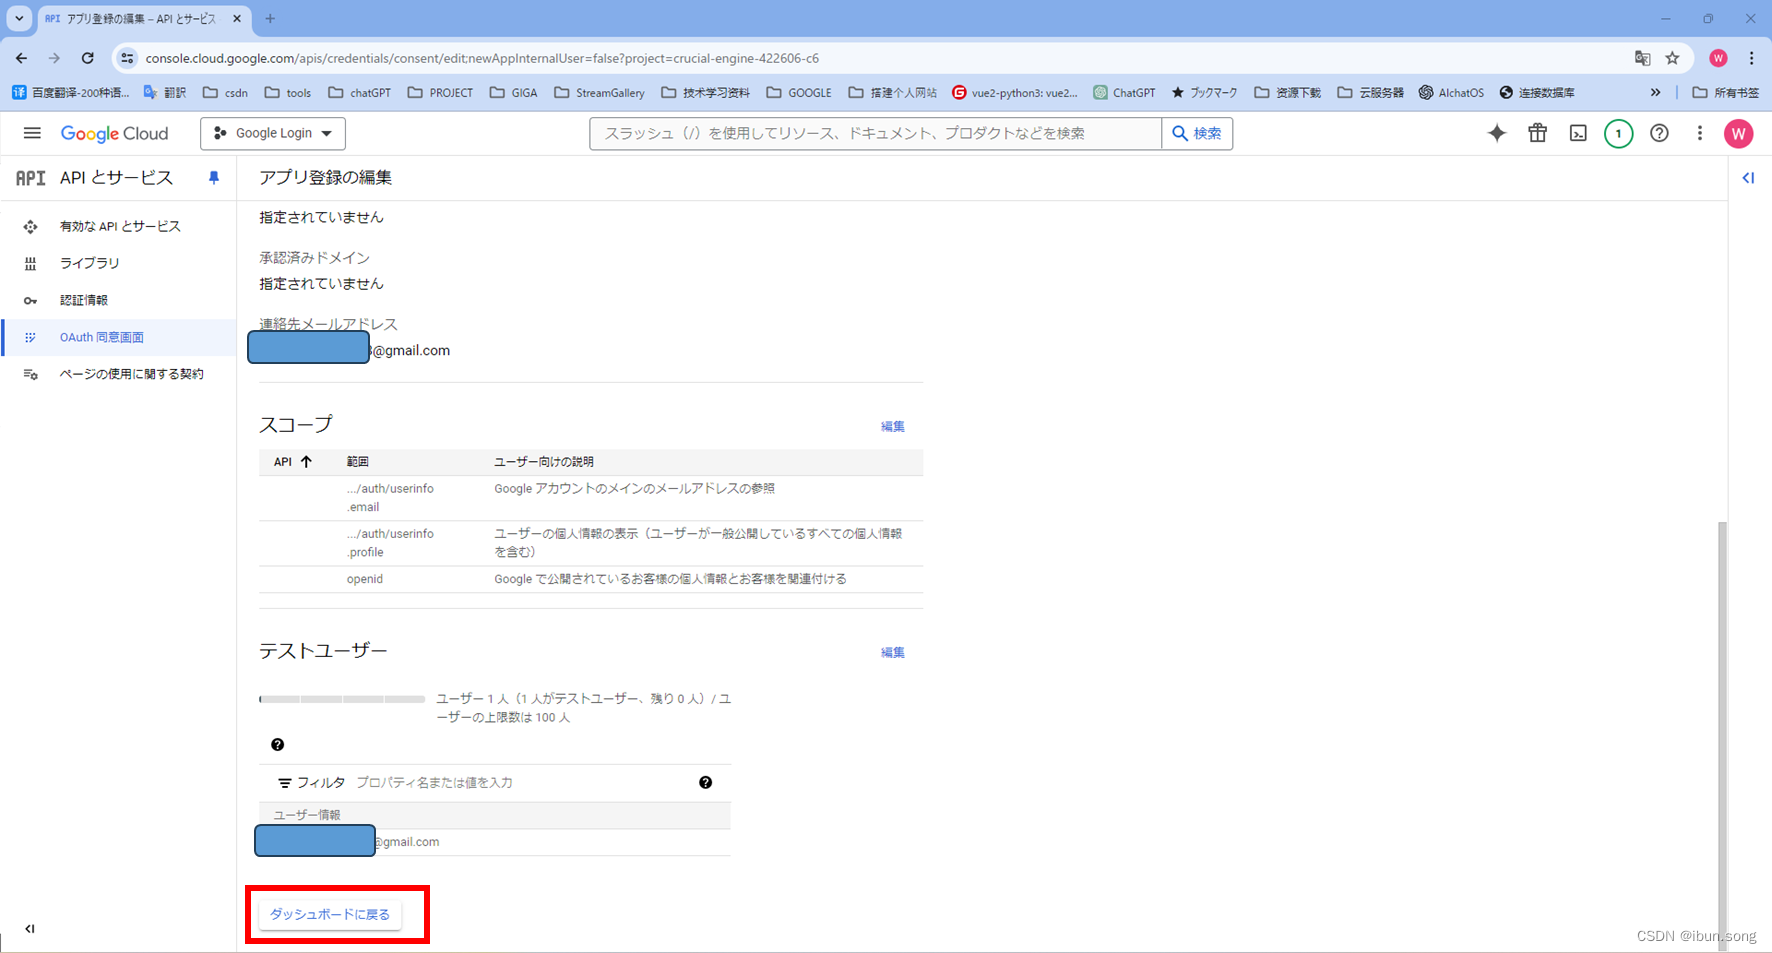
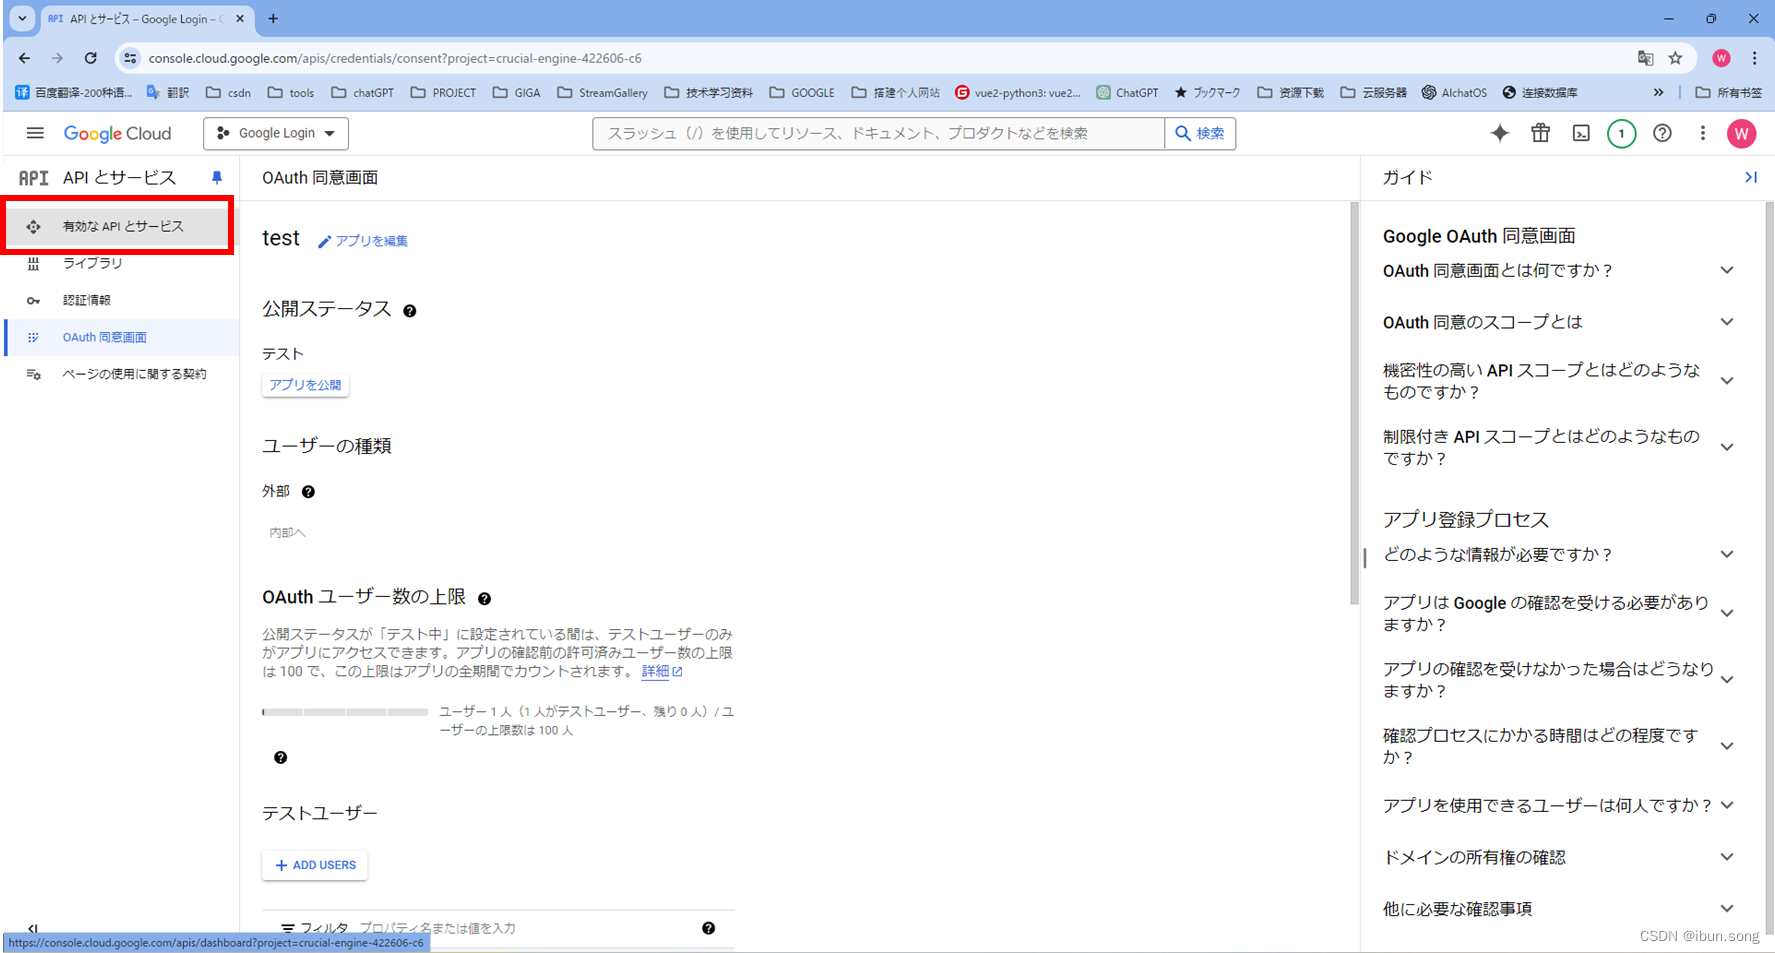
2. 配置 OAuth 权限请求页面并选择范围
首次使用谷歌开发平台时需要配置,配置过的可以跳过此步骤。
参考文章: 配置 OAuth 权限请求页面并选择范围
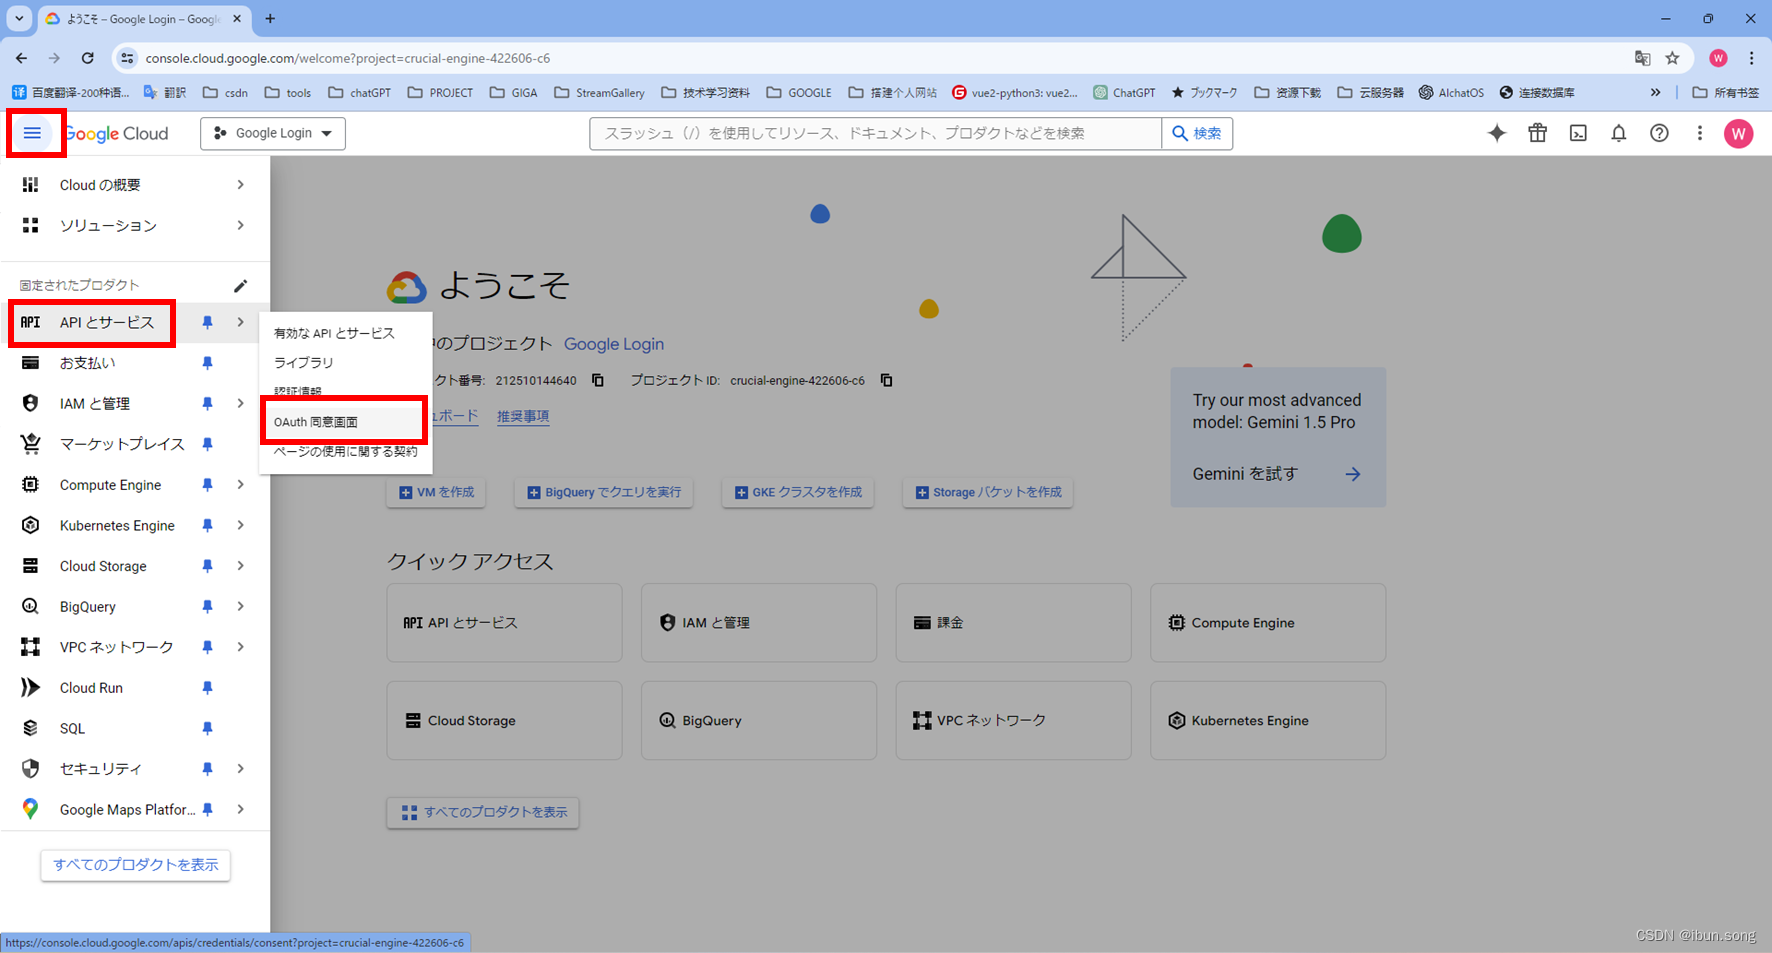
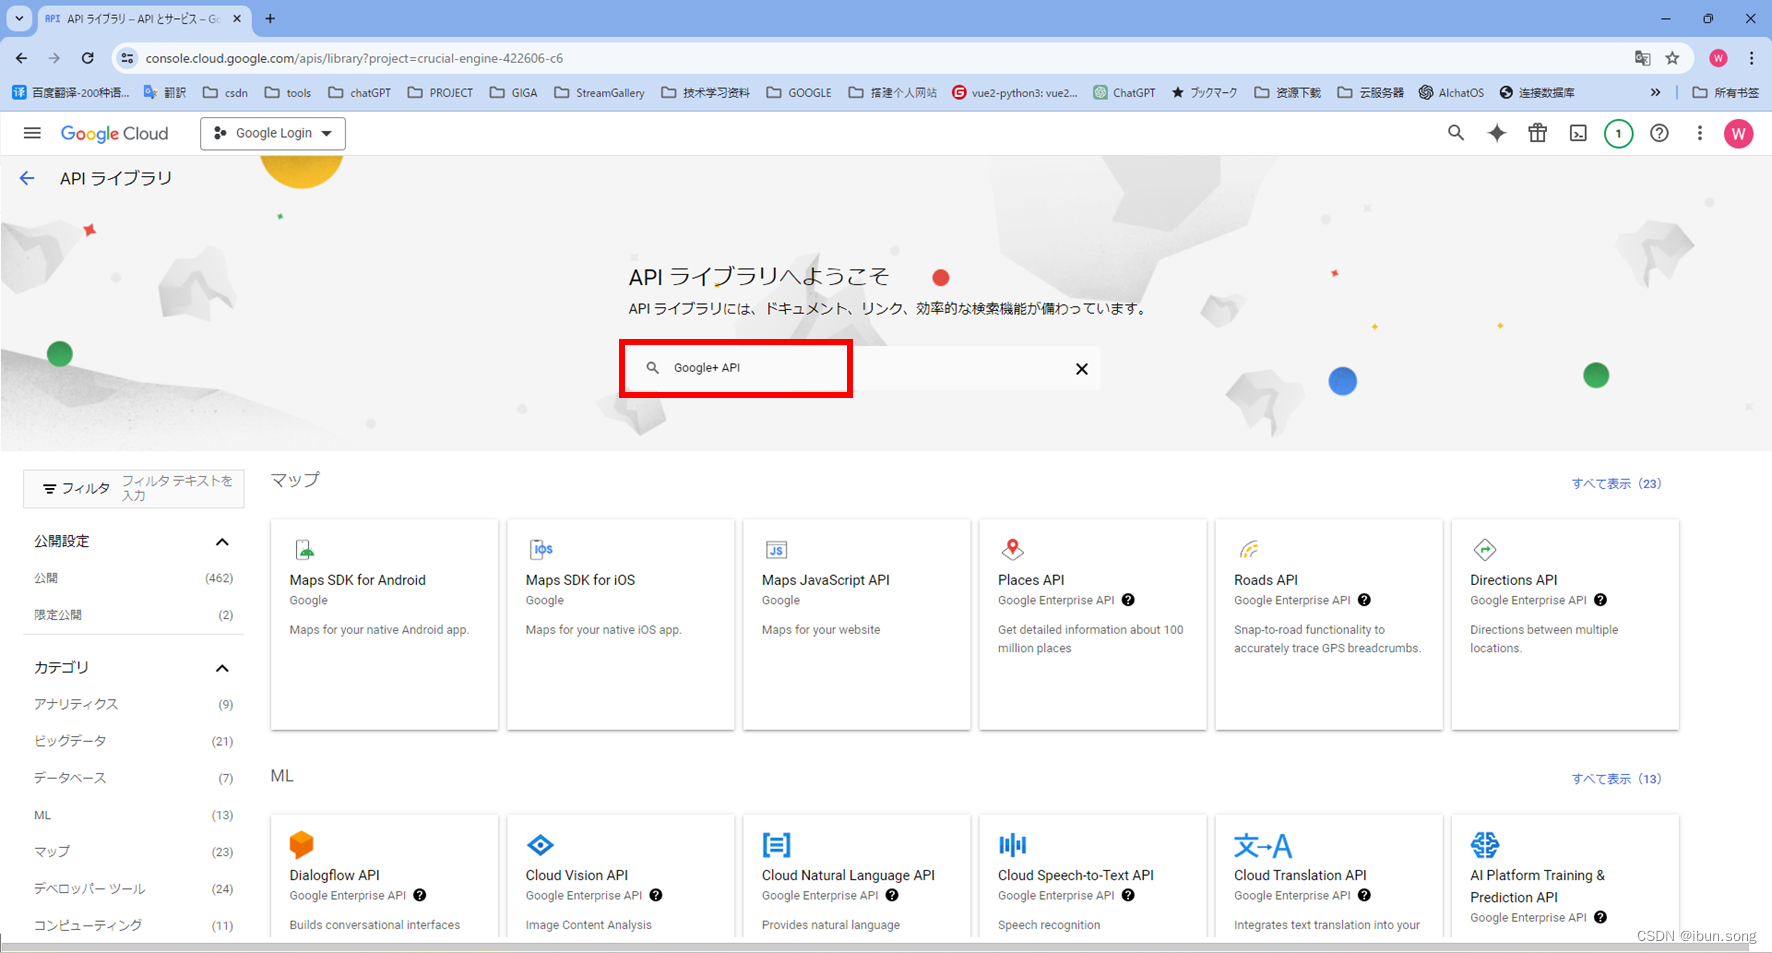
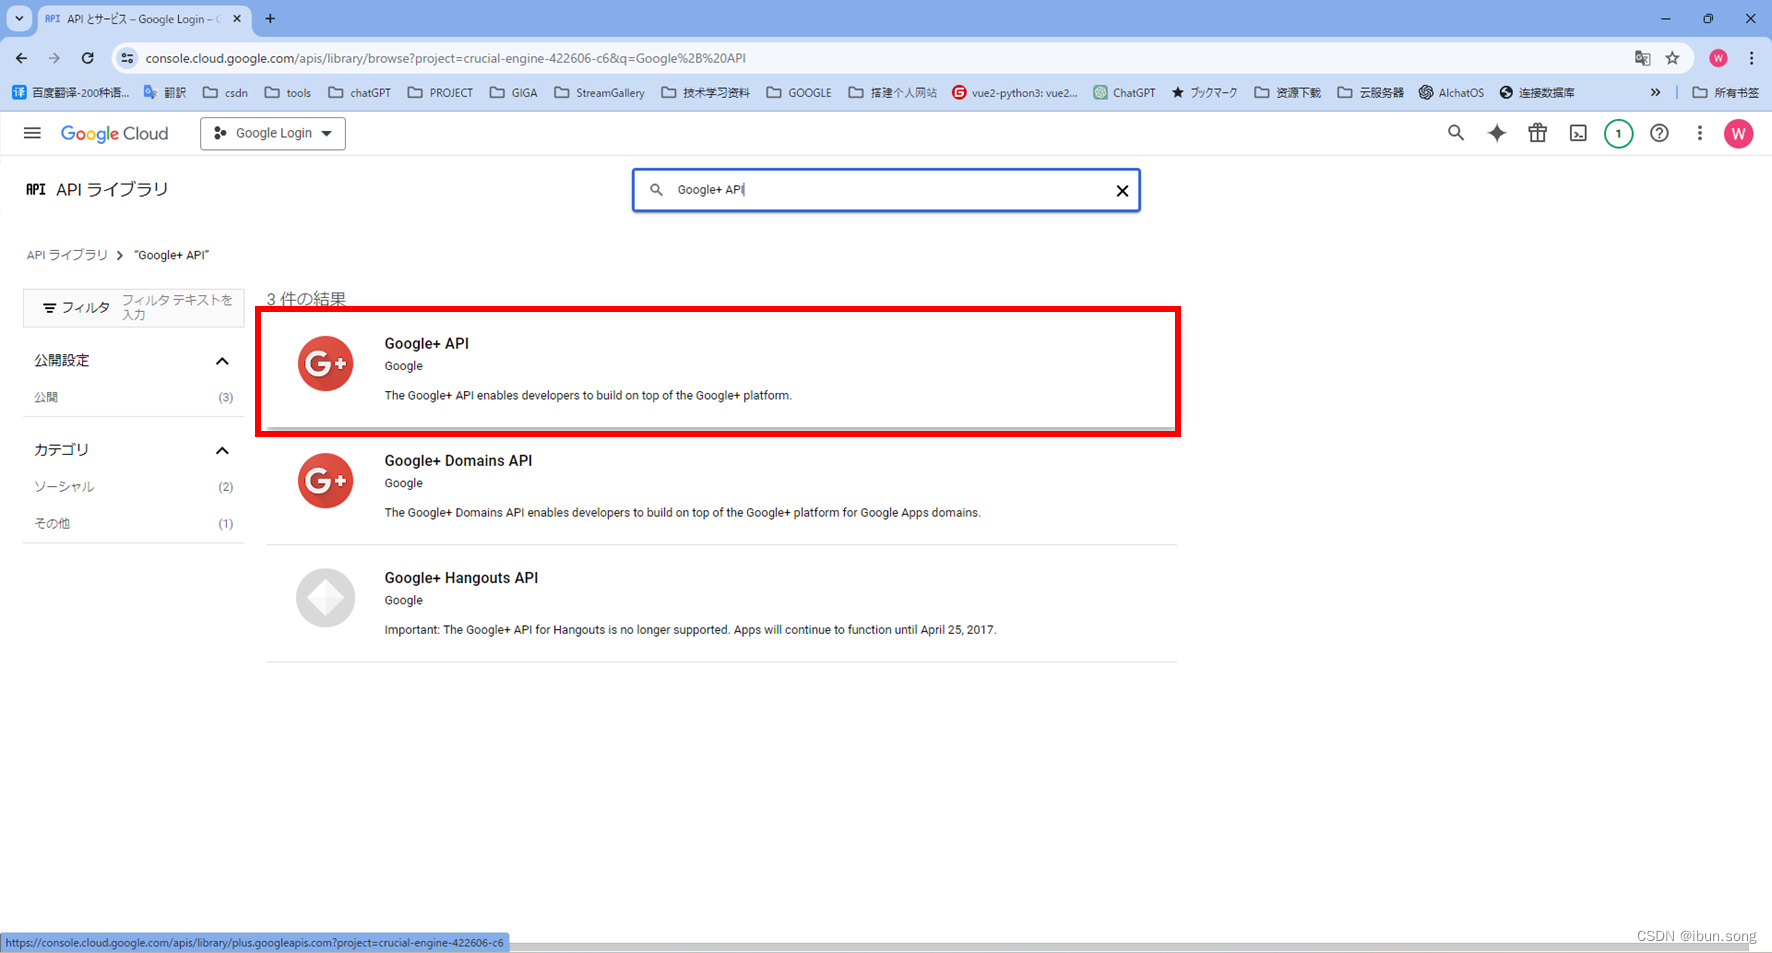
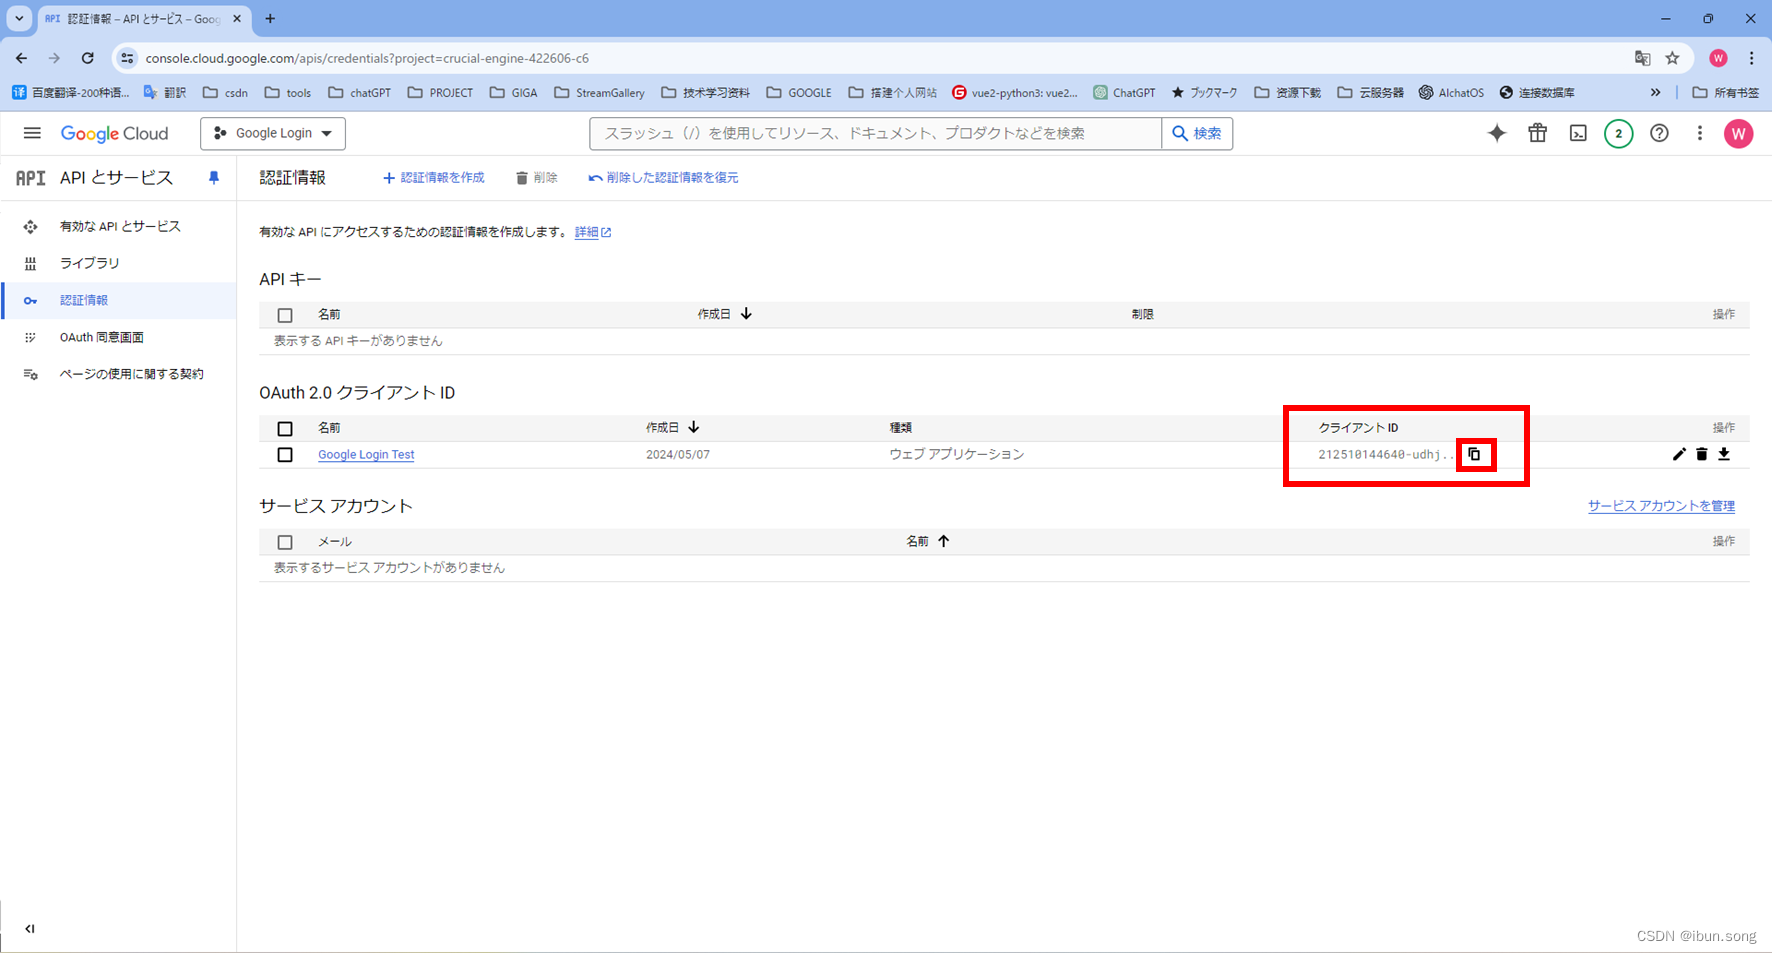
3. 启动API 和 服务
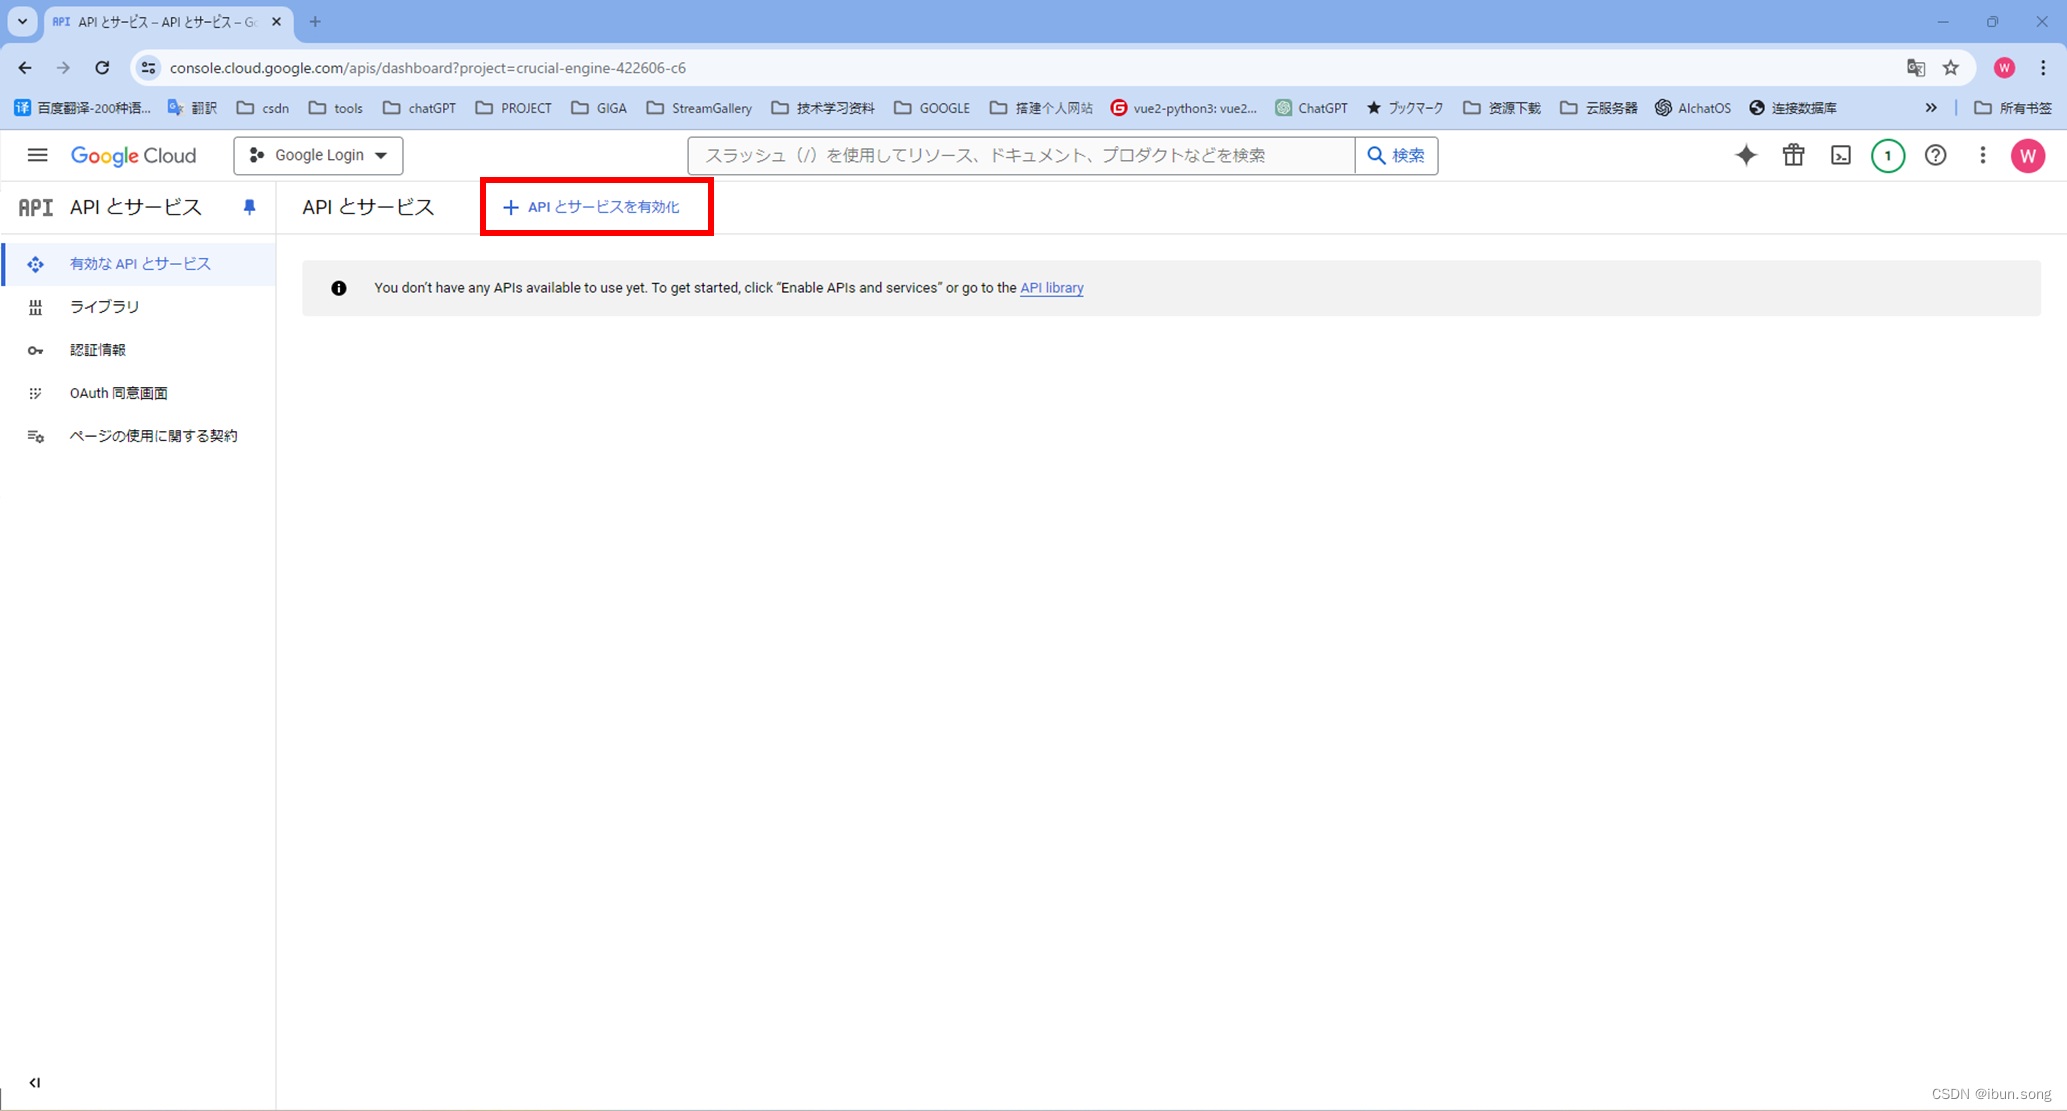
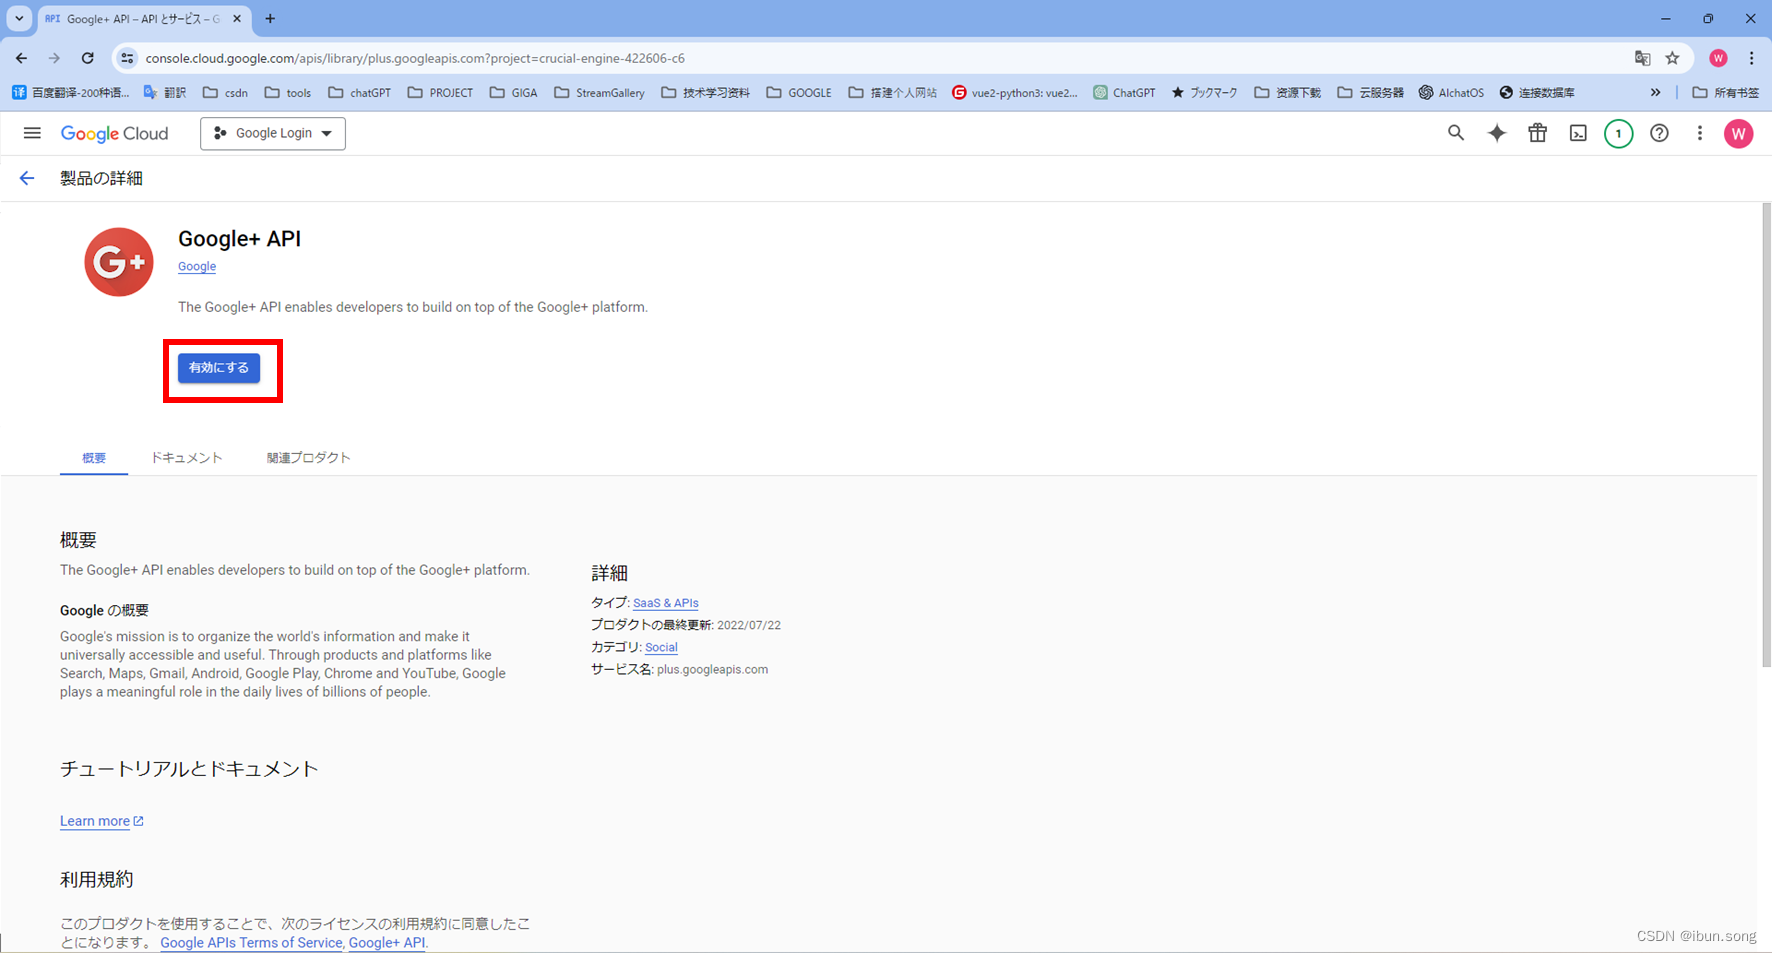

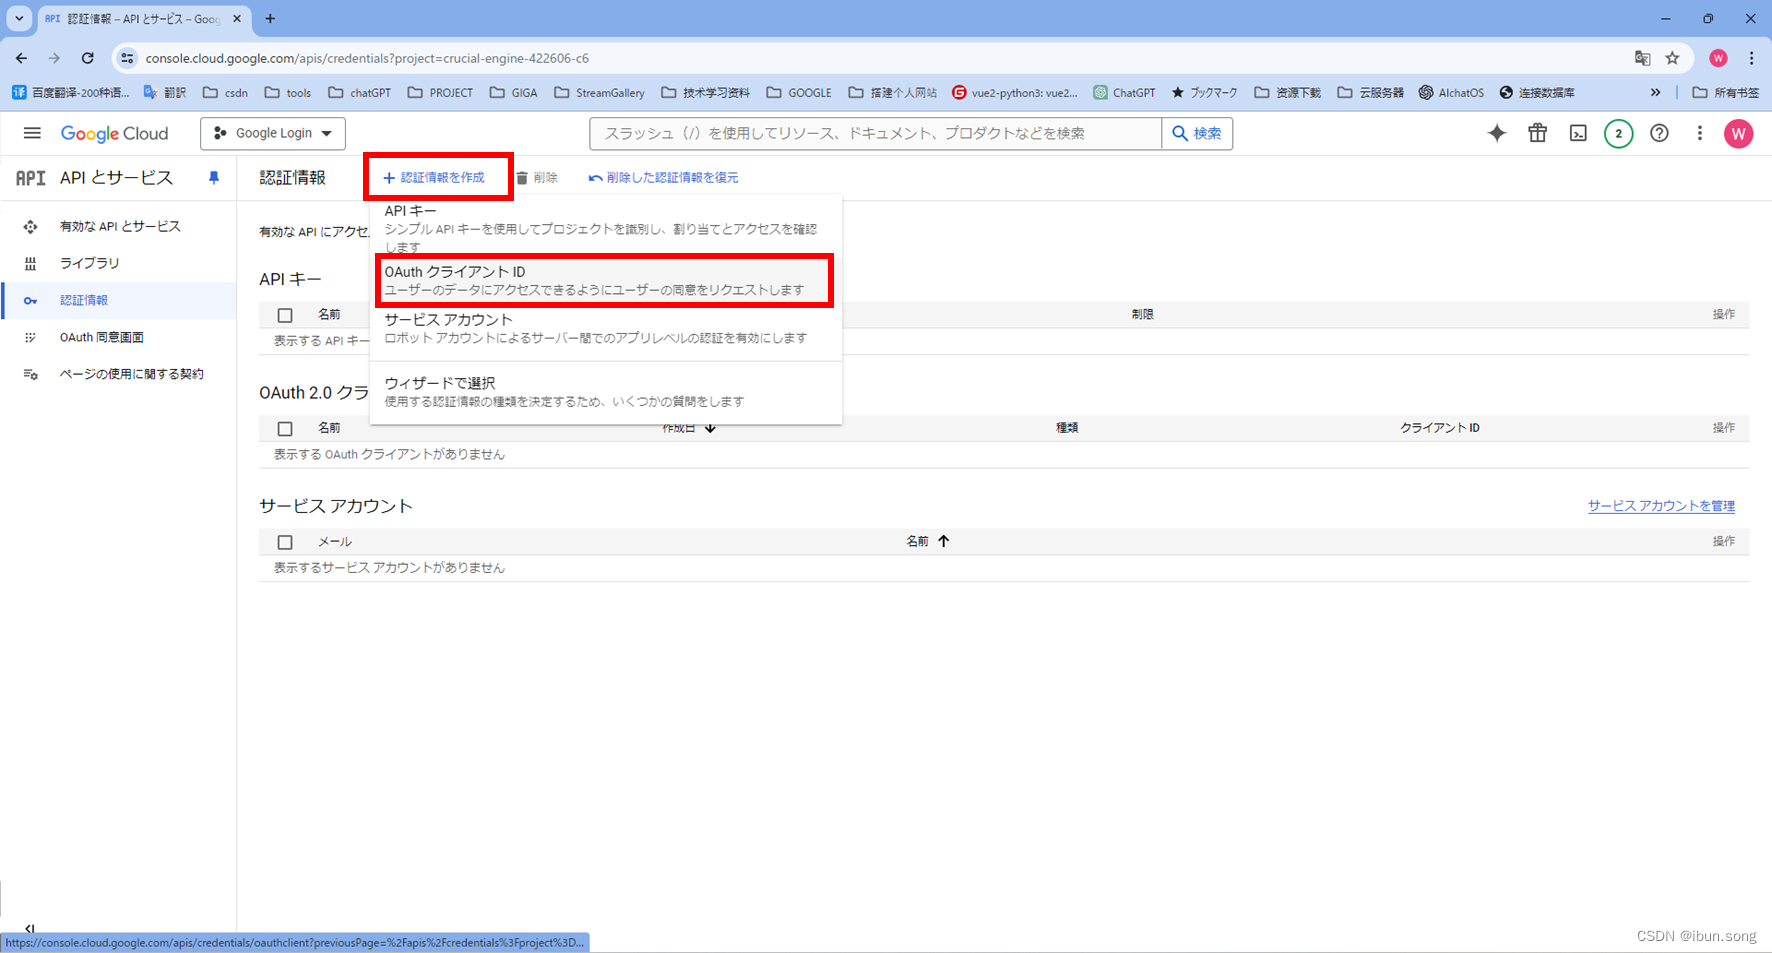
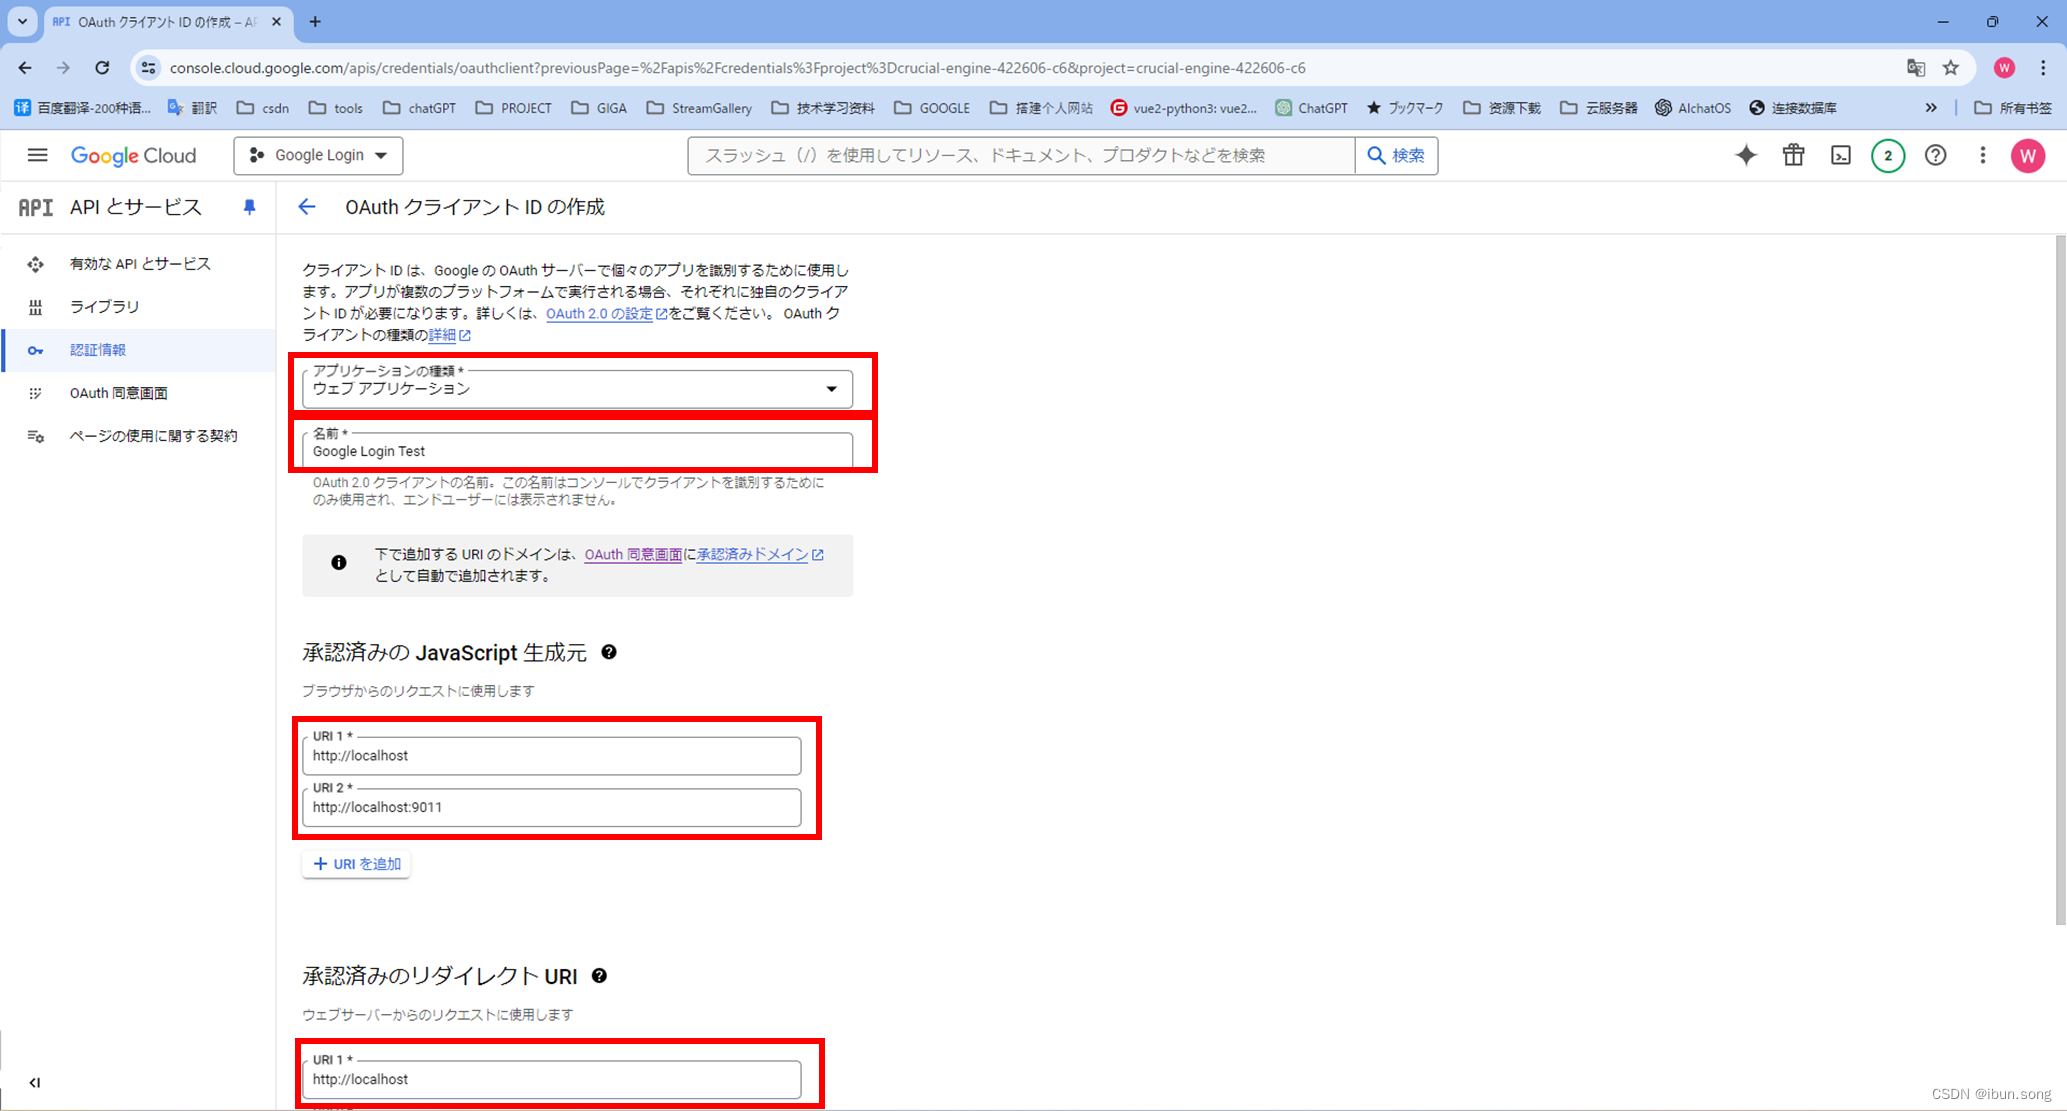
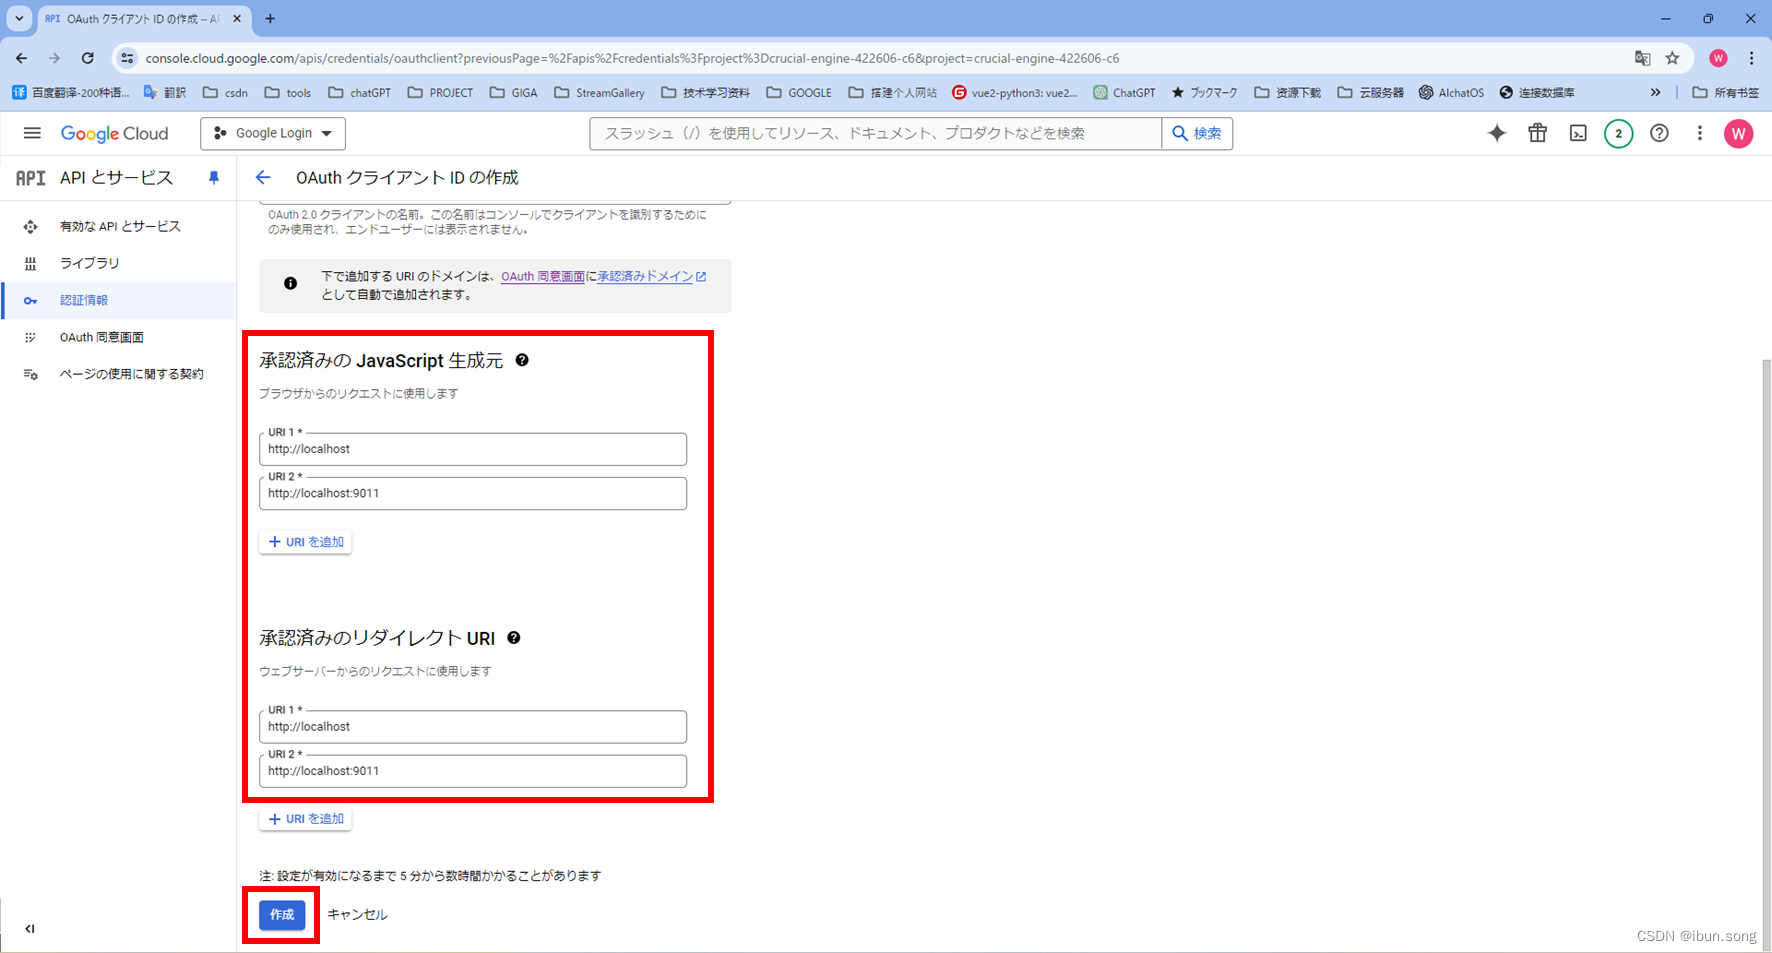
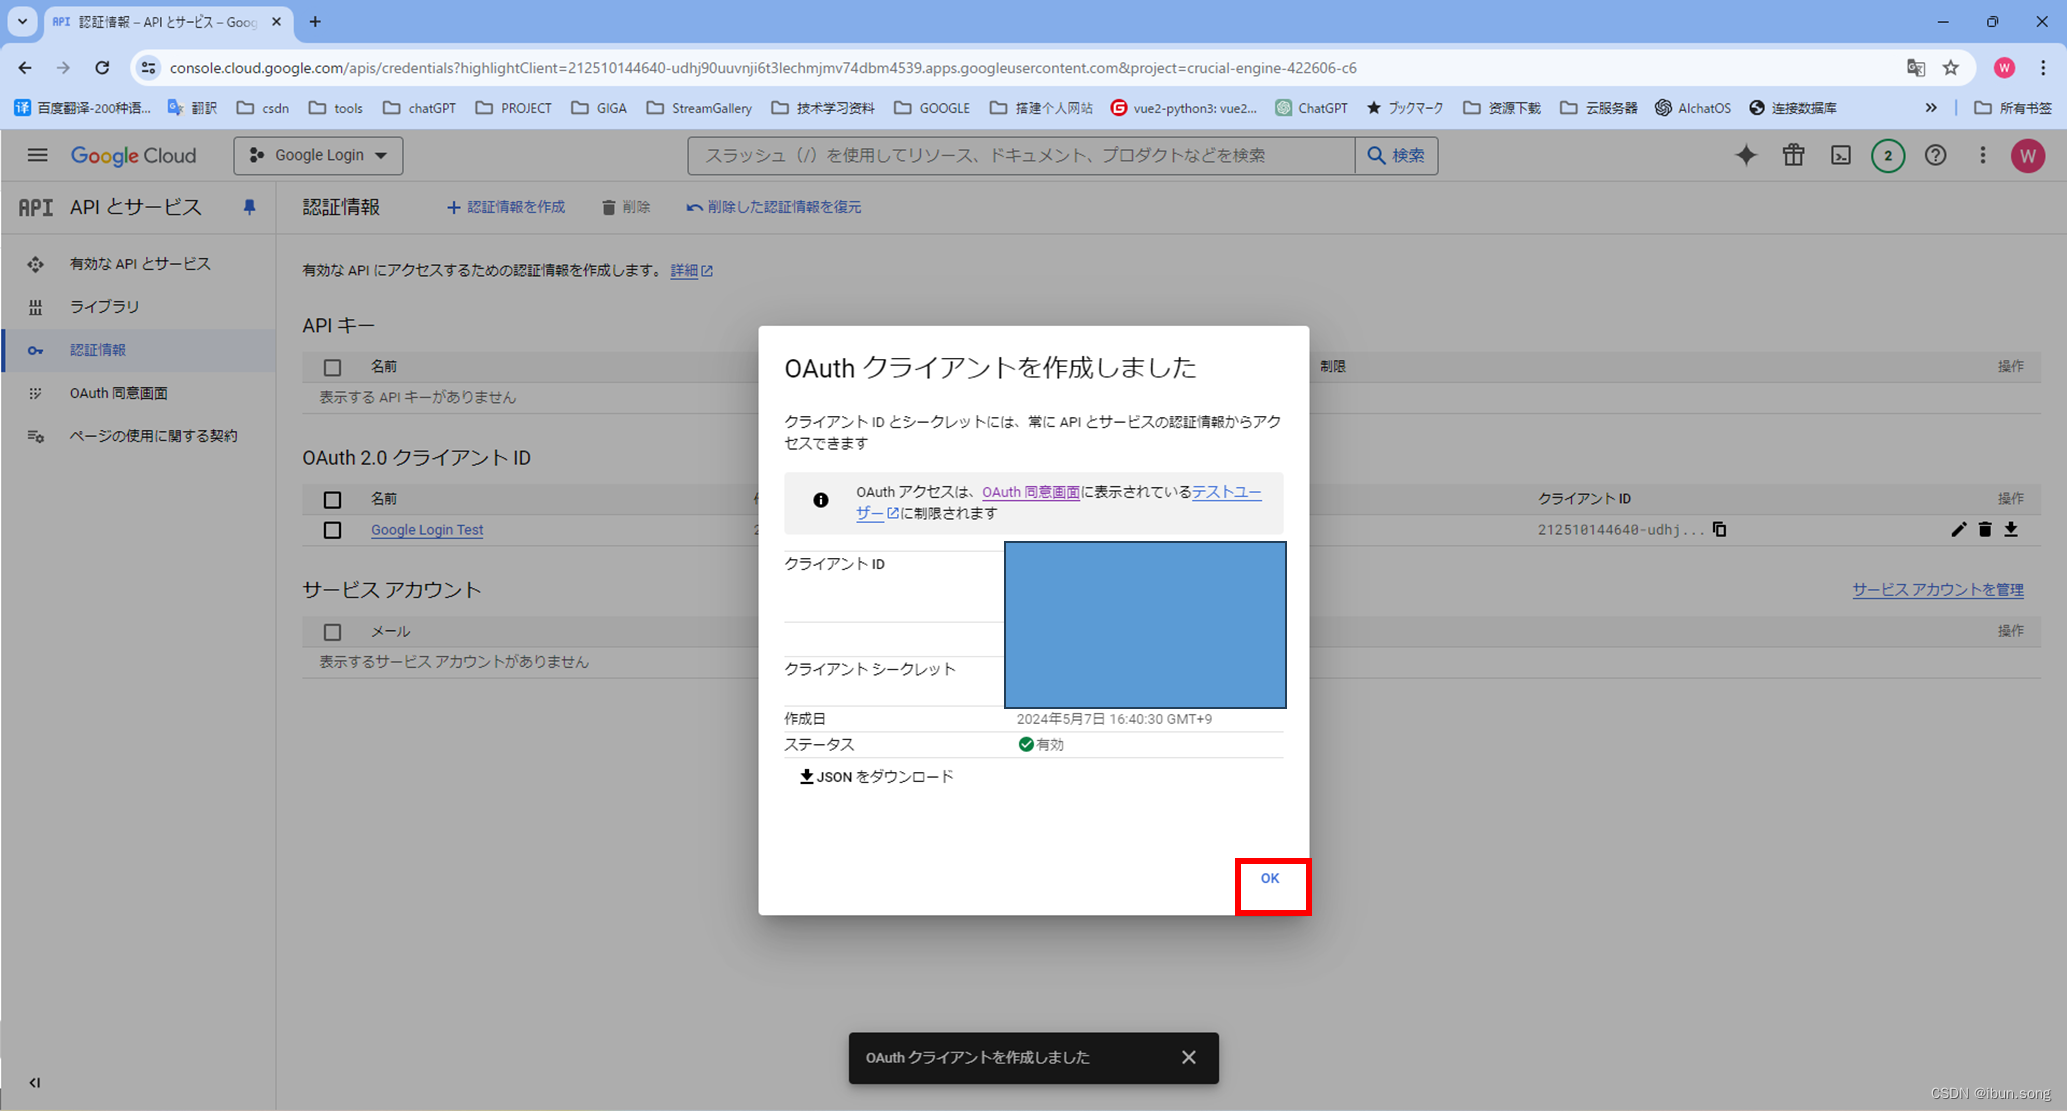
Client_ID 在之后代码中会用到,不用提前保存,需要了就点一下这个页面的复制按钮
二、 登录代码实现
1. 参考Google官网文档
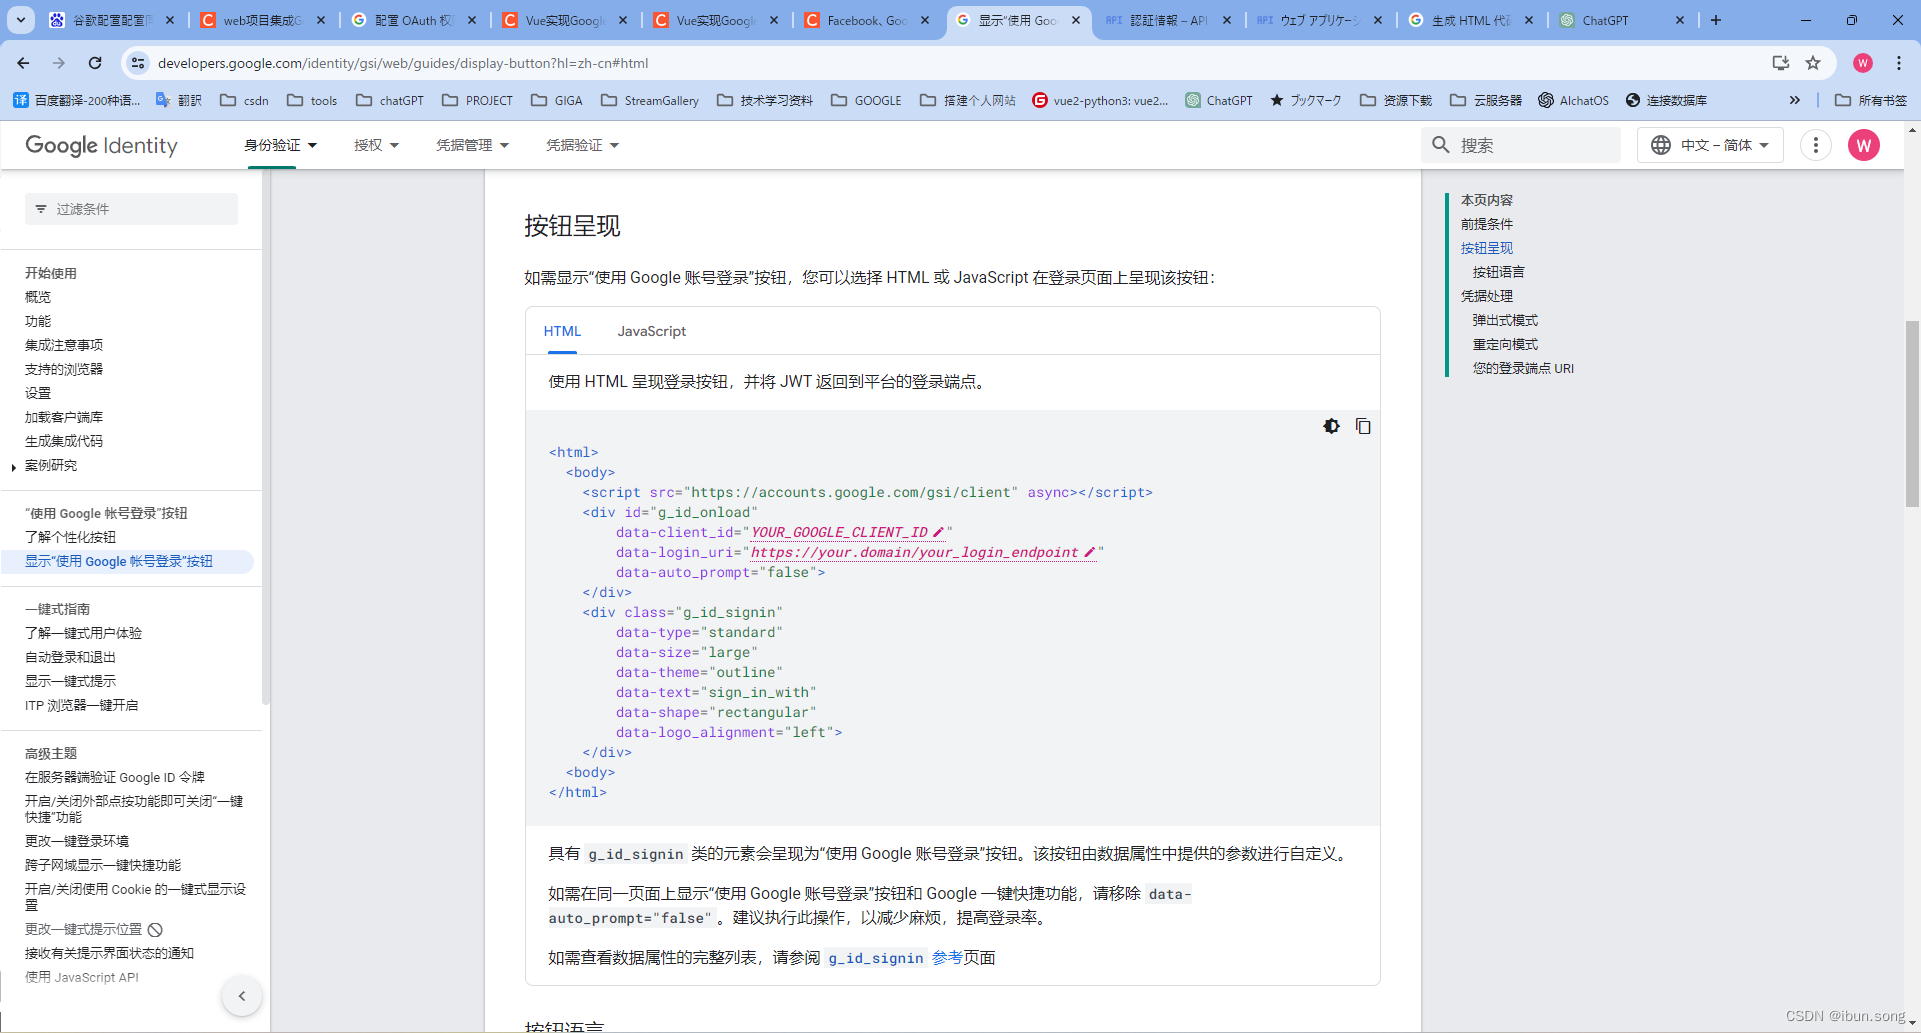
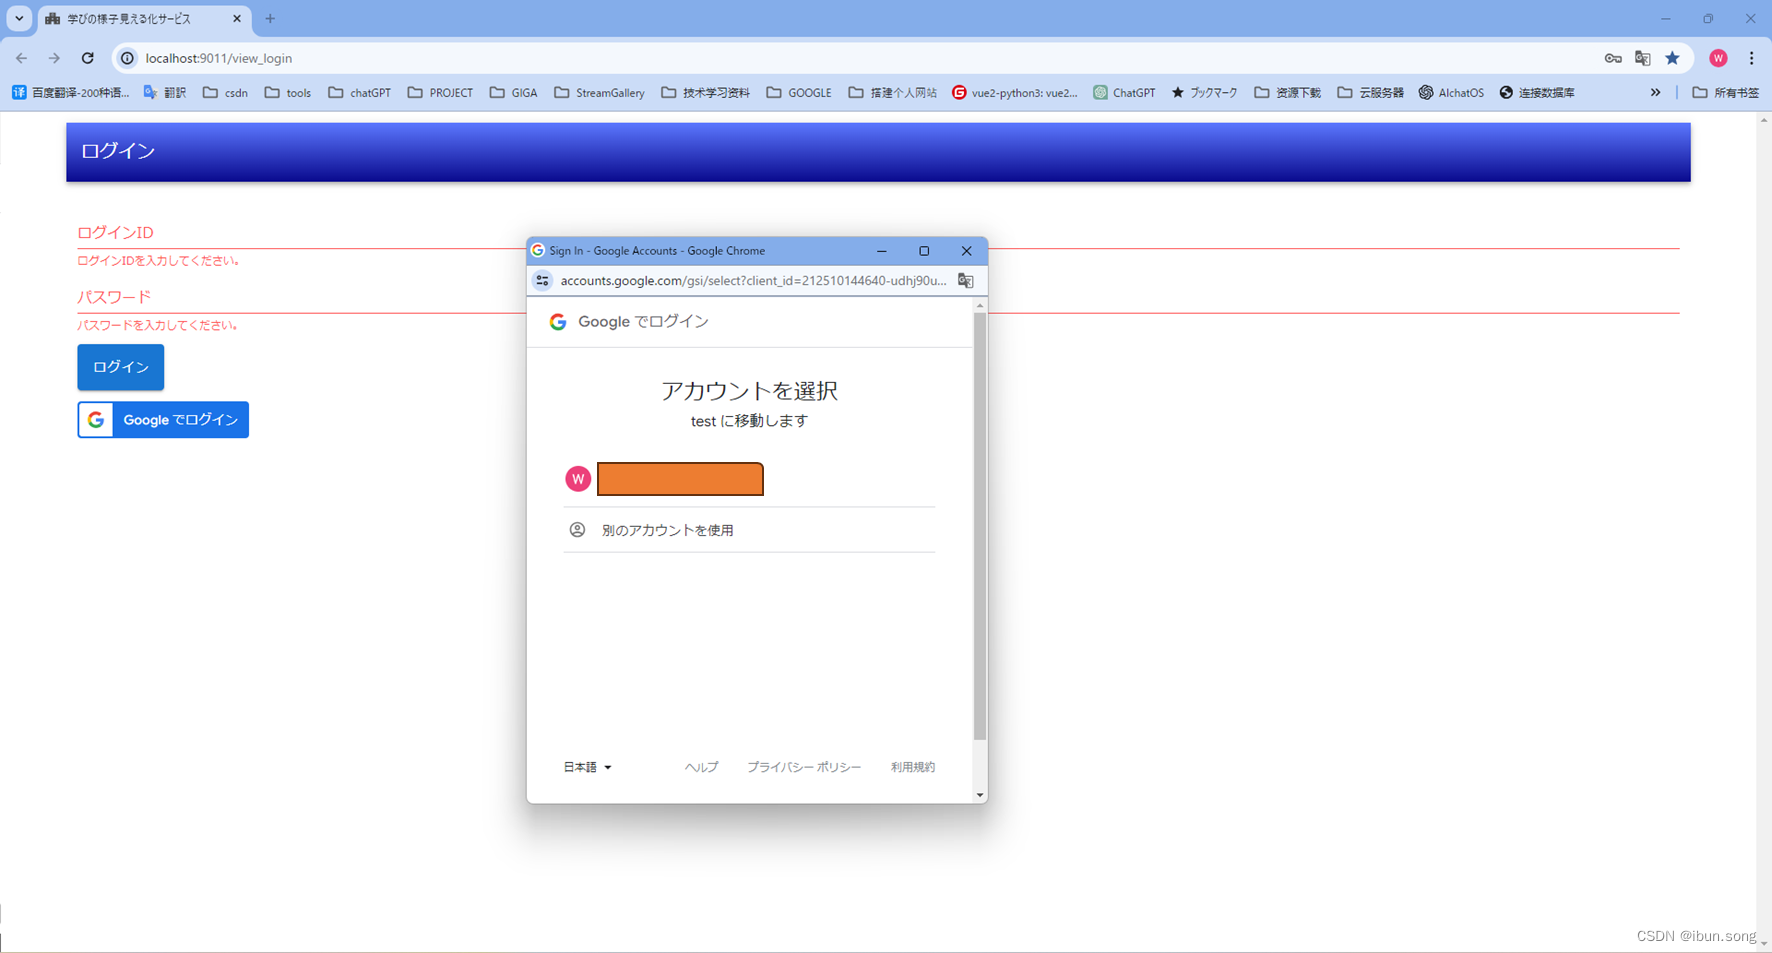
请务必在用户可能登录的任何页面上加载客户端库。
<script src="https://accounts.google.com/gsi/client" async></script>
使用 HTML 呈现登录按钮,并将 JWT 返回到平台的登录端点。
<html>
<body>
<script src="https://accounts.google.com/gsi/client" async></script>
<div id="g_id_onload"
data-client_id="YOUR_GOOGLE_CLIENT_ID"
data-login_uri="https://your.domain/your_login_endpoint"
data-auto_prompt="false">
</div>
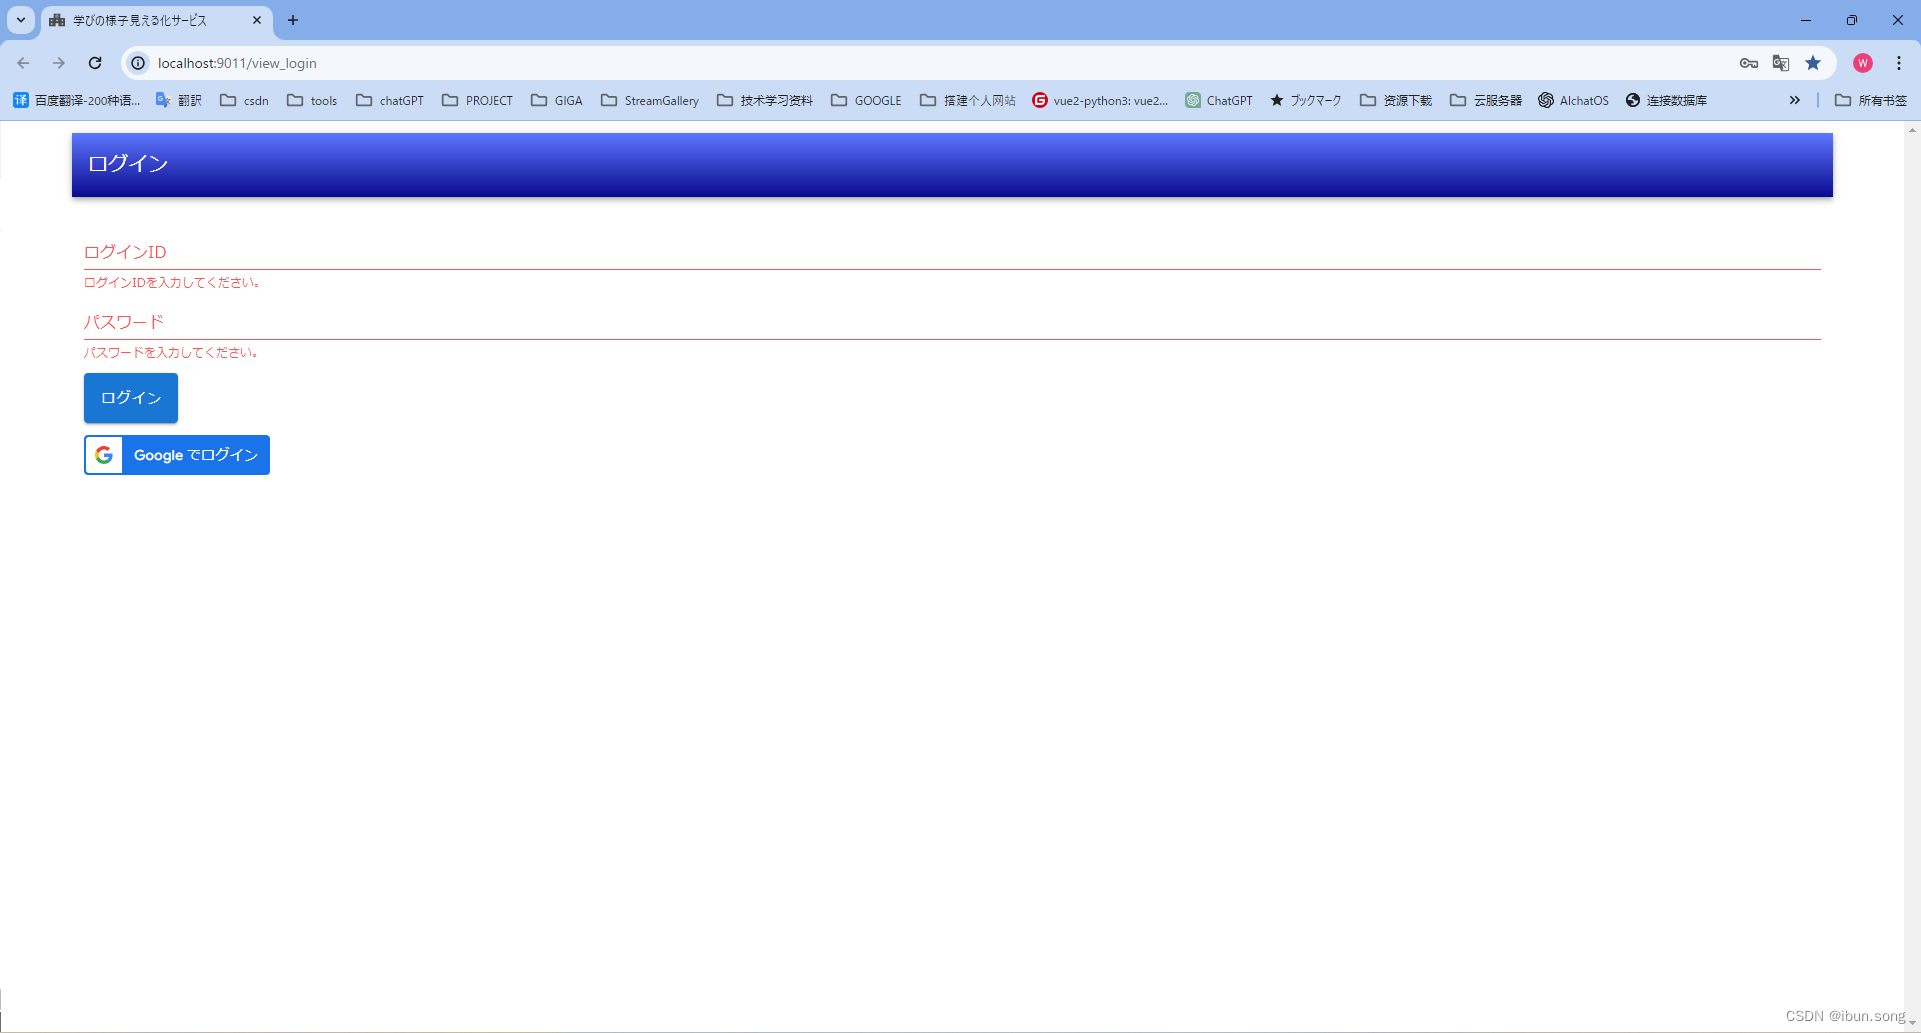
<div class="g_id_signin"
data-type="standard"
data-size="large"
data-theme="outline"
data-text="sign_in_with"
data-shape="rectangular"
data-logo_alignment="left">
</div>
<body>
</html>
使用 JavaScript 呈现登录按钮,并将 JWT 返回给浏览器的 JavaScript 回调处理程序。
<html>
  <body>
    <script src="https://accounts.google.com/gsi/client" async></script>
    <script>
      function handleCredentialResponse(response) {
        console.log("Encoded JWT ID token: " + response.credential);
      }
      window.onload = function () {
        google.accounts.id.initialize({
          client_id: "YOUR_GOOGLE_CLIENT_ID"
          callback: handleCredentialResponse
        });
        google.accounts.id.renderButton(
          document.getElementById("buttonDiv"),
          { theme: "outline", size: "large" }  // customization attributes
        );
        google.accounts.id.prompt(); // also display the One Tap dialog
      }
    </script>
    <div id="buttonDiv"></div>
  </body>
</html>
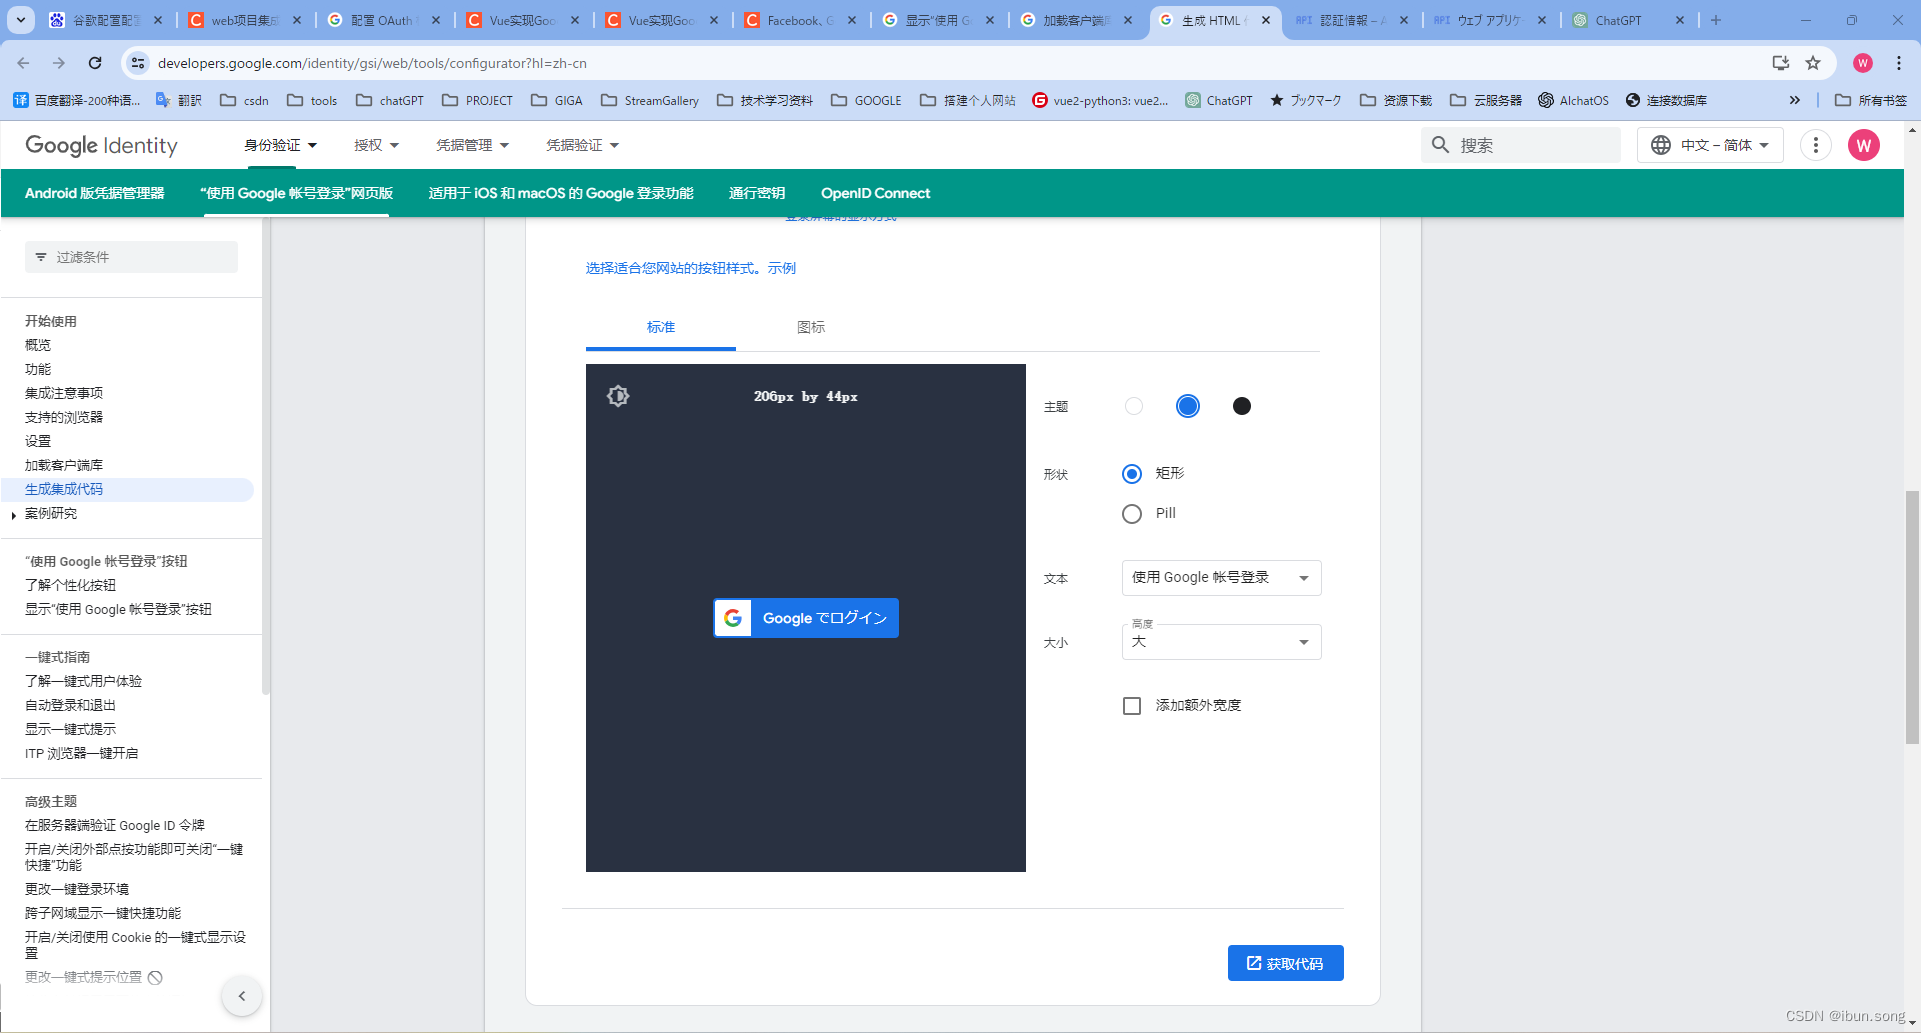
2. Google官网代码生成器
生成HTML代码: https://developers.google.com/identity/gsi/web/tools/configurator?hl=zh-cn
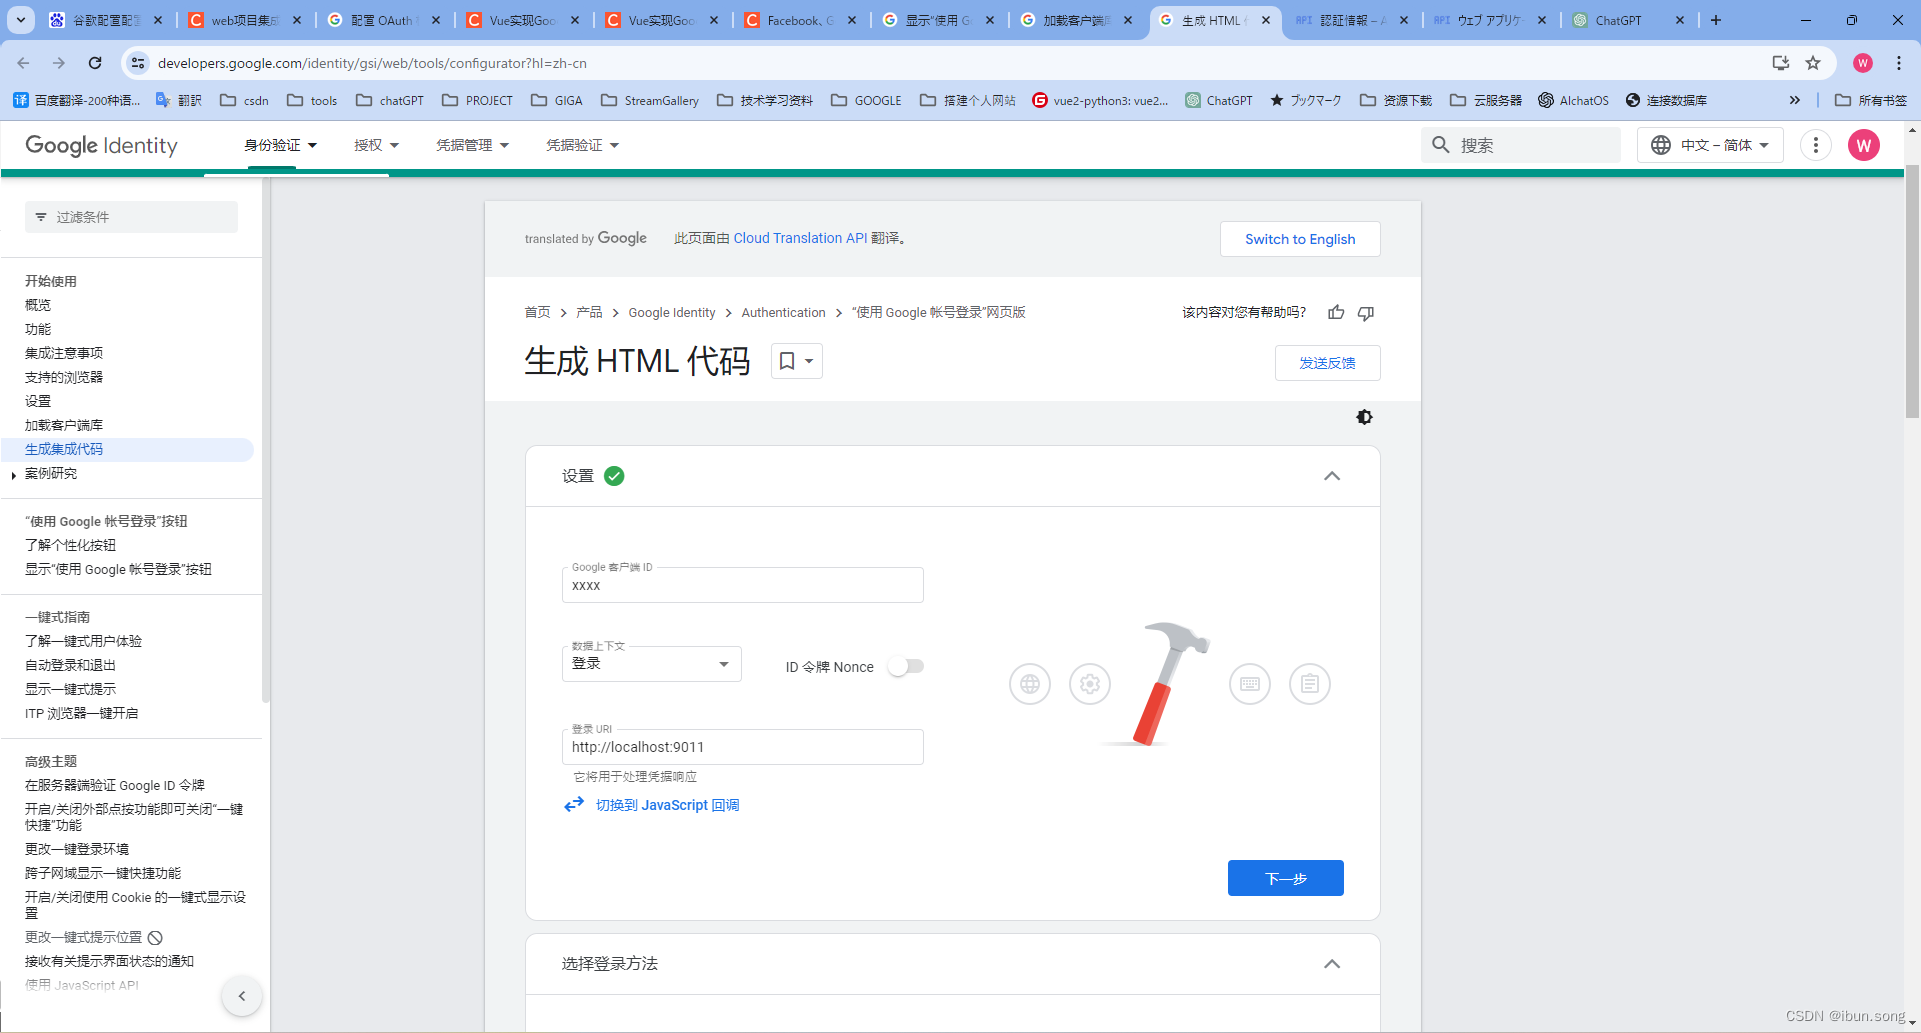

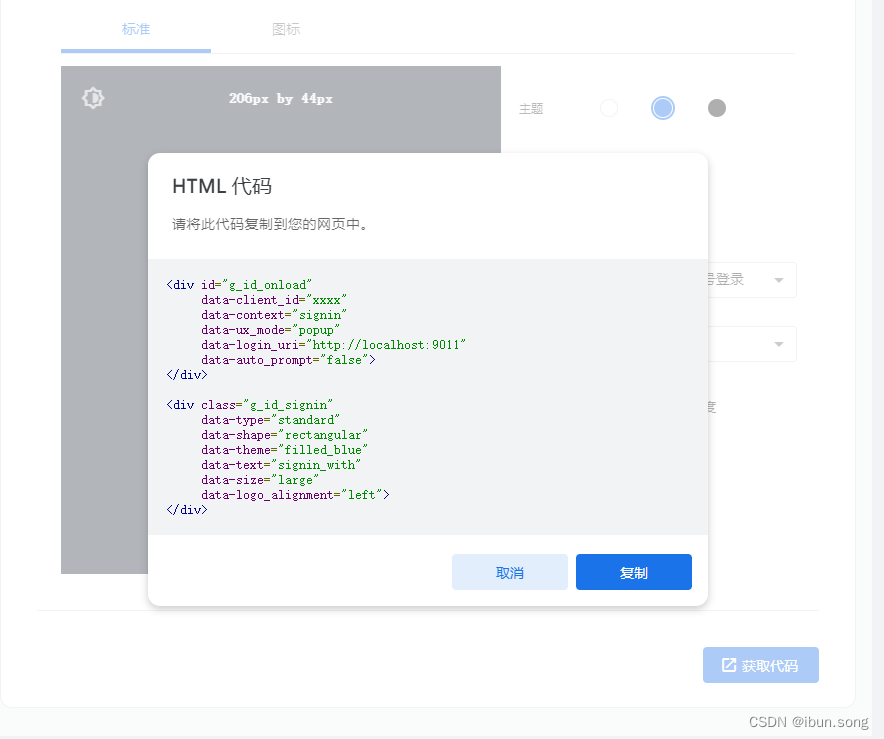
<div id="g_id_onload"
     data-client_id="xxxx"
     data-context="signin"
     data-ux_mode="popup"
     data-login_uri="http://localhost:9011"
     data-auto_prompt="false">
</div>

<div class="g_id_signin"
     data-type="standard"
     data-shape="rectangular"
     data-theme="filled_blue"
     data-text="signin_with"
     data-size="large"
     data-logo_alignment="left">
</div>
3. 项目中实装
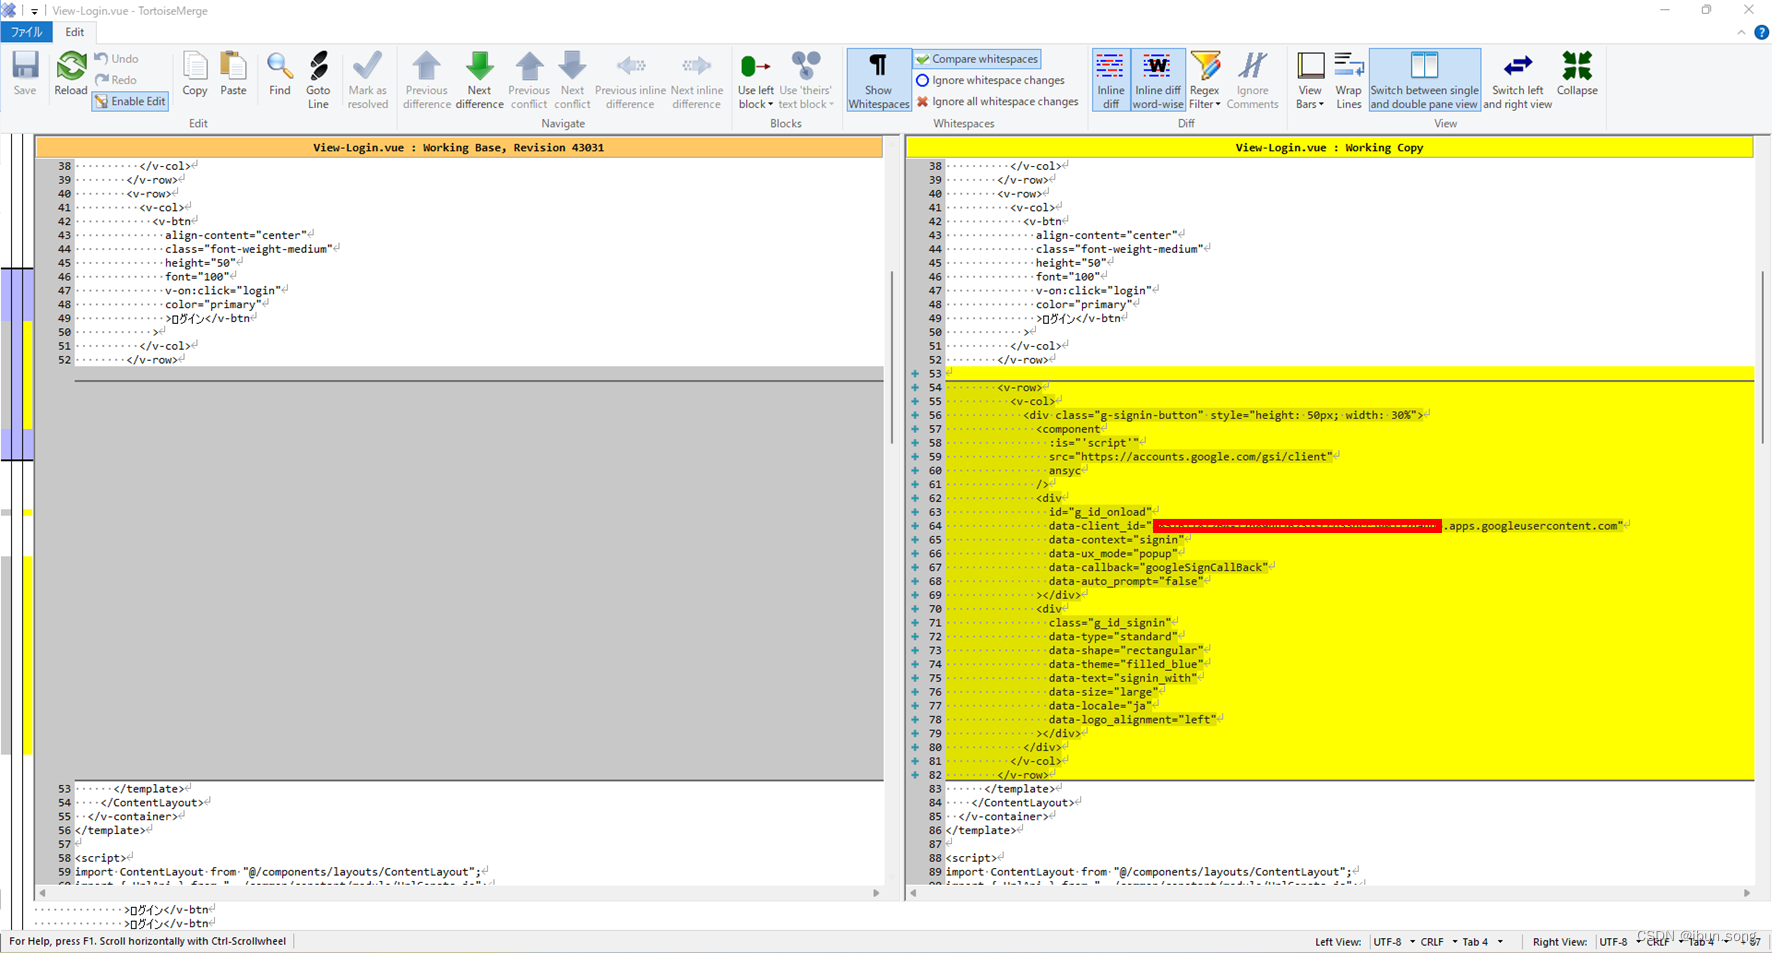
        <v-row>
          <v-col>
            <div class="g-signin-button" style="height: 50px; width: 30%">
              <component
                :is="'script'"
                src="https://accounts.google.com/gsi/client"
                ansyc
              />
              <div
                id="g_id_onload"
                data-client_id="换成你自己的Client_ID.apps.googleusercontent.com"
                data-context="signin"
                data-ux_mode="popup"
                data-callback="googleSignCallBack"
                data-auto_prompt="false"
              ></div>
              <div
                class="g_id_signin"
                data-type="standard"
                data-shape="rectangular"
                data-theme="filled_blue"
                data-text="signin_with"
                data-size="large"
                data-locale="ja"
                data-logo_alignment="left"
              ></div>
            </div>
          </v-col>
        </v-row>
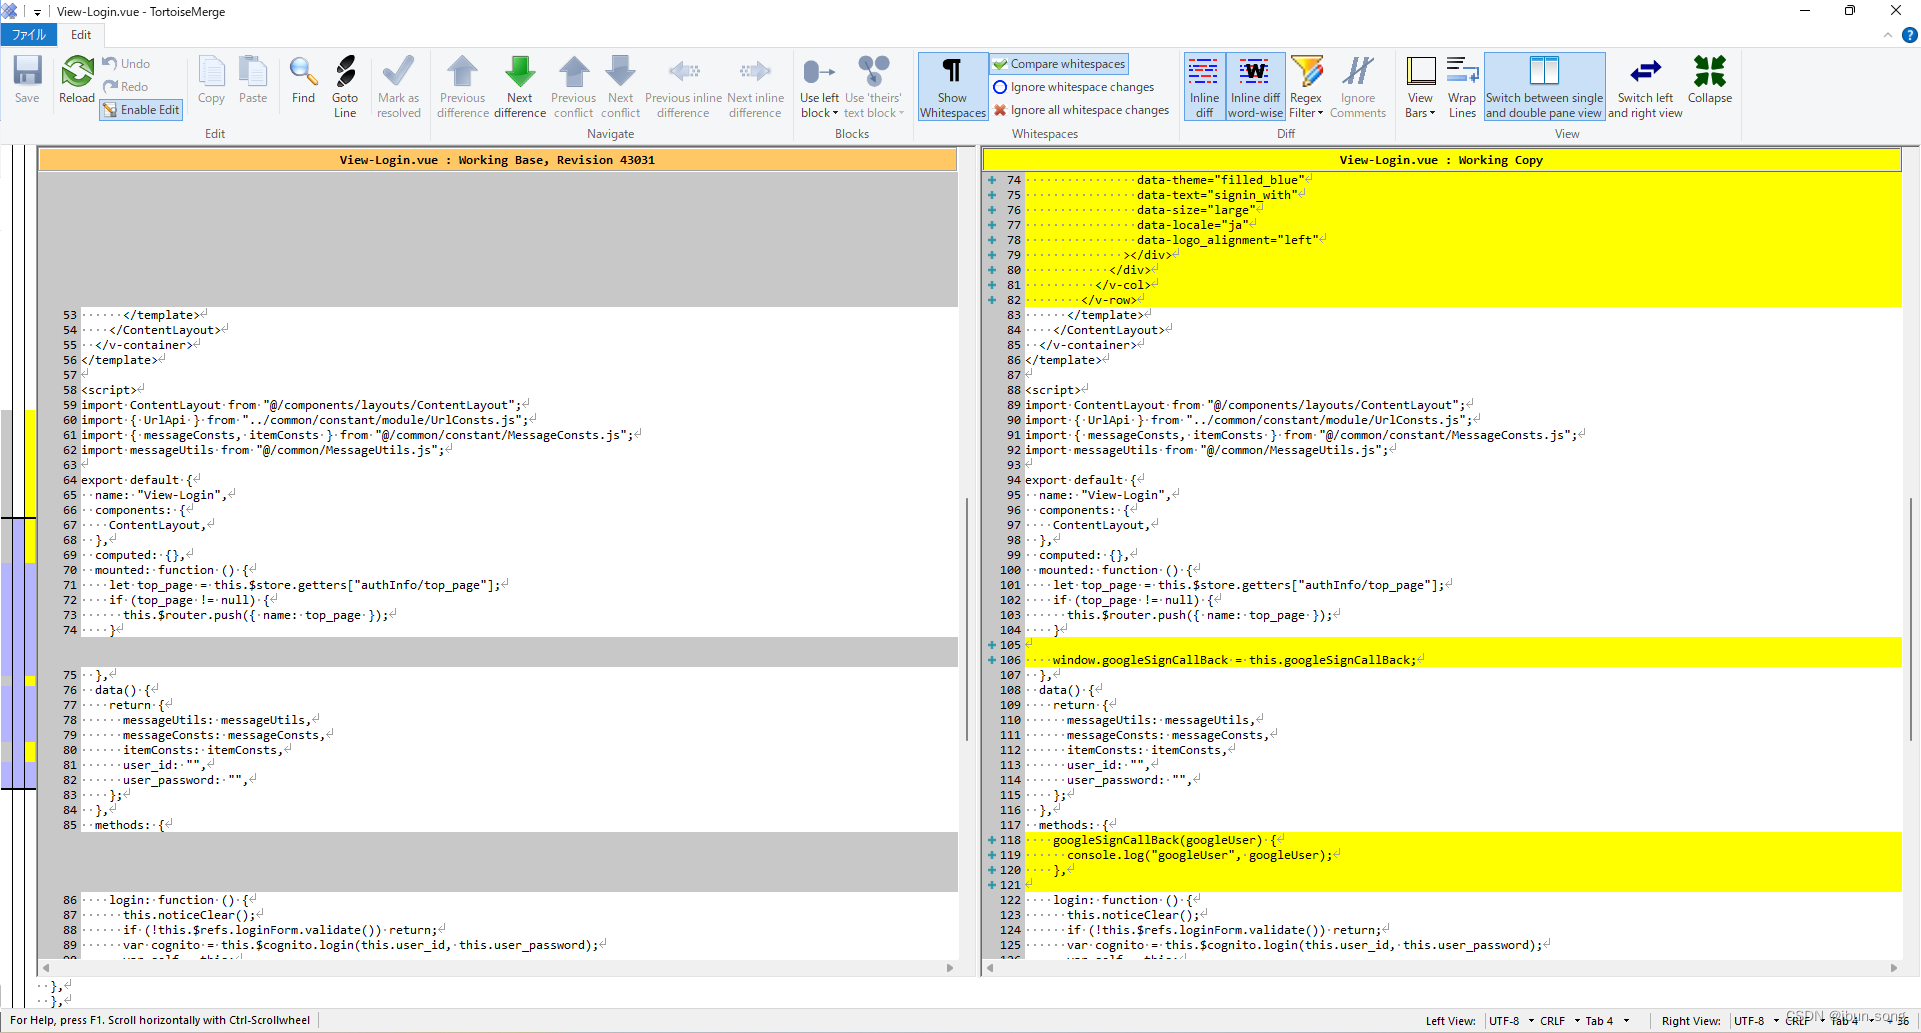
  mounted: function () {
    window.googleSignCallBack = this.googleSignCallBack;
  },
methods: {
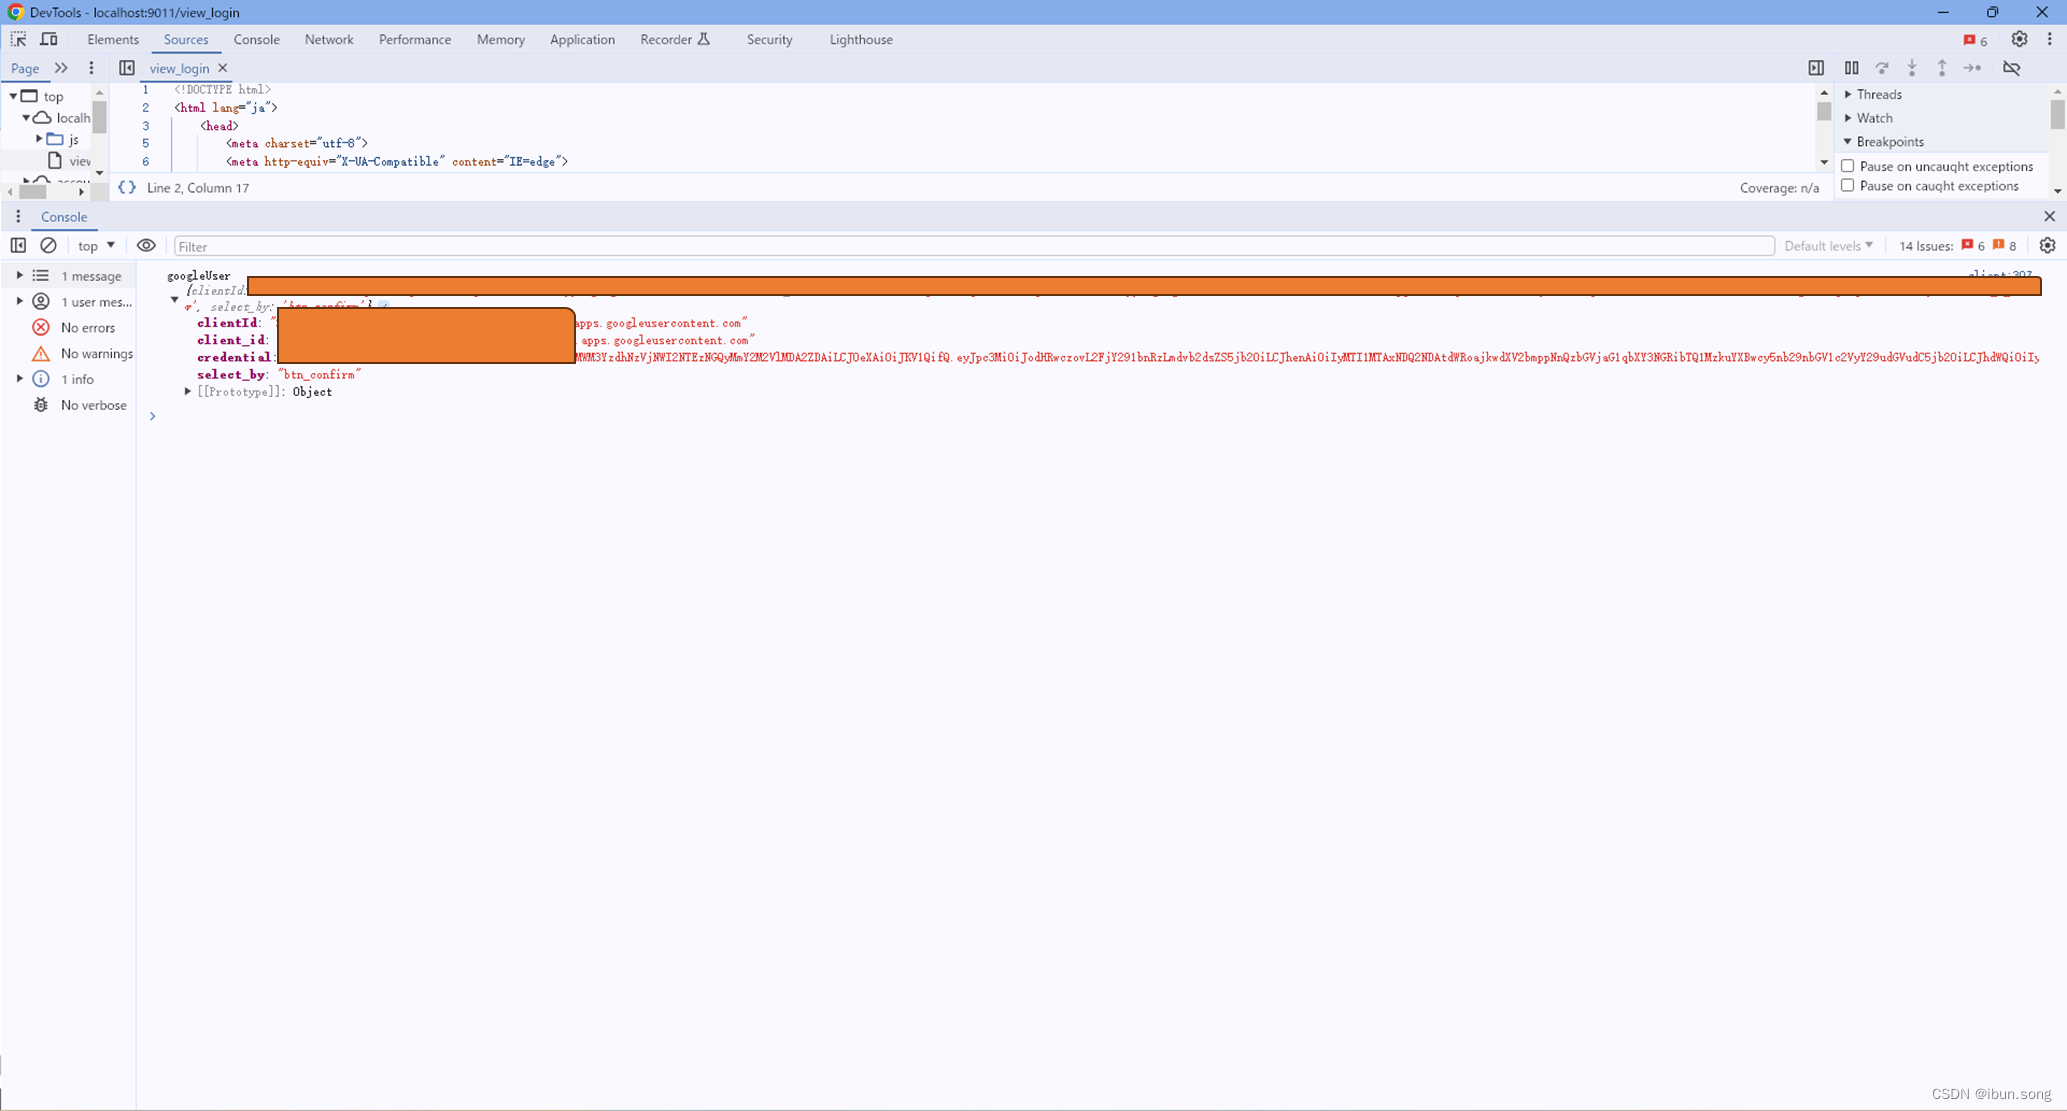
googleSignCallBack(googleUser) {
console.log("googleUser", googleUser);
},
},


 3496
3496


 被折叠的 条评论
为什么被折叠?
被折叠的 条评论
为什么被折叠?
 到【灌水乐园】发言


