


配置文件最主要的目的 : 解决硬编码的问题(代码写死)
SpringBoot 的配置文件,有三种格式
1.properties
2.yaml
3.yml(是 yaml 的简写)
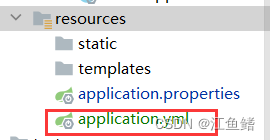
SpringBoot 只支持三个文件
1.application.properties
2.application.yaml
3.application.yml
yaml 和 yml 是一样的,学会一个就行
如果一个项目中同时存在 properties 和 yml ,虽然两个都会生效,但是 properties 的优先级更高
但是正常情况下都只有一个文件,多了容易乱
properties 的代码格式一般为键值对的样式,以 = 分割,单词小写,单词之间用 . 分割
下面是一些配置举例,配置端口号和配置数据库先不细说

我们自定义的配置该如何拿到运用呢?
我们创建一个类
package com.example.ioc.controller;

import org.springframework.beans.factory.annotation.Value;
import org.springframework.web.bind.annotation.RequestMapping;
import org.springframework.web.bind.annotation.RestController;

@RestController
public class PropertiesController {
    //读取配置文件
    @Value("${demo.key1}")
    private String key1;

    @RequestMapping("/readkey")
    public String readkey(){
        return "读取到的配置项key1"+key1;
    }
}
就能成功拿到了

名字一一对应

什么样的内容适合放在配置文件中呢?
那些可能会发生改变的信息,与我的程序运行没有太大关系的,我们就把它放在配置文件中
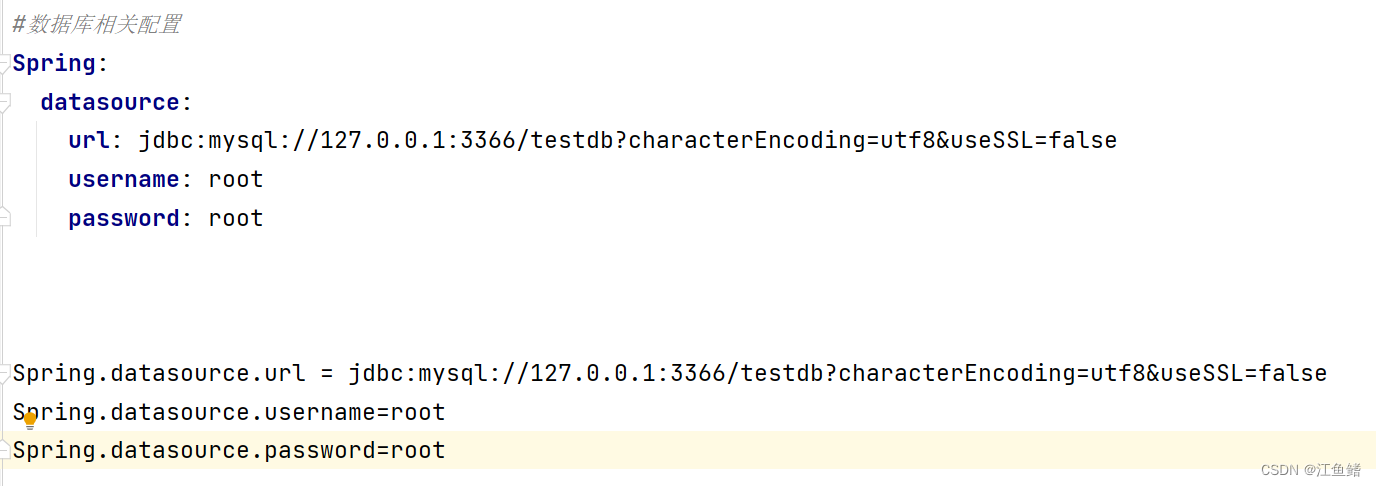
但是其实我们发现 properties 有很多冗余的信息 比如

想要解决这个问题,就可以使用 yml 配置文件的格式化了
我们先在 resources 底下创建一个文件,application.yml
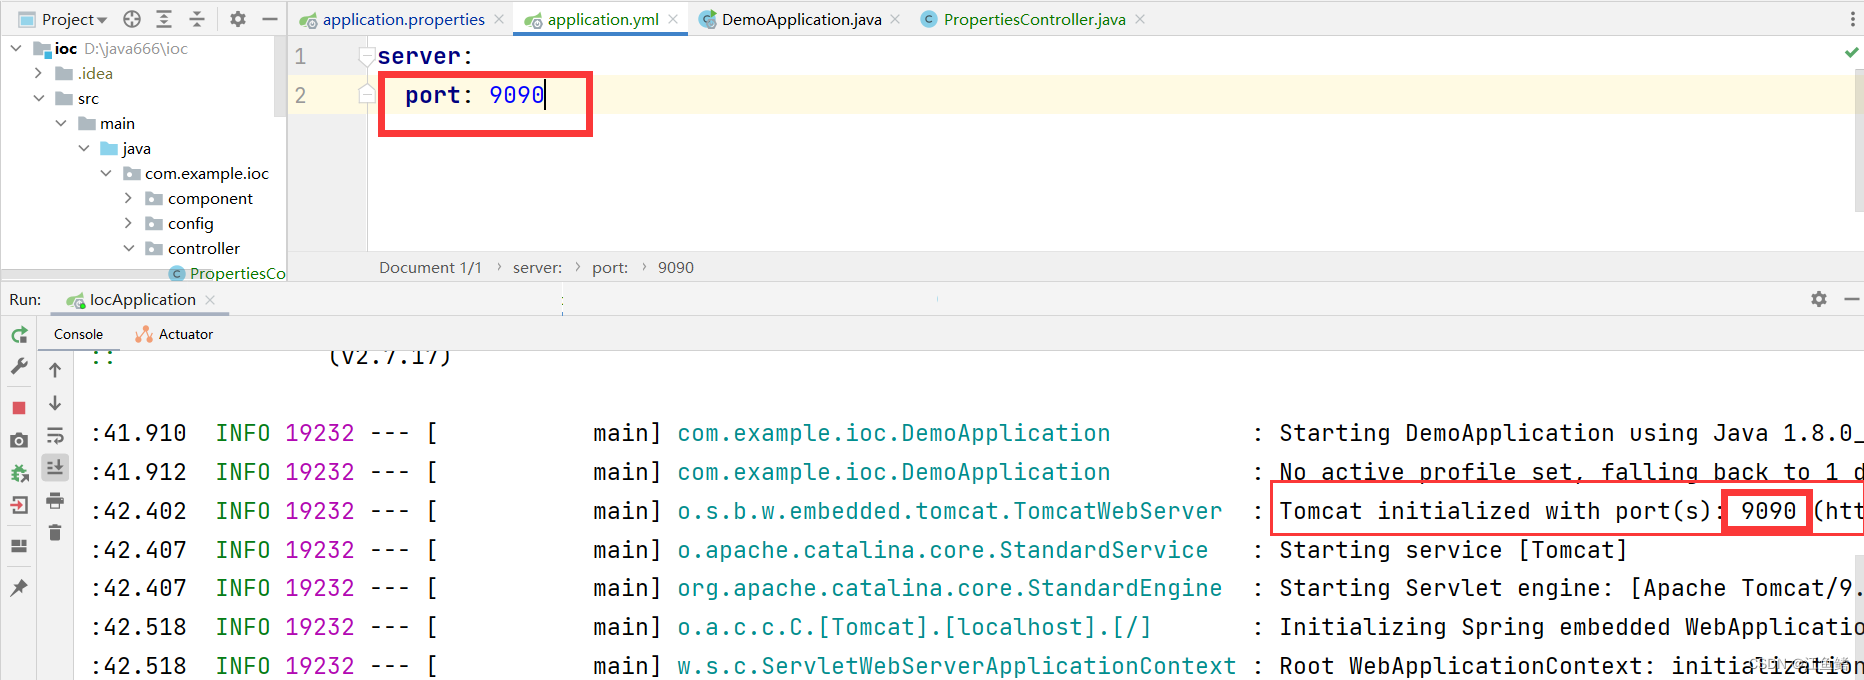
yml 文件对比 properties 文件格式,yml 文件把 . 换成冒号+换行,key后面用冒号赋值

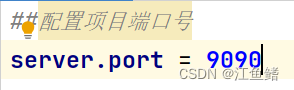
这样就可以把端口改为 9090 了
但是我们稍作修改,把9090 前面的空格删掉,再次运行程序,发现修改端口失败了
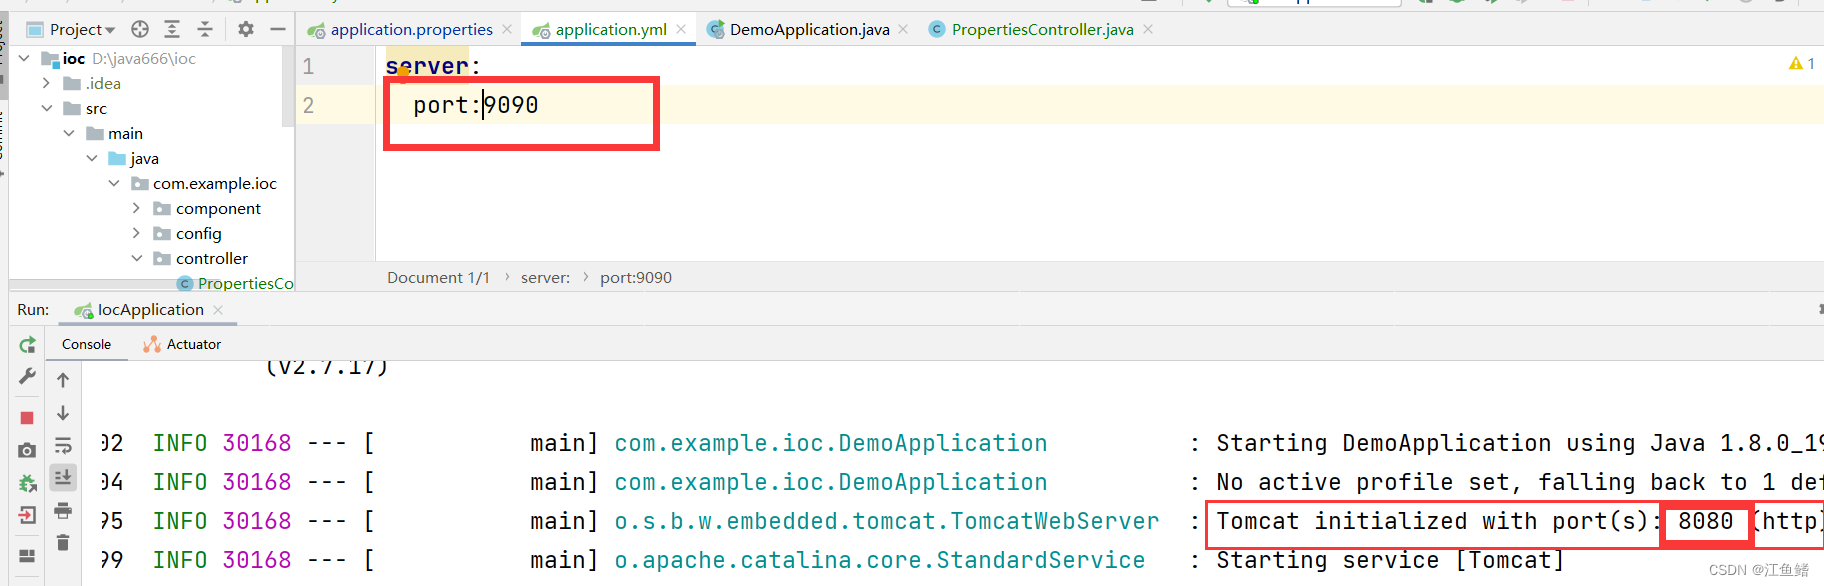
yml 的格式有严格要求,我们要在值前面的冒号的后面加空格,空格不可省略
我们对数据库相关配置进行修改的样式如下
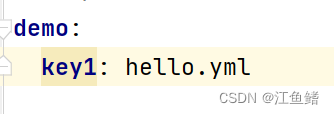
yml 的自定义配置该如何写并且使用呢?
然后创建一个类
package com.example.ioc.controller;
import org.springframework.beans.factory.annotation.Value;
import org.springframework.web.bind.annotation.RequestMapping;
import org.springframework.web.bind.annotation.RestController;
@RestController
public class YmlController
{
@Value("${demo.key1}")
public String key1;
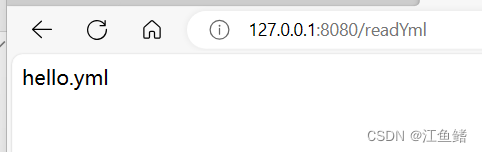
@RequestMapping ("/readYml")
public String readYml(){
return key1;
}
}这样就能成功使用了
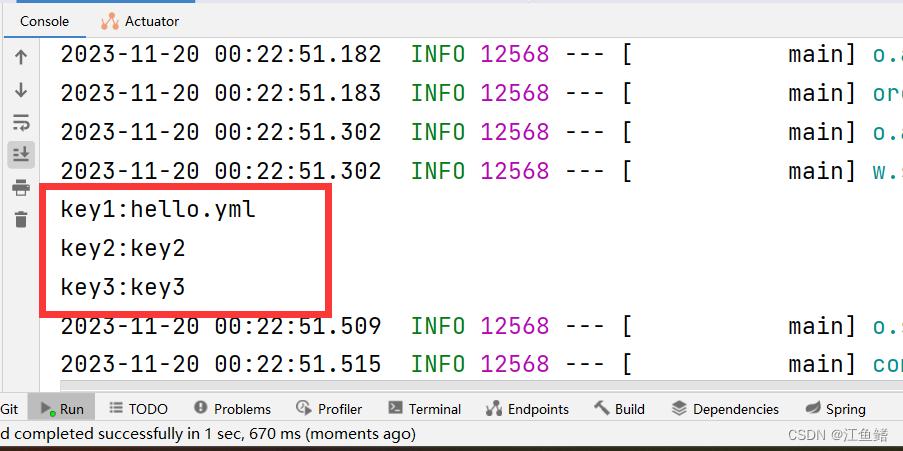
我们再看看多个数据

@PostConstruct//这是一个初始化注解,在属性注入完成之后就会执行这个方法
package com.example.ioc.controller;

import org.springframework.beans.factory.annotation.Value;
import org.springframework.web.bind.annotation.RequestMapping;
import org.springframework.web.bind.annotation.RestController;

import javax.annotation.PostConstruct;

@RestController
public class YmlController
{
    @Value("${demo.key1}")
    public String key1;

    @Value("${demo.key2}")
    public String key2;

    @Value("${demo.key3}")
    public String key3;


    @RequestMapping ("/readYml")
    public String readYml(){
        return key1;
    }

    @PostConstruct//这是一个初始化注解,在属性注入完成之后就会执行这个方法
    public void init(){
        System.out.println("key1:"+key1);
        System.out.println("key2:"+key2);
        System.out.println("key3:"+key3);
    }
}
我们再看看单双引号的区别

双引号里面的 \n 是换行
单引号会对特殊字符进行转义,因为\n 本身表示的意思是换行,但是使用单引号的时候,内容变成了 \n 而不是换行,所以认为是转义
yml 该如何配置对象?
配置文件为

再创建一个student类
package com.example.ioc;

import lombok.Data;
import org.springframework.boot.context.properties.ConfigurationProperties;
import org.springframework.stereotype.Component;

@Component
@ConfigurationProperties(prefix = "student")
@Data
public class Student {
    private Integer id;
    private String name;
    private Integer age;
}
然后就能运行了
package com.example.ioc.controller;
import com.example.ioc.Student;
import org.springframework.beans.factory.annotation.Autowired;
import org.springframework.beans.factory.annotation.Value;
import org.springframework.web.bind.annotation.RequestMapping;
import org.springframework.web.bind.annotation.RestController;
import javax.annotation.PostConstruct;
@RestController
public class YmlController
{
@Autowired
public Student student;
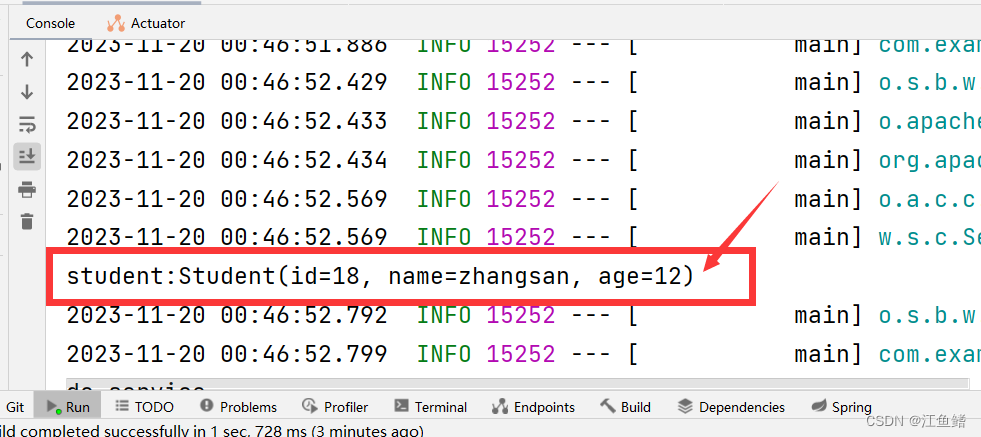
@PostConstruct//这是一个初始化注解,在属性注入完成之后就会执行这个方法
public void init(){
System.out.println("student:"+student);
}
}
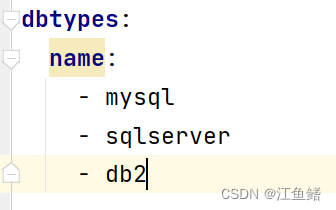
yml 如何配置集合呢?
package com.example.ioc.model;

import lombok.Data;
import org.springframework.boot.context.properties.ConfigurationProperties;
import org.springframework.stereotype.Component;

import java.util.List;

@Component
@ConfigurationProperties(prefix = "dbtypes")
@Data
public class DBTypes {
    private List<String> name;
}
package com.example.ioc.controller;

import com.example.ioc.model.DBTypes;
import com.example.ioc.model.Student;
import org.springframework.beans.factory.annotation.Autowired;
import org.springframework.beans.factory.annotation.Value;
import org.springframework.web.bind.annotation.RequestMapping;
import org.springframework.web.bind.annotation.RestController;

import javax.annotation.PostConstruct;

@RestController
public class YmlController
{
    @Autowired
    public DBTypes dbTypes;

    @PostConstruct//这是一个初始化注解,在属性注入完成之后就会执行这个方法
    public void init(){
        System.out.println("dbTypes:"+dbTypes);
    }
}
用数组去接收也是可以滴

记得要加空格哦

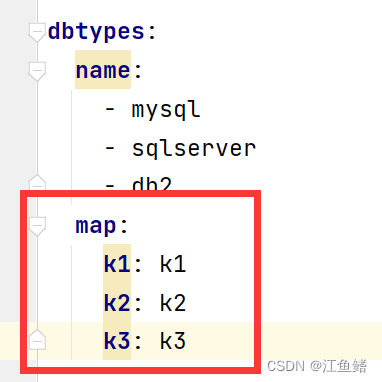
yml 也可以配置map
import lombok.Data;
import org.springframework.boot.context.properties.ConfigurationProperties;
import org.springframework.stereotype.Component;

import java.util.HashMap;
import java.util.List;

@Component
@ConfigurationProperties(prefix = "dbtypes")
@Data
public class DBTypes {
    private List<String> name;

    private HashMap<String,String> map;
}
package com.example.ioc.controller;
import com.example.ioc.model.DBTypes;
import com.example.ioc.model.Student;
import org.springframework.beans.factory.annotation.Autowired;
import org.springframework.beans.factory.annotation.Value;
import org.springframework.web.bind.annotation.RequestMapping;
import org.springframework.web.bind.annotation.RestController;
import javax.annotation.PostConstruct;
@RestController
public class YmlController
{
@Autowired
public DBTypes dbTypes;
@PostConstruct//这是一个初始化注解,在属性注入完成之后就会执行这个方法
public void init(){
System.out.println("dbTypes:"+dbTypes);
}
}
yml 的优缺点 :


 7685
7685


 被折叠的 条评论
为什么被折叠?
被折叠的 条评论
为什么被折叠?
 到【灌水乐园】发言


