


sceneform简介:
Sceneform makes it straightforward to render realistic 3D scenes in AR and non-AR apps, without having to learn OpenGL. It includes: A high-level scene graph API(包括动画、人脸检测等等)、A realistic physically based render provided by filament(渲染器)、导入3d文件的插件(好像用不了)。总体来说,sceneform就是让arcore的使用变的简单。
放置一个模型:
配置文件的修改,依赖的添加等,这里略过。首先创建布局文件:
<fragment android:name="com.google.ar.sceneform.ux.ArFragment"
android:id="@+id/ux_fragment"
android:layout_width="match_parent"
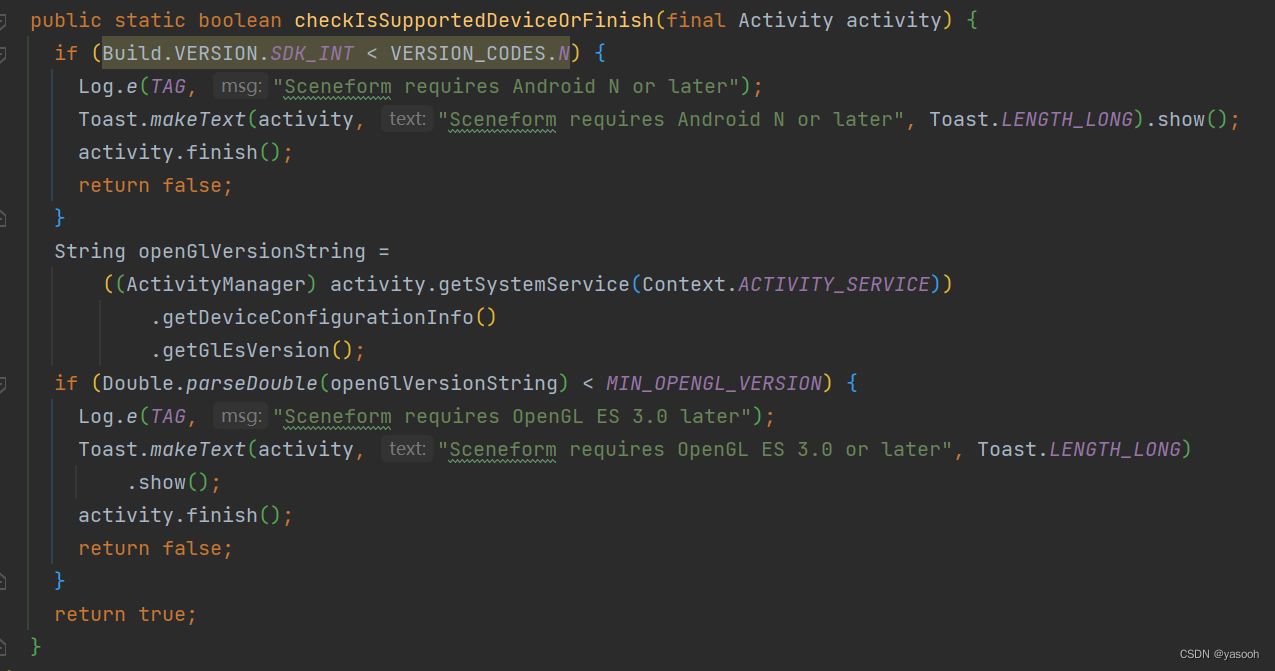
android:layout_height="match_parent" />这里用到了sceneform的ArFragment,它会自动创建并管理一个ARCoreSession(可用getArSceneView()获取)、ArSceneView(可用getSession()获取),当然这发生在在检查设备是否支持ARCore并且获取了相机权限之后。 检查代码:
下一步Create renderables,Renderable( is a 3D model that can be placed anywhere in the scene and consists of Meshes, Materials and Textures.)可以理解为,将你的3d文件代入到代码中。举个例子,假如要把本地的3d文件添加到相机的预览画面中,首先在(module级)build.gradle文件中引入:
apply plugin: 'com.google.ar.sceneform.plugin'

sceneform.asset('sampledata/models/andy.obj', // 'Source Asset Path' specified during import.
                'default',                    // 'Material Path' specified during import.
                'sampledata/models/andy.sfa', // '.sfa Output Path' specified during import.
                'src/main/res/raw/andy')      // '.sfb Output Path' specified during import.
然后在代码中就可以创建:
private ModelRenderable andyRenderable;
@Override
protected void onCreate(Bundle savedInstanceState) {
…
ModelRenderable.builder()
.setSource(this, R.raw.andy)
.build()
.thenAccept(renderable -> andyRenderable = renderable)
.exceptionally(
throwable -> {
Log.e(TAG, "Unable to load Renderable.", throwable);
return null;
});
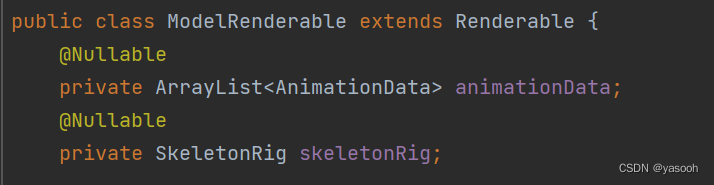
}这里的ModelRenderable继承自Renderable,扩展了动画相关的属性,如果你的模型没有动画,可以直接用Renderable,
下一步就要创建Scene,可以理解为,Scene挂载在ArSceneView上,而Scene像是一个树状的数据结构,可以有很多个Node,Node则是包含了所有Sceneform需要的信息(位置、方向、模型等),下面的代码展示的是创建一个AnchorNode(相当与根节点)并将它挂在ArSceneView上,最后设置它的Renderable为官方示例中的andy模型,这里的Node可以有多个孩子,但是只有一个父亲。这样运行后,待检测处plane后点击可以将andy模型放置在平面上。
 arFragment.setOnTapArPlaneListener(
        (HitResult hitResult, Plane plane, MotionEvent motionEvent) -> {
          if (andyRenderable == null) {
            return;
          }

          // Create the Anchor.
          Anchor anchor = hitResult.createAnchor();
          AnchorNode anchorNode = new AnchorNode(anchor);
          anchorNode.setParent(arFragment.getArSceneView().getScene());

          // Create the node andy and add it to the anchor.
          Node andy=new Node();
          andy.setParent(anchorNode);
          andy.setRenderable(andyRenderable);

        });
移动一个模型
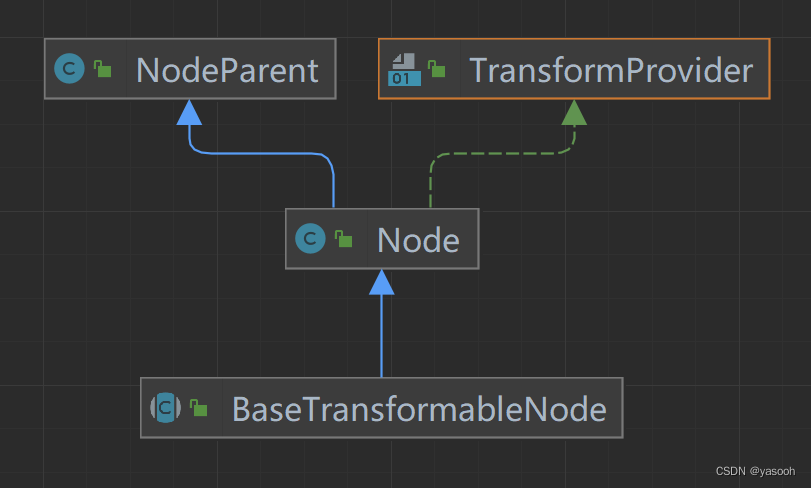
上面的代码运行结果它是不可以移动、缩放、旋转模型的,如果要达到上述的效果,需要研究下TransformableNode,经下图可发现,它继承BaseTransformableNode,继承关系如下下图:
![]()
NodeParent类如下图所示:可以根据方法名大致理解其意义:至于接口TransfromProvider规定了一个方法名,getWorldModelMatrix()应该是要获取模型的位置数据
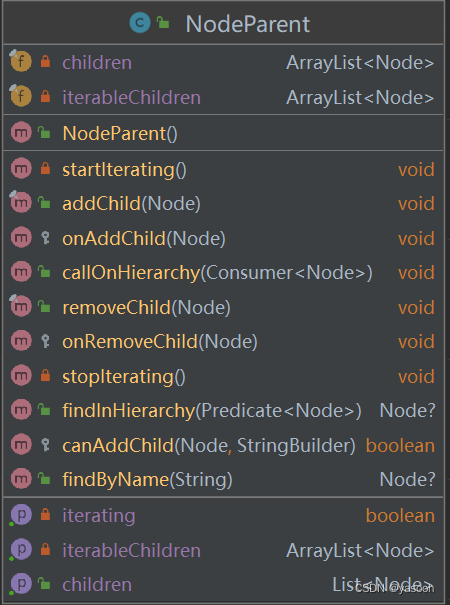
Node类主要是实现了getWorldModelMatrix(),主要是规定节点的位置、方向、和模型等信息,重要的是添加了点击、触碰等方法:

BaseTransformavleNode添加了TransformationSystem和BaseTransformationController,看一下TransformationSystem,就可以理解它干了什么,可以看到添加了一系列的监听事件,而对于
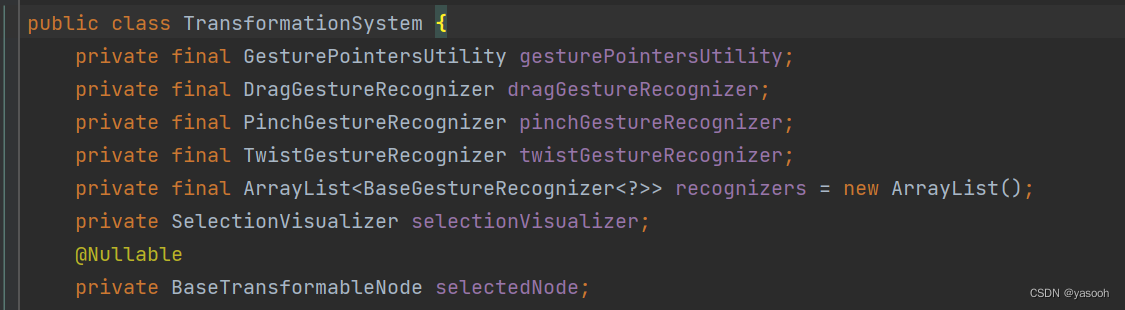
BaseTransformationController,可以看到它是对手势操作的控制器:

最终到了TransformableNode,可以看到定义了移动、缩放、旋转三个控制器,分别追一下源码可以看到,也是继承自 BaseTransformationController<DragGesture>,到这里不在介绍具体的原理,有兴趣的可以自己去追源码。
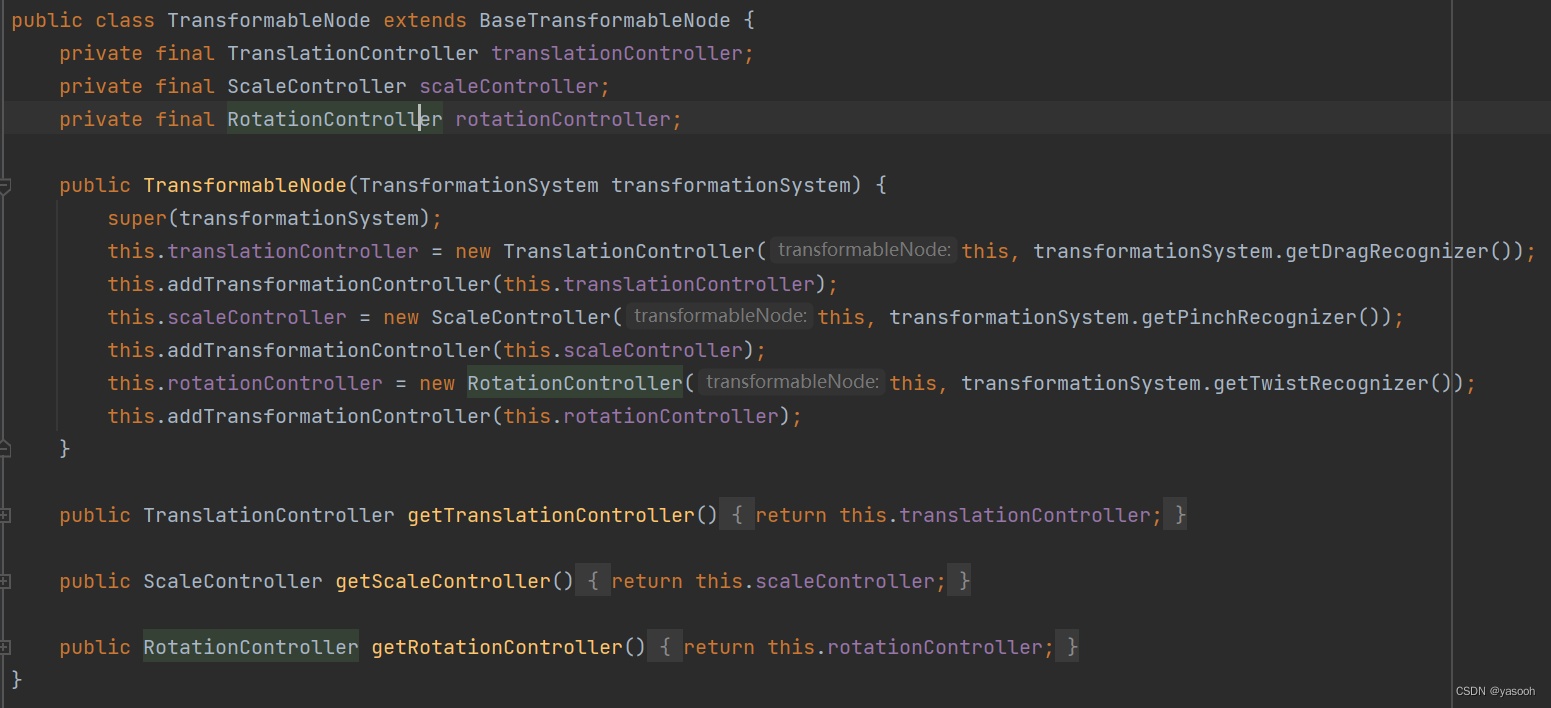
前人栽树,后人乘凉。了解了原理后,就可以直接用了,将上一部分的代码改一下,然后重新运行一下,就会实现移动、缩放、旋转模型的效果。

动画相关:
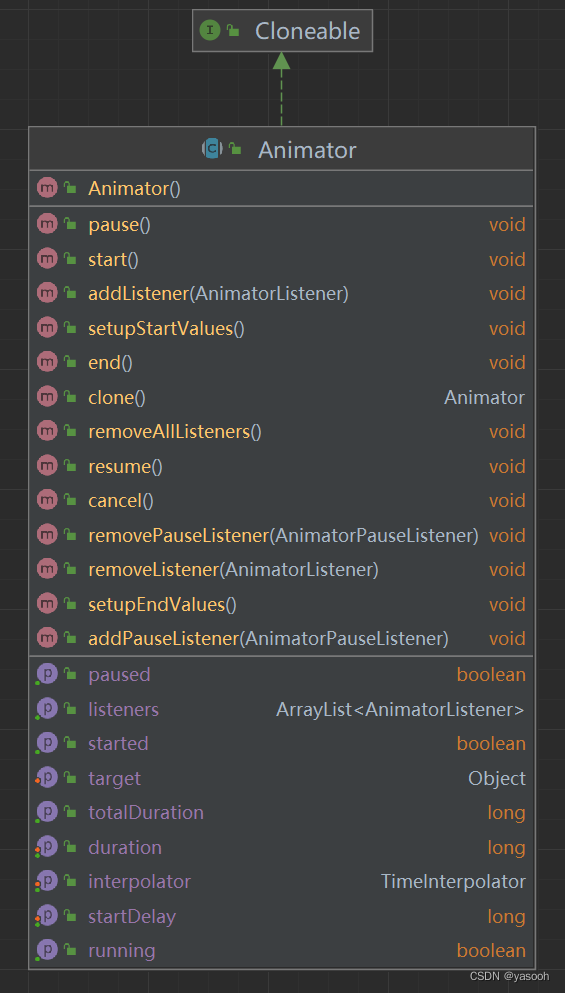
如果你的模型带有动画,该如何控制动画呢。先来了解ModelAnimator,继承自Animator,很多方法名都是顾名思义。
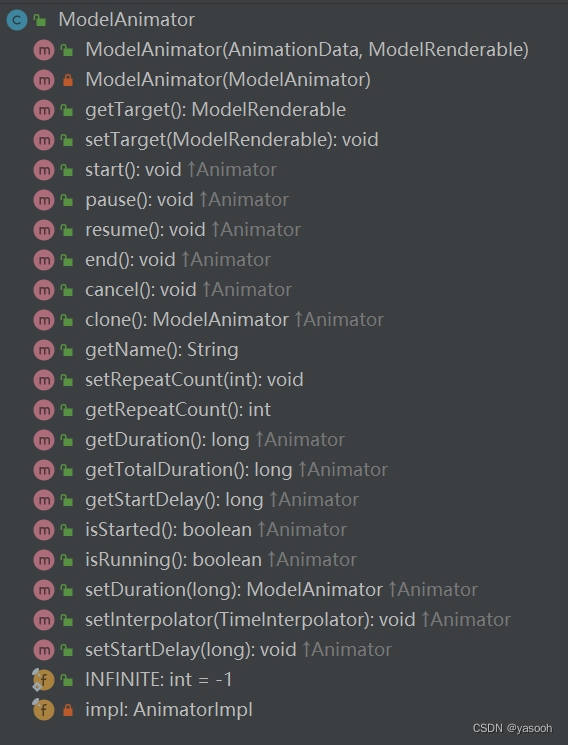
添加一个按钮,点击后播放动画,ModelAnimator有一个构造方法,只需传入ModelRenderable就可指明播放的是哪一个模型的动画。
 ...
 private ModelAnimator animator;
 ...
 private FloatingActionButton animationButton;
 ...

 protected void onCreate(Bundle savedInstanceState) {
    ...

    animationButton = findViewById(R.id.animate);
    animationButton.setEnabled(false);
    animationButton.setOnClickListener(this::onPlayAnimation);
 }

 private void onPlayAnimation(View unusedView) {
    if (animator == null || !animator.isRunning()) {
      AnimationData data = modelRenderable.getAnimationData(nextAnimation);

      //创建动画(将动画绑定到ModelRenderable上)
      animator = new ModelAnimator(data, modelRenderable);
      animator.start();
    }
  }
暂停,继续播放动画也是类似:
private void onStopAnimation(View view) {
    if(animator!=null&&!animator.isPaused()){
      stopButton.setImageResource(R.drawable.stop_animation);
      animator.pause();
    }else if (animator!=null&&animator.isPaused()){
      stopButton.setImageResource(R.drawable.active_animation);
      animator.resume();
    }
  }
有一个方法,在每一帧都会被执行,在这里可以控制一些按钮的可用性或样式等:
private void onFrameUpdate(FrameTime unusedframeTime) {

    if (anchorNode == null) {
      if (animationButton.isEnabled()) {
        animationButton.setBackgroundTintList(ColorStateList.valueOf(android.graphics.Color.GRAY));
        animationButton.setEnabled(false);

      stopButton.setBackgroundTintList(ColorStateList.valueOf(android.graphics.Color.GRAY));
        stopButton.setEnabled(false);
      }
    } else {
      if (!animationButton.isEnabled()) {
        animationButton.setBackgroundTintList(
            ColorStateList.valueOf(ContextCompat.getColor(this, R.color.colorPrimary)));
        animationButton.setEnabled(true);

       stopButton.setBackgroundTintList(ColorStateList.valueOf(ContextCompat.getColor(this, R.color.colorPrimary)));
        stopButton.setEnabled(true);
      }
    }
  }
从自己的服务器加载模型:
这部分是花时间最久的,但是最终的解决方法却还是用官方提供的方法,在创建Modelrenderable时,将自己服务器的下载地址填进就ok,文件类型(glb、gltf、sfb)都可以
ModelRenderable.builder().setSource(
            this,
            Uri.parse("自己的下载地址"))
            .build()
            .thenAccept(
                    modelRenderable -> {
                      MainActivity activity = owner.get();
                      if (activity != null) {
                        activity.modelRenderable = modelRenderable;
                      }
                    })
            .exceptionally(
                    throwable -> {
                      Toast toast =
                              Toast.makeText(this, "Unable to load Tiger renderable", Toast.LENGTH_LONG);
                      toast.setGravity(Gravity.CENTER, 0, 0);
                      toast.show();
                      return null;
                    });
视频录制:
这部分不多介绍,花了一天的时间自己写了代码,却发现官方示例中的代码写的太好了,还是用了人家的,官方封装了视频录制功能,关键在于Set up Surface for the MediaRecorder。
public class VideoRecorder {
  private static final String TAG = "VideoRecorder";
  private static final int DEFAULT_BITRATE = 10000000;
  private static final int DEFAULT_FRAMERATE = 30;

  // recordingVideoFlag is true when the media recorder is capturing video.
  private boolean recordingVideoFlag;

  private MediaRecorder mediaRecorder;

  private Size videoSize;

  private SceneView sceneView;
  private int videoCodec;
  private File videoDirectory;
  private String videoBaseName;
  private File videoPath;
  private int bitRate = DEFAULT_BITRATE;
  private int frameRate = DEFAULT_FRAMERATE;
  private Surface encoderSurface;

  public VideoRecorder() {
    recordingVideoFlag = false;
  }

  public File getVideoPath() {
    return videoPath;
  }

  public void setBitRate(int bitRate) {
    this.bitRate = bitRate;
  }

  public void setFrameRate(int frameRate) {
    this.frameRate = frameRate;
  }

  public void setSceneView(SceneView sceneView) {
    this.sceneView = sceneView;
  }

  /**
   * Toggles the state of video recording.
   *
   * @return true if recording is now active.
   */
  public boolean onToggleRecord() {
    if (recordingVideoFlag) {
      stopRecordingVideo();
    } else {
      startRecordingVideo();
    }
    return recordingVideoFlag;
  }

  private void startRecordingVideo() {
    if (mediaRecorder == null) {
      mediaRecorder = new MediaRecorder();
    }

    try {
      buildFilename();
      setUpMediaRecorder();
    } catch (IOException e) {
      Log.e(TAG, "Exception setting up recorder", e);
      return;
    }

    // Set up Surface for the MediaRecorder
    encoderSurface = mediaRecorder.getSurface();

    sceneView.startMirroringToSurface(
        encoderSurface, 0, 0, videoSize.getWidth(), videoSize.getHeight());

    recordingVideoFlag = true;
  }

  private void buildFilename() {
    if (videoDirectory == null) {
      videoDirectory =
          new File(
              Environment.getExternalStoragePublicDirectory(Environment.DIRECTORY_PICTURES)
                  + "/Sceneform");
    }
    if (videoBaseName == null || videoBaseName.isEmpty()) {
      videoBaseName = "Sample";
    }
    videoPath =
        new File(
            videoDirectory, videoBaseName + Long.toHexString(System.currentTimeMillis()) + ".mp4");
    File dir = videoPath.getParentFile();
    if (!dir.exists()) {
      dir.mkdirs();
    }
  }

  private void stopRecordingVideo() {
    // UI
    recordingVideoFlag = false;

    if (encoderSurface != null) {
      sceneView.stopMirroringToSurface(encoderSurface);
      encoderSurface = null;
    }
    // Stop recording
    mediaRecorder.stop();
    mediaRecorder.reset();
  }

  private void setUpMediaRecorder() throws IOException {

    mediaRecorder.setVideoSource(MediaRecorder.VideoSource.SURFACE);
    mediaRecorder.setOutputFormat(MediaRecorder.OutputFormat.MPEG_4);

    mediaRecorder.setOutputFile(videoPath.getAbsolutePath());
    mediaRecorder.setVideoEncodingBitRate(bitRate);
    mediaRecorder.setVideoFrameRate(frameRate);
    mediaRecorder.setVideoSize(videoSize.getWidth(), videoSize.getHeight());
    mediaRecorder.setVideoEncoder(videoCodec);

    mediaRecorder.prepare();

    try {
      mediaRecorder.start();
    } catch (IllegalStateException e) {
      Log.e(TAG, "Exception starting capture: " + e.getMessage(), e);
    }
  }

  public void setVideoSize(int width, int height) {
    videoSize = new Size(width, height);
  }

  public void setVideoQuality(int quality, int orientation) {
    CamcorderProfile profile = CamcorderProfile.get(quality);
    if (profile == null) {
      profile = CamcorderProfile.get(CamcorderProfile.QUALITY_HIGH);
    }
    if (orientation == Configuration.ORIENTATION_LANDSCAPE) {
      setVideoSize(profile.videoFrameWidth, profile.videoFrameHeight);
    } else {
      setVideoSize(profile.videoFrameHeight, profile.videoFrameWidth);
    }
    setVideoCodec(profile.videoCodec);
    setBitRate(profile.videoBitRate);
    setFrameRate(profile.videoFrameRate);
  }

  public void setVideoCodec(int videoCodec) {
    this.videoCodec = videoCodec;
  }
}


 2389
2389


 被折叠的 条评论
为什么被折叠?
被折叠的 条评论
为什么被折叠?
 到【灌水乐园】发言


