


最近要实现RGB相关cuda算子的功能,最终通过自己手写核函数实现。这里记录一下对cv-cuda的调研和使用,因为项目要求gcc-5,而cv-cuda要求gcc11而放弃使用,但是相关的记录,以及使用方法都要记录下来,以便下次项目一旦更新gcc(笑)时再次使用cv-cuda
https://cvcuda.github.io/ 官网连接
https://cvcuda.github.io/installation.html 安装指南
安装相关
在官网下载对应cuda版本的nvcv包
nvcv-dev-0.4.0_beta-cuda12-x86_64-linux.tar.xz 对应 lib doc include
cvcuda-tests-0.4.0_beta-cuda12-x86_64-linux.tar.xz 对应 lib
nvcv-lib-0.4.0_beta-cuda12-x86_64-linux.tar.xz 对应bin share
统一放入/home/softwares/cvcuda_test路径下,tar -xvf 解压后
zyx@host:/home/softwares/cvcuda_test/opt/nvidia/cvcuda0$ ls
bin  doc  etc  include  lib  share
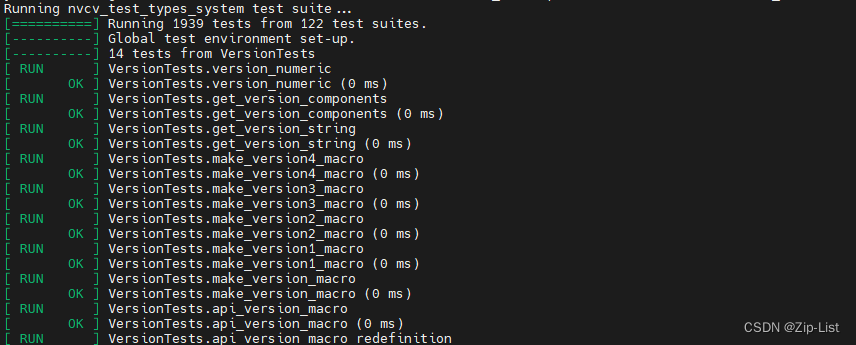
执行对应的测试脚本,检验cvcuda安装是否正确
export LD_LIBRARY_PATH=/home/softwares/cvcuda_test/opt/nvidia/cvcuda0/lib/x86_64-linux-gnu/:$LD_LIBRARY_PATH
zyx@host:/home/softwares/cvcuda_test/opt/nvidia/cvcuda0/bin$ ./run_tests.sh
输出如下,正确
编译相关
1 这里要对项目的conanfile做改动,提升gcc的版本

2 库文件和头文件的路径要设定好
if (${TARGET_ARCH} STREQUAL "x86_64")
find_package(ffmpeg-with-qsv-cuda)
if (ffmpeg-with-qsv-cuda_FOUND)
  include_directories(SYSTEM ${ffmpeg-with-qsv-cuda_INCLUDE_DIRS})
  list(APPEND LINK_SEARCH_PATH ${ffmpeg-with-qsv-cuda_LIB_DIRS})
  link_directories(${ffmpeg-with-qsv-cuda_LIB_DIRS})
  message("ffmpeg-with-qsv-cuda_LIB provided")
endif()

find_package(CUDA REQUIRED)
if (CUDA_FOUND)
  include_directories(SYSTEM ${CUDA_INCLUDE_DIRS})
endif()


# list(APPEND CMAKE_PREFIX_PATH "/home/softwares/cvcuda_test/opt/nvidia/cvcuda0/lib/x86_64-linux-gnu/cmake")

# find_package(nvcv_types REQUIRED)
# if (nvcv_types_FOUND)
#   include_directories(SYSTEM ${CUDA_INCLUDE_DIRS})
# endif()

# find_package(cvcuda REQUIRED)
# if (cvcuda_FOUND)
#   include_directories(SYSTEM ${CUDA_INCLUDE_DIRS})
# endif()

set(CVCUDA_LIBRARY_PATH "/home/softwares/cvcuda_test/opt/nvidia/cvcuda0")
include_directories(${CVCUDA_LIBRARY_PATH}/include)
link_directories(${CVCUDA_LIBRARY_PATH}/lib/x86_64-linux-gnu)
# message(STATUS "######################--------------------------#################################")

endif()


if (${TARGET_ARCH} STREQUAL "x86_64")
  set(TARGET_ARCH_LIBRARIES
  avutil
  avcodec
  datatools
  nvcv_types cvcuda
  ${TensorRT_LIBRARIES}
  ${CUDA_LIBRARIES})
endif()
编译过程中的一些错误:
报错 /home/softwares/cvcuda_test/opt/nvidia/cvcuda0/include/nvcv/detail/ImageBatchImpl.hpp:115:65: error: no matching function for call to ‘nvcv::ImageBatch::ImageBatch()’inline ImageBatchVarShape::ImageBatchVarShape(ImageBatch &&batch)
因为cvcuda是gcc-11的要求,而项目原来的编译器是gcc-5的,所以报这个错误,用gcc-11的编译器后报错解决。但是会报如下的错误,因为gcc太高cuda里的有些东西会有问题
报错 /usr/include/c++/11/bits/std_function.h:435:145: note:`_ArgTypes’
/usr/include/c++/11/bits/std_function.h:435:145: error: parameter packs not expanded with ‘...’:
  435 |         function(_Functor&& __f)
      |                                                                                                                                                 ^
/usr/include/c++/11/bits/std_function.h:435:145: note:         ‘_ArgTypes’
/usr/include/c++/11/bits/std_function.h:530:146: error: parameter packs not expanded with ‘...’:
  530 |         operator=(_Functor&& __f)
      |                                                                                                                                                  ^
/usr/include/c++/11/bits/std_function.h:530:146: note:         ‘_ArgTypes’
https://github.com/NVlabs/instant-ngp/issues/119
原因是cv-cuda和cuda两个库对gcc11的适配不是很好,这里的解决办法是用gcc-10(更低版本的gcc)放入/usr/local/cuda/bin 即cuda就默认使用gcc-10的编译器
sudo apt install gcc-10 g++-10
export CC=/usr/bin/gcc-10
export CXX=/usr/bin/g++-10
export CUDA_ROOT=/usr/local/cuda
ln -s /usr/bin/gcc-10 $CUDA_ROOT/bin/gcc
ln -s /usr/bin/g++-10 $CUDA_ROOT/bin/g++
(Build Instant-NGP as described)
仍然运行报错,因为一些中间件communication的基础库都是 gcc-5开发的,对于11,会有问题。
使用相关
cv-cuda的开发文档不是很全,这里参照源码中的example学习使用
其对数据结构进行了部分封装。但万变不离其宗,和自己实现的算子流程是很一致的。
1 分配内存
这里分配内存时用了 TensorDataStridedCuda::Buffer 这个数据结构,实际是指定NCHW每一层的size,同样的调用cudaMalloc分配内存
2 内存的属性
拿到分配的一块内存后,如何解析这块内存,使用了 Tensor::Requirements这个结构记录内存的属性,同时传入TensorDataStridedCuda这个数据结构中,该结构最终用于生成我们的Tensor继续后续的算子操作
3 算子操作
老一套的crop,resize CustomCrop,Resize,已经为我们实现好了对应算子操作的类,需要做的就是,指定好传入和传处的tensor的shape,非常的面向过程,和自己实现算子的过程完全一致。拿到处理好的tensor,再怎么操作就和cv-cuda无关了,cv-cuda更多解决的是需要手写算子相关的东西。
int main(int argc, char *argv[])
{
    // Default parameters
    std::string imagePath = "./samples/assets/tabby_tiger_cat.jpg";
    uint32_t    batchSize = 1;

    // Parse the command line paramaters to override the default parameters
    int retval = ParseArgs(argc, argv, imagePath, batchSize);
    if (retval != 0)
    {
        return retval;
    }

    // NvJpeg is used to decode the images to the color format required.
    // Since we need a contiguous buffer for batched input, a buffer is
    // preallocated based on the  maximum image dimensions and  batch size
    // for NvJpeg to write into.

    // Note : The maximum input image dimensions needs to be updated in case
    // of testing with different test images

    int maxImageWidth  = 720;
    int maxImageHeight = 720;
    int maxChannels    = 3;

    // tag: Create the cuda stream
    cudaStream_t stream;
    CHECK_CUDA_ERROR(cudaStreamCreate(&stream));

    // tag: Allocate input tensor
    // Allocating memory for RGBI input image batch of uint8_t data type
    // without padding since NvDecode utility currently doesnt support
    // Padded buffers.

    nvcv::TensorDataStridedCuda::Buffer inBuf;
    inBuf.strides[3] = sizeof(uint8_t);
    inBuf.strides[2] = maxChannels * inBuf.strides[3];
    inBuf.strides[1] = maxImageWidth * inBuf.strides[2];
    inBuf.strides[0] = maxImageHeight * inBuf.strides[1];
    CHECK_CUDA_ERROR(cudaMallocAsync(&inBuf.basePtr, batchSize * inBuf.strides[0], stream));

    // tag: Tensor Requirements
    // Calculate the requirements for the RGBI uint8_t Tensor which include
    // pitch bytes, alignment, shape  and tensor layout
    nvcv::Tensor::Requirements inReqs
        = nvcv::Tensor::CalcRequirements(batchSize, {maxImageWidth, maxImageHeight}, nvcv::FMT_RGB8);

    // Create a tensor buffer to store the data pointer and pitch bytes for each plane
    nvcv::TensorDataStridedCuda inData(nvcv::TensorShape{inReqs.shape, inReqs.rank, inReqs.layout},
                                       nvcv::DataType{inReqs.dtype}, inBuf);

    // TensorWrapData allows for interoperation of external tensor representations with CVCUDA Tensor.
    nvcv::Tensor inTensor = nvcv::TensorWrapData(inData);

    // tag: Image Loading
    // NvJpeg is used to load the images to create a batched input device buffer.
    uint8_t             *gpuInput = reinterpret_cast<uint8_t *>(inBuf.basePtr);
    // The total images is set to the same value as batch size for testing
    uint32_t             totalImages = batchSize;
    // Format in which the decoded output will be saved
    nvjpegOutputFormat_t outputFormat = NVJPEG_OUTPUT_RGBI;

    NvDecode(imagePath, batchSize, totalImages, outputFormat, gpuInput);

    // tag: The input buffer is now ready to be used by the operators

    // Set parameters for Crop and Resize
    // ROI dimensions to crop in the input image
    int cropX      = 150;
    int cropY      = 50;
    int cropWidth  = 400;
    int cropHeight = 300;

    // Set the resize dimensions
    int resizeWidth  = 320;
    int resizeHeight = 240;

    //  Initialize the CVCUDA ROI struct
    NVCVRectI crpRect = {cropX, cropY, cropWidth, cropHeight};

    // tag: Allocate Tensors for Crop and Resize
    // Create a CVCUDA Tensor based on the crop window size.
    nvcv::Tensor cropTensor(batchSize, {cropWidth, cropHeight}, nvcv::FMT_RGB8);
    // Create a CVCUDA Tensor based on resize dimensions
    nvcv::Tensor resizedTensor(batchSize, {resizeWidth, resizeHeight}, nvcv::FMT_RGB8);

#ifdef PROFILE_SAMPLE
    cudaEvent_t start, stop;
    cudaEventCreate(&start);
    cudaEventCreate(&stop);
    cudaEventRecord(start);
#endif
    // tag: Initialize operators for Crop and Resize
    cvcuda::CustomCrop cropOp;
    cvcuda::Resize     resizeOp;

    // tag: Executes the CustomCrop operation on the given cuda stream
    cropOp(stream, inTensor, cropTensor, crpRect);

    // Resize operator can now be enqueued into the same stream
    resizeOp(stream, cropTensor, resizedTensor, NVCV_INTERP_LINEAR);

    // tag: Profile section
#ifdef PROFILE_SAMPLE
    cudaEventRecord(stop);
    cudaEventSynchronize(stop);
    float operatorms = 0;
    cudaEventElapsedTime(&operatorms, start, stop);
    std::cout << "Time for Crop and Resize : " << operatorms << " ms" << std::endl;
#endif

    // tag: Copy the buffer to CPU and write resized image into .bmp file
    WriteRGBITensor(resizedTensor, stream);

    // tag: Clean up
    CHECK_CUDA_ERROR(cudaStreamDestroy(stream));

    // tag: End of Sample
}


 1488
1488


 被折叠的 条评论
为什么被折叠?
被折叠的 条评论
为什么被折叠?
 到【灌水乐园】发言


