


vcpkg remove --outdated (卸载所有过期包)
vcpkg integrate project 集成到vs2022中
vcpkg integrate install  (安装)
vcpkg remove boost:x64-windows --recurse (卸载包)
vcpkg integrate remove   (移除)
vcpkg search [pat] 搜索可用于生成的包
vcpkg install … 安装软件包
vcpkg remove … 卸载软件包
vcpkg remove --outdated 卸载所有过期的软件包
vcpkg list 列出已安装的软件包
vcpkg update 显示要更新的包列表
vcpkg upgrade 重建所有过时的软件包
vcpkg x-history (实验)显示了包的控制版本的历史记录
1.vcpkg学习使用
Step1:安装git
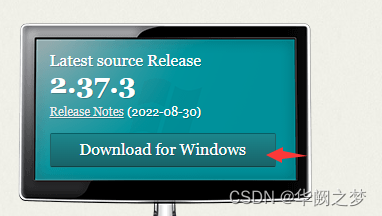
下载地址
Step2:下载安装vcpkg
等待一段直到下载完成。
git clone https://github.com/microsoft/vcpkg
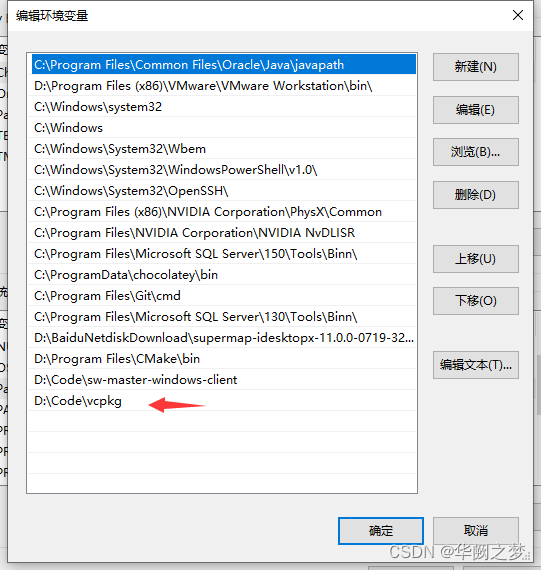
配置环境变量
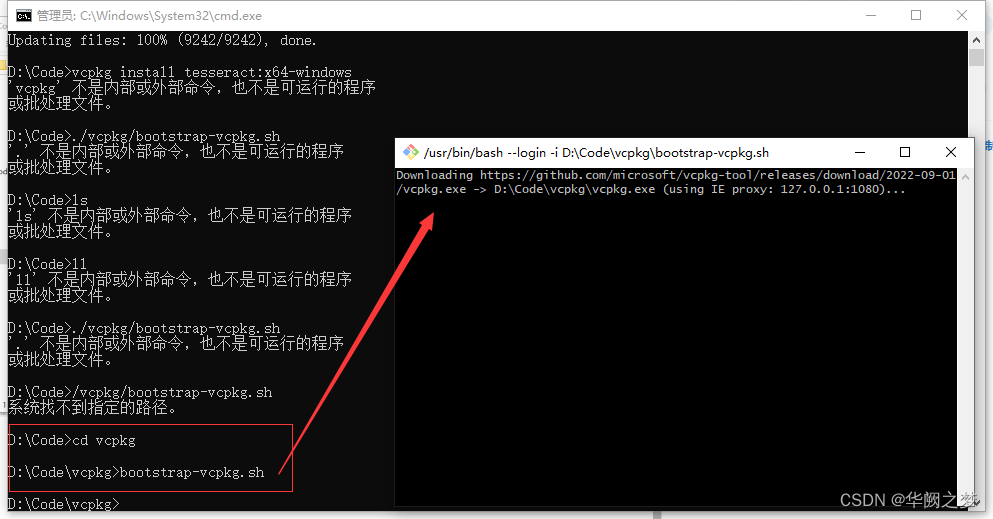
Step3:编译项目。即:下图右侧的黑框消失
bootstrap-vcpkg.sh
step4:集成到系统环境
vcpkg integrate project

//导航相关模块
vcpkg install recast
vcpkg install sdl2
2.基于vcpkg调用Tesseract第三方库
step1:下载第三方库
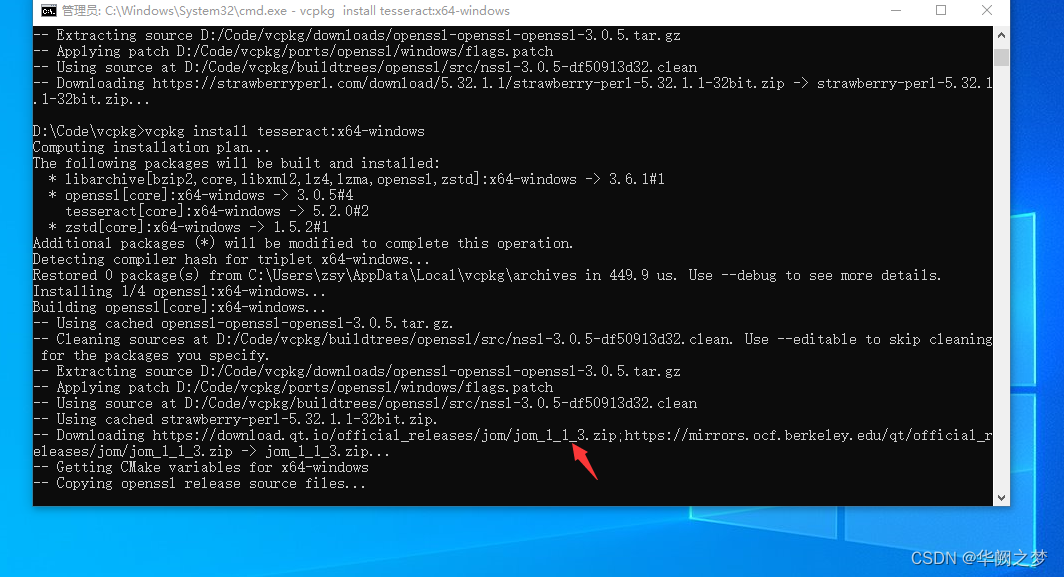
注:遇到下载半天的可以自己用迅雷去下载或者科学上网或者多多try again,在放到相应的文件夹如:D:\Code\vcpkg\downloads
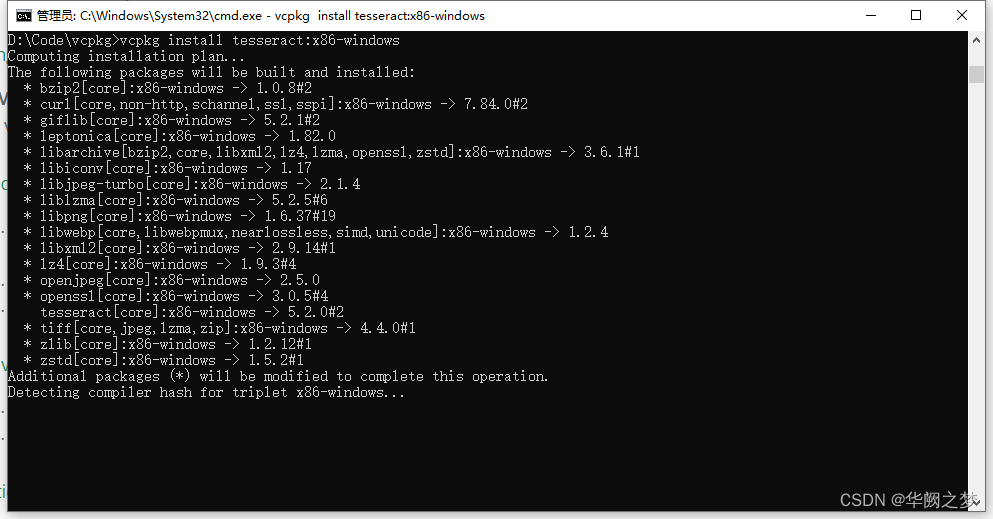
 vcpkg install tesseract:x64-windows
vcpkg install tesseract:x86-windows
API官网案例演示
step2:安装opencv
vcpkg install opencv:x86-windows
vcpkg install opencv:x64-windows
官网API学习手册
step3:配置Tesseract中文训练字符
下载地址

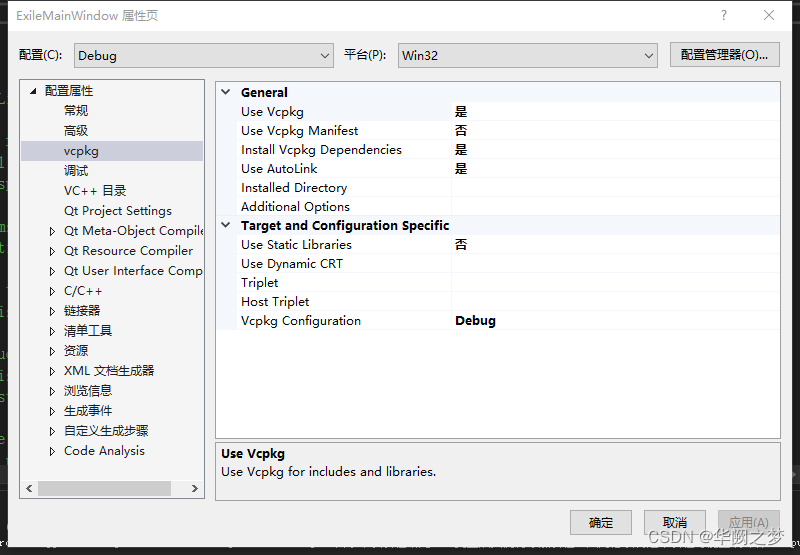
注意项目配置应该设置为如下
文件下载下来并放到项目输出目录下并新建文件夹命名为tessdata即可
#include <stdio.h>
#include <iostream>
#include <opencv2/highgui/highgui_c.h>
#include<opencv2/opencv.hpp>
#include <leptonica/allheaders.h>
#include <tesseract/baseapi.h>
#include <tesseract/publictypes.h>
#include <string>
#include <fstream>
using namespace cv;
using namespace tesseract;
using namespace std;
int main()
{
string outText;
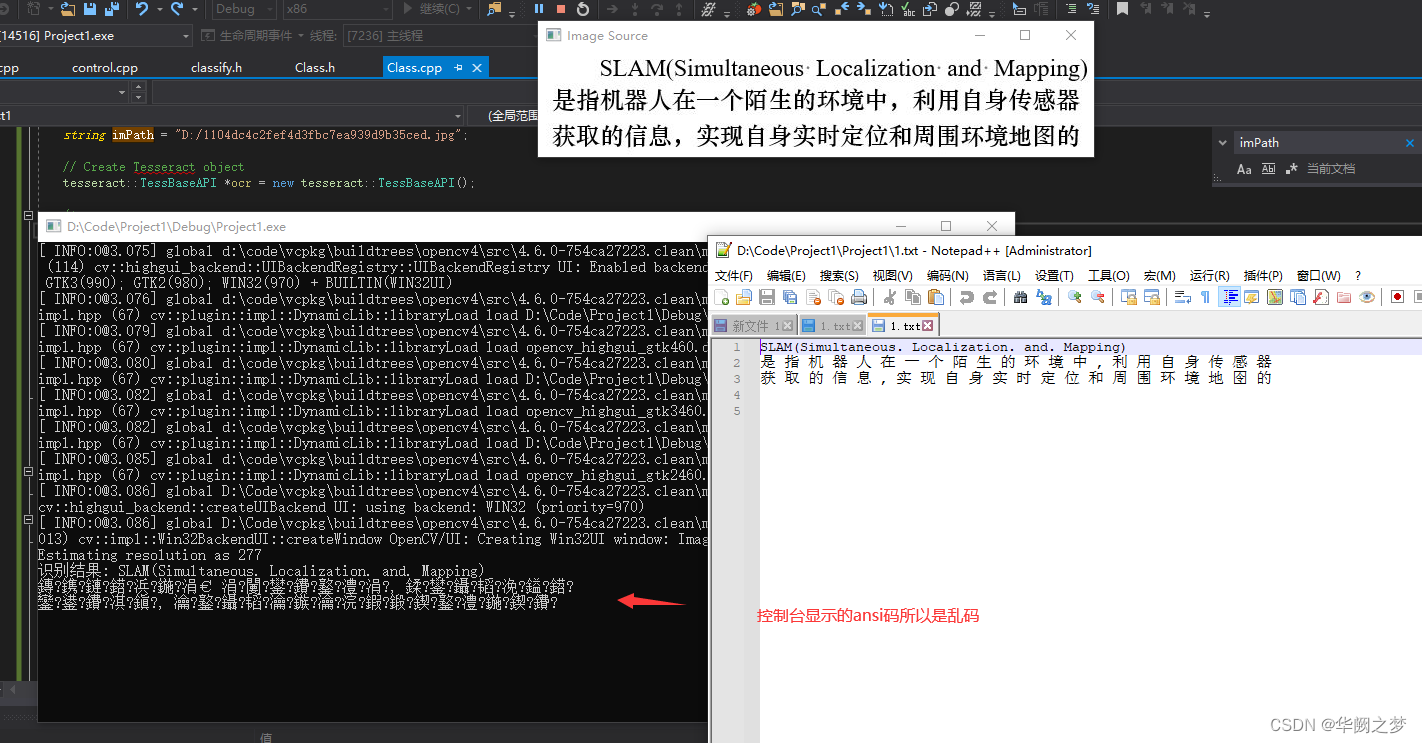
string imPath = "D:/1104dc4c2fef4d3fbc7ea939d9b35ced.jpg";
// Create Tesseract object
tesseract::TessBaseAPI *ocr = new tesseract::TessBaseAPI();
/*
Initialize OCR engine to use English (eng) and The LSTM
OCR engine.
There are four OCR Engine Mode (oem) available
OEM_TESSERACT_ONLY Legacy engine only.
OEM_LSTM_ONLY Neural nets LSTM engine only.
OEM_TESSERACT_LSTM_COMBINED Legacy + LSTM engines.
OEM_DEFAULT Default, based on what is available.
*/
//中英文识别
ocr->Init(NULL, "chi_sim", tesseract::OEM_LSTM_ONLY);
//英文识别
//ocr->Init("./tessdata", "eng", tesseract::OEM_LSTM_ONLY);
// Set Page segmentation mode to PSM_AUTO (3)
// Other important psm modes will be discussed in a future post.
ocr->SetPageSegMode(tesseract::PSM_AUTO);
// Open input image using OpenCV
Mat im = cv::imread(imPath, IMREAD_COLOR);
imshow("Image Source", im);
// Set image data
ocr->SetImage(im.data, im.cols, im.rows, 3, im.step);
// Run Tesseract OCR on image
outText = string(ocr->GetUTF8Text());
std::ofstream fout("1.txt", std::ios::out);
std::cout << "识别结果: " << string(outText) << std::endl;
fout << outText;
fout.close();
// Destroy used object and release memory
ocr->End();
waitKey(0);
}
解决方法:
方式一:网上找vs2017控制台出现中文乱码
方式二:网上找个utf-8转ansi码的代码自己转一下
方式三:解决方案,亲测可用
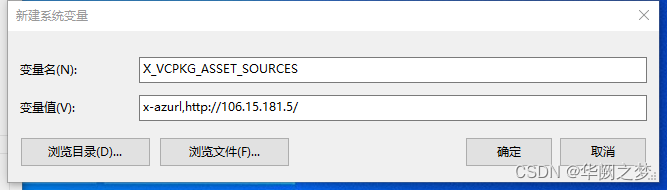
1.Vcpkg配置国内镜像方法
镜像地址: http://106.15.181.5
环境变量名:X_VCPKG_ASSET_SOURCES
环境变量值:x-azurl,http://106.15.181.5/
2.ROS环境搭建
如何将个人代码库导入到vcpkg
官网环境搭建地址
官网vcpkg配置方式
C:\Windows\System32\cmd.exe /k "D:\Program Files\Microsoft Visual Studio\2022\Professional\Common7\Tools\VsDevCmd.bat" -arch=amd64 -host_arch=amd64&& set ChocolateyInstall=c:\opt\chocolatey&& c:\opt\ros\melodic\x64\setup.bat


 562
562


 被折叠的 条评论
为什么被折叠?
被折叠的 条评论
为什么被折叠?
 到【灌水乐园】发言


