


在quill编辑器中集成秀米和135编辑器
需求
说我们的编辑器太丑了,让添加秀米或者135这种好看的编辑器,好嘛,大工程,不敢怼需求只能开干
因为我们项目里用的是quill的编辑器,秀米官网声明只支持ueditor内核的编辑器。如果项目里用的编辑器不是ueditor内核的,指定要加秀米135的功能,按照这个博主文章一路操作下来,还是很感谢期间博主的解答(该博主github仓库地址:https://github.com/font-size/quill-xiumi-135)
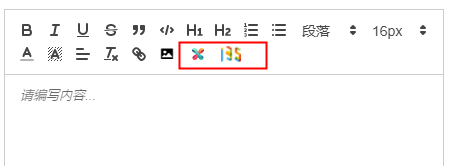
这是做好之后的样子

接下来的就是我的踩坑路程
1.在vue项目中引用quill集成秀米和135编辑器
1>: 首先自定义一个blot,自定义内容规则,通过走这个blot通道,可以保留样式。
2>修改秀米页面的代码,改成走quill的方法插入。所以在quill项目中暴露出一个能插入代码的方法,绑定到window,在秀米页面里使用这个方法,让秀米的数据通过这个方法插入到quill中。
3:使用elementui的modal弹出框,在里面用iframe加载秀米的html(注意跨域,建议放项目public目录里)
自定义的blot代码,放置于src/utils/blot.js
export default function (Quill) {
  // 引入源码中的BlockEmbed
  const BlockEmbed = Quill.import('blots/block/embed');
  // 定义新的blot类型
  class AppPanelEmbed extends BlockEmbed {
    static create(value) {
      const node = super.create(value);
      // node.setAttribute('contenteditable', 'false');
      // node.setAttribute('width', '100%');
      //   设置自定义html
      node.innerHTML = this.transformValue(value)
      // 返回firstChild,避免被包一层<div class='rich-innerHtml'></div>的无意义标签
      return node.firstChild;
    }

    static transformValue(value) {
      let handleArr = value.split('\n')
      handleArr = handleArr.map(e => e.replace(/^[\s]+/, '')
        .replace(/[\s]+$/, ''))
      return handleArr.join('')
    }

    // 返回节点自身的value值 用于撤销操作
    static value(node) {
      return node.innerHTML
    }
  }
  // blotName
  AppPanelEmbed.blotName = 'AppPanelEmbed';
  // class名将用于匹配blot名称
  AppPanelEmbed.className = 'rich-innerHtml';
  // 标签类型自定义,这玩意还必须加,去掉会报错
  AppPanelEmbed.tagName = 'div';
  Quill.register(AppPanelEmbed, true);
}
2.在使用的文件引入blot.js,在这里我是直接封装了一个quilt的组件,所以直接在这个组件里引入的

import 'quill/dist/quill.core.css';
import 'quill/dist/quill.snow.css';
import 'quill/dist/quill.bubble.css';
// 引入自定义blot
import blotSelect from '@/utils/blot'
3.通过自定义blot只完成了一步,即开辟了一个不会被quill过滤的通道,按照博主的指引可以直接去博主的仓库下载这个项目,直接将这两个html拷贝出来,也可以复制下面两段代码(这是已经修正过得代码所以是没有问题的)自己创建页面,把页面放到项目里,我是在public下新建了一个view的文件夹,直接将两个html放进去了。

135EditorDialogPage.html
<!DOCTYPE html>
<html>
<head>
  <meta http-equiv="Content-Type" content="text/html; charset=utf-8"/>
  <title>135编辑器</title>
  <style>
    html, body {
      padding: 0;
      margin: 0;
    }
    #editor135 {
      position: absolute;
      width: 100%;
      height: 100%;
      border: none;
      box-sizing: border-box;
    }
  </style>
</head>
<body>

<iframe id="editor135" src="//www.135editor.com/simple_editor.html?callback=true&appkey="></iframe>
<!-- <script type="text/javascript" src="internal.js"></script> -->
<script>
  var editor135 = document.getElementById('editor135');
  var parent = window.parent;
  window.onload = function () {
	  setTimeout(function(){
      editor135.contentWindow.postMessage(parent.getHtml(),'*');
	  }, 500);
  };
  document.addEventListener("mousewheel", function (event) {
    event.preventDefault();
    event.stopPropagation();
  });
  window.addEventListener('message', function (event) {
      if (typeof event.data !== 'string') return;
    // console.log(event.data,'我是event')
      parent.setRichText_135(event.data)
      // editor.setContent(event.data);
      // editor.fireEvent("catchRemoteImage");
      // dialog.close();
  }, false);
</script>
</body>
</html>
xiumi-ue-dialog-v5.html
<!DOCTYPE html>
<html>
<head>
    <meta http-equiv="Content-Type" content="text/html; charset=utf-8"/>
    <title>XIUMI connect</title>
    <style>
        html, body {
            padding: 0;
            margin: 0;
        }

        #xiumi {
            position: absolute;
            width: 100%;
            height: 100%;
            border: none;
            box-sizing: border-box;
        }
    </style>
</head>
<body>
<iframe id="xiumi"
        src="//xiumi.us/studio/v5#/paper">
</iframe>
<!-- <script type="text/javascript" src="internal.js"></script> -->
<script>
    var parent = window.parent;
    var xiumi = document.getElementById('xiumi');
    var xiumi_url = window.location.protocol + "//xiumi.us";
    xiumi.onload = function () {
        // console.log("postMessage");
        xiumi.contentWindow.postMessage('ready', xiumi_url);
    };
    document.addEventListener("mousewheel", function (event) {
        event.preventDefault();
        event.stopPropagation();
    });
    window.addEventListener('message', function (event) {
        if (event.origin == xiumi_url) {
            // console.log(event.origin,'event.origin')
            // console.log(xiumi_url,'xiumi_url')
            parent.setRichText_xm(event.data)
            // console.log(event.data,'event.data')
            // editor.execCommand('insertHtml', event.data);
            // dialog.close();
        }
    }, false);
</script>
</body>
</html>
注意:我们手动改,改成quiill接收,并通过我们之前自定义的blot通道插入内容即可。注意这个setRichText方法,到这里数据传输功能已经完成,现在来完善整个流程。
现在我们回到第二步quiltEditor的组件文件,自己来添加按钮控制弹窗的显示与隐藏页面,在加入弹窗模块

<!-- 秀米弹窗 -->
    <el-dialog
      :title="title"
      custom-class="xm-dialog"
      width="1200px"
      top="50px"
      :visible.sync="showXiumi"
      :close-on-click-modal="false"
      :modal-append-to-body="false"
      :append-to-body="true"
    >
    <div class="xm-header-l">
      *温馨提示:点击右侧导出插入当前模板内容
    </div>
    <div class="xm-header-r"></div>
      <iframe
        src="/view/xiumi-ue-dialog-v5.html"
        frameborder="0" width="100%"
        sandbox="allow-scripts allow-top-navigation allow-same-origin"
        :height="fullheight+'px'"
        id="xiumiIframe">
      </iframe>
    </el-dialog>
data的变量定义
showXiumi:false,// 秀米编辑器
show135:false,// 135编辑器
selection: {}, // 光标位置
下面是相关js逻辑处理代码
watch: {
    // Watch content change
    value(newVal, oldVal) {
      if (newVal) {
        this.contentValue = newVal;
      } else if (!newVal) {
        this.contentValue = '';
      }
    }
  },
created() {
    this.contentValue = this.value; //value是通过props父级传递到子级的动态数据内容
  },

  mounted() {
    this.editor = this.$refs.myTextEditor.quill; //通过ref得到quill的整个dom
    // console.log(this.value,'__________')
    // console.log(this.editor,'#########')
    // 双向绑定代码 v-model
    this.editor.on('text-change', () => {
        this.emitChange()
        this.selection = this.editor.getSelection()
      })
    // 插入内容
    this.firstSetHtml()
    // 粘贴板监听
    this.listenPaste()

    // 暴露方法绑定到window上,给public\pluging\xiumi-ue-dialog-v5.html使用
    window.setRichText_xm = this.setRichText_xm
    window.setRichText_135 = this.setRichText_135
    // 调用135页面的时候 带入数据 getHtml()
    window.getHtml = this.getHtml
    // console.log(window.getHtml,'window.getHtml')
  },
 // 秀米显示 modal
    showXiumiModel() {
      this.showXiumi = true
    },
    // 135显示 modal
    show135Model() {
      this.show135 = true
    },
    setRichText_135(e) {
      const index = this.selection?this.selection.index: 0
      // console.log('光标位置',index)
      //这个主要是用来处理在135编辑器添加导出到quill再点击135编辑器返回到quill的重复内容
      this.editor.setContents([
        { insert: '', attributes: { bold: true } },
        { insert: '\n' }
      ]);
      this.editor.insertEmbed(index ||  0, 'AppPanelEmbed', e)
      this.show135 = false
    },
    setRichText_xm(e) {
      const index = this.selection?this.selection.index: 0
      // console.log('光标位置',index)
      this.editor.insertEmbed(index ||  0, 'AppPanelEmbed', e)
      this.showXiumi = false
    },
    // 更新text-change
    emitChange() {
      // 获取到quill 根dom中的html
      let html = this.contentValue
      const quill = this.editor
      const text = this.editor.getText()
      if (html === '<p><br></p>') html = ''
      // v-model相关
      this.$emit('input', html)
      this.$emit('change', { html, text, quill })
      // 返回quill中文本长度
      // bug注意:这个方法无法计算秀米代码的中的文字长度!
      this.$emit("getConetntLength", this.editor.getLength())
    },
    // 回显内容时检查秀米代码
    firstSetHtml() {
      // value 为回显内容
      if(this.value) {
        // 判断是否有秀米和或135元素
        if(this.value.indexOf('xiumi.us') > -1 || this.value.indexOf('135editor.com') > -1 ) {
          const originNode =  new DOMParser().parseFromString(this.value,'text/html').body.childNodes
          this.nodesInQuill(originNode)
        }
      }
    },
    // 根据node类型分发处理
    nodesInQuill(originNode) {
      for(let i = originNode.length - 1; i >= 0; i --) {
        if(originNode[i].localName === 'section') {
          // 秀米类型代码,走新blot
          this.setRichText_xm(originNode[i].outerHTML, 0)
          this.setRichText_135(originNode[i].outerHTML, 0)
        } else {
          // 正常插入
          this.editor.clipboard.dangerouslyPasteHTML(0, originNode[i].outerHTML)
        }
      }
    },
    // 监听粘贴板
    listenPaste() {
        this.editor.root.addEventListener('paste', (e) => {
          const msg = (e.clipboardData || window.clipboardData).getData('text/html') // 获取粘贴板文本
          if(msg) {
            if(msg.indexOf("xiumi.us") > -1 || msg.indexOf("_135editor") > -1) {
              const value = new DOMParser().parseFromString(msg,'text/html').body.childNodes // 获取nodes
              // console.log(value)
              e.preventDefault() // 阻止复制动作
              e.stopPropagation()// 阻止冒泡
              this.nodesInQuill(value) // 根据不同标签,使用不同的插入方法
            }
          }
        })
    },
    // 获取html内容
    getHtml() {
      // console.log('富文本',this.contentValue )
      return this.contentValue
    }
到这里就结束了看效果
秀米编辑器:编辑好后点击导出便可导出到quill编辑器中,也可在quill编辑器中输入同步到秀米中


135编辑器:编辑好后点击完成编辑便可导出到quill编辑器中,也可在quill编辑器中输入同步到135中


 2239
2239


 被折叠的 条评论
为什么被折叠?
被折叠的 条评论
为什么被折叠?
 到【灌水乐园】发言


