


1.基于完全注解和基于xml配置文件的比较
下面是一个xml配置文件bean1.xml
<?xml version="1.0" encoding="UTF-8"?>
<beans xmlns="http://www.springframework.org/schema/beans"
       xmlns:xsi="http://www.w3.org/2001/XMLSchema-instance"
       xmlns:context="http://www.springframework.org/schema/context"
       xmlns:aop="http://www.springframework.org/schema/aop" xmlns:tx="http://www.springframework.org/schema/tx"
       xsi:schemaLocation="http://www.springframework.org/schema/beans http://www.springframework.org/schema/beans/spring-beans.xsd http://www.springframework.org/schema/context https://www.springframework.org/schema/context/spring-context.xsd http://www.springframework.org/schema/aop https://www.springframework.org/schema/aop/spring-aop.xsd http://www.springframework.org/schema/tx http://www.springframework.org/schema/tx/spring-tx.xsd">
    <!--开启组件扫描-->
    <context:component-scan base-package="com.limi"></context:component-scan>

    <!-- 1.在 spring 配置文件配置数据库连接池-->
    <!-- 数据库连接池 -->
    <bean id="dataSource" class="com.alibaba.druid.pool.DruidDataSource" destroy-method="close">
        <property name="url" value="jdbc:mysql://localhost:3306/db_springtest" />
        <property name="username" value="root" />
        <property name="password" value="123456" />
        <property name="driverClassName" value="com.mysql.jdbc.Driver" />
    </bean>

    <!--2.配置 JdbcTemplate 对象,注入 DataSource-->
    <!-- JdbcTemplate 对象 -->
    <bean id="jdbcTemplate" class="org.springframework.jdbc.core.JdbcTemplate">
        <!--注入 dataSource-->
        <property name="dataSource" ref="dataSource"></property>
    </bean>

    <!--3.创建事务管理器-->
    <bean id="transactionManager" class="org.springframework.jdbc.datasource.DataSourceTransactionManager">
        <!--注入数据源-->
        <property name="dataSource" ref="dataSource"></property>
    </bean>

    <!--4 配置通知-->
    <tx:advice id="txadvice">
        <!--配置事务参数-->
        <tx:attributes>
            <!--指定哪种规则的方法上面添加事务-->
            <tx:method name="change" propagation="REQUIRED"/>
        </tx:attributes>
    </tx:advice>

    <!--5 配置切入点和切面-->
    <aop:config>
        <!--配置切入点-->
        <aop:pointcut id="pc" expression="execution(* com.limi.service.AccountService.*(..))"/>
        <!--配置切面-->
        <aop:advisor advice-ref="txadvice" pointcut-ref="pc"/>
    </aop:config>

</beans>
其实xml配置文件是可以用java配置类完全代替的
这是上文xml配置文件对应的java配置类写法
配置类SpringConfig
package com.limi.config;

import com.alibaba.druid.pool.DruidDataSource;
import org.springframework.context.annotation.Bean;
import org.springframework.context.annotation.ComponentScan;
import org.springframework.context.annotation.Configuration;
import org.springframework.jdbc.core.JdbcTemplate;
import org.springframework.jdbc.datasource.DataSourceTransactionManager;
import org.springframework.transaction.annotation.EnableTransactionManagement;
import javax.sql.DataSource;


@Configuration //配置类, 代替xml配置文件
@ComponentScan(basePackages = "com.limi") //组件扫描
@EnableTransactionManagement //开启事务
public class SpringConfig {

    //创建数据库连接池
    //@Bean注解写在方法上面, 用于将方法的返回值加入到IOC容器中
    @Bean
    public DruidDataSource getDruidDataSource() {
        DruidDataSource dataSource = new DruidDataSource();
        dataSource.setDriverClassName("com.mysql.jdbc.Driver");
        dataSource.setUrl("jdbc:mysql://localhost:3306/db_springtest");
        dataSource.setUsername("root");
        dataSource.setPassword("123456");
        return dataSource;
    }
    //创建 JdbcTemplate 对象, 参数dataSource会自动从IOC容器中寻找并注入
    @Bean
    public JdbcTemplate getJdbcTemplate(DataSource dataSource) {
        //到 ioc 容器中根据类型找到 dataSource
        JdbcTemplate jdbcTemplate = new JdbcTemplate();
        //注入 dataSource
        jdbcTemplate.setDataSource(dataSource);
        return jdbcTemplate;
    }
    //创建事务管理器
    @Bean
    public DataSourceTransactionManager
    getDataSourceTransactionManager(DataSource dataSource) {
        DataSourceTransactionManager transactionManager = new DataSourceTransactionManager();
        transactionManager.setDataSource(dataSource);
        return transactionManager;
    }
}
2.项目代码

配置类SpringConfig
package com.limi.config;

import com.alibaba.druid.pool.DruidDataSource;
import org.springframework.context.annotation.Bean;
import org.springframework.context.annotation.ComponentScan;
import org.springframework.context.annotation.Configuration;
import org.springframework.jdbc.core.JdbcTemplate;
import org.springframework.jdbc.datasource.DataSourceTransactionManager;
import org.springframework.transaction.annotation.EnableTransactionManagement;
import javax.sql.DataSource;


@Configuration //配置类, 代替xml配置文件
@ComponentScan(basePackages = "com.limi") //组件扫描
@EnableTransactionManagement //开启事务
public class SpringConfig {

    //创建数据库连接池
    //@Bean注解写在方法上面, 用于将方法的返回值加入到IOC容器中
    @Bean
    public DruidDataSource getDruidDataSource() {
        DruidDataSource dataSource = new DruidDataSource();
        dataSource.setDriverClassName("com.mysql.jdbc.Driver");
        dataSource.setUrl("jdbc:mysql://localhost:3306/db_springtest");
        dataSource.setUsername("root");
        dataSource.setPassword("123456");
        return dataSource;
    }
    //创建 JdbcTemplate 对象, 参数dataSource会自动从IOC容器中寻找并注入
    @Bean
    public JdbcTemplate getJdbcTemplate(DataSource dataSource) {
        //到 ioc 容器中根据类型找到 dataSource
        JdbcTemplate jdbcTemplate = new JdbcTemplate();
        //注入 dataSource
        jdbcTemplate.setDataSource(dataSource);
        return jdbcTemplate;
    }
    //创建事务管理器
    @Bean
    public DataSourceTransactionManager
    getDataSourceTransactionManager(DataSource dataSource) {
        DataSourceTransactionManager transactionManager = new DataSourceTransactionManager();
        transactionManager.setDataSource(dataSource);
        return transactionManager;
    }

}
Account
package com.limi.entity;

public class Account {
    private Integer id;

    private String userName;

    private Double price;

    public Account(){}

    public Account(Integer id, String userName, Double price) {
        this.id = id;
        this.userName = userName;
        this.price = price;
    }

    public Integer getId() {
        return id;
    }

    public void setId(Integer id) {
        this.id = id;
    }

    public String getUserName() {
        return userName;
    }

    public void setUserName(String userName) {
        this.userName = userName;
    }

    public Double getPrice() {
        return price;
    }

    public void setPrice(Double price) {
        this.price = price;
    }
}
AccountDao
package com.limi.dao;

public interface AccountDao {

    //修改账户余额
    int updateMoneyById(Integer id, Double money);
}
AccountDaoImpl
package com.limi.dao;

import org.springframework.beans.factory.annotation.Autowired;
import org.springframework.jdbc.core.JdbcTemplate;
import org.springframework.stereotype.Repository;

@Repository
public class AccountDaoImpl implements  AccountDao{

    @Autowired
    private JdbcTemplate jdbcTemplate;

    @Override
    public int updateMoneyById(Integer id, Double money) {

        String sql;
        if(money>0)
            sql = "update t_account set money = money+? where id = ?";//加法
        else
        {
            money = -money;
            sql = "update t_account set money = money-? where id = ?";//减法
        }
        int res = jdbcTemplate.update(sql, money, id);
        return res;
    }
}
AccountService
package com.limi.service;

import com.limi.dao.AccountDao;
import org.springframework.beans.factory.annotation.Autowired;
import org.springframework.stereotype.Service;

@Transactional
@Service
public class AccountService {

    @Autowired
    private AccountDao accountDao;

    public void change(){
        //模拟1号账户给2号账户转账200
        accountDao.updateMoneyById(1, -200.00);
        //模拟出故障
        int a = 10/0;
        accountDao.updateMoneyById(2, 200.00);
    }
}
测试类MyTest
package com.limi.test;
import com.limi.config.SpringConfig;
import com.limi.dao.AccountDao;
import com.limi.service.AccountService;
import org.junit.Test;
import org.springframework.context.ApplicationContext;
import org.springframework.context.annotation.AnnotationConfigApplicationContext;
import org.springframework.context.support.ClassPathXmlApplicationContext;

public class MyTest {

    @Test
    public void test1(){
        //1.加载配置类
        ApplicationContext context = new AnnotationConfigApplicationContext(SpringConfig.class);

        //2.获取配置的对象, 参数1:bean的id值, 参数2: 类名.class
        AccountService accountService = context.getBean("accountService", AccountService.class);

        //3.使用对象
        accountService.change();
    }
}
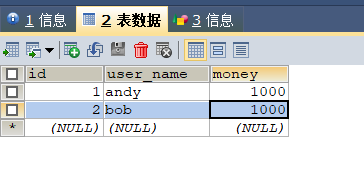
执行转账前

执行结果

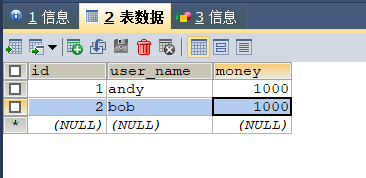
可以看到事务开启成功, 当故障出现执行了回滚, 保证了数据的正确性.


 739
739


 被折叠的 条评论
为什么被折叠?
被折叠的 条评论
为什么被折叠?
 到【灌水乐园】发言


