


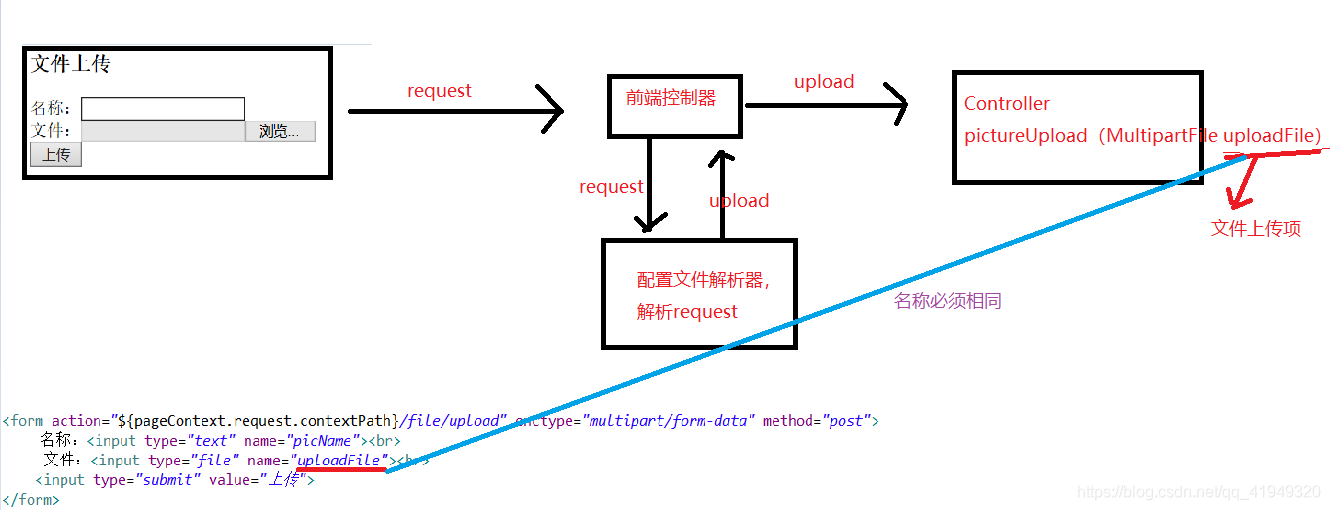
SpringMVC实现文件上传
代码逻辑:
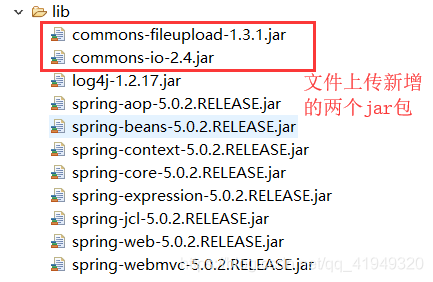
1、导入关于文件上传的jar包
2、给出 web.xml 和 success.jsp
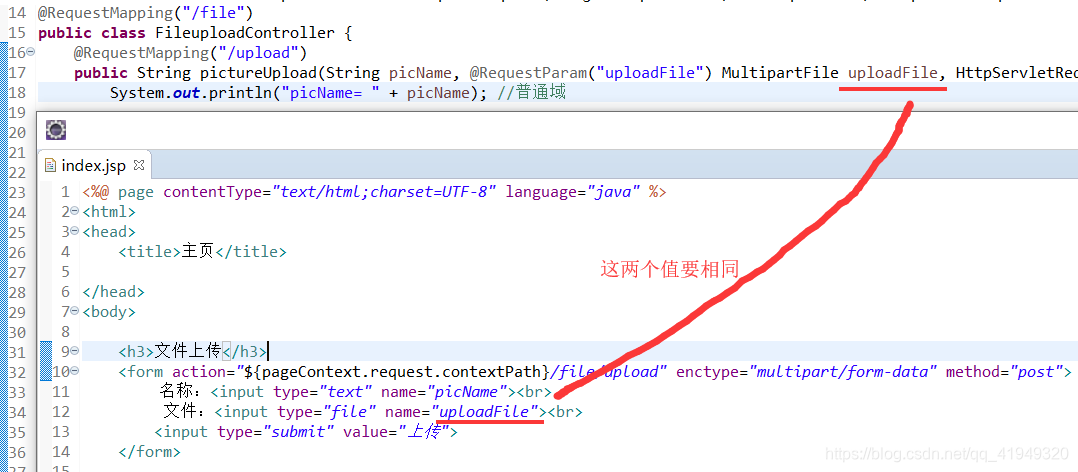
3、给出前端代码
<%@ page contentType="text/html;charset=UTF-8" language="java" %>
<html>
<head>
    <title>主页</title>

</head>
<body>

    <h3>文件上传</h3>


    <form action="${pageContext.request.contextPath}/file/upload" enctype="multipart/form-data" method="post">
	  	 名称:<input type="text" name="picName"><br>
	         文件:<input type="file" name="uploadFile"><br>
	    <input type="submit" value="上传">
	</form>


</body>
</html>
4、给出控制器代码
import org.apache.commons.io.FilenameUtils;
import org.springframework.stereotype.Controller;
import org.springframework.web.bind.annotation.RequestMapping;
import org.springframework.web.bind.annotation.RequestParam;
import org.springframework.web.multipart.MultipartFile;

import javax.servlet.http.HttpServletRequest;
import java.io.File;
import java.util.UUID;

@Controller
@RequestMapping("/file")
public class FileuploadController {
    @RequestMapping("/upload")
    public String pictureUpload(String picName, @RequestParam("uploadFile") MultipartFile uploadFile, HttpServletRequest request) throws Exception {
        System.out.println("picName= " + picName); //普通域

        //处理文件
        String _path = request.getServletContext().getRealPath("/");//项目的部署目录
        File path = new File(_path, "/upload");
        if (!path.exists()) {
            path.mkdirs();
        }

        System.out.println(path);

        //处理文件名重复
        String fileName = uploadFile.getOriginalFilename();//上传的文件名"logo.jpg" "logo-随机数.jpg"
        fileName = FilenameUtils.getBaseName(fileName) + "-" + UUID.randomUUID().toString().replaceAll("-","") + "." + FilenameUtils.getExtension(fileName);

        //上传
        uploadFile.transferTo(new File(path, fileName));

        //跳转页面
        return "success";
    }
}
5、在SpringMVC.xml中配置文件解析器
	<!--
        注意:文件上传的解析器 id 是固定的,不能起别的名称,否则无法实现请求参数的绑定。(不光是文件,其他字段也将无法绑定)
        设置上传文件的最大尺寸为 5MB,或者 value=5242880
    -->
    <bean id="multipartResolver" class="org.springframework.web.multipart.commons.CommonsMultipartResolver">
        <property name="maxUploadSize" value="#{1024 * 1024 * 5}"></property>
    </bean>
运行结果:
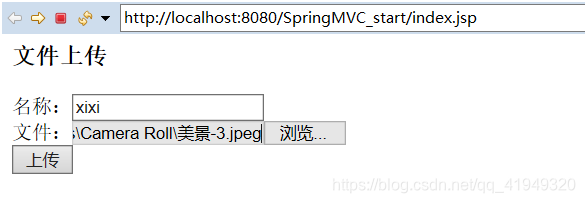

顺着打印出来的path 我们可以找到上传图片的位置。


 4294
4294


 被折叠的 条评论
为什么被折叠?
被折叠的 条评论
为什么被折叠?
 到【灌水乐园】发言


