


Hive部署及简单测试
Hive部署
笔者选择部署Hive2.1.0。其他版本大同小异。在之前虚拟机的基础上进行安装,选择安装在node3。
下载
在Apache Hive的官网,也就是hive.apache.org下载安装包。由于是外网,可能需要科学上网。
或者直接传送门。笔者手头已经有个旧版本的包了,就懒得下载了,一样用。。。

解压安装
上传
在node3:
cd /export/software/
rz
解压
tar -zxvf apache-hive-2.1.0-bin.tar.gz -C /export/server/
cd /export/server/
mv apache-hive-2.1.0-bin hive-2.1.0-bin
为了使用方便,改个名。
安装MySQL
由于Hive的元数据是保存在MySQL的,故需要安装MySQL,笔者的node3已经安装过了。
修改Hive配置
默认配置一般都不是想要的状态。。。
cd /export/server/hive-2.1.0-bin/conf/
mv hive-env.sh.template hive-env.sh
vim hive-env.sh
在49行插入:
HADOOP_HOME=/export/server/hadoop-2.7.5

在52行插入:
export HIVE_CONF_DIR=/export/server/hive-2.1.0-bin/conf

使用:wq保存退出。
使用 ll -ah 查看当前目录下的文件:
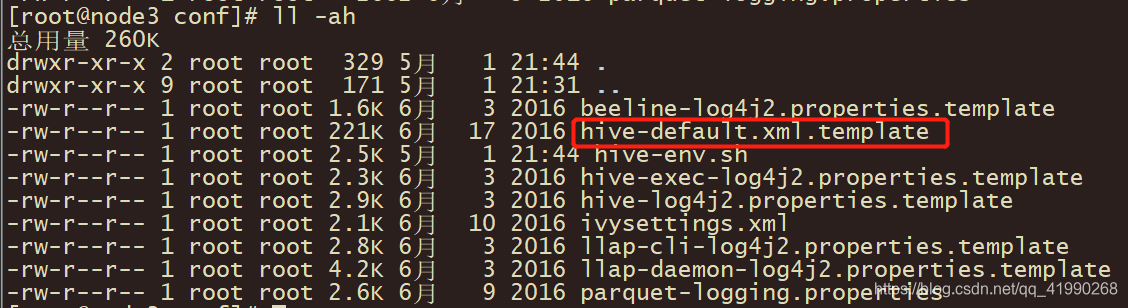
手动改haive-default-xml.template的名称及内容。笔者直接在win搞个hive-site.xml,内容先改成:
<?xml version="1.0" encoding="UTF-8" standalone="no"?>
<?xml-stylesheet type="text/xsl" href="configuration.xsl"?><!--
   Licensed to the Apache Software Foundation (ASF) under one or more
   contributor license agreements.  See the NOTICE file distributed with
   this work for additional information regarding copyright ownership.
   The ASF licenses this file to You under the Apache License, Version 2.0
   (the "License"); you may not use this file except in compliance with
   the License.  You may obtain a copy of the License at

       http://www.apache.org/licenses/LICENSE-2.0

   Unless required by applicable law or agreed to in writing, software
   distributed under the License is distributed on an "AS IS" BASIS,
   WITHOUT WARRANTIES OR CONDITIONS OF ANY KIND, either express or implied.
   See the License for the specific language governing permissions and
   limitations under the License.
-->
<configuration>
</configuration>
在configuration夹层中添加:
<property>
<name>javax.jdo.option.ConnectionUserName</name>
<value>root</value>
</property>
<property>
<name>javax.jdo.option.ConnectionPassword</name>
<value>123456</value>
</property>
<property>
<name>javax.jdo.option.ConnectionURL</name>
<value>jdbc:mysql://node3:3306/hivemetadata?createDatabaseIfNotExist=true&useSSL=false</value>
</property>
<property>
<name>javax.jdo.option.ConnectionDriverName</name>
<value>com.mysql.jdbc.Driver</value>
</property>
<property>
<name>hive.metastore.schema.verification</name>
<value>false</value>
</property>
<property>
<name>datanucleus.schema.autoCreateAll</name>
<value>true</value>
</property>
<property>
<name>hive.server2.thrift.bind.host</name>
<value>node3</value>
</property>
然后rz上传也可以实现同样的效果:
放入Hive所需的MySQL驱动依赖包
笔者选用5.3.18的jar包。rz上传后:
cp /export/software/mysql-connector-java-5.1.38.jar /export/server/hive-2.1.0-bin/lib/
cd /export/server/hive-2.1.0-bin/
ll ./lib
确认lib目录下已经有该文件。
配置Hive环境变量
vim /etc/profile
找个空白处:
#HIVE_HOME
export HIVE_HOME=/export/server/hive-2.1.0-bin
export PATH=:$PATH:$HIVE_HOME/bin
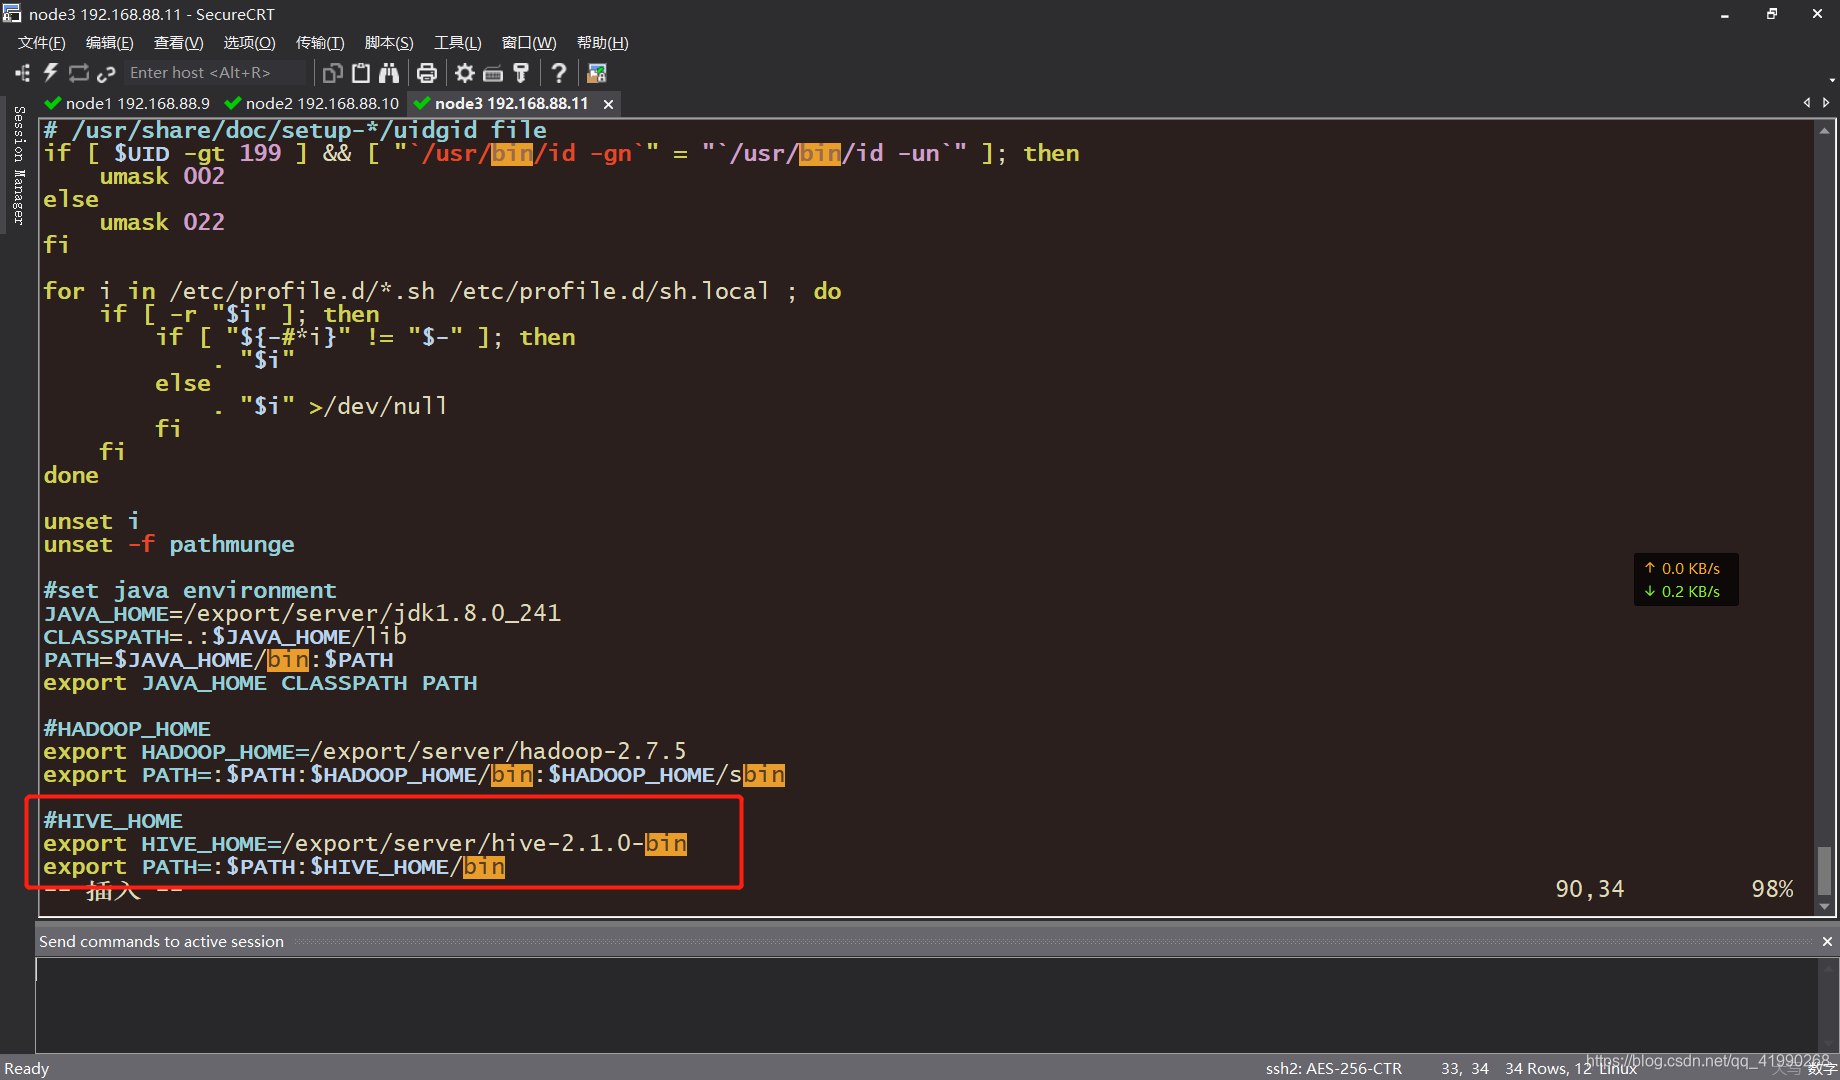
笔者直接放最后了。。。记得保存。
Hive首次启动
首次启动需要做一些配置。之后启动就可以省去这些步骤。

笔者已经有一些命令了(忘了哪些是自己写的shell脚本。。。读者如果没有,可以查阅笔者之前的稿子)。
启动HDFS
start-dfs.sh
启动YARN
start-yarn.sh
启动Hive
首次启动需要初始化元数据。
之后启动HIVE不再需要初始化元数据!!!
创建HDFS目录
HIVE会自动把数据“搬”到HDFS的仓库目录。
hdfs dfs -mkdir  -p    /user/hive/warehouse
hdfs dfs -chmod g+w   /tmp
hdfs dfs -chmod g+w   /user/hive/warehouse
在node1:50070可以看到:
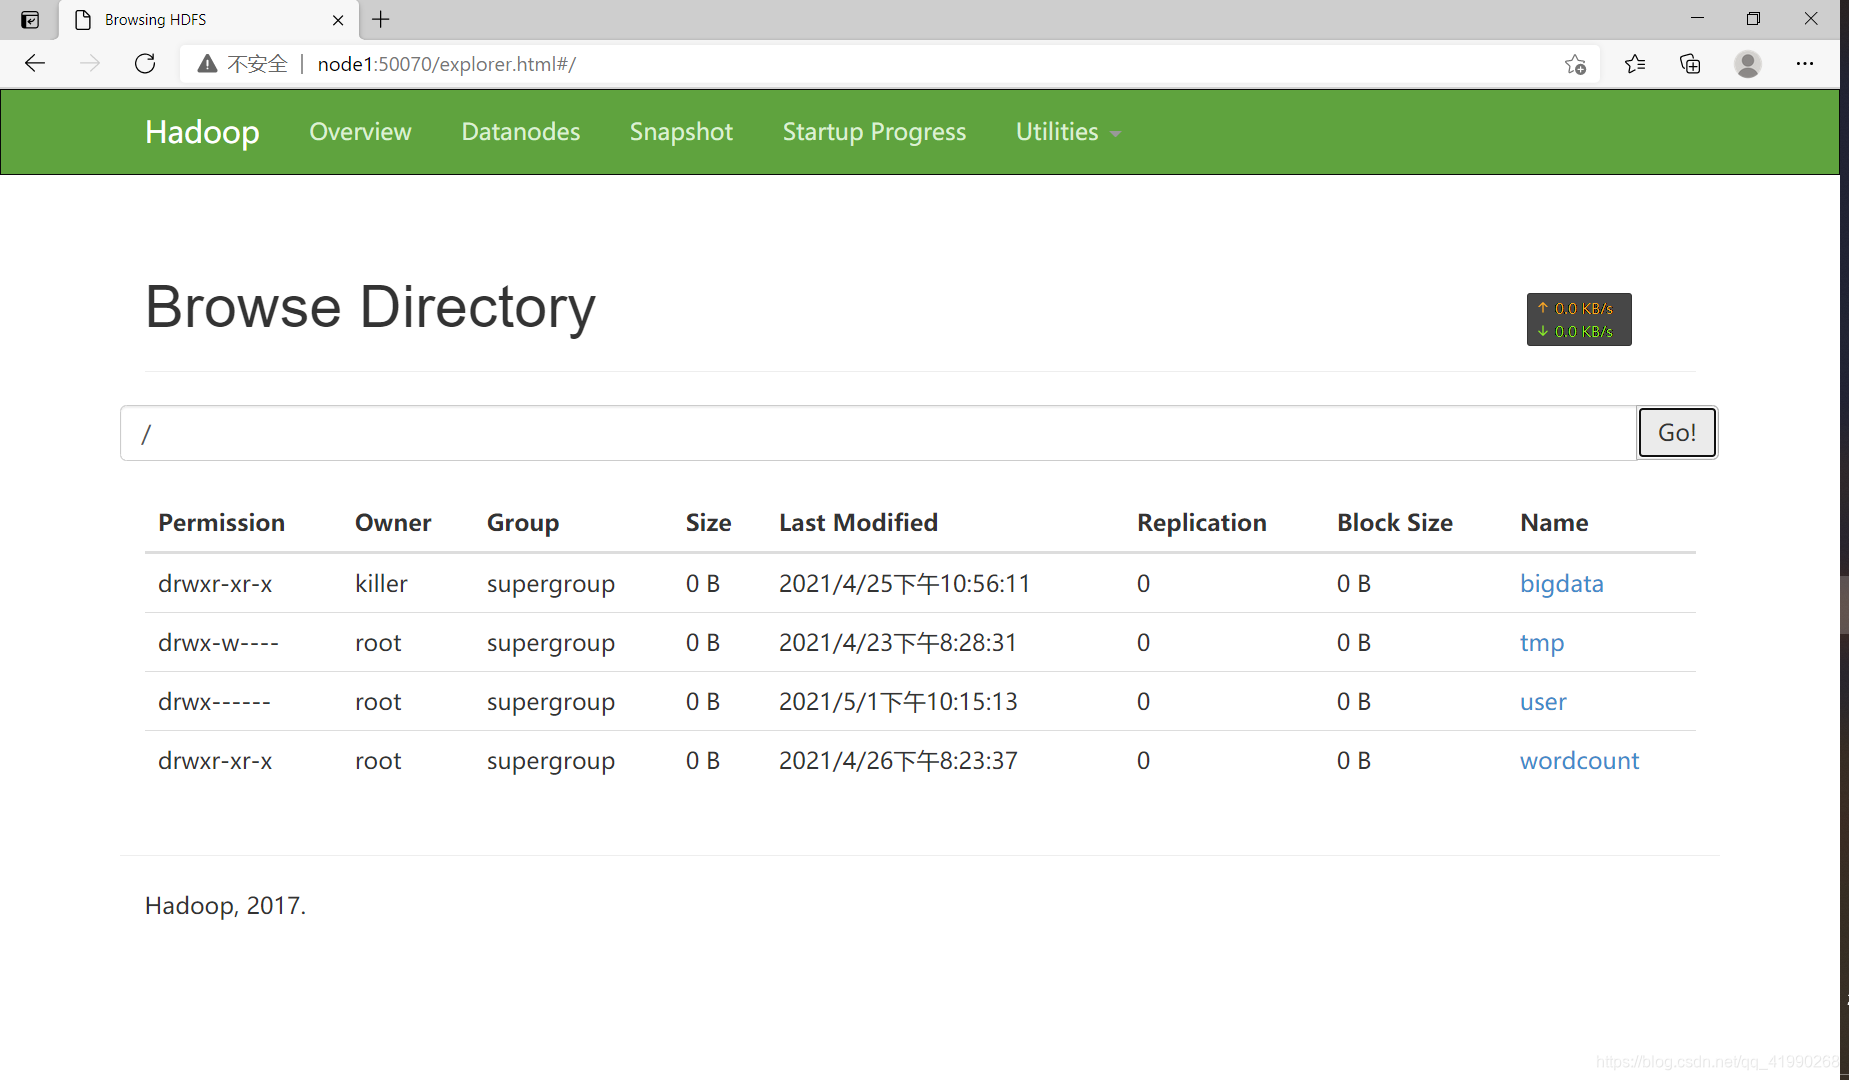


路径/user/hive/warehouse用作Hive中所有表的数据在HDFS中的存储目录。
初始化Hive元数据
cd /export/server/hive-2.1.0-bin/
ll -ah ./bin
可以看到可用的命令:
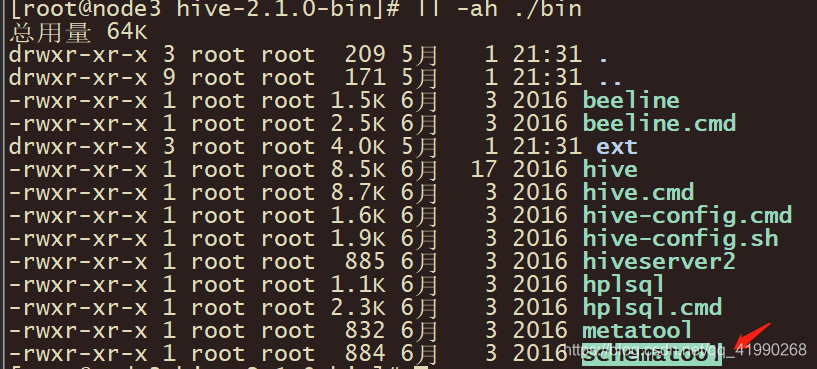
使用:
bin/schematool -dbType mysql -initSchema
末尾会出现:
schemaTool completed
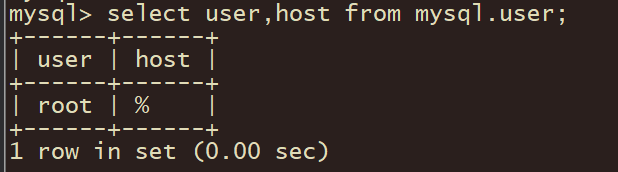
可以在MySQL中使用:
show databases;
看到:
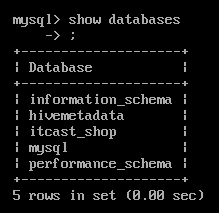
说明Hive的MySQL数据库创建完成。
正式启动
cd /export/server/hive-2.1.0-bin/bin/
hive
启动后:

启动成功!!!
Hive实现wordcount
之前使用MapReduce写个wordcount得花费好长时间。。。还得琢磨K2、V2、K3、V3。。。事实上,Hive可以使用SQL语句自动生成MapReduce程序。。。虽然MapReduce已经接近淘汰,并且Hive声明未来的高本吧不再支持MapReduce。。。
创建表
在启动Hive的命令行:
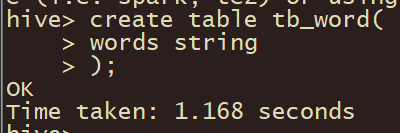
create table tb_word(
words string
);
由于Hive底层是Java,元数据是MySQL,故Hive的表数据可以直接使用Java的数据类型。
在启动Hive的命令行:
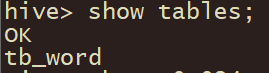
show tables;
可以看出表格已经被创建。
加载HDFS数据
还是使用之前的那个wc.txt试试效果:
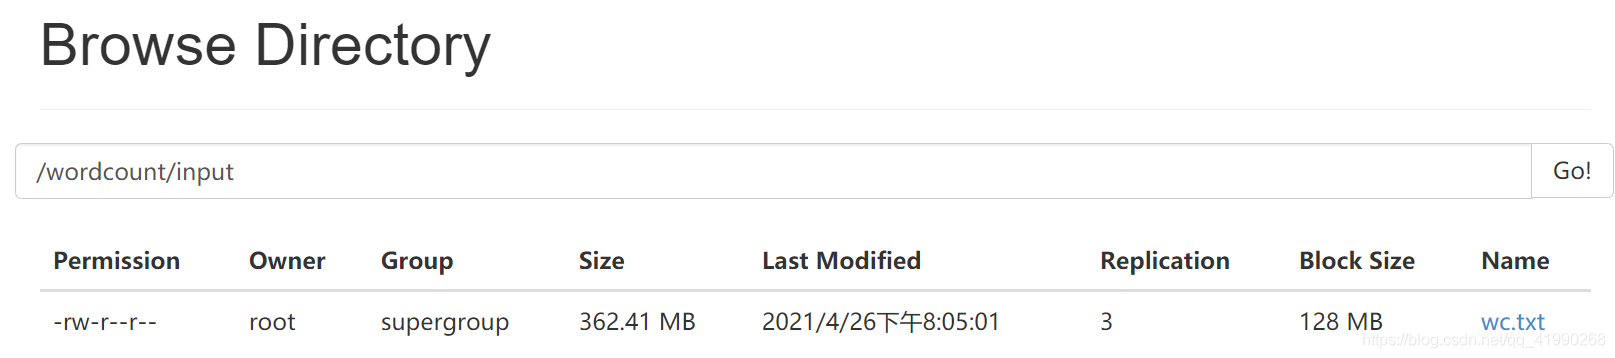
使用:
load data inpath '/wordcount/input/wc.txt' into table tb_word;
Hive的命令行会显示:
hive> load data inpath '/wordcount/input/wc.txt' into table tb_word;
Loading data to table default.tb_word
OK
Time taken: 0.553 seconds
执行完毕后:
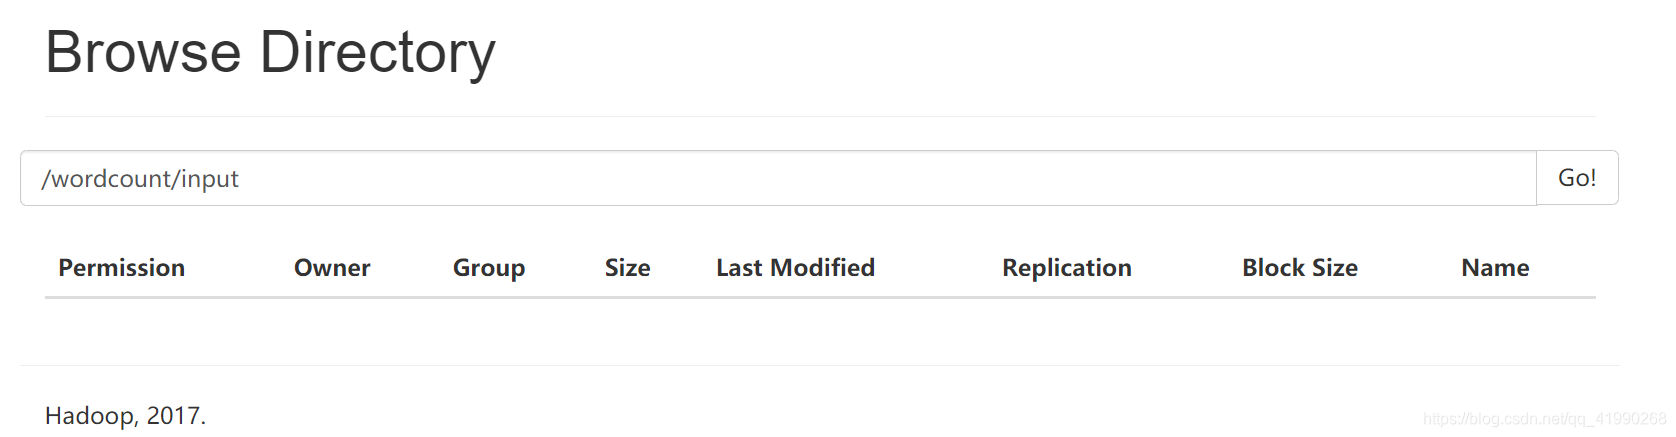
原来的数据wc.txt就被“搬”走了!!!

文件被搬到了HDFS文件系统的/user/hive/warehouse/tb_word目录下。
SQL分析处理
在启动了Hive的命令行分2次执行:
create table tb_word2 as select explode(split(words," ")) as word from tb_word;
select word,count(*) as numb from tb_word2 group by word order by numb desc;
开始运算:
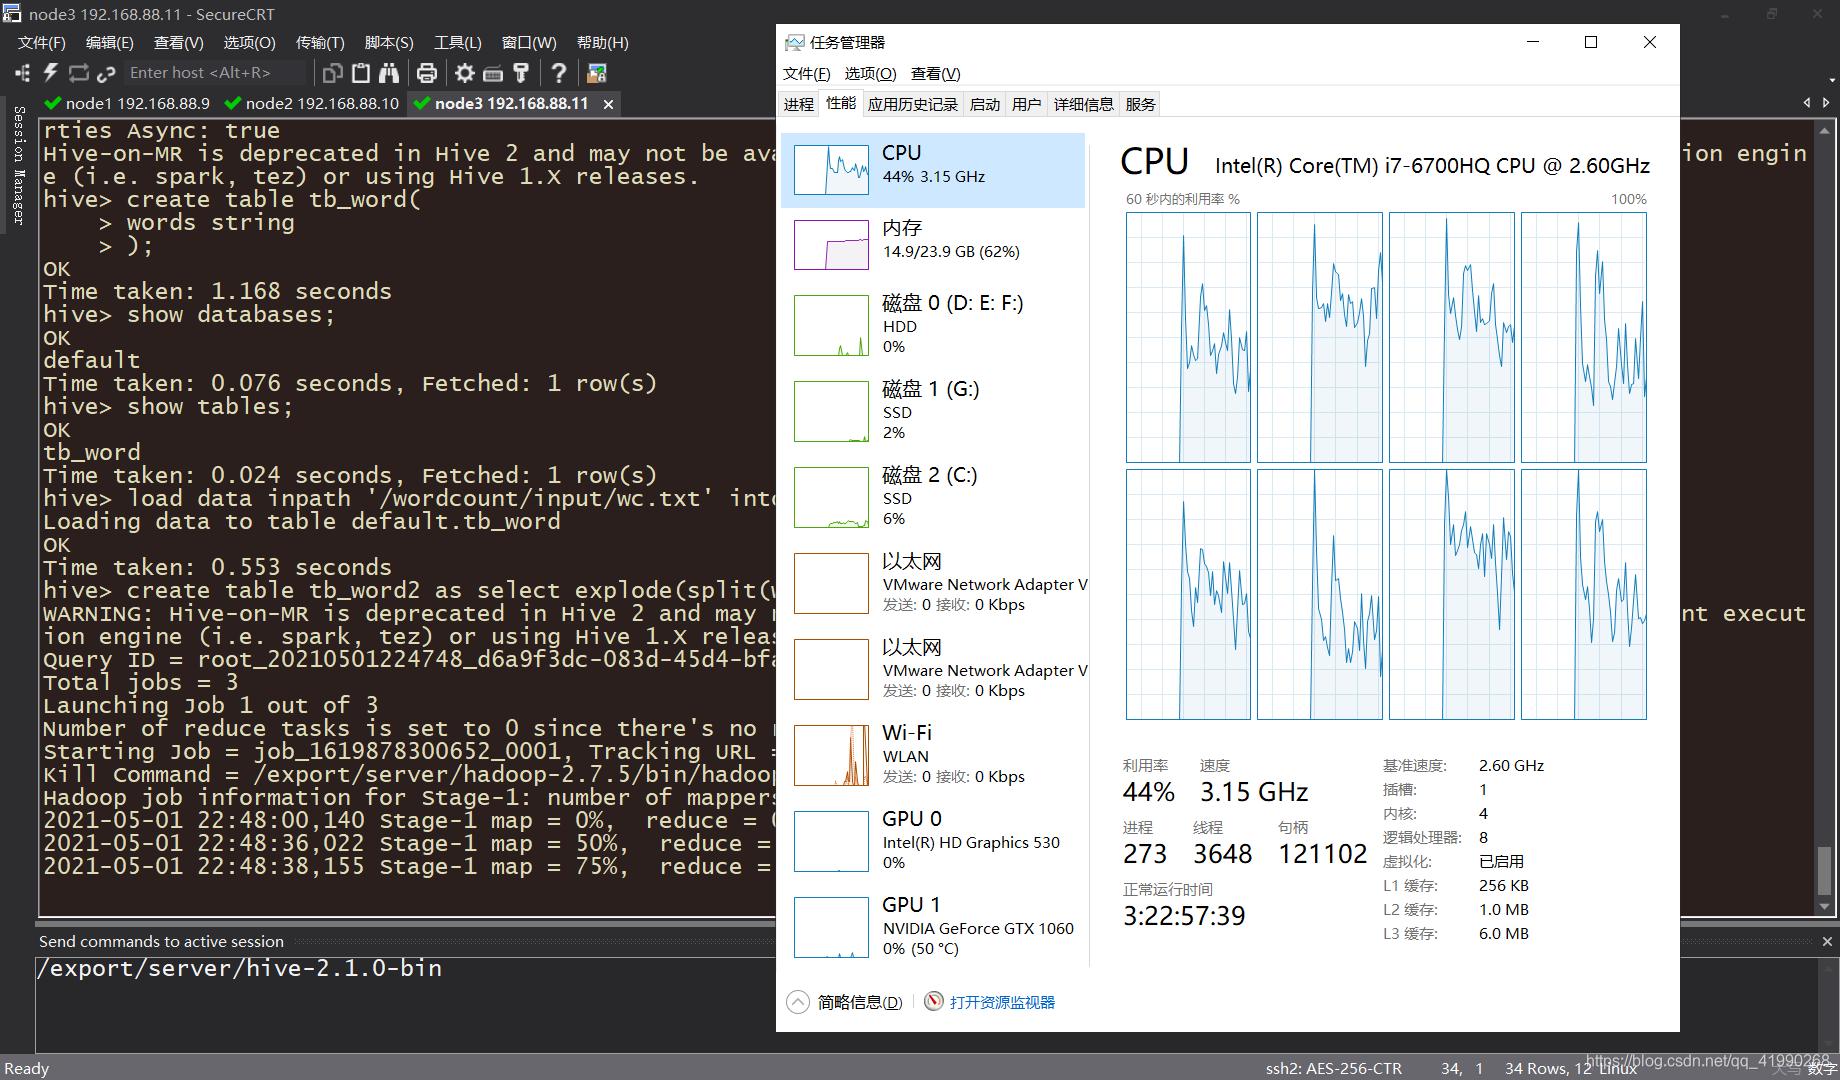
在node3:8088可以看到:

等待完成:
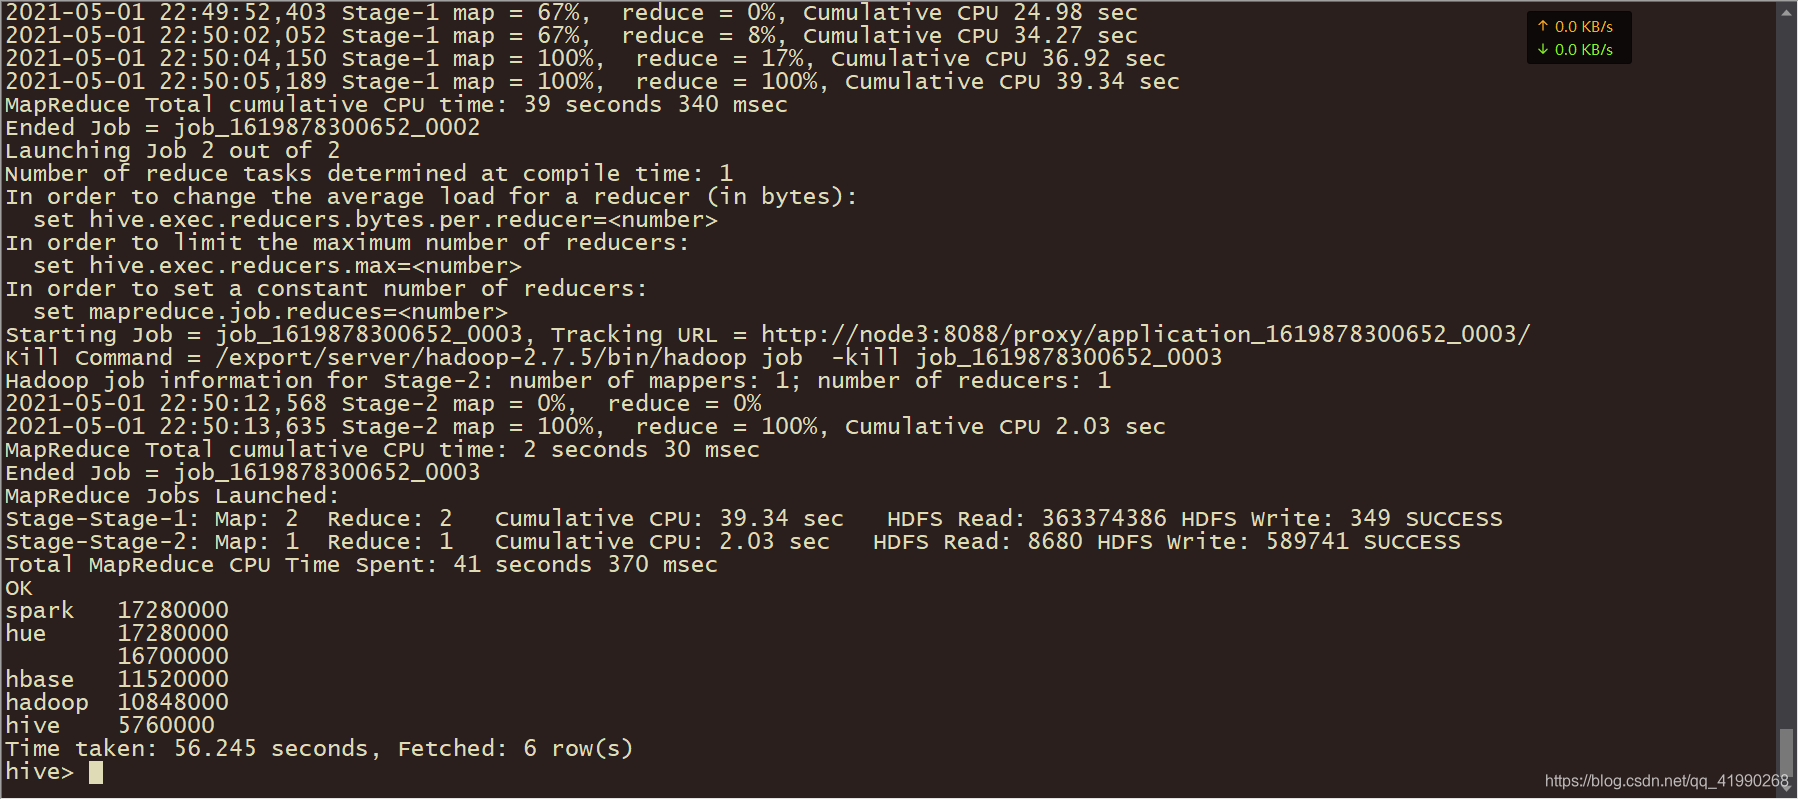
Hive异常机智呢!!!MapReduce程序显然是在Map阶段尚未完成就开始执行Reduce。比之前笔者写的MqpReduce高效多了。。。
Total MapReduce CPU Time Spent: 41 seconds 370 msec
OK
spark   17280000
hue     17280000
        16700000
hbase   11520000
hadoop  10848000
hive    5760000
Time taken: 56.245 seconds, Fetched: 6 row(s)
这老爷机。。。廉颇老矣。。。
创建表是为了实现HDFS文件与表的映射。SQL + 函数是实现计算处理需求。
hive> create table tb_word2 as select explode(split(words," ")) as word from tb_word;
WARNING: Hive-on-MR is deprecated in Hive 2 and may not be available in the future versions. Consider using a different execution engine (i.e. spark, tez) or using Hive 1.X releases.
Query ID = root_20210501224748_d6a9f3dc-083d-45d4-bfae-5ba64722871d
Total jobs = 3
Launching Job 1 out of 3
Number of reduce tasks is set to 0 since there's no reduce operator
Starting Job = job_1619878300652_0001, Tracking URL = http://node3:8088/proxy/application_1619878300652_0001/
Kill Command = /export/server/hadoop-2.7.5/bin/hadoop job  -kill job_1619878300652_0001
Hadoop job information for Stage-1: number of mappers: 2; number of reducers: 0
2021-05-01 22:48:00,140 Stage-1 map = 0%,  reduce = 0%
2021-05-01 22:48:36,022 Stage-1 map = 50%,  reduce = 0%, Cumulative CPU 45.57 sec
2021-05-01 22:48:38,155 Stage-1 map = 75%,  reduce = 0%, Cumulative CPU 48.58 sec
2021-05-01 22:49:05,266 Stage-1 map = 100%,  reduce = 0%, Cumulative CPU 70.35 sec
MapReduce Total cumulative CPU time: 1 minutes 10 seconds 350 msec
Ended Job = job_1619878300652_0001
Stage-4 is selected by condition resolver.
Stage-3 is filtered out by condition resolver.
Stage-5 is filtered out by condition resolver.
Moving data to directory hdfs://node1:8020/user/hive/warehouse/.hive-staging_hive_2021-05-01_22-47-48_807_5979069376130498884-1/-ext-10002
Moving data to directory hdfs://node1:8020/user/hive/warehouse/tb_word2
MapReduce Jobs Launched:
Stage-Stage-1: Map: 2   Cumulative CPU: 70.35 sec   HDFS Read: 380025735 HDFS Write: 363356169 SUCCESS
Total MapReduce CPU Time Spent: 1 minutes 10 seconds 350 msec
OK
Time taken: 78.89 seconds
hive> select word,count(*) as numb from tb_word2 group by word order by numb desc;
WARNING: Hive-on-MR is deprecated in Hive 2 and may not be available in the future versions. Consider using a different execution engine (i.e. spark, tez) or using Hive 1.X releases.
Query ID = root_20210501224918_0fe4faa9-c8ba-4933-9190-c3b87922bd41
Total jobs = 2
Launching Job 1 out of 2
Number of reduce tasks not specified. Estimated from input data size: 2
In order to change the average load for a reducer (in bytes):
  set hive.exec.reducers.bytes.per.reducer=<number>
In order to limit the maximum number of reducers:
  set hive.exec.reducers.max=<number>
In order to set a constant number of reducers:
  set mapreduce.job.reduces=<number>
Starting Job = job_1619878300652_0002, Tracking URL = http://node3:8088/proxy/application_1619878300652_0002/
Kill Command = /export/server/hadoop-2.7.5/bin/hadoop job  -kill job_1619878300652_0002
Hadoop job information for Stage-1: number of mappers: 2; number of reducers: 2
2021-05-01 22:49:28,605 Stage-1 map = 0%,  reduce = 0%
2021-05-01 22:49:48,103 Stage-1 map = 50%,  reduce = 0%, Cumulative CPU 19.28 sec
2021-05-01 22:49:52,403 Stage-1 map = 67%,  reduce = 0%, Cumulative CPU 24.98 sec
2021-05-01 22:50:02,052 Stage-1 map = 67%,  reduce = 8%, Cumulative CPU 34.27 sec
2021-05-01 22:50:04,150 Stage-1 map = 100%,  reduce = 17%, Cumulative CPU 36.92 sec
2021-05-01 22:50:05,189 Stage-1 map = 100%,  reduce = 100%, Cumulative CPU 39.34 sec
MapReduce Total cumulative CPU time: 39 seconds 340 msec
Ended Job = job_1619878300652_0002
Launching Job 2 out of 2
Number of reduce tasks determined at compile time: 1
In order to change the average load for a reducer (in bytes):
  set hive.exec.reducers.bytes.per.reducer=<number>
In order to limit the maximum number of reducers:
  set hive.exec.reducers.max=<number>
In order to set a constant number of reducers:
  set mapreduce.job.reduces=<number>
Starting Job = job_1619878300652_0003, Tracking URL = http://node3:8088/proxy/application_1619878300652_0003/
Kill Command = /export/server/hadoop-2.7.5/bin/hadoop job  -kill job_1619878300652_0003
Hadoop job information for Stage-2: number of mappers: 1; number of reducers: 1
2021-05-01 22:50:12,568 Stage-2 map = 0%,  reduce = 0%
2021-05-01 22:50:13,635 Stage-2 map = 100%,  reduce = 100%, Cumulative CPU 2.03 sec
MapReduce Total cumulative CPU time: 2 seconds 30 msec
Ended Job = job_1619878300652_0003
MapReduce Jobs Launched:
Stage-Stage-1: Map: 2  Reduce: 2   Cumulative CPU: 39.34 sec   HDFS Read: 363374386 HDFS Write: 349 SUCCESS
Stage-Stage-2: Map: 1  Reduce: 1   Cumulative CPU: 2.03 sec   HDFS Read: 8680 HDFS Write: 589741 SUCCESS
Total MapReduce CPU Time Spent: 41 seconds 370 msec
OK
spark   17280000
hue     17280000
        16700000
hbase   11520000
hadoop  10848000
hive    5760000
Time taken: 56.245 seconds, Fetched: 6 row(s)
明明只有2条SQL语句,喂猫执行了3个MapReduce程序?
第一行SQL是拆分字段建立临时表并将临时表插入到新表。
第二行SQL是先分组计数,再按照统计的个数来降序排序。如果自己写MapReduce程序,也得先写个分组器完成计数,再将第一次计算的结果进行排序。
Hive能完成的把SQL语句转换为MapRedue功能,人工完全可以做,且做法基本一致,Hive只是起到了自动生成代码的功能,着实是个很强大的工具。
Hive统计二手房
之前统计二手房数据的csv文件也是画了很多时间写MapReduce。事实上使用Hive很容易就能实现。
准备数据
由于HDFS是分布式的,可以在node1中:
hdfs dfs -mkdir -p /export/data/
创建个目录。
cd /export/data/
利用rz上传这个文件:
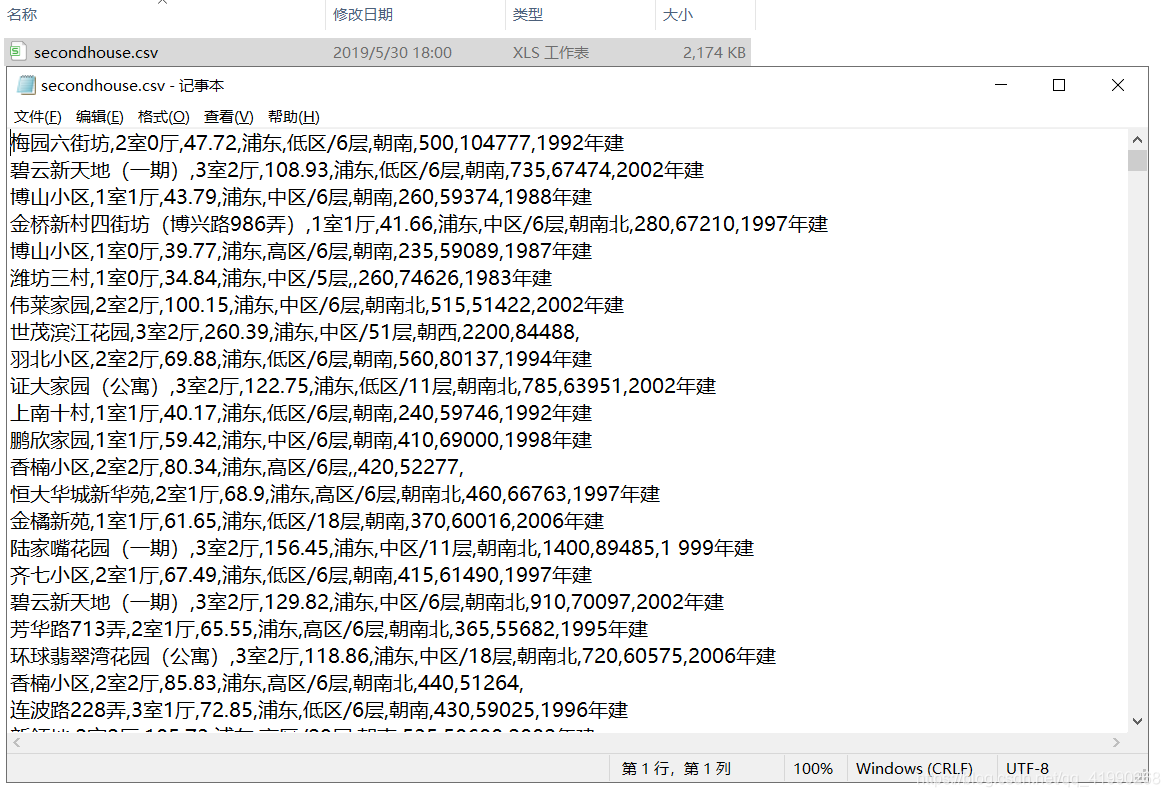
上传到HDFS中:
hdfs dfs -put /export/data/secondhouse.csv /export/data
在node1:50070可以看到:
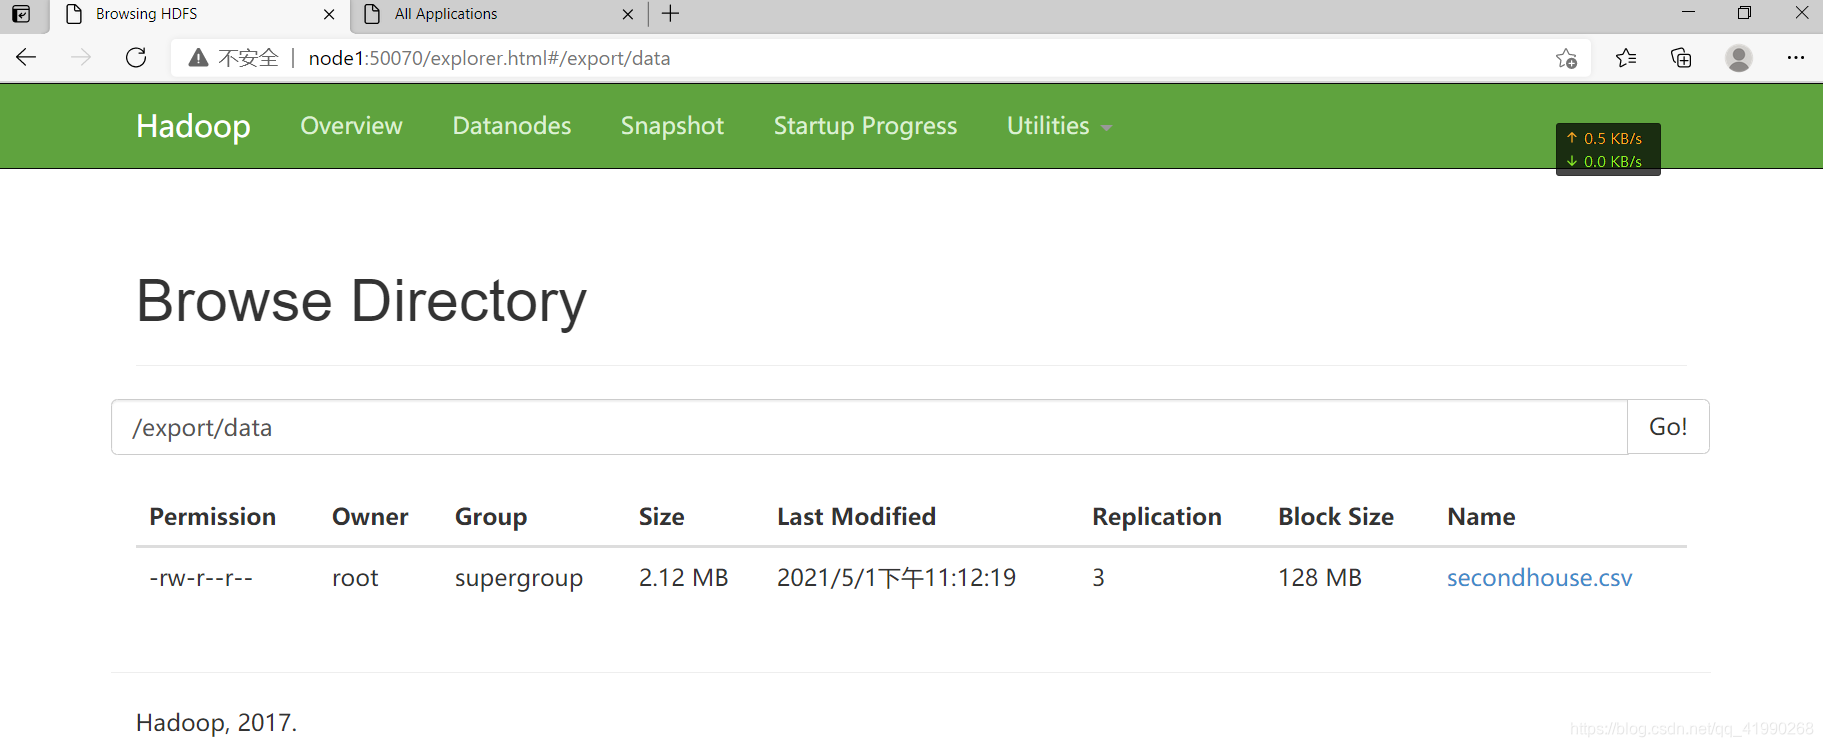
上传成功。
创建Hive表
在启动了Hive的命令行使用:
create table tb_house(
xiaoqu string,
huxing string,
area double,
region string,
floor string,
fangxiang string,
t_price int,
s_price int,
buildinfo string
) row format delimited fields terminated by ',';
加载数据
加载本地数据
在启动了Hive的命令行使用:
load data local inpath '/export/data/secondhouse.csv' into table tb_house;
这种方式是加载本地文件。由于此时node3的前台程序Hive占用了命令行,笔者想偷个懒,之前是上传到了node1的该目录,当然是访问不到的。。。会报错:
hive> load data local inpath '/export/data/secondhouse.csv' into table tb_house;
FAILED: SemanticException Line 1:23 Invalid path ''/export/data/secondhouse.csv'': No files matching path file:/export/data/secondhouse.csv
先在node1的命令行:
cd /export/data/
scp -r secondhouse.csv node3:$PWD
这句话一定要注意PWD是大写!!!不信可以在闲置的node2使用echo $pwd 和 echo $PWD分别查看,PWD小写是不能显示内容的!!!会导致分发路径有误!!!
再次加载本地数据即可成功。写local就是标注是从Linux本地文件中读取。
加载HDFS文件
由于之前已经上传到了HDFS中,在启动了Hive的命令行使用:
load data inpath '/export/data/secondhouse.csv' into table tb_house;
即可直接加载数据。不写local,就是默认情况,从HDFS加载。
这2种方式均可。但是考虑到大数据的数据量都不会小,当然是优先使用加载HDFS文件!!!小文件测试使用加载本地文件的方式要方便些。
SQL分析处理
在启动了Hive的命令行(当然还是node3)使用:
select
  region,
  count(*) as numb,
  round(avg(s_price),2) as avgprice,
  max(s_price) as maxprice,
  min(s_price) as minprice
from tb_house
group by region;
这次数据量很小,计算很快:
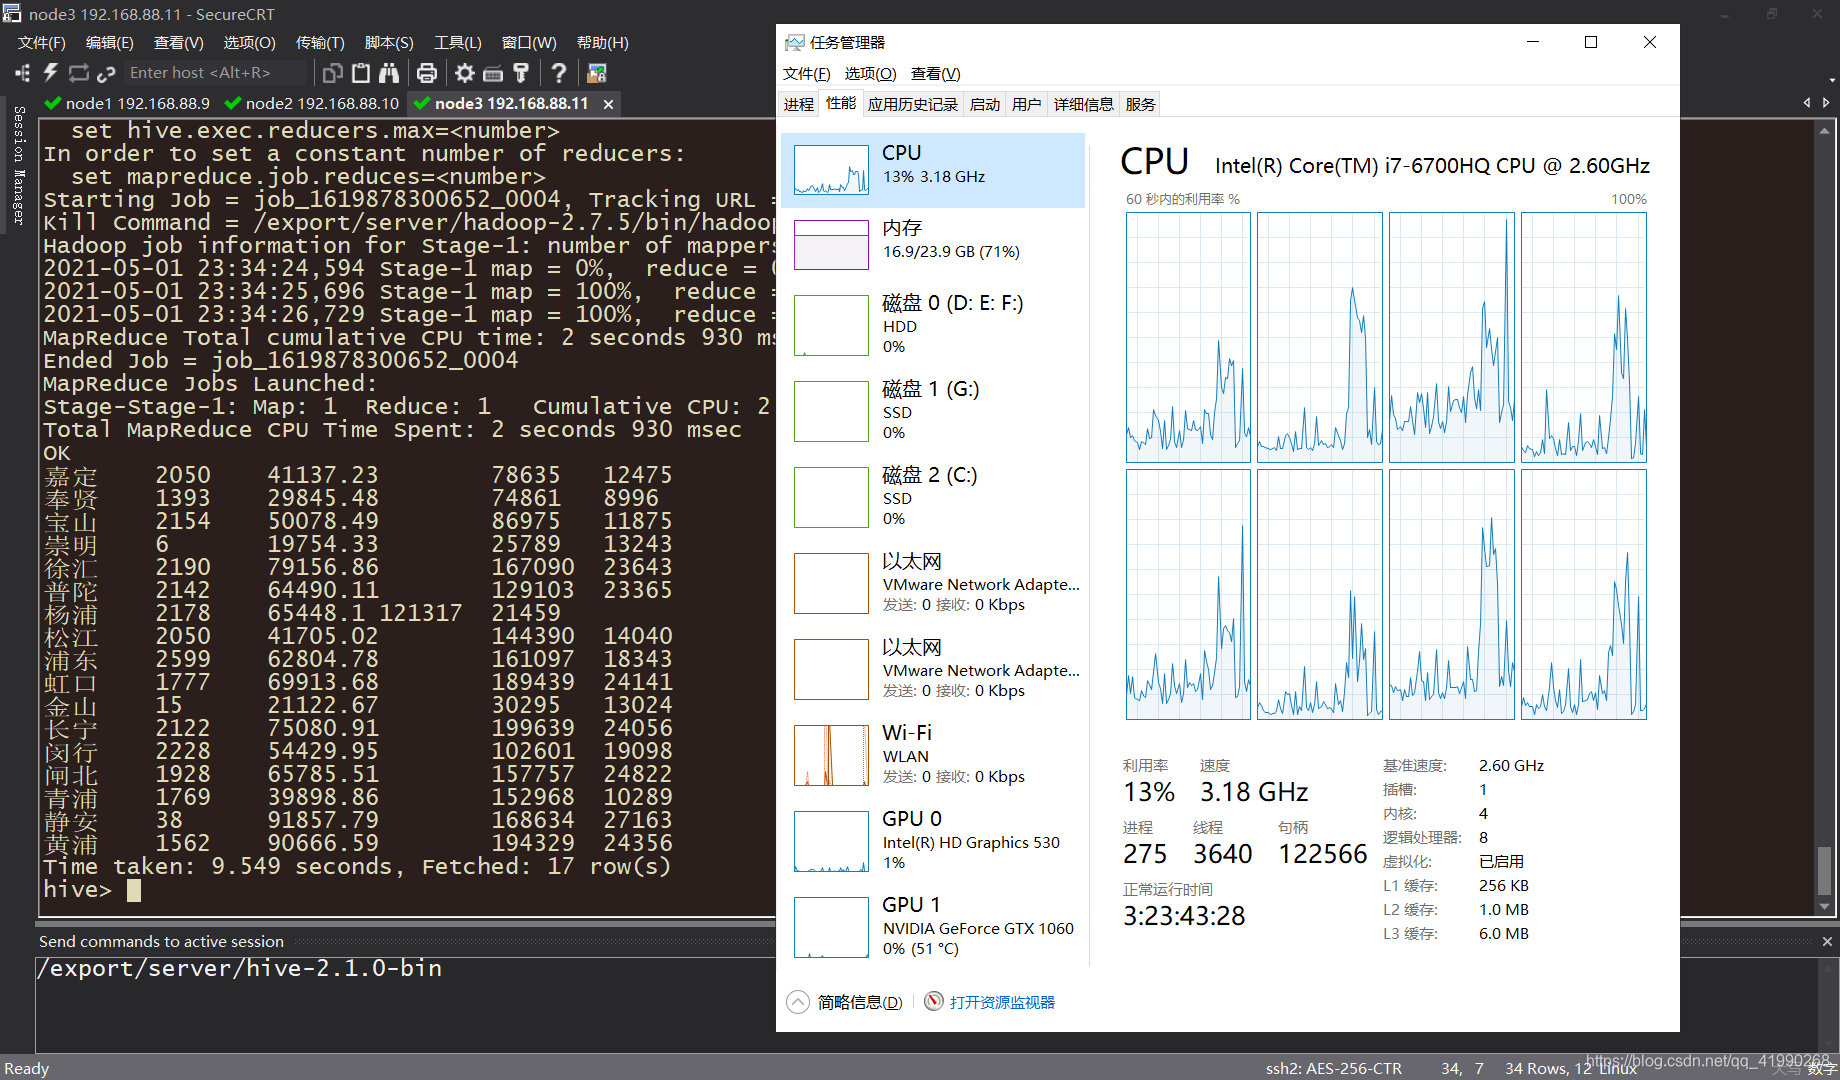
有了Hive这个大杀器,实现MapReduce还是很便捷的。
关闭集群
关闭Hive
在启动了Hive的命令行(当然还是node3)使用:
quit;
一定要有分号!!!
关闭HDFS
stop-dfs.sh
关闭YARN
stop-yarn.sh
由于没有使用ZooKeeper,jps查看进程也没有它,基本结束了所有进程。先留个快照再关闭。


 被折叠的 条评论
为什么被折叠?
被折叠的 条评论
为什么被折叠?
 到【灌水乐园】发言


