


微信公众号:潇雷
当努力到一定程度,幸运自与你不期而遇
一、前言
文件上传在系统中是必须掌握的技能,而云存储,既能够方便管理和存储,在分布式环境下也很能很好的应用,并且有专业的维护团队来维护,可以为企业节约开发成本。
阿里云对象存储OSS(Object Storage Service)为您提供基于网络的数据存取服务。使用OSS,您可以通过网络随时存储和调用包括文本、图片、音视频在内的各类数据文件。这次分享的是如何用阿里云的oss来实现文件上传功能。
二、文件上传方式
对于常见的web文件上传有这两种方式:
2.1 文件上传到自己的应用服务器,提交给网关,然后转发到自己的应用服务,再通过java代码,将文件上传到oss,具体的流程图如下:
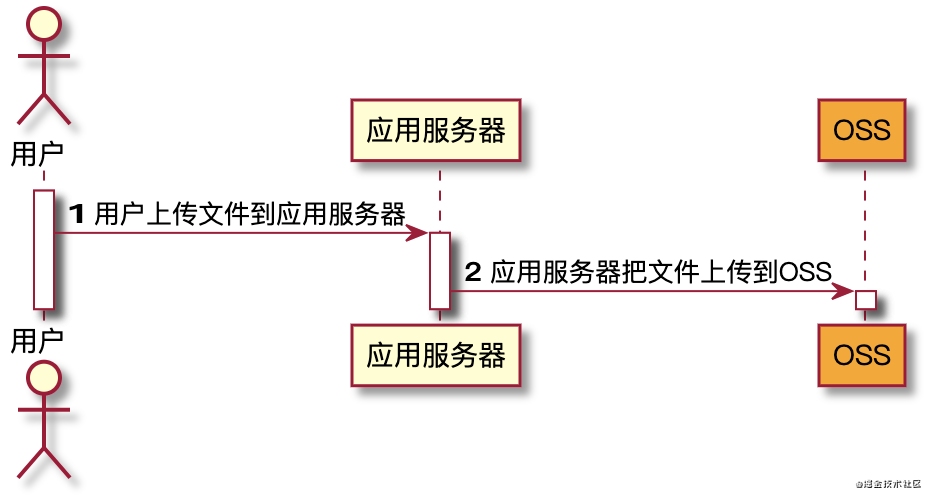
这种方法有几个缺点:
- 上传慢,数据先到应用服务器,再去oss,增大了网络传输
- 扩展性差:如果后续用户多了,应用服务器就会成为瓶颈
- 费用高:增加应用服务器本身需要成本
2.2 服务端签名后上传
所谓签名就是先去应用服务器获得认证,通过存在服务器中的账号密码,对用户发起的请求做个防伪签名,签名中包含着图片上传的位置、名称等信息,但是不包含明码的accesskey,accessId等信息,然后发给oss服务求,oss会对发送过来的签名进行解析,通过后实现文件上传,这种方式就不需要将图片经过应用服务器,而相当于去应用服务器中问他能不能上传,得到反馈后再去上传的操作。
既保证了安全,又不需要经过应用服务器。
三、使用
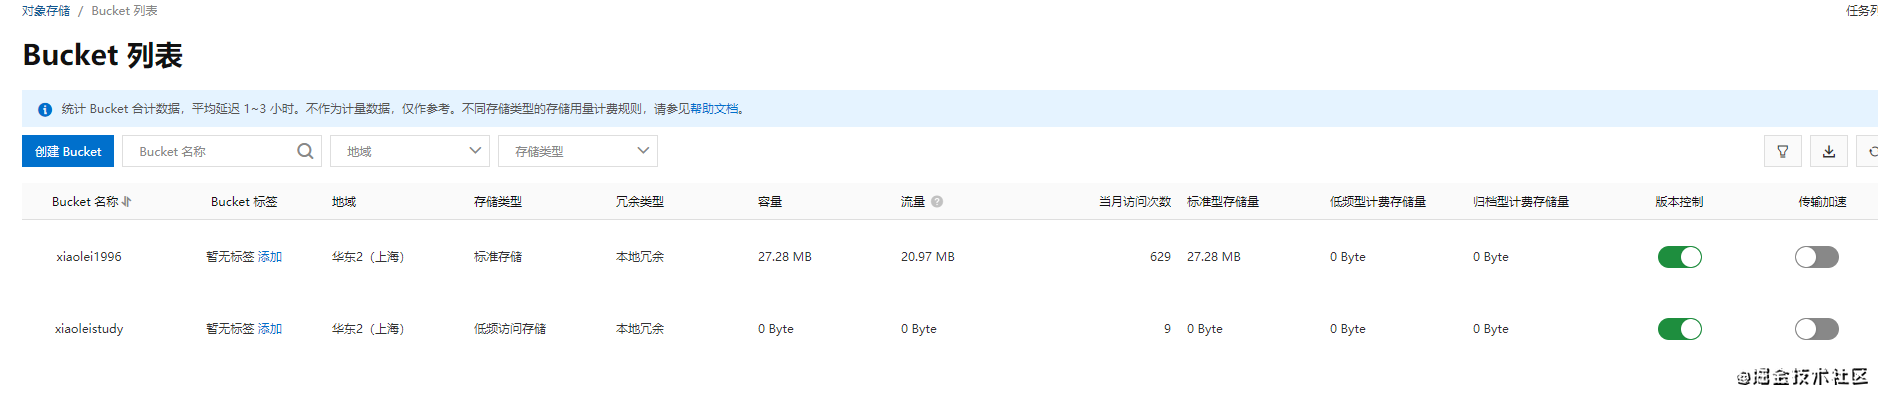
先去阿里云的oss中创建好自己的bucket,因为这块内容我自己以前创建过了,也比较简单,就不带着一起创建了,这就是创建完成的样子,也需要进行accessKey的配置。
3.1 简单入门
导依赖:
<dependency>
        <groupId>com.aliyun.oss</groupId>
        <artifactId>aliyun-sdk-oss</artifactId>
        <version>3.5.2</version>
</dependency>
配置信息
这个对象是由endpoint、accessKeyId、accessKeySecret这三个来创建的,完成配置后,即可实现文件上传。
// Endpoint以杭州为例,其它Region请按实际情况填写。
String endpoint = "oss-cn-shanghai.aliyuncs.com";
// 阿里云主账号AccessKey拥有所有API的访问权限,风险很高。强烈建议您创建并使用RAM账号进行API访问或日常运维,请登录RAM控制台创建RAM账号。
String accessKeyId = "XXX";
String accessKeySecret = "XXX";

// 创建OSSClient实例。
OSS ossClient = new OSSClientBuilder().build(endpoint, accessKeyId, accessKeySecret);

// 上传文件。<yourLocalFile>由本地文件路径加文件名包括后缀组成,例如/users/local/myfile.txt。
ossClient.putObject("xiaolei1996", "system", new File("C:\\Users\\xulei\\Downloads\\u=2311863124,2129220996&fm=26&gp=0 (1).jpg"));

// 关闭OSSClient。
ossClient.shutdown();
3.2 springcloud Alibaba-oss使用
使用的过程中,alibaba-oss的包更像是一种优化,自己不需要在代码里面创建这个对象,而是在配置文件中引入信息后,通过@Autowired 即可实现对象注入。
jar包
<dependency>
    <groupId>com.alibaba.cloud</groupId>
    <artifactId>spring-cloud-starter-alicloud-oss</artifactId>
    <version>2.1.0.RELEASE</version>
</dependency>
配置oss
cloud:
  alicloud:
    access-key: xxx
    secret-key: xxx
    oss:
      endpoint: oss-cn-shanghai.aliyuncs.com
测试
@Autowired
OSSClient ossClient;

// 上传文件。<yourLocalFile>由本地文件路径加文件名包括后缀组成,例如/users/local/myfile.txt。
ossClient.putObject("xiaolei1996", "system", new File("C:\\Users\\xulei\\Downloads\\u=2311863124,2129220996&fm=26&gp=0 (1).jpg"));
ossClient.shutdown();
public class OSSClient implements OSS {
    private CredentialsProvider credsProvider;
    private URI endpoint;
    private ServiceClient serviceClient;
这块有个小坑,不要使用OSSClient 来引入这个类,它是个类,而不是接口,因此,需要把注入信息改写成:
@Autowired
OSS ossClient;
不然会有这个错误提示:
Description:

Field ossClient in com.xl.gulimall.product.ProductApplication required a bean of type 'com.aliyun.oss.OSSClient' that could not be found.

The injection point has the following annotations:
	- @org.springframework.beans.factory.annotation.Autowired(required=true)


Action:

Consider defining a bean of type 'com.aliyun.oss.OSSClient' in your configuration.
3.3 获得服务端签名使用
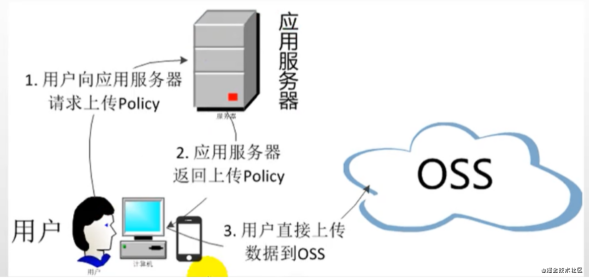
服务端签名后直传的原理如下:
- 用户发送上传policy请求到应用服务器
- 应用服务器返回上传policy和签名给用户
- 用户直接上传数据到oss
@Value("${spring.cloud.alicloud.oss.endpoint}")
    private String endpoint;
    @Value("${spring.cloud.alicloud.access-key}")
    private String accessKeyId;
    @Value("${spring.cloud.alicloud.secret-key}")
    private String accessKeySecret;

    @RequestMapping("/oss/policy")
    public R policy(){
        String bucket = "xiaolei1996"; // 请填写您的 bucketname 。
        String host = "https://" + bucket + "." + endpoint; // host的格式为 bucketname.endpoint
        // callbackUrl为 上传回调服务器的URL,请将下面的IP和Port配置为您自己的真实信息。
        String format = new SimpleDateFormat("yyyy-MM-dd").format(new Date());
        String dir = format+"/"; // 用户上传文件时指定的前缀。
        Map<String, String> respMap =null;
        // 创建OSSClient实例。
        OSS ossClient = new OSSClientBuilder().build(endpoint, accessKeyId, accessKeySecret);
        try {
            long expireTime = 30000;
            long expireEndTime = System.currentTimeMillis() + expireTime * 1000;
            Date expiration = new Date(expireEndTime);
            // PostObject请求最大可支持的文件大小为5 GB,即CONTENT_LENGTH_RANGE为5*1024*1024*1024。
            PolicyConditions policyConds = new PolicyConditions();
            policyConds.addConditionItem(PolicyConditions.COND_CONTENT_LENGTH_RANGE, 0, 1048576000);
            policyConds.addConditionItem(MatchMode.StartWith, PolicyConditions.COND_KEY, dir);

            String postPolicy = ossClient.generatePostPolicy(expiration, policyConds);
            byte[] binaryData = postPolicy.getBytes("utf-8");
            String encodedPolicy = BinaryUtil.toBase64String(binaryData);
            String postSignature = ossClient.calculatePostSignature(postPolicy);

            respMap= new LinkedHashMap<String, String>();
            respMap.put("accessid", accessKeyId);
            respMap.put("policy", encodedPolicy);
            respMap.put("signature", postSignature);
            respMap.put("dir", dir);
            respMap.put("host", host);
            respMap.put("expire", String.valueOf(expireEndTime / 1000));
            // respMap.put("expire", formatISO8601Date(expiration));
        } catch (Exception e) {
            System.out.println(e.getMessage());
        }
        return R.ok().put("data",respMap);
    }
前端获得返回的结果如下:
{
    "msg":"success",
    "code":0,
    "data":{
        "accessid":"LTAIPMS1nt9B7gye",
        "policy":"eyJleHBpcmF0aW9uIjoiMjAyMS0wMS0wMlQxODoxODozOS4wMTZaIiwiY29uZGl0aW9ucyI6W1siY29udGVudC1sZW5ndGgtcmFuZ2UiLDAsMTA0ODU3NjAwMF0sWyJzdGFydHMtd2l0aCIsIiRrZXkiLCIyMDIxLTAxLTAyLyJdXX0=",
        "signature":"yPW7qgQH59UFO4Lx5zwscNsuyNE=",
        "dir":"2021-01-02/",
        "host":"https://xiaolei1996.oss-cn-shanghai.aliyuncs.com",
        "expire":"1609611519"
    }
}
3.4 前端处理返回结果
<template>
  <div>
    <el-upload
      action="https://xiaolei1996.oss-cn-shanghai.aliyuncs.com"
      :data="dataObj"
      list-type="picture"
      :multiple="false" :show-file-list="showImage"
      :file-list="fileList"
      :before-upload="beforeUpload"
      :on-remove="handleRemove"
      :on-success="handleUploadSuccess"
      :on-preview="handlePreview">
      <el-button size="small" type="primary">点击上传</el-button>
      <div slot="tip" class="el-upload__tip">只能上传jpg/png文件,且不超过10MB</div>
    </el-upload>
    <el-dialog :visible.sync="dialogVisible">
      <img width="100%" :src="fileList[0].url" alt="">
    </el-dialog>
  </div>
</template>
<script>
   import {policy} from './policy'
   import { getUUID } from '@/utils'

  export default {
    name: 'singleUpload',
    props: {
      value: String
    },
    computed: {
      imageUrl() {
        return this.value;
      },
      imageName() {
        if (this.value != null && this.value !== '') {
          return this.value.substr(this.value.lastIndexOf("/") + 1);
        } else {
          return null;
        }
      },
      fileList () {
        return [{
          name: this.imageName,
          url: this.imageUrl
        }]
      },
      showFileList: {
        get: function () {
          return this.value !== null && this.value !== ''&& this.value!==undefined;
        },
        set: function (newValue) {
        }
      }
    },
    data () {
      return {
        dataObj: {
          policy: '',
          signature: '',
          key: '',
          ossaccessKeyId: '',
          dir: '',
          host: ''
          // callback:'',
        },
        dialogVisible: false,
        showImage: false
      }
    },
    methods: {
      emitInput(val) {
        this.$emit('input', val)
      },
      handleRemove(file, fileList) {
        this.emitInput('');
      },
      handlePreview(file) {
        this.dialogVisible = true;
      },
      beforeUpload(file) {
        let _self = this;
        return new Promise((resolve, reject) => {
          policy().then(response => {
            console.log('响应数据', response)
            _self.dataObj.policy = response.data.policy
            _self.dataObj.signature = response.data.signature
            _self.dataObj.ossaccessKeyId = response.data.accessid
            _self.dataObj.key = response.data.dir + getUUID() + '_$ {filename} '
            _self.dataObj.dir = response.data.dir
            _self.dataObj.host = response.data.host
            console.log('响应数据22', _self.dataObj)
            resolve(true)
          }).catch(err => {
            reject(false)
          })
        })
      },
      handleUploadSuccess (res, file) {
        console.log("上传成功...")
        this.showImage = true
        this.fileList.pop()
        this.fileList.push({ name: file.name, url: this.dataObj.host + '/' + this.dataObj.key.replace(' $ {filename} ', file.name) })
        this.emitInput(this.fileList[0].url)
        console.log('url', this.fileList[0].url)
      }
    }
  }
</script>
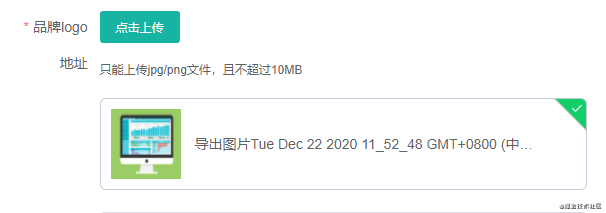
上传结果展示:
四、总结
这就是一个简单的oss文件上传功能,并可以满足web系统的一个基本开发,如果有额外需要,可以参考oss的官方文档,进行更多功能研究。
参考:
阿里云oss


 1141
1141


 被折叠的 条评论
为什么被折叠?
被折叠的 条评论
为什么被折叠?
 到【灌水乐园】发言


