


2022-11-01课堂内容
01-配置开发环境
在使用Spring Boot进行开发之前,第一件事就是配置好开发环境。在使用 Spring Boot 进行开发之前,第一件事就是配置好开发环境。工欲善其事,必先利其器,IDE(集成开发环境)的选择相当重要,目前市面上有很多优秀的 IDE 开发工具,例如 IntelliJ IDEA、Spring Tools、Visual Studio Code 和 Eclipse 等等,那么我们该如何选择呢?
这里我们极力推荐大家使用 IntelliJ IDEA,因为相比于与其他 IDE,IntelliJ IDEA 对 Spring Boot 提供了更好的支持。Spring Boot 版本及其环境配置要求如下表

02-创建 Spring Boot 项目
开发环境配置完成后,接下来,我们就可以通过 Intellij IDEA 创建一个 Spring Boot 项目了。
方案一:通过官网创建,通过IDEA打开
方案二:通过Spring Initializr(Default)构建(实质还是按照官网创建)
方案三:通过Spring Initializr(Custom)构建,即阿里云镜像创建:
- 输入 https://start.aliyun.com
方案四:使用Maven手动创建
(1)方案一:通过官网创建
官网:https://start.spring.io/

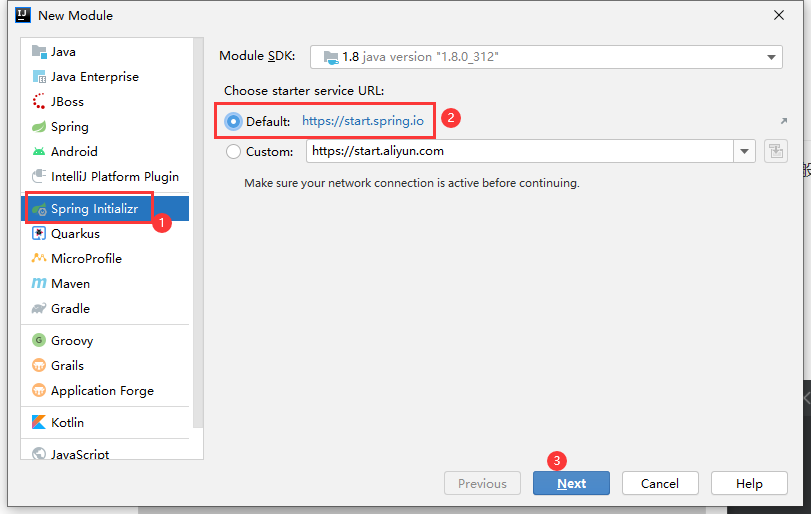
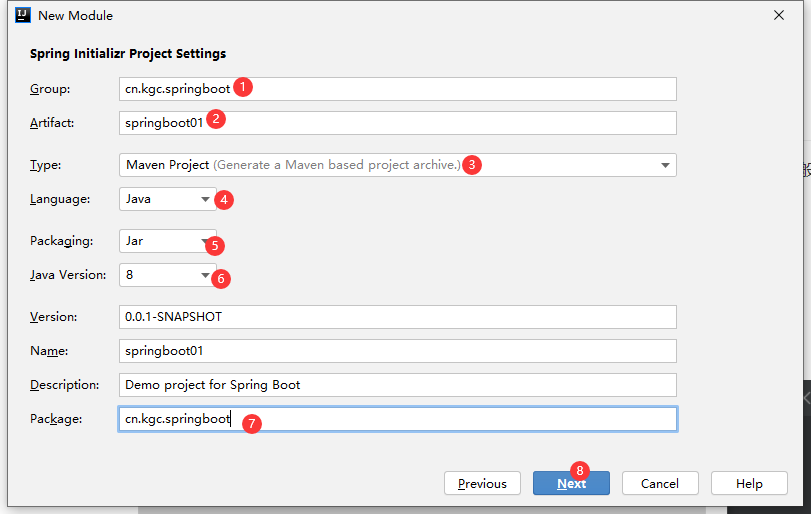
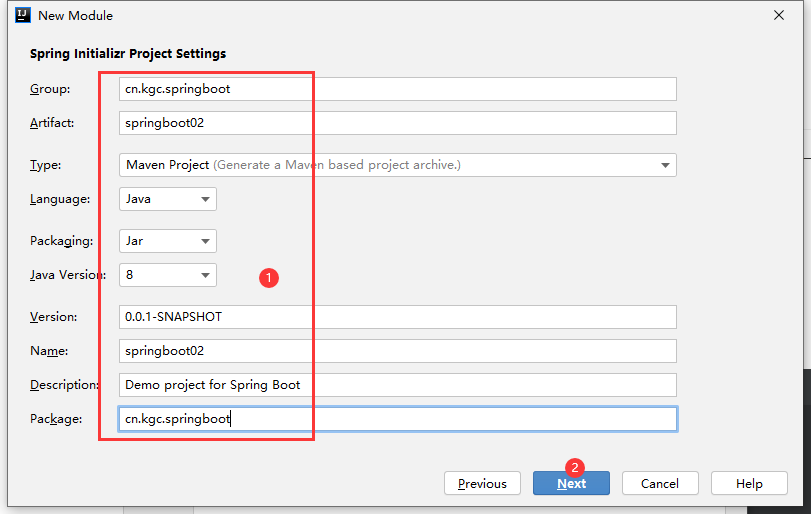
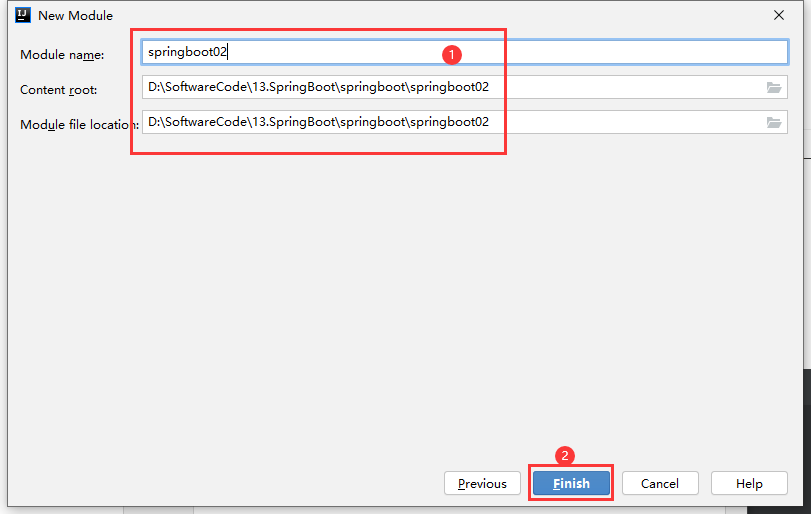
(2)方案二:通过Spring Initializr(Default)构建(实质还是按照官网创建)
首先新建一个新工程,在此新工程下新建Module
右击springboot–>new–>Module–>Spring Initializr–>选择Default:https://start.spring.io/–>Next–>
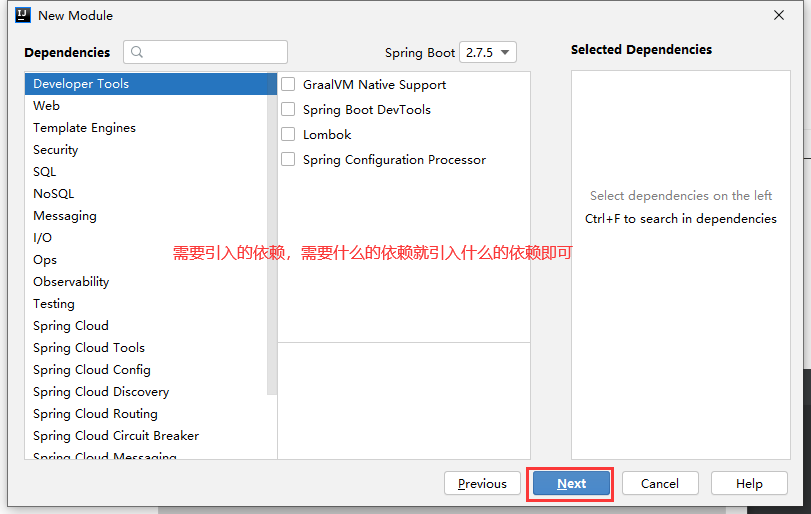

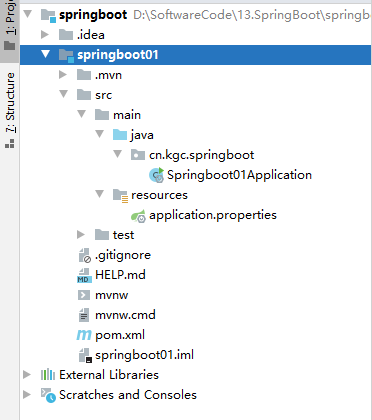
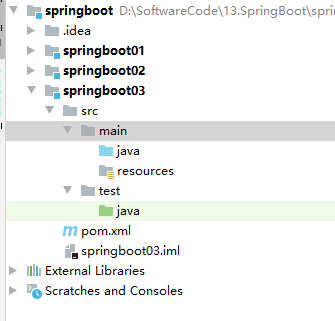
创建的工程如下:
(3)方案三:通过Spring Initializr(Custom)构建,即阿里云镜像创建
- 输入 https://start.aliyun.com
右击springboot–>new–>Module–>Spring Initializr–>选择Custom,并输入: https://start.aliyun.com -->Next


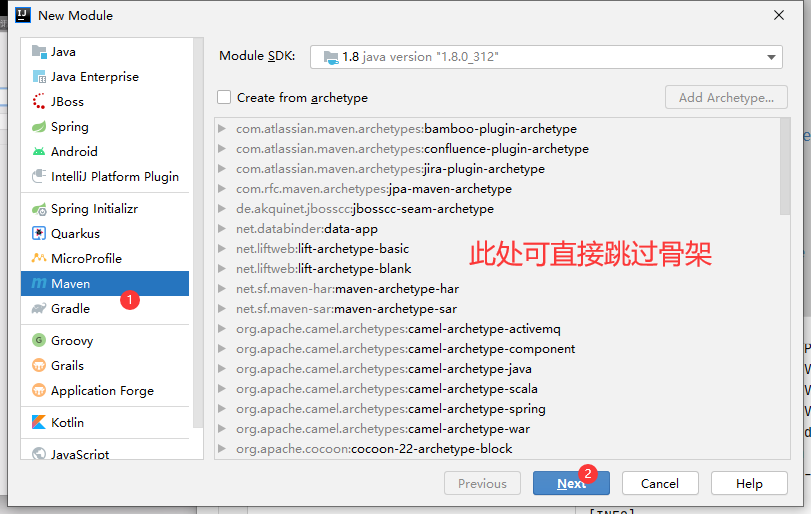
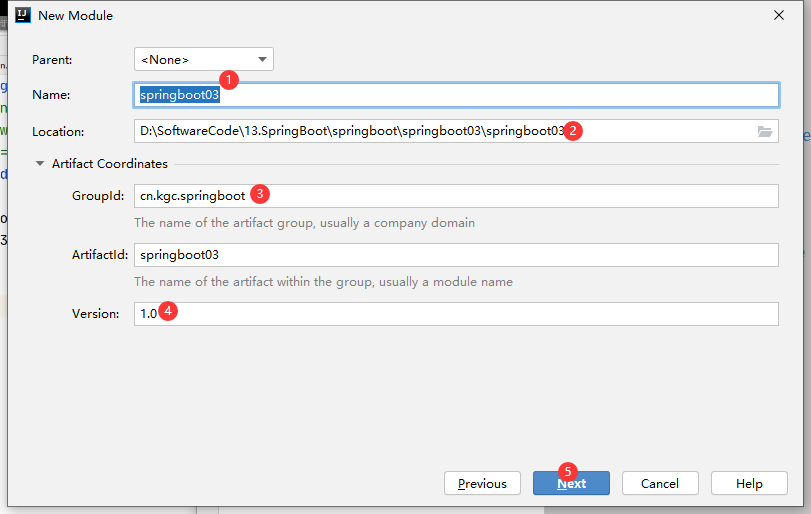
(4)方案四:使用Maven手动创建
①右击springboot–>new–>Module–>Maven–>选择如下
②在该 Maven 项目的 pom.xml 中添加以下配置,导入 Spring Boot 相关的依赖
<!--1.继承springboot的父工程-->
<parent>
    <groupId>org.springframework.boot</groupId>
    <artifactId>spring-boot-starter-parent</artifactId>
    <version>2.7.5</version>
    <relativePath/> <!-- lookup parent from repository -->
</parent>

<dependencies>
    <!--2.构建web环境 spring+springmvc-->
    <dependency>
        <groupId>org.springframework.boot</groupId>
        <artifactId>spring-boot-starter-web</artifactId>
    </dependency>
</dependencies>

<!--3.springboot的打包插件(项目打jar包必要插件)-->
<build>
    <plugins>
        <plugin>
            <groupId>org.springframework.boot</groupId>
            <artifactId>spring-boot-maven-plugin</artifactId>
        </plugin>
    </plugins>
</build>
启动Spring Boot
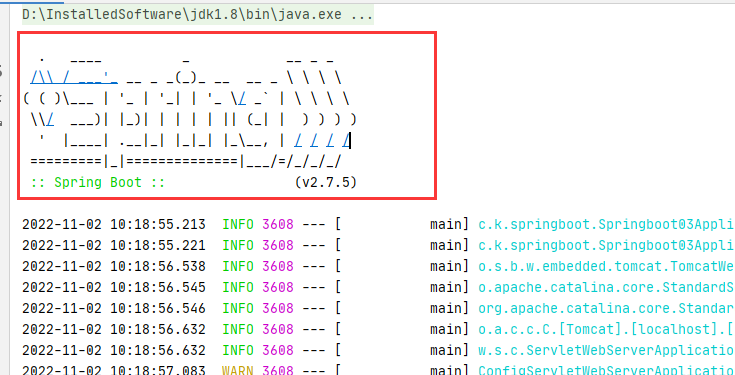
默认情况下,Spring Boot项目会创建一个名为***Application的主程序启动类(例如创建springboot03Application.java),该类中使用了一个组合注解@SpringBootApplication,用来开启 Spring Boot 的自动配置,另外该启动类中包含一个 main() 方法,用来启动该项目。直接运行启动类springboot03Application.java中的main()方法,便可以启动该项目,结果如下图
(1)在cn.kgc.springboot包下,创建一个名为 Springboot03Application主程序,用来启动 Spring Boot 应用,代码如下
/*
* spring工程启动类
 * 启动类类名规则:XxxApplication
 * 注解@SpringBootApplication :标识当前类是项目的启动类
 *
 * 注解说明: 该注解是组合注解
 * (1) @SpringBootConfiguration    用来自动配置spring相关环境  @Configuration
 * (2) @EnableAutoConfiguration    开启自动配置 核心注解
 * (3) @ComponentScan              开启包扫描    路径:启动类所在的包及其子包
 */
@SpringBootApplication
public class Springboot03Application {
    public static void main(String[] args){
        SpringApplication.run(Springboot03Application.class, args);
    }
}
(2)在cn.kgc.springboot.controller包下,创建一个名为HelloController.java的程序,启动Spring Boot,用于测试
@RestController
@RequestMapping("/hello")
public class HelloController {

    @GetMapping
    public String test1(){
        return "hello springboot";
    }
}
(3)启动Spring Boot,输入请求:http://localhost:8080/hello

@SpringBootApplication注解
注解@SpringBootApplication :标识当前类是项目的启动类
注解说明:该注解是组合注解
(1)@SpringBootConfiguration 用来自动配置spring相关环境 @Configuration
(2)@EnableAutoConfiguration 开启自动配置 核心注解
(3)@ComponentScan 开启包扫描 路径:启动类所在的包及其子包
03-打包SpringBoot成Jar包
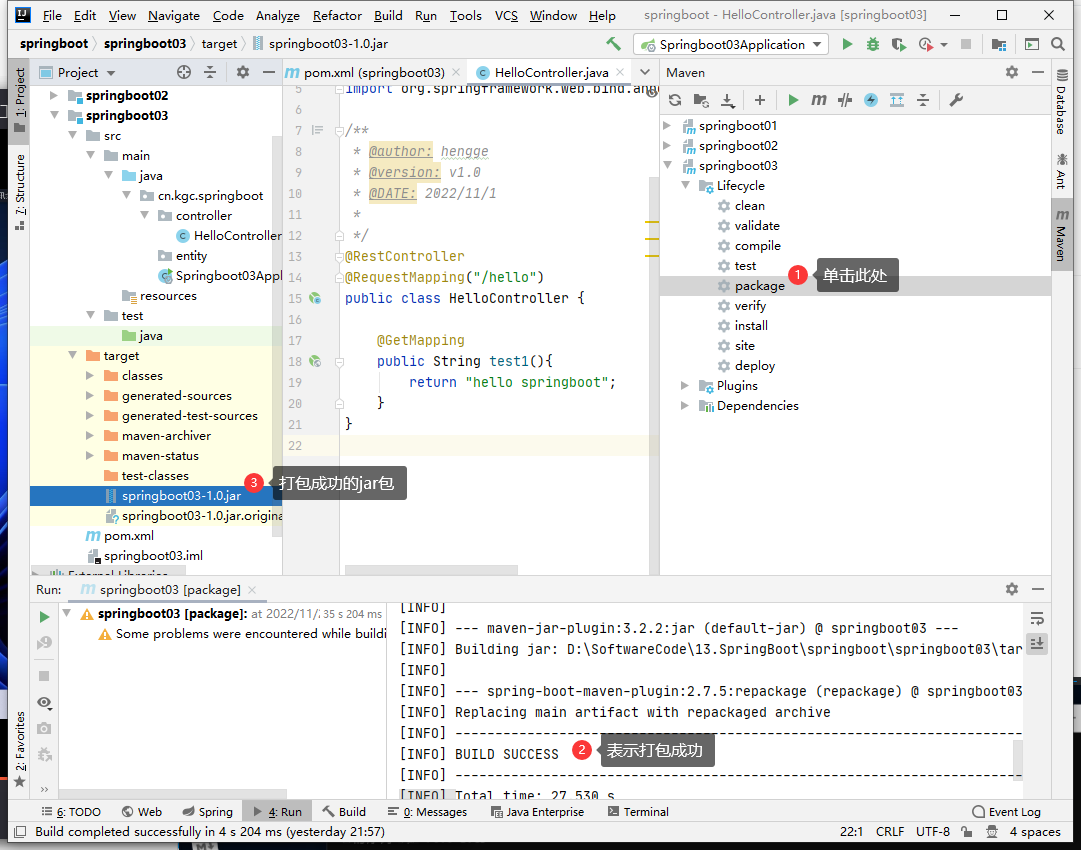
(1)将springboot03打包成jar包:SpringBoot支持我们去打包成jar包,如下图中所示,将项目springboot03打包成jar包(如下③所示),将其保存至指定目录。(此处以F盘为例)
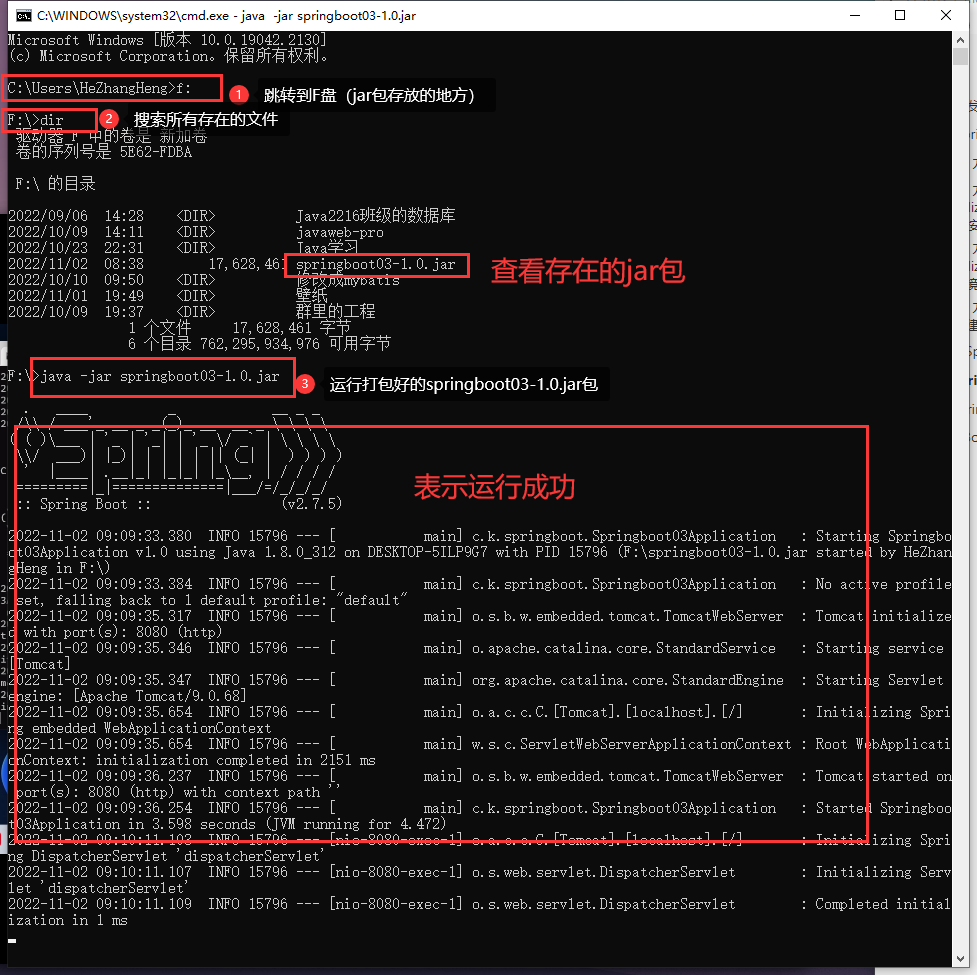
(2)将jar包保存至F盘根目录中,使用win+R输入cmd,打开DOC窗口,在DOC窗口输入以下命令即可运行springboot03的工程。
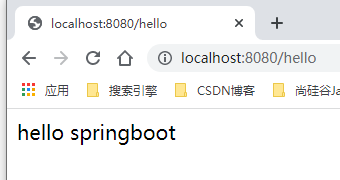
(3)不要关闭DOC窗口,打开网页输入请求路径:http://localhost:8080/hello
04-static和templates目录的区别
在创建SpringBoot项目时,在resources目录下会自动生成static和templates这两个目录:
- static(静态资源目录:CSS、JS、images等) -->可直接访问
- templates(动态模板页面:jsp) -->不能直接访问(相当于WEB-INF)
1-static(静态资源目录)
(1)书写html和css
-
hello.html
<!DOCTYPE html> <html lang="en"> <head> <meta charset="UTF-8"> <title>hello</title> </head> <body> <h1>static中的hello.html</h1> </body> </html> -
test.css
h1{
    color: red;
    font-size: 30px;
}
(2)启动SpringBoot启动类
@SpringBootApplication
public class Springboot03Application {
    public static void main(String[] args) {
        SpringApplication.run(Springboot03Application.class, args);
    }
}
(3)启动后,输入请求地址
- 输入请求地址:localhost:8080/test.css -->可以直接访问
- 输入请求地址:localhost:8080/hello.html -->可以直接访问

2-templates(动态模板)
(1)直接访问不到
-
hello.html
<!DOCTYPE html>
<html lang="en">
<head>
    <meta charset="UTF-8">
    <title>动态页面</title>
</head>
<body>
    <h1>templates hello.html</h1>
</body>
</html>
启动后,输入请求地址:localhost:8080/hello.html,是访问不到templates下的hello.html,只能访问到static下的hello.html
(2)修改,使其能够访问到templates下的hello.html
- ①必须在pom.xml中引入thymeleaf配置:spring-boot-starter-thymeleaf
<!--4.引入thymeleaf模板引擎-->
<dependency>
    <groupId>org.springframework.boot</groupId>
    <artifactId>spring-boot-starter-thymeleaf</artifactId>
</dependency>
- ②新建HtmlConterooler.java
@Controller
@RequestMapping("/html")
public class HtmlController {

    @RequestMapping("temp")
    public String test01(){
        return "hello";
    }

    @RequestMapping("static1")
    public String test02(){
        return "/hello.html";
    }

    @RequestMapping("static2")
    public String test03(){
        return "redirect:/hello.html";
    }
}
-
③启动SpringBoot
1、当注释掉pom.xml中的thymeleaf配置
(1)输入请求路径:http://localhost:8080/html/temp  -->访问失败
(2)输入请求路径:http://localhost:8080/html/static1  -->访问的是static下的hello.html
(3)输入请求路径:http://localhost:8080/html/static2,将重定向至http://localhost:8080/hello.html-->访问的是static下的hello.html

2、当在pom.xml中添加了thymeleaf配置
(1)输入请求路径:http://localhost:8080/html/temp  -->访问的是templates下的hello.html
(2)输入请求路径:http://localhost:8080/html/static1  -->访问的是templates下的hello.html
(3)输入请求路径:http://localhost:8080/html/static2,将重定向至http://localhost:8080/hello.html-->访问的是static下的hello.html
05-SpringBoot基本设置
在SpringBoot中,还是存在配置文件的,其中配置文件命名为application.XXX,存在两种风格,以下将详细介绍两种风格的区别
properties风格和yml风格的区别(配置的格式和位置决定配置文件的优先级)
(1)如果.properties和.yml在同一目录层级下,.properties优先级更高
(2)如果.properties和.yml不在同一目录层级下,config目录中的配置文件优先级高于resources目录下的配置文件
1-properties风格
- 在application.properties中配置
(1)SpringBoot设置端口号
#配置端口
server.port=8001
(2)SpringBoot设置项目名(虚拟路径名)
#配置项目的虚拟路径(根路径) 项目名使用/开头
server.context-path: /springboot
访问请求路径:localhost:8001/springboot/
2-yml风格(建议使用此风格)
(1)SpringBoot设置端口号
server:
  port: 8002 #设置端口号
(2)SpringBoot设置项目名(虚拟路径名)
server:
  servlet:
    context-path: /springboot   #配置项目的虚拟路径(根路径) 项目名使用/开头
上述两个综合(port和servlet同级)
server:
  port: 8989 #配置端口
  servlet:
    context-path: /springboot   #配置项目的虚拟路径(根路径) 项目名使用/开头
3-properties和yml优先级
properties风格和yml风格的区别(配置的格式和位置决定配置文件的优先级)
(1)如果.properties和.yml在同一目录层级下,.properties优先级更高
(2)如果.properties和.yml不在同一目录层级下,config目录中的配置文件优先级高于resources目录下的配置文件
06-关闭启动图标
在启动SpringBoot项目时,控制台会打印图标,要想关闭此图标,可在启动类中书写代码关闭即可
(1)SpringBoot03Application.java
@SpringBootApplication
public class Springboot03Application {
    public static void main(String[] args){
        //关闭启动图标
        SpringApplication springApplication = new SpringApplication(Springboot03Application.class);
        springApplication.setBannerMode(Banner.Mode.OFF);
        springApplication.run(args);
    }
}
07-获取指定名称bean
(1)SpringBoot03Application.java
@SpringBootApplication
public class Springboot03Application {
    public static void main(String[] args){
        //获取指定名称bean
        ConfigurableApplicationContext run = SpringApplication.run(Springboot03Application.class, args);
        HelloController helloController = run.getBean("helloController", HelloController.class);
        System.out.println("helloController = " + helloController);
    }
}
(2)在HelloController.java中添加无参构造,用于显示
@RestController
@RequestMapping("/hello")
public class HelloController {

    //无参构造
    public HelloController(){
        System.out.println("HelloController()");
    }
}
(3)运行springboot03
ller helloController = run.getBean(“helloController”, HelloController.class);
System.out.println("helloController = " + helloController);
}
}
(2)在HelloController.java中添加无参构造,用于显示

```java
@RestController
@RequestMapping("/hello")
public class HelloController {

    //无参构造
    public HelloController(){
        System.out.println("HelloController()");
    }
}
(3)运行springboot03


 1635
1635


 被折叠的 条评论
为什么被折叠?
被折叠的 条评论
为什么被折叠?
 到【灌水乐园】发言


