


画矩形的接口:
// 填充矩形
// ctx.fillRect(20,20,80,80)
// 清楚矩形区域
// ctx.clearRect(30,30,60,60)
// 无填充的矩形
// ctx.strokeRect(20,20,40,40)
渐变色:
注意:要注意渐变色的范围的定义方式!
var gradient = ctx.createLinearGradient(100,0,100,200)
gradient.addColorStop(0.0,"blue")
gradient.addColorStop(0.5,"lightsteelblue")

ctx.fillStyle = gradient
ctx.fillRect(0,0,100,100)
阴影:
- 2D对象的路径可以使用阴影增强显示效果。
- 阴影是一个区域的轮廓线使用偏移量、颜色和模糊来实现的
- 需要指定一个阴影颜色(shadowColor),阴影X轴偏移值(shadowOffsetX),阴影Y轴偏移值(shadowOffsetY)和阴影模糊 (shadowBlur)
- 这些参数的定义都使用2D context来定义。2D context是唯一的 绘制操作接口
ctx.fillStyle = "yellow"
ctx.fillRect(0,0,parent.width,parent.height)

// 定义阴影效果
ctx.shadowColor = "blue"
ctx.shadowOffsetX = 2
ctx.shadowOffsetY = 2
// 模糊程度
ctx.shadowBlur = 10

// 绘制矩形
ctx.fillStyle = "white"
ctx.fillRect(50,50,150,150)
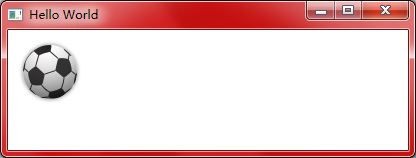
图片:
QML画布支持多种资源的图片绘制。在画布中使用一个图片需要先加载图片资源
ctx.drawImage("qrc:/new/preImg/ball.png",10,10)Component.onCompleted: {
loadImage("qrc:/new/preImg/ball.png")
}这里使用了 Component.onCompleted加载图片资源(这种奇怪的用法...)
裁剪:
在右边我们对足球图片 进行了裁剪
图片或者轮廓路径都可以使用一个路径来裁剪
裁剪需要定义一个裁剪路径,然后调用clip()函数来实现裁剪
在clip()之前所有的绘制操作都会用来进行裁剪
import QtQuick 2.9
import QtQuick.Window 2.2
Window {
visible: true
width: 400
height: 120
title: qsTr("Hello World")
Item {
id: root
anchors.fill: parent
Canvas{
// 画布尺寸
anchors.fill: parent
// 重写 onPaint
onPaint: {
var ctx = getContext("2d")
ctx.drawImage("qrc:/new/preImg/ball.png",10,10)
ctx.save()
ctx.strokeStyle = "red"
// 创建路径
ctx.beginPath()
ctx.moveTo(90,10)
ctx.lineTo(155,10)
ctx.lineTo(125,75)
ctx.closePath()
// ctx.translate(100, 0)
// 裁剪
ctx.clip()
ctx.drawImage("qrc:/new/preImg/ball.png",90,10)
ctx.stroke()
ctx.restore()
}
Component.onCompleted: {
    loadImage("qrc:/new/preImg/ball.png")
}
}
}
}

我们对 clip 前面的 2d 对象使用自定义的路径(红色外框的三角形)进行了裁剪!


 126
126


 被折叠的 条评论
为什么被折叠?
被折叠的 条评论
为什么被折叠?
 到【灌水乐园】发言


