


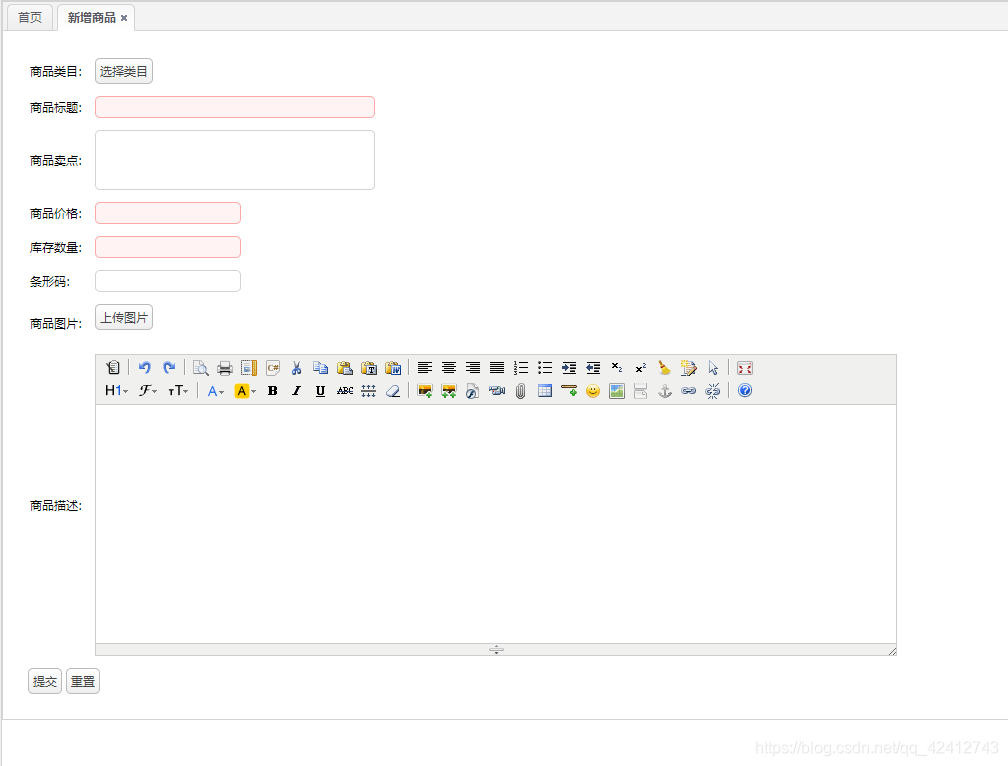
商品添加:
选择类目的功能实现:
创建一个pojo来描述tree的节点信息,包含三个属性id、text、state。放到e3-common工程中。
public class EasyUITreeNode implements Serializable {

	private long id;
	private String text;
	private String state;
	public long getId() {
		return id;
	}
	public void setId(long id) {
		this.id = id;
	}
	public String getText() {
		return text;
	}
	public void setText(String text) {
		this.text = text;
	}
	public String getState() {
		return state;
	}
	public void setState(String state) {
		this.state = state;
	}

}
interface:
public interface ItemCatService {

	List<EasyUITreeNode> getItemCatlist(long parentId);
}
service:
参数:long parentId
业务逻辑:
1、根据parentId查询节点列表
2、转换成EasyUITreeNode列表。
3、返回。
返回值:List
/**
 * 商品分类管理
 * <p>Title: ItemCatServiceImpl</p>
 * <p>Description: </p>
 * <p>Company: www.itcast.cn</p>
 * @version 1.0
 */
@Service
public class ItemCatServiceImpl implements ItemCatService {

	@Autowired
	private TbItemCatMapper itemCatMapper;

	@Override
	public List<EasyUITreeNode> getItemCatlist(long parentId) {
		//根据parentId查询子节点列表
		TbItemCatExample example = new TbItemCatExample();
		Criteria criteria = example.createCriteria();
		//设置查询条件
		criteria.andParentIdEqualTo(parentId);
		//执行查询
		List<TbItemCat> list = itemCatMapper.selectByExample(example);
		//创建返回结果List
		List<EasyUITreeNode> resultList = new ArrayList<>();
		//把列表转换成EasyUITreeNode列表
		for (TbItemCat tbItemCat : list) {
			EasyUITreeNode node = new EasyUITreeNode();
			//设置属性
			node.setId(tbItemCat.getId());
			node.setText(tbItemCat.getName());
			node.setState(tbItemCat.getIsParent()?"closed":"open");
			//添加到结果列表
			resultList.add(node);
		}
		//返回结果
		return resultList;
	}

}
controller:
初始化tree请求的url:/item/cat/list
参数:
long id(父节点id)
返回值:json。数据格式
List《EasyUITreeNode》
/**
 * 商品分类管理Controller
 * <p>Title: ItemCatController</p>
 * <p>Description: </p>
 * <p>Company: www.itcast.cn</p>
 * @version 1.0
 */
@Controller
public class ItemCatController {

	@Autowired
	private ItemCatService itemCatService;

	@RequestMapping("/item/cat/list")
	@ResponseBody
	public List<EasyUITreeNode> getItemCatList(
			@RequestParam(name="id", defaultValue="0")Long parentId) {
		//调用服务查询节点列表
		List<EasyUITreeNode> list = itemCatService.getItemCatlist(parentId);
		return list;

	}
}
上传图片功能的实现
使用的是KindEditor的多图片上传插件。
KindEditor 4.x 文档
http://kindeditor.net/doc.php
请求的url:/pic/upload
参数:MultiPartFile uploadFile
返回值:
可以创建一个pojo对应返回值。可以使用map
业务逻辑:
1、接收页面传递的图片信息uploadFile
2、把图片上传到图片服务器。使用封装的工具类实现。需要取文件的内容和扩展名。
3、图片服务器返回图片的url
4、将图片的url补充完整,返回一个完整的url。
5、把返回结果封装到一个Map对象中返回。
准备:
1、需要把commons-io-fileupload 的jar包添加到工程中。
<!-- 文件上传组件 -->
		<dependency>
			<groupId>commons-fileupload</groupId>
			<artifactId>commons-fileupload</artifactId>
		</dependency>
2、配置多媒体解析器。
<!-- 定义文件上传解析器 -->
	<bean id="multipartResolver"
		class="org.springframework.web.multipart.commons.CommonsMultipartResolver">
		<!-- 设定默认编码 -->
		<property name="defaultEncoding" value="UTF-8"></property>
		<!-- 设定文件上传的最大值5MB,5*1024*1024 -->
		<property name="maxUploadSize" value="5242880"></property>
	</bean>
controller层:
/**
 * 图片上传处理Controller
 * <p>Title: PictureController</p>
 * <p>Description: </p>
 * <p>Company: www.itcast.cn</p>
 * @version 1.0
 */
@Controller
public class PictureController {

	@Value("${IMAGE_SERVER_URL}")
	private String IMAGE_SERVER_URL;

	@RequestMapping(value="/pic/upload", produces=MediaType.TEXT_PLAIN_VALUE+";charset=utf-8")
	@ResponseBody
	public String uploadFile(MultipartFile uploadFile) {
		try {
			//把图片上传的图片服务器
			FastDFSClient fastDFSClient = new FastDFSClient("classpath:conf/client.conf");
			//取文件扩展名
			String originalFilename = uploadFile.getOriginalFilename();
			String extName = originalFilename.substring(originalFilename.lastIndexOf(".") + 1);
			//得到一个图片的地址和文件名
			String url = fastDFSClient.uploadFile(uploadFile.getBytes(), extName);
			//补充为完整的url
			url = IMAGE_SERVER_URL + url;
			//封装到map中返回
			Map result = new HashMap<>();
			result.put("error", 0);
			result.put("url", url);
			return JsonUtils.objectToJson(result);
		} catch (Exception e) {
			e.printStackTrace();
			Map result = new HashMap<>();
			result.put("error", 1);
			result.put("message", "图片上传失败");
			return JsonUtils.objectToJson(result);
		}
	}
}
商品添加功能的实现:
功能分析
请求的url:/item/save
参数:表单的数据。可以使用pojo接收表单的数据,要求pojo的属性和input的name属性要一致。
使用TbItem对象接收表单的数据。
TbItem item,String desc
返回值:
Json数据。应该包含一个status的属性。
可以使用E3Result,放到e3-common中。

业务逻辑:
1、生成商品id
实现方案:
a)Uuid,字符串,不推荐使用。
b)数值类型,不重复。日期+时间+随机数20160402151333123123
c)可以直接去毫秒值+随机数。可以使用。
d)使用redis。Incr。推荐使用。
使用IDUtils生成商品id
2、补全TbItem对象的属性
3、向商品表插入数据
4、创建一个TbItemDesc对象
5、补全TbItemDesc的属性
6、向商品描述表插入数据
7、E3Result.ok()
interface层:
E3Result addItem(TbItem item, String desc);
service层:
     /**
	 * 添加商品
	 * <p>Title: addItem</p>
	 * <p>Description: </p>
	 * @param item
	 * @param desc
	 * @return
	 * @see cn.e3mall.service.ItemService#addItem(cn.e3mall.pojo.TbItem, java.lang.String)
	 */
	@Override
	public E3Result addItem(TbItem item, String desc) {
		//生成商品id
		final long itemId = IDUtils.genItemId();
		//补全item的属性
		item.setId(itemId);
		//1-正常,2-下架,3-删除
		item.setStatus((byte) 1);
		item.setCreated(new Date());
		item.setUpdated(new Date());
		//向商品表插入数据
		itemMapper.insert(item);
		//创建一个商品描述表对应的pojo对象。
		TbItemDesc itemDesc = new TbItemDesc();
		//补全属性
		itemDesc.setItemId(itemId);
		itemDesc.setItemDesc(desc);
		itemDesc.setCreated(new Date());
		itemDesc.setUpdated(new Date());
		//向商品描述表插入数据
		itemDescMapper.insert(itemDesc);
		//发送商品添加消息
		jmsTemplate.send(topicDestination, new MessageCreator() {

			@Override
			public Message createMessage(Session session) throws JMSException {
				TextMessage textMessage = session.createTextMessage(itemId + "");
				return textMessage;
			}
		});
		//返回成功
		return E3Result.ok();
	}
controller层:
/**
	 * 商品添加功能
	 */
	@RequestMapping(value="/item/save", method=RequestMethod.POST)
	@ResponseBody
	public E3Result addItem(TbItem item, String desc) {
		E3Result result = itemService.addItem(item, desc);
		return result;
	}
查询商品列表展示
分页插件PageHelper
使用方法
第一步:把PageHelper依赖的jar包添加到工程中。官方提供的代码对逆向工程支持的不好,使用参考资料中的pagehelper-fix。
<dependency>
				<groupId>com.github.pagehelper</groupId>
				<artifactId>pagehelper</artifactId>
				<version>${pagehelper.version}</version>
</dependency>
第二步:在Mybatis配置xml中配置拦截器插件:
<configuration>
	<plugins>
		<plugin interceptor="com.github.pagehelper.PageHelper">
			<!-- 设置数据库类型 Oracle,Mysql,MariaDB,SQLite,Hsqldb,PostgreSQL六种数据库-->
        	<property name="dialect" value="mysql"/>
		</plugin>
	</plugins>
</configuration>
响应的json数据格式EasyUIResult:
public class EasyUIDataGridResult implements Serializable{

	//总条数
	private long total;
	//一页显示10条,显示多少页
	private List rows;
	public long getTotal() {
		return total;
	}
	public void setTotal(long total) {
		this.total = total;
	}
	public List getRows() {
		return rows;
	}
	public void setRows(List rows) {
		this.rows = rows;
	}

}
interface:
EasyUIDataGridResult getItemList(int page, int rows);
service:
参数:int page ,int rows
业务逻辑:查询所有商品列表,要进行分页处理。
返回值:EasyUIDataGridResult
/**
	 * 商品列表查询
	 * <p>Title: getItemList</p>
	 * <p>Description: </p>
	 * @param page
	 * @param rows
	 * @return
	 * @see cn.e3mall.service.ItemService#getItemList(int, int)
	 */
	@Override
	public EasyUIDataGridResult getItemList(int page, int rows) {
		//设置分页信息
		PageHelper.startPage(page, rows);
		//执行查询
		TbItemExample example = new TbItemExample();
		List<TbItem> list = itemMapper.selectByExample(example);
		//创建一个返回值对象
		EasyUIDataGridResult result = new EasyUIDataGridResult();
		result.setRows(list);
		//取分页结果
		PageInfo<TbItem> pageInfo = new PageInfo<>(list);
		//取总记录数
		long total = pageInfo.getTotal();
		result.setTotal(total);
		return result;
	}
controller:
1、初始化表格请求的url:/item/list
2、Datagrid默认请求参数:
1、page:当前的页码,从1开始。
2、rows:每页显示的记录数。
3、响应的数据:json数据。E3Result
@RequestMapping("/item/list")
	@ResponseBody
	public EasyUIDataGridResult getItemList(Integer page, Integer rows) {
		//调用服务查询商品列表
		EasyUIDataGridResult result = itemService.getItemList(page, rows);
		return result;
	}


 2142
2142


 被折叠的 条评论
为什么被折叠?
被折叠的 条评论
为什么被折叠?
 到【灌水乐园】发言


