


1.VSCode按照Remote SSH 插件
2. 添加远程连接输入SSH登录指令
3. 输入密码(注意由于周期之前已经添加过SSH公钥,因此
4. 给开发机按照上插件: python python debugger jupyter
5. 新建python文件
任务一
请实现一个wordcount函数,统计英文字符串中每个单词出现的次数。返回一个字典,key为单词,value为对应单词出现的次数。
Input:
"""Hello world!
This is an example.
Word count is fun.
Is it fun to count words?
Yes, it is fun!"""
Output
{'hello': 1, 'world': 1, 'this': 1, 'is': 4, 'an': 1, 'example': 1, 'word': 1, 'count': 2,
'fun': 3, 'it': 2, 'to': 1, 'words': 1, 'yes': 1}
TIPS:记得先去掉标点符号,然后把每个单词转换成小写。不需要考虑特别多的标点符号,只需要考虑实例输入中存在的就可以
解答
编写代码需要用到的知识点:
- .split(’ ') 返回的是list ( )里面的是分割符
- ‘’.join(a) 返回的是str ‘’l里面是拼接符号
- 哈希表:dict
        if s in hash_tabels:
            hash_tabels[s] += 1
        else:
            hash_tabels[s] = 1
dict.get
if dict.get(key) ==None:
	dict[key] =1
else:
	dict[key]+=1

用 defaultdict(int) 来简化字典的计数过程。在遍历每个单词时,直接增加其计数
  初始化
  word_count = defaultdict(int)
  #赋值并统计次数
  for word in words:
        word_count[word] += 1
- 正则化
#去掉标点符号 替换为''
re.sub(r'[^\w\s]', '', text)
#小写
.lower()
#去除连续空格 只保留一个空格
re.sub(r'\s+', ' ', text)
- 去除’\n’
replace("\n", " ")
思路:
单词是
每一行空格后有标点符号 + ‘\n’
或者没有标点 只有空格+ ‘\n’或者’\n’
如果开头是’\n’:
if input_str.startswith('\n'):
’\n’变为
如果末尾是单词+标点+‘\n’+单词(下一行):去除标点后得到’\n’:‘\n’替换为空格后->如果换行符后是顶格单词,就是单词+空格+单词
如果末尾是单词+’\n’:+单词 得到:单词+空格+单词
如果末尾是单词+标点+‘\n’+空格+ 单词:
去除标点后得到’\n’:'\n’替换为空格后->就是单词+空格+空格+单词
所以最后要去除连续空格,留下一个空格
import re
import string
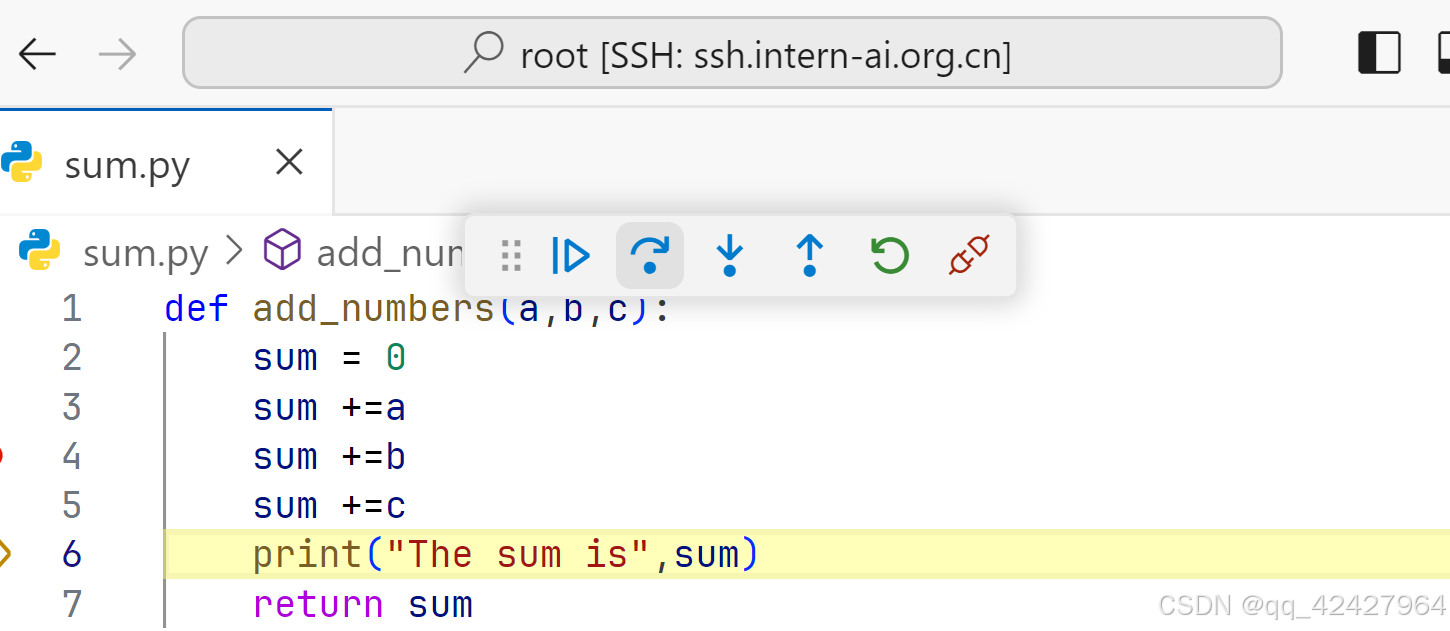
def add_numbers(a,b,c):
sum = 0
sum +=a
sum +=b
sum +=c
print("The sum is",sum)
return sum
def remove_punctuation(input_str:string)->list:
strs = re.sub(r'[^\w\s]', '',input_str)
strs = strs.replace("\n", " ")
strs = re.sub(r'\s+', ' ', strs)
print(strs.split(' '))
return strs.split(' ')
def lowercase(input_str)->str:
print(input_str.lower())
return input_str.lower()
def wordcount(S:list):
hash_tabels = {}
for s in S:
if s in hash_tabels:
hash_tabels[s] += 1
else:
hash_tabels[s] = 1
return hash_tabels
if __name__ == '__main__':
x,y,z = 1,2,3
result = add_numbers(1,2,3)
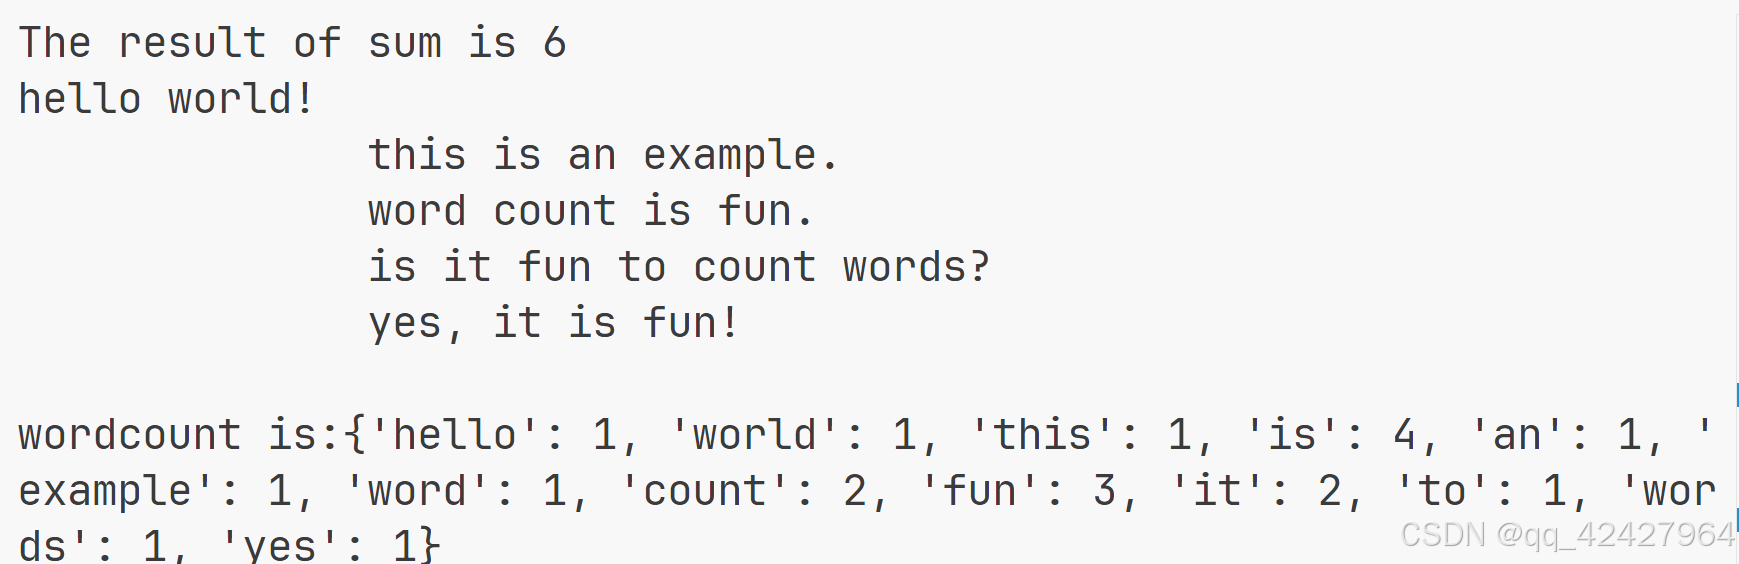
print("The result of sum is",result)
text = """Hello world!
This is an example.
Word count is fun.
Is it fun to count words?
Yes, it is fun!"""
text = lowercase(text)
text = remove_punctuation(text)
print(f'\nwordcount is:{wordcount(text)}')
最后输出
```python
hello world!
this is an example.
word count is fun.
is it fun to count words?
yes, it is fun!
['hello', 'world', 'this', 'is', 'an', 'example', 'word', 'count', 'is', 'fun', 'is', 'it', 'fun', 'to', 'count', 'words', 'yes', 'it', 'is', 'fun']
wordcount is:{'hello': 1, 'world': 1, 'this': 1, 'is': 4, 'an': 1, 'example': 1, 'word': 1, 'count': 2, 'fun': 3, 'it': 2, 'to': 1, 'words': 1, 'yes': 1}
```\
vscode输出:
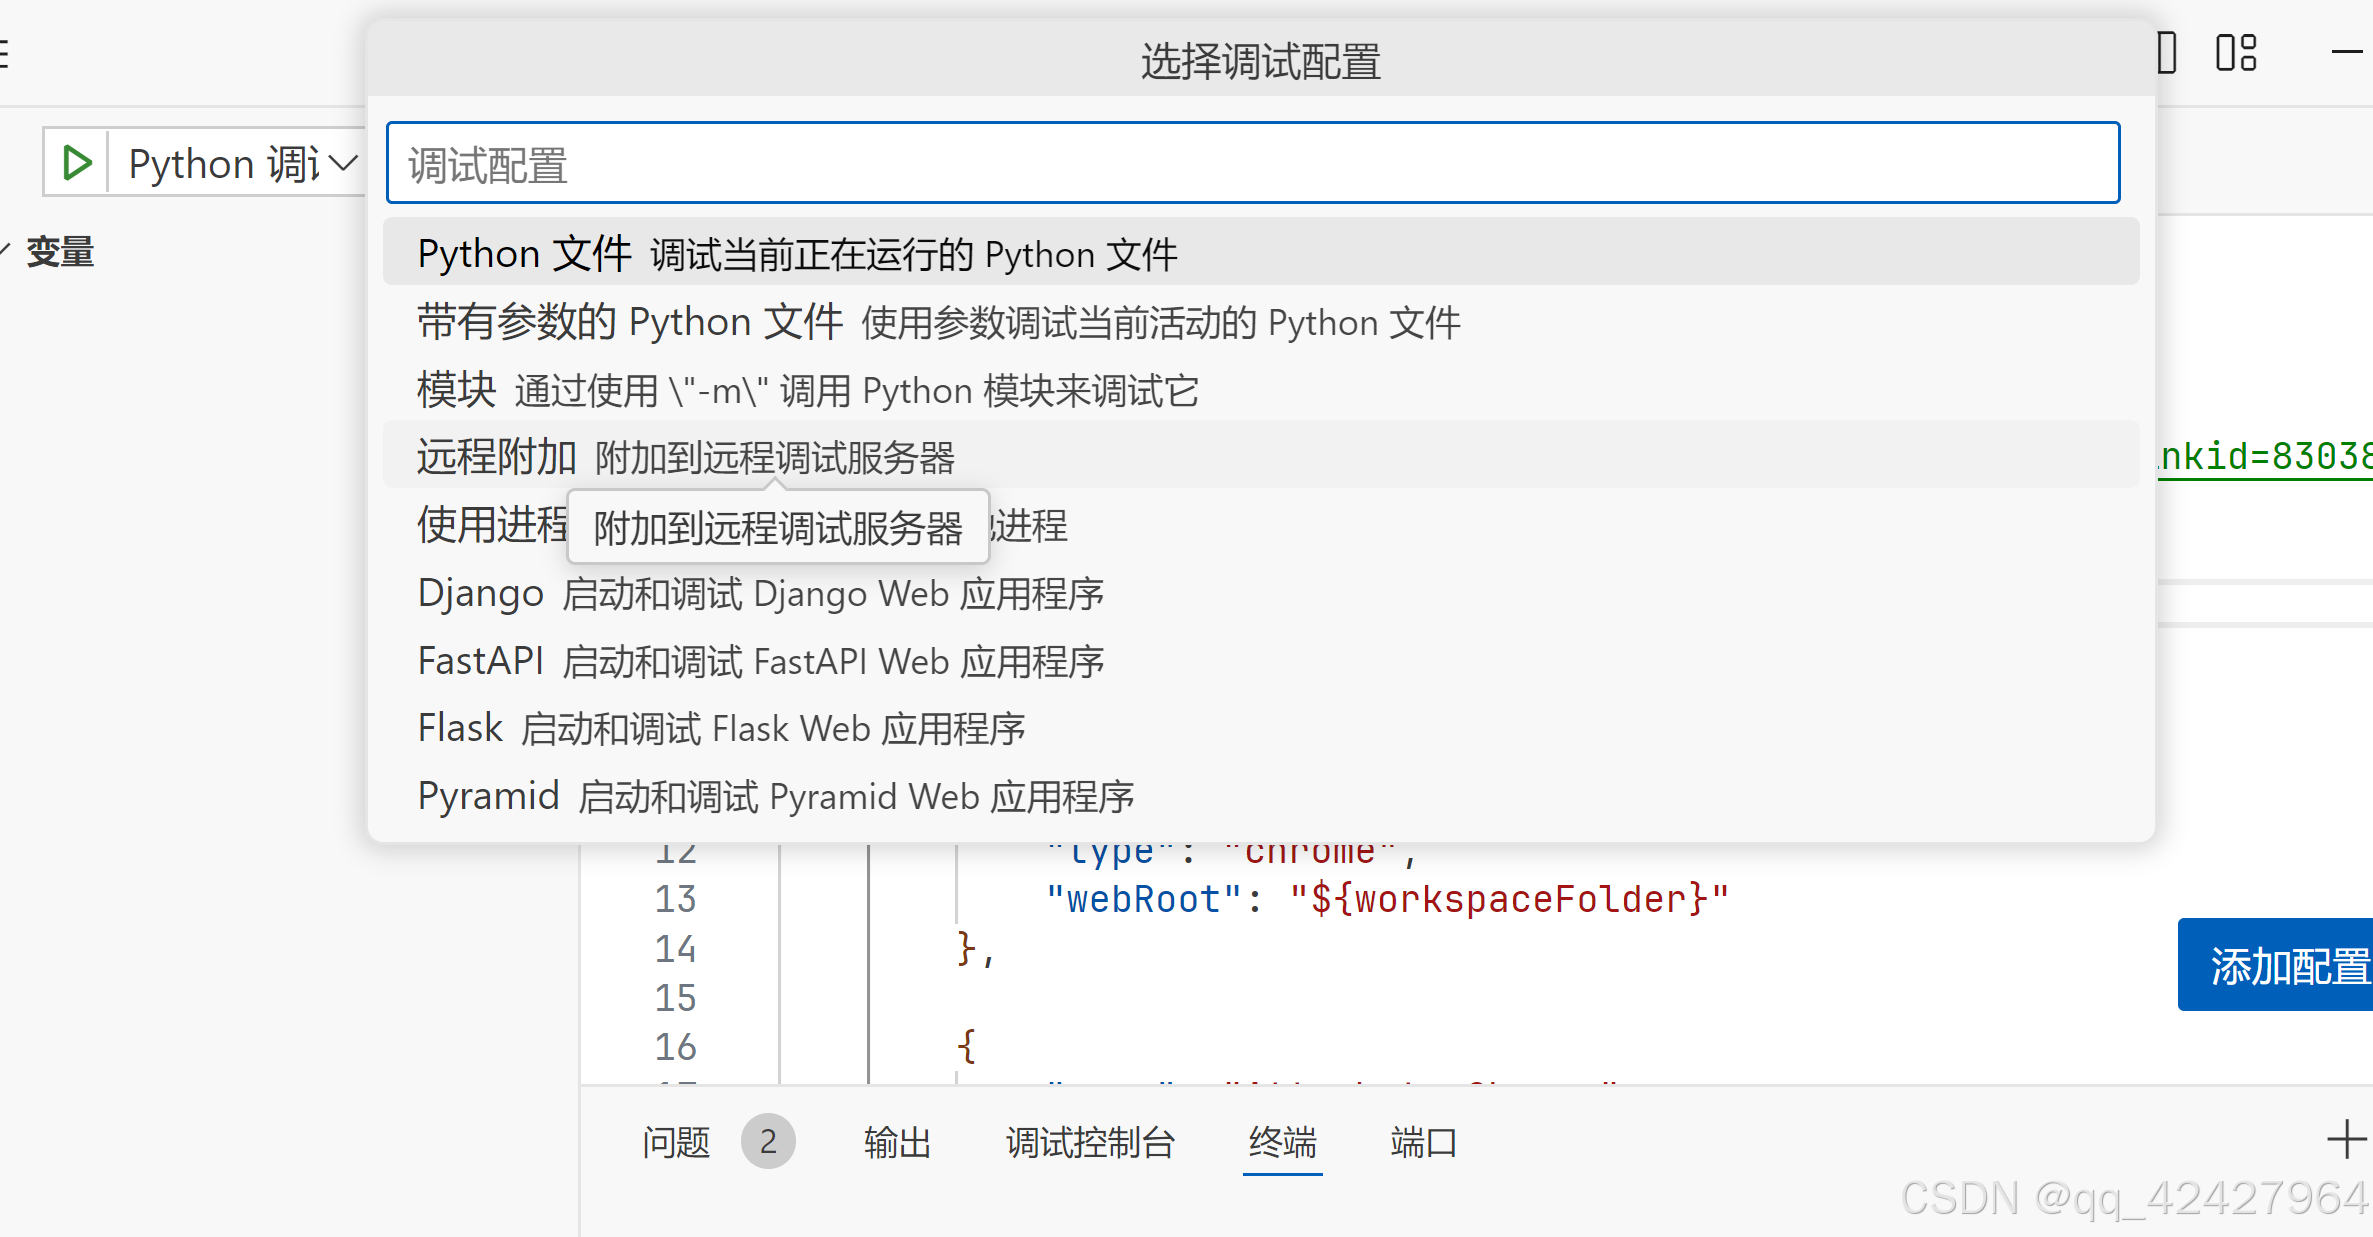
## Vscode连接InternStudio debug
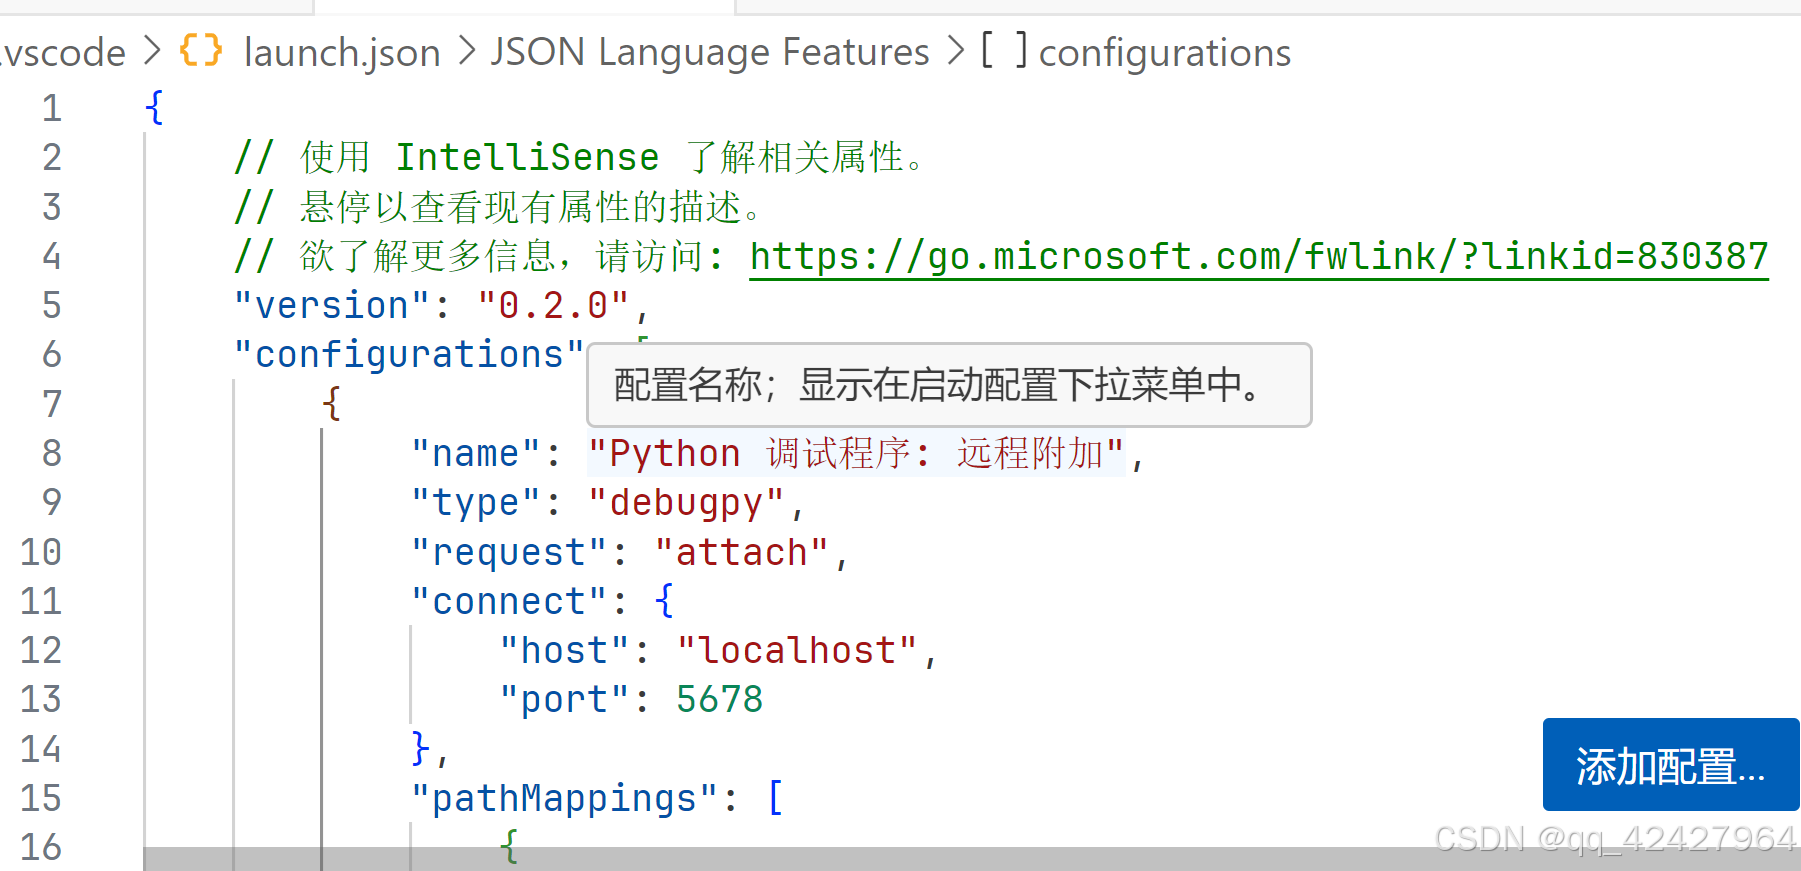
1. 通过remote的方法连接我们在命令行中发起的debug server。首先我们要配置一下debug的config
2. 点击VSCode侧边栏的“Run and Debug”(运行和调试),单击"create a lauch.json file"
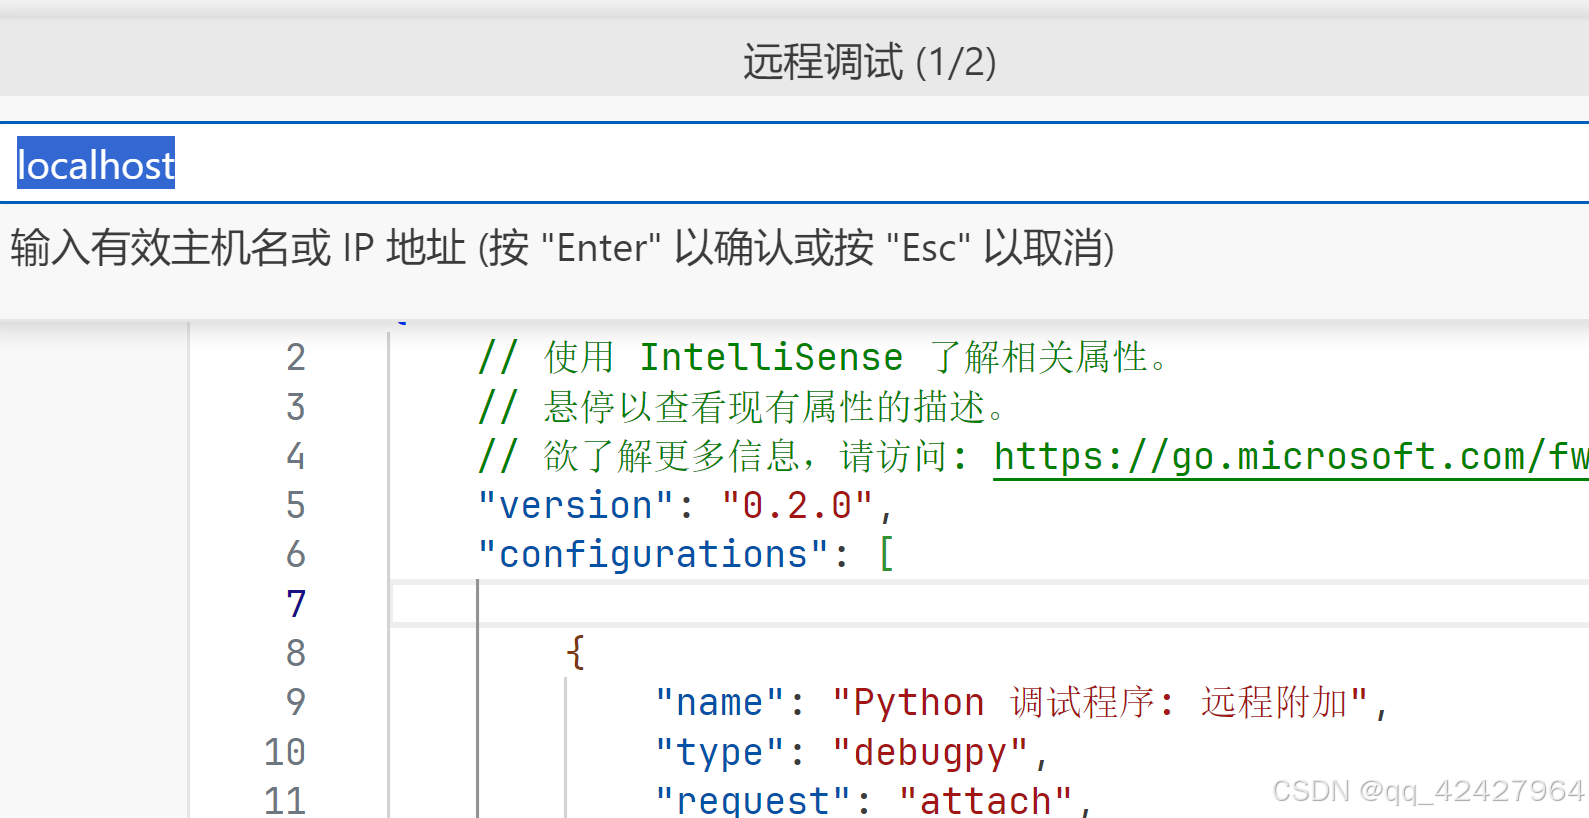
3. 选择debugger时选择python debuger。选择debug config时选择remote attach就行,随后会让我们选择debug server的地址,因为我们是在本地debug,所以全都保持默认直接回车就可以了,也就是我们的server地址为localhost:5678。
4. 点添加配置,选第一个python debug
生成json
选择python debug remote attach 点绿色箭头

发现调试界面 原来的停止红色变为
采用命令行debug:
```python
python -m debugpy --listen 5678 --wait-for-client ./myscript.py
./myscript.py可以替换为我们想要debug的python文件,后面可以和直接在命令行中启动python一样跟上输入的参数。记得要先在想要debug的python文件打好断点并保存。
–wait-for-client参数会让我们的debug server在等客户端连入后才开始运行debug。在这就是要等到我们在run and debug界面启动debug。

在终端中:发起debug server,然后再去vscode debug页面单击一下绿色箭头开启debug。
python -m debugpy --listen 5678 --wait-for-client这个命令太长了,每次都打很麻烦。这里我们可以给这段常用的命令设置一个别名。
在linux系统中,可以对 ~/.bashrc 文件中添加以下命令
alias pyd='python -m debugpy --wait-for-client --listen 5678'
然后执行
pyd ./myscript.py


 849
849

 被折叠的 条评论
为什么被折叠?
被折叠的 条评论
为什么被折叠?
 到【灌水乐园】发言


