


1.在WEB-INF目录下配置web.xml文件,着重配置DispatcherServlet前端控制器
<?xml version="1.0" encoding="UTF-8"?>
<web-app xmlns:xsi="http://www.w3.org/2001/XMLSchema-instance"
xmlns="http://xmlns.jcp.org/xml/ns/javaee"
xsi:schemaLocation="http://xmlns.jcp.org/xml/ns/javaee
http://xmlns.jcp.org/xml/ns/javaee/web-app_4_0.xsd"
id="WebApp_ID" version="4.0">
  <display-name>SpringMVCLearn</display-name>
  <welcome-file-list>
    <welcome-file>index.html</welcome-file>
    <welcome-file>index.htm</welcome-file>
    <welcome-file>index.jsp</welcome-file>
    <welcome-file>default.html</welcome-file>
    <welcome-file>default.htm</welcome-file>
    <welcome-file>default.jsp</welcome-file>
  </welcome-file-list>
  <servlet>
  <servlet-name>springMvcLearn</servlet-name>
  <servlet-class>org.springframework.web.servlet.DispatcherServlet</servlet-class>
  <!-- SpringMVC的配置文件所在的位置和名称 -->
  <init-param>
  <param-name>contextConfigLocation</param-name>
  <param-value>classpath:springmvc02.xml</param-value>
  </init-param>
  <!-- 自启动 -->
  <load-on-startup>1</load-on-startup>
  </servlet>
  <servlet-mapping>
  <servlet-name>springMvcLearn</servlet-name>
  <!-- SpringMVC拦截所有请求,再进行转发 -->
 <url-pattern>/</url-pattern>
 <!--
 关于web.xml的url映射的小知识:
< url-pattern>/</url-pattern>  会匹配到/login这样的路径型url,不会匹配到模式为*.jsp这样的后缀型url
< url-pattern>/*</url-pattern> 会匹配所有url:路径型的和后缀型的url(包括/login,*.jsp,*.js和*.html等) -->
  </servlet-mapping>
</web-app>
1.1
关于web.xml的url映射的小知识:
< url-pattern>/</url-pattern> 会匹配到/login这样的路径型url,不会匹配到模式为*.jsp这样的后缀型url
< url-pattern>/*</url-pattern> 会匹配所有url:路径型的和后缀型的url(包括/login,*.jsp,*.js和*.html等)
2.在SRC目录下新建SpringMVC配置文件
<?xml version="1.0" encoding="UTF-8"?>
<beans xmlns="http://www.springframework.org/schema/beans"
xmlns:xsi="http://www.w3.org/2001/XMLSchema-instance"
xmlns:mvc="http://www.springframework.org/schema/mvc"
xmlns:context="http://www.springframework.org/schema/context"
xsi:schemaLocation="http://www.springframework.org/schema/beans
http://www.springframework.org/schema/beans/spring-beans.xsd
http://www.springframework.org/schema/mvc
http://www.springframework.org/schema/mvc/spring-mvc.xsd
http://www.springframework.org/schema/context
http://www.springframework.org/schema/context/spring-context.xsd">
<context:component-scan base-package="cn.edu.controller"></context:component-scan>
<mvc:annotation-driven></mvc:annotation-driven>
<bean class="org.springframework.web.servlet.view.InternalResourceViewResolver">
<property name="prefix" value="/"></property>
<property name="suffix" value=".jsp"></property>
</bean>
</beans>
2.1:<mvc:annotation-driven></mvc:annotation-driven>:<!-- 采用注解开发 mvc:annotation-driven这个配置替代了两个bean的配置:处理映射器, 处理适配器 -->
2.2:<bean class="org.springframework.web.servlet.view.InternalResourceViewResolver">
<property name="prefix" value="/"></property>
<property name="suffix" value=".jsp"></property>
</bean>配置视图解析器
2.3 <context:component-scan base-package="cn.edu.controller"></context:component-scan>开启包扫描
3.创建controller(基于注解方式,着重配置映射器与适配器)
3.1注解式的映射器
在spring3.1之前使用org.springframework.web.servlet.mvc.annotation.DefaultAnnotationHandlerMapping注解映射器。
在spring3.1之后使用org.springframework.web.servlet.mvc.method.annotation.RequestMappingHandlerMapping注解映射器。
RequestMappingHandlerMapping注解式映射器,对类中标记@ResquestMapping的方法进行映射,根据ResquestMapping定义的url匹配。ResquestMapping标记的方法,匹配成功返回HandlerMethod对象给前端控制器,HandlerMethod对象中封装url对应的方法Method。从spring3.1版本开始,废除了DefaultAnnotationHandlerMapping的使用,推荐使用RequestMappingHandlerMapping完成注解式处理器映射。
3.2注解式适配器
在spring3.1之前使用org.springframework.web.servlet.mvc.annotation.AnnotationMethodHandlerAdapter注解适配器。
在spring3.1之后使用org.springframework.web.servlet.mvc.method.annotation.RequestMappingHandlerAdapter注解适配器。
RequestMappingHandlerAdapter注解式处理器适配器,对标记@ResquestMapping的方法进行适配。从spring3.1版本开始,废除了AnnotationMethodHandlerAdapter的使用,推荐使RequestMappingHandlerAdapter完成注解式处理器适配。
import org.springframework.stereotype.Controller;
import org.springframework.web.bind.annotation.RequestMapping;
import org.springframework.web.servlet.ModelAndView;

@Controller
public class LoginController {
	@RequestMapping("login")
	public String login() {
		return "login";
	};
	@RequestMapping("first")
	public ModelAndView loginActive(String username,String password){
		ModelAndView view=new ModelAndView();
		System.out.println(username);
		System.out.println(password);
		if("四维空间".equals(username) && "123".equals(password)) {
			view.addObject("username",username);
			view.setViewName("success");
		}else {
			view.addObject("error", "用户名或密码错误!");
			view.setViewName("login");
		};
		return view;
	};


}
4.编写JSP
4.1 login.jsp文件如下
<%@ page language="java" contentType="text/html; charset=UTF-8"
    pageEncoding="UTF-8"%>
<%@ taglib uri="http://java.sun.com/jsp/jstl/core" prefix="c" %>
<!DOCTYPE html>
<html>
<head>
<meta charset="UTF-8">
<title>Insert title here</title>
</head>
<body>
${error}
<form action="first" method="get">
用户名:<input type="text" name="username"></br>
密码:<input type="password" name="password"></br>
<input type="submit" value="提交">
</form>
</body>
</html>
4.2 success.jsp文件如下
<%@ page language="java" contentType="text/html; charset=UTF-8"
pageEncoding="UTF-8"%>
<%@ taglib uri="http://java.sun.com/jsp/jstl/core" prefix="c" %>
<!DOCTYPE html>
<html>
<head>
<meta charset="UTF-8">
<title>Insert title here</title>
</head>
<body>
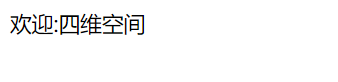
欢迎:${username}
</body>
</html>5.结果展示


 233
233


 被折叠的 条评论
为什么被折叠?
被折叠的 条评论
为什么被折叠?
 到【灌水乐园】发言


