


参考自:链接: 黑马程序员
从视频P251-P274
目录
CSS高级技巧
1 精灵图 (CSS Sprites)
网页中图像过多时。服务器会频繁地接收个发送请求图片,造成服务器压力过大,大大降低了页面的加载速度。
- 有效地减少服务器接收和发送请求的次数,提高页面的加载速度。
- 针对背景图片,将多个小背景图片整合到一张大图片中。
1.1 精灵图的使用
- 以整张大图片的左上角为原点。
- 使用 background-position 移动背景图片位置 。
- 一般情况下精灵图都是负值 。
1.2 精灵图的缺点
- 图片文件较大。
- 图片放大缩小会失真。
- 更换图片很复杂。
2 字体图标 (iconfont)
用于显示网页中结构和样式比较简单的小图标。
展示的是图标,本质属于字体。
使用分为三步:
1、下载字体图标;
2、引入字体图标;
3、追加字体图标。
2.1 优点
- 减少了服务器请求: 图标字体比图像小,一旦字体加载了,图标就会马上渲染出来。
- 灵活: 本质是文字,可以随意改变样式。
- 兼容性好
- 但是不能替代精灵技术
2.2 字体图标的下载
- icomoon 字库【需科学上网】
- 阿里 iconfont 字库
2.3 字体图标的引入
1、把下载包里的 fonts 文件夹放入页面根目录下。
2、在 css 样式中全局声明字体。
使用下面的代码 或 在下载字体图标的文件中打开style.css,截取一段。

<style>
	@font-face {
	font-family: 'icomoon';
	src: url('fonts/icomoon.eot?7kkyc2' );
	src: url('fonts/icomoon.eot?7kkyc2#iefix') format ('embedded-opentype'),
	url('fonts/icomoon.ttf?7kkyc2') format('truetype'),
	url('fonts/icomoon.woff?7kkyc2') format('woff'),
	url('fonts/icomoon.svg?7kkyc2#icomoon') format('svg');
	font-weight: normal;
	font-style: normal;
	}
</style>
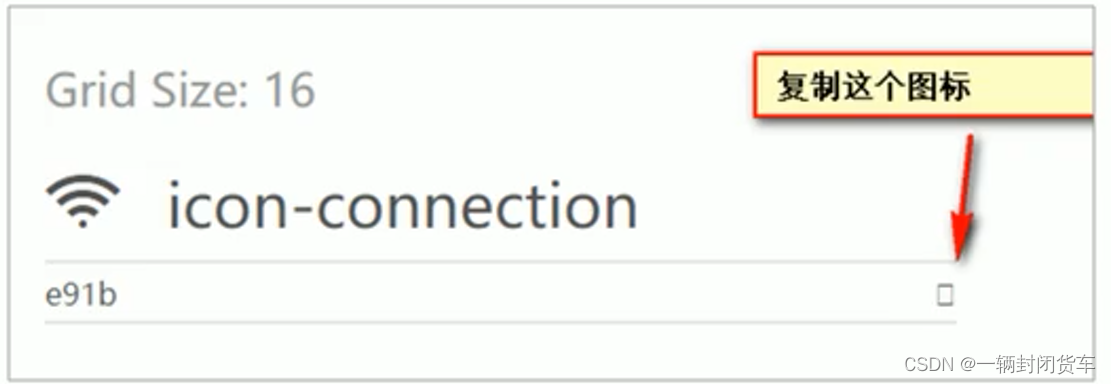
3、html标签内添加小图标。
找到demo.html,复制图标插入html。
4、声明字体
选择器 { font-family: icomoon; }
2.4 字体图标的追加
点开下载字体图标的网址–>点击 IcoMoon App–>Import Icons–>选择 selection.json 文件上传–>选择要追加的字体图标
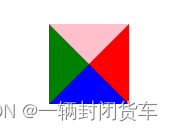
3 CSS三角
每个盒子的边框本质都是三角。
<!DOCTYPE html>
<html lang="zh">

<head>
    <meta charset="UTF-8">
    <meta http-equiv="X-UA-Compatible" content="IE=edge">
    <meta name="viewport" content="width=device-width, initial-scale=1.0">
    <title>Document</title>
    <style>
        .box {
            width: 0;
            height: 0;
            border-top: 10px solid pink;
            border-right: 10px solid red;
            border-bottom: 10px solid blue;
            border-left: 10px solid green;
            margin: 200px auto;
        }
    </style>
</head>

<body>
    <div class="box"></div>
</body>
</html>
4 CSS用户界面样式
更改一些用户操作样式,以便提高更好地用户体验。
- 更改用户的鼠标样式
- 表单轮廓
- 防止表单域拖拽
4.1 鼠标样式 cursor
li {cursor: pointer; }
| 属性值 | 描述 |
|---|---|
| default | 默认 |
| pointer | 小手 |
| move | 移动 |
| text | 文本 |
| not-allow | 禁止 |
4.2 轮廓线 outline
{outline: none/0; } 去掉默认的蓝色边框。
4.3 防止表单域拖拽 resize
textarea { resize:none; }
5 vertical-align 属性应用
用于设置元素的垂直对齐方式,仅对行内元素和行内块元素有效。
vertical-align : baseline | top | middle | bottom
| 值 | 描述 |
|---|---|
| baseline | 默认。元素放置在父元素的基线上 |
| top | 元素的顶端和行内最高元素的顶端对齐 |
| middle | 元素放置在父元素的中部 |
| bottom | 元素的底端和行内最低元素的顶端对齐 |
5.1 实现行内块和文字垂直居中

5.2 解决图片底部默认空白缝隙问题
图片默认和文字的 基线 对齐。
- 给图片添加 vertical-align: middle | top | bottom
- 把图片转换为块元素 display:block;(会影响布局)。
5.3 单行文本溢出显示省略号
满足三个条件:
    <style>
        p {
            /* 1、强制一行内显示文本*/
            white-space: nowrap;
            /* 2、超出的部分隐藏 */
            overflow: hidden;
            /* 3、文字用省略号替代超出的部分 */
            text-overflow: ellipsis;
        }
    </style>
5.4 多行文本溢出显示省略号
兼容性有较大问题,较适用于webKit浏览器或移动端。
    <style>
        p {
            overflow: hidden;
            text-overflow: ellipsis;
            /* 弹性伸缩盒子模型显示 */
            display: -webkit-box;
            /* 限制在一个块元素显示的文本的行数 第二行之后就可以显示省略号了*/
            -webkit-line-clamp: 2;
            /* 设置或检索伸缩盒对象的子元素的排列方式 */
            -webkit-box-orient: vertical;
        }
    </style>
6 常见布局技巧
6.1 margin负值
- 让 list 的 border 从重叠在一起的样子变为不重叠。
    <style>
        ul li {
            list-style: none;
            float: left;
            width: 100px;
            height: 200px;
            border: 1px solid red;
            margin-left: -1px;
        }
    </style>


6.2 文字围绕浮动元素

- 完成这项布局不需要分为左右两个盒子,只需要放一个左侧盒子并且加上浮动即可,浮动创造之的目的就是实现文字围绕效果。
6.3 行内块巧妙运用
- 页码的布局

<!DOCTYPE html>
<html lang="zh">
<head>
<meta charset="UTF-8">
<meta http-equiv="X-UA-Compatible" content="IE=edge">
<meta name="viewport" content="width=device-width, initial-scale=1.0">
<title>Document</title>
<style>
* {
margin: 0;
padding: 0;
}
.box a {
display: inline-block;
width: 36px;
height: 36px;
background-color: #f7f7f7;
border: 1px solid #ccc;
text-align: center;
text-decoration: none;
line-height: 36px;
font-size: 14px;
}
.box {
text-align: center;
}
.box .prev,
.box .next {
width: 85px;
}
.box .current,
.box .elp {
border: none;
background-color: #fff;
}
.box input {
height: 36px;
width: 45px;
border: 1px solid #ccc;
outline: none;
}
.box button {
width: 60px;
height: 36px;
background-color: #f7f7f7;
border: 1px solid #ccc;
}
</style>
</head>
<body>
<div class="box">
<a href="#" class="prev"><<上一页</a>
<a href="#" class="current">2</a>
<a href="#">3</a>
<a href="#">4</a>
<a href="#">5</a>
<a href="#">6</a>
<a href="#" class="elp">...</a>
<a href="#" class="next">>>下一页</a>
到第
<input type="text">
页
<button>确定</button>
</div>
</body>
</html>
6.4 CSS三角强化
- 做成这种效果


    <style>
        /* 简化代码 */
        div {
            width: 0;
            height: 0;
            /* 1、只保留右边的边框有颜色 */
            border-color: transparent blue transparent transparent;
            /* 2、样式都是solid */
            border-style: solid;
            /* 3、上边框宽度要大于右边框,将三角形挤开,其余边框为0 */
            border-width: 100px 50px 0 0;
        }
    </style>
7 CSS初始化
重设浏览器的样式,也称CSS reset


 334
334


 被折叠的 条评论
为什么被折叠?
被折叠的 条评论
为什么被折叠?
 到【灌水乐园】发言


