


WPF 绑定(Binding)
示例一:当向tb_value1中输入内容时,tb_value2中的内容也会跟着变化;
demo:
<Grid>
        <StackPanel>
            <TextBox Name="tb_value1" ></TextBox>
            <TextBox Name="tb_value2" Text="{Binding ElementName=tb_value1, Path=Text, Mode=TwoWay,UpdateSourceTrigger=PropertyChanged }"></TextBox>
        </StackPanel>
    </Grid>
或者:
<Grid>
        <StackPanel>
            <TextBox Name="tb_value1"></TextBox>
            <TextBox Name="tb_value2"></TextBox>
        </StackPanel>
    </Grid>
Binding bing = new Binding();
            bing.Source = tb_value1;
            bing.Path = new PropertyPath("Text");
            bing.Mode = BindingMode.OneWay;
            tb_value2.SetBinding(TextBox.TextProperty, bing);
代码取消绑定:
BindingOperations.ClearAllBindings(tb_value2);
示例二:
<Grid>
        <StackPanel>
            <TextBlock Name="tb_Msg" Text="Hello World" Margin=" 10" Foreground="{Binding ElementName=listbox, Path=SelectedItem.Tag}"></TextBlock>
            <Separator></Separator>
            <ListBox Name="listbox" Margin="10">
                <ListBoxItem Tag="Blue">Blue</ListBoxItem>
                <ListBoxItem Tag="Green">Green</ListBoxItem>
                <ListBoxItem Tag="Red">Red</ListBoxItem>
            </ListBox>
        </StackPanel>
    </Grid>
示例三:双向绑定
<Window x:Class="WPF0320.MainWindow"
        xmlns="http://schemas.microsoft.com/winfx/2006/xaml/presentation"
        xmlns:x="http://schemas.microsoft.com/winfx/2006/xaml"
        Title="MainWindow" Height="350" Width="525">
    <Grid>
        <StackPanel>
            <Slider Margin="10" Name="slider1" TickFrequency="1" IsSnapToTickEnabled="True" Minimum="0" Maximum="100"></Slider>
            <TextBox Margin="10" Text="{Binding ElementName=slider1, Path=Value, Mode=TwoWay, UpdateSourceTrigger=PropertyChanged}"></TextBox>
        </StackPanel>
    </Grid>
</Window>
四.使用RelativeSource相对于本身或者父元素的绑定
例如:下面这两句都是将按钮的内容绑定到自身的高度,第二个就是使用RelativeSource实现的。
<Button Height="30" Margin="10" Name="btnOK" Content="{Binding ElementName=btnOK, Path=Height}"></Button>
<Button Height="30" Margin="10" Name="btnON" Content="{Binding RelativeSource={RelativeSource Mode=Self}, Path=Height}"></Button>
下面举例获取父元素的属性:最终按钮上显示的内容是15,15,15,15;
<StackPanel Margin="15" Name="sp1">
            <Button Height="30" Margin="10" Name="btnON" Content="{Binding RelativeSource={RelativeSource Mode=FindAncestor, AncestorType=StackPanel}, Path=Margin}"></Button>
        </StackPanel>
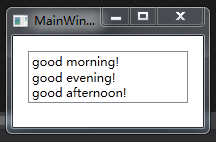
五.使用ItemsSource绑定集合元素
窗体XAML代码:
<Window x:Class="WPF0417.MainWindow"
        xmlns="http://schemas.microsoft.com/winfx/2006/xaml/presentation"
        xmlns:x="http://schemas.microsoft.com/winfx/2006/xaml"
        Title="MainWindow" Height="350" Width="525">
    <Grid>
        <StackPanel Margin="15" Name="sp1">
            <ListBox ItemsSource="{Binding ObjCollections}">

            </ListBox>
        </StackPanel>
    </Grid>
</Window>
窗体后台代码:
public partial class MainWindow : Window
    {
        public MainWindow()
        {
            InitializeComponent();

            objCollections.Add("good morning!");
            objCollections.Add("good evening!");
            objCollections.Add("good afternoon!");

            this.DataContext = this;
        }
        private ObservableCollection<string> objCollections = new ObservableCollection<string>();
        public ObservableCollection<string> ObjCollections
        {
            get { return objCollections; }
            set { objCollections = value; }
        }
    }
执行效果:
六.使用DataContext绑定数据
运行效果:窗体中两个文本框绑定到窗体的宽和高的属性中;

窗体XAML代码:
<Window x:Class="WPF0417.MainWindow"
        xmlns="http://schemas.microsoft.com/winfx/2006/xaml/presentation"
        xmlns:x="http://schemas.microsoft.com/winfx/2006/xaml"
        Title="MainWindow" Height="350" Width="525">
    <Grid>
        <StackPanel>
            <TextBox Name="txt1" Margin="10" Text="{Binding Width}"></TextBox>
            <TextBox Name="txt2" Margin="10" Text="{Binding Height}"></TextBox>
        </StackPanel>
    </Grid>
</Window>
窗体后台代码:
public partial class MainWindow : Window
    {
        public MainWindow()
        {
            InitializeComponent();

            this.DataContext = this;
        }
    }
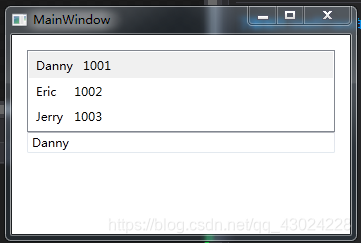
七.与类的结合绑定数据
窗体XAML代码:
<Window x:Class="WPF0417.MainWindow"
        xmlns="http://schemas.microsoft.com/winfx/2006/xaml/presentation"
        xmlns:x="http://schemas.microsoft.com/winfx/2006/xaml"
        Title="MainWindow" Height="350" Width="525">
    <Grid>
        <StackPanel Margin="15" Name="sp1">
            <ListBox ItemsSource="{Binding ObjCollections}" Name="list1">
                <ListBox.ItemTemplate>
                    <DataTemplate>
                        <UniformGrid Columns="2">
                            <TextBlock Text="{Binding Name}" Margin="5"></TextBlock>
                            <TextBlock Text="{Binding Number}" Margin="5"></TextBlock>
                        </UniformGrid>
                    </DataTemplate>
                </ListBox.ItemTemplate>
            </ListBox>
            <TextBox Text="{Binding ElementName=list1, Path=SelectedItem.Name}"></TextBox>
        </StackPanel>
    </Grid>
</Window>
窗体后台代码:
public partial class MainWindow : Window
    {
        public MainWindow()
        {
            InitializeComponent();

            objCollections.Add(new Student() { Name = "Danny",Number = 1001 });
            objCollections.Add(new Student() { Name = "Eric", Number = 1002 });
            objCollections.Add(new Student() { Name = "Jerry", Number = 1003 });

            this.DataContext = this;
        }
        private ObservableCollection<Student> objCollections = new ObservableCollection<Student>();
        public ObservableCollection<Student> ObjCollections
        {
            get { return objCollections; }
            set { objCollections = value; }
        }

        public class Student
        {
            public string Name { get; set; }
            public int Number { get; set; }
        }
    }
运行效果:(选择后在最下面的TextBox中显示)


 11万+
11万+

 被折叠的 条评论
为什么被折叠?
被折叠的 条评论
为什么被折叠?
 到【灌水乐园】发言


