


十、Spring集成web环境
基本三层架构环境搭建
①创建基本的环境架构

创建相应的三层架构,然后分别编写对应的接口以及实现


编写UserServlet类
import javax.servlet.ServletException;
import javax.servlet.http.HttpServlet;
import javax.servlet.http.HttpServletRequest;
import javax.servlet.http.HttpServletResponse;
import java.io.IOException;

public class UserServlet extends HttpServlet {
    @Override
    protected void doGet(HttpServletRequest req, HttpServletResponse resp) throws ServletException, IOException {
        ApplicationContext app = new ClassPathXmlApplicationContext("applicationContext.xml");
        UserService userService = app.getBean(UserService.class);
        userService.save();
    }
}
②配置applicationContext.xml文件以及web.xml文件,分别如下
<?xml version="1.0" encoding="UTF-8"?>
<beans xmlns="http://www.springframework.org/schema/beans"
       xmlns:xsi="http://www.w3.org/2001/XMLSchema-instance"
       xsi:schemaLocation="http://www.springframework.org/schema/beans http://www.springframework.org/schema/beans/spring-beans.xsd">


    <!--配置数据源对象-->
    <bean id="dataSource" class="com.mchange.v2.c3p0.ComboPooledDataSource">
        <property name="driverClass" value="com.mysql.jdbc.Driver"/>
        <property name="jdbcUrl" value="jdbc:mysql://localhost:3306/test/>
        <property name="user" value="root"/>
        <property name="password" value="123456"/>
    </bean>

    <!--配置dao-->
    <bean id="userDao" class="com.itheima.dao.impl.UserDaoImpl"/>

    <!--配置service-->
    <bean id="userService" class="com.itheima.service.impl.UserServiceImpl">
        <property name="userDao" ref="userDao"/>
    </bean>

</beans>
<?xml version="1.0" encoding="UTF-8"?>
<web-app xmlns="http://xmlns.jcp.org/xml/ns/javaee"
         xmlns:xsi="http://www.w3.org/2001/XMLSchema-instance"
         xsi:schemaLocation="http://xmlns.jcp.org/xml/ns/javaee http://xmlns.jcp.org/xml/ns/javaee/web-app_4_0.xsd"
         version="4.0">

    <servlet>
        <servlet-name>UserServlet</servlet-name>
        <servlet-class>com.itheima.web.UserServlet</servlet-class>
    </servlet>
    <servlet-mapping>
        <servlet-name>UserServlet</servlet-name>
        <url-pattern>/userServlet</url-pattern>
    </servlet-mapping>

</web-app>
③编写完毕之后,配置Tomcat环境
点击右上角的Edit Configuration,然后进入下面的配置界面

之后运行Tomcat即可。
ApplicationContext应用上下文获取方式
应用上下文对象是通过 new ClasspathXmlApplicationContext(spring配置文件) 方式获取的,但是每次从容器中获得 Bean 时都要编写 new ClasspathXmlApplicationContext(spring配置文件) ,这样的弊端是配置文件加载多次,应用上下文对象创建多次。
实际上的applicationContext的使用中,需要频繁加载,导致运行速度下降。
public class UserServlet extends HttpServlet {
    @Override
    protected void doGet(HttpServletRequest req, HttpServletResponse resp) throws ServletException, IOException {
        ApplicationContext app = new ClassPathXmlApplicationContext("applicationContext.xml");
        UserService userService = app.getBean(UserService.class);
        userService.save();
    }
}
在 Web 项目中,可以使用 ServletContextListener 监听 Web 应用的启动,我们可以在 Web 应用启动时,就加载 Spring 的配置文件,创建应用上下文对象 ApplicationContext ,在将其存储到最大的域 servletContext 域中,这样就可以在任意位置从域中获得应用上下文 ApplicationContext 对象了。
自定义ContextLoaderListener
实际操作
①创建listener.ContextLoaderListener类,实现ServletContextListener类
public class ContextLoaderListener implements ServletContextListener {

    @Override
    public void contextInitialized(ServletContextEvent servletContextEvent) {
        ApplicationContext app = new ClassPathXmlApplicationContext("applicationContext.xml");
        // 将Spring的应用上下文对象存放到最大的域ServletContext域中
        ServletContext servletContext = servletContextEvent.getServletContext();
        servletContext.setAttribute("app", app);
        System.out.println("Spring容器创建完毕...");
    }

    @Override
    public void contextDestroyed(ServletContextEvent servletContextEvent) {

    }
}
重写第一个方法,用ServletContext类存放应用上下文对象。
②在web.xml文件中配置监听器:将刚才编写的监听器类配置进web.xml文件中
<!--配置监听器-->
<listener>
    <listener-class>com.itheima.listener.ContextLoaderListener</listener-class>
</listener>
③在实际的UserServlet类中,重新编写获取Bean对象的方法
public class UserServlet extends HttpServlet {
    @Override
    protected void doGet(HttpServletRequest req, HttpServletResponse resp) throws ServletException, IOException {
        // ApplicationContext app = new ClassPathXmlApplicationContext("applicationContext.xml");
        // req.getServletContext();
        ServletContext servletContext = this.getServletContext();
        ApplicationContext app = (ApplicationContext) servletContext.getAttribute("app");
        UserService userService = app.getBean(UserService.class);
        userService.save();
    }
}
可以使用两种方法获取到Bean对象,使用了监听器之后,就可以减少加载上下文对象的次数,提高了运行速度。
关于applicationContext.xml文件的解耦合
如果applicationContext文件修改了名称,那么ApplicationContext类中的实例对象也需要跟随一起修改,耦合性比较高。
解耦合这个配置文件,操作如下
①在web.xml文件中添加新的标签,配置全局初始化参数,第二个<param-value>标签中的属性值就是现在applicationContext.xml文件的当前名称,第一个值是用户自定义的全局初始化属性的名称。
<!--全局初始化参数-->
<context-param>
    <param-name>contextConfigLocation</param-name>
    <param-value>applicationContext.xml</param-value>
</context-param>
②在之前出现的应用上下文监听器类中重写的第一个方法中,将ServletContext类提到第一行,之后利用这个对象读取到web.xml中的全局参数
@Override
public void contextInitialized(ServletContextEvent servletContextEvent) {
    ServletContext servletContext = servletContextEvent.getServletContext();
    // 读取web.xml中的全局参数
    String contextConfigLocation = servletContext.getInitParameter("contextConfigLocation");
    ApplicationContext app = new ClassPathXmlApplicationContext(contextConfigLocation);
    // 将Spring的应用上下文对象存放到最大的域ServletContext域中
    servletContext.setAttribute("app", app);
    System.out.println("Spring容器创建完毕...");
}
这样就能够成功实现解耦合applicationContext.xml配置文件。
但是在开发中,servletContext.setAttribute("app", app);这一行代码中的“app"(第一个字符串参数,用户自定义的名称)第一个参数也是耦合程度较高的,在后续的使用中,需要调用这个参数,这个时候我们就应该实现这个参数的解耦合操作,避免后面的使用中耦合程度高。
servletContext.setAttribute的解耦合
①首先我们需要实现这个方法的第一个参数的解耦合,我们需要借助到一个工具。首先创建一个工具类listener.WebApplicationContextUtils
public class WebApplicationContextUtils {

    public static ApplicationContext getApplicationContext (ServletContext servletContext) {
        return (ApplicationContext) servletContext.getAttribute("app");
    }

}
这样创建完毕之后,就可以在其他方法中调用了(静态方法)
②在UserServlet类中,原先的ApplicationContext app = (ApplicationContext) servletContext.getAttribute("app");代码就能够被舍弃不用,转而调用刚才编写的静态方法获取到ApplicationContext对象
public class UserServlet extends HttpServlet {
    @Override
    protected void doGet(HttpServletRequest req, HttpServletResponse resp) throws ServletException, IOException {
        // ApplicationContext app = new ClassPathXmlApplicationContext("applicationContext.xml");
        // req.getServletContext();
        ServletContext servletContext = this.getServletContext();
        // ApplicationContext app = (ApplicationContext) servletContext.getAttribute("app");
        ApplicationContext app = WebApplicationContextUtils.getApplicationContext(servletContext);
        UserService userService = app.getBean(UserService.class);
        userService.save();
    }
}
Spring提供获取应用上下文的工具
上面的分析不用手动实现,Spring 提供 了一个监听器 ContextLoaderListener 就是对 上述功能的封装,该监听器内部加载 Spring 配置文件,创建应用上下文对象,并存储到 ServletContext 域中,提供了一个客户端工具 WebApplicationContextUtils 供使用者获得应用上下文对象。
所以我们需要做的只有两件事:
① 在 web.xml 中配置 ContextLoaderListener 监听器(导入 spring-web 坐标)
② 使用 WebApplicationContextUtils 获得应用上下文对象 ApplicationContext
实际使用过程中,上述的解耦合以及工具包,Spring本身已有提供,我们直接进行使用即可。
①在web.xml文件中配置ContextLoaderListener监听器(需要在pom.xml中导入spring-web坐标)
- 配置全局初始化参数
- 配置监听器
<!--全局初始化参数-->
<context-param>
    <param-name>contextConfigLocation</param-name>
    <param-value>classpath:applicationContext.xml</param-value>
</context-param>

<!--配置监听器-->
<listener>
    <listener-class>org.springframework.web.context.ContextLoaderListener</listener-class>
</listener>
②在web层的UserServlet类中使用WebApplicationContextUtils获取应用上下文对象ApplicationContext,最后利用多态返回一个ApplicationContext类对象
public class UserServlet extends HttpServlet {
    @Override
    protected void doGet(HttpServletRequest req, HttpServletResponse resp) throws ServletException, IOException {
        // ApplicationContext app = new ClassPathXmlApplicationContext("applicationContext.xml");
        // req.getServletContext();
        ServletContext servletContext = this.getServletContext();
        // ApplicationContext app = (ApplicationContext) servletContext.getAttribute("app");
        // ApplicationContext app = WebApplicationContextUtils.getApplicationContext(servletContext);
        ApplicationContext app = WebApplicationContextUtils.getWebApplicationContext(servletContext);
        UserService userService = app.getBean(UserService.class);
        userService.save();
    }
}
十一、SpringMVC的简介

简介
Spring MVC是一种基于Java的实现MVC设计模式的请求驱动类型的轻量级web框架,属于SpringFrameWork的后续产品,已经融合在Spring Web Flow中。
MVC:Model View Controller,模型视图控制器
SpringMVC工作流程

Tomcat服务器在这里进行了三个步骤:①接收客户端请求;②封装代表请求的req、代表响应的resp;③请求调用资源
在web应用层面,所有的web应用分为两部分:特有行为以及共有行为。共有行为可以通过SpringMVC中的前端控制器完成封装,特有行为需要用户根据需要自行编写。
SpringMVC的开发步骤

根据上述的步骤图,实际开发中,一共需要解决六个步骤。
需求:客户端发起请求,服务器端接收请求,执行逻辑并进行视图跳转
①导入SpringMVC坐标
②配置SpringMVC核心控制器DispatcherServlet
③创建Controller类和视图页面
④使用注解配置Controller类中业务方法的映射地址
⑤配置SpringMVC核心文件spring-mvc.xml
⑥客户端发起请求测试
实际使用
需求:客户端发起请求,服务器端接收请求,执行逻辑并进行视图跳转
①导入SpringMVC坐标
<dependency>
    <groupId>org.springframework</groupId>
    <artifactId>spring-web</artifactId>
    <version>5.0.5.RELEASE</version>
</dependency>
在pom.xml导入上述坐标,之后进入下一步
②配置SpringMVC核心控制器DispatcherServlet
在web.xml文件中导入前端控制器,封装公共行为
<!--配置SpringMVC的前端控制器-->
<servlet>
    <servlet-name>DispatcherServlet</servlet-name>
    <servlet-class>org.springframework.web.servlet.DispatcherServlet</servlet-class>
    <load-on-startup>1</load-on-startup>
</servlet>
<servlet-mapping>
    <servlet-name>DispatcherServlet</servlet-name>
    <url-pattern>/</url-pattern><!--缺省值-->
</servlet-mapping>
③创建Controller类和视图页面
创建视图页面:在webapp包下面创建jsp/jspx文件,命名为success.jsp文件
随便编写一点内容测试,代码如下
<%@ page contentType="text/html;charset=UTF-8" language="java" %>
<html>
<head>
    <title>Title</title>
</head>
<body>
    <h1>Success!</h1>
</body>
</html>
④使用注解配置Controller类中业务方法的映射地址
创建controller包,在其中创建UserController类
import org.springframework.stereotype.Controller;
import org.springframework.web.bind.annotation.RequestMapping;

@Controller
public class UserController {

    @RequestMapping("/quick")
    public String save() {
        System.out.println("Controller save running...");
        return "success.jsp";
    }
}
这里使用注解方式配置类中业务方法的映射地址
⑤配置SpringMVC核心文件spring-mvc.xml
但是这样的注解使用需要在xml文件配置注解扫描,为了区分不同层次的业务,我们新建一个spring-mvc.xml文件,编写如下
<!--Controller的组件扫描-->
<context:component-scan base-package="com.itheima.controller"/>
但是仅仅写了spring-mvc.xml文件还不够,还需要加载这个配置文件,根据之前的经验,我们利用之前写的listener包中的应用上下文加载监听器,所以在web.xml文件中编写前端控制器的时候加入这个参数即可。
<!--配置SpringMVC的前端控制器-->
<servlet>
    <servlet-name>DispatcherServlet</servlet-name>
    <servlet-class>org.springframework.web.servlet.DispatcherServlet</servlet-class>
    <init-param>
        <param-name>contextConfigLocation</param-name>
        <param-value>classpath:spring-mvc.xml</param-value>
    </init-param>
    <load-on-startup>1</load-on-startup>
</servlet>
⑥客户端发起请求测试
至此,其他层次业务代码编写完成。现在直接进行Tomcat工程的启动即可。可以发现业务正常启动,在localhost:8080后面输入刚刚的/quick即可进入我们编写的jsp文件,出现 Success!字样,运行成功。
知识总结
在上述的工程中,运行的流程,在用户输入localhost:8080/quick之后,业务的运行逻辑如下

在实际上的SpringMVC项目中,流程图示如下:

发起请求的是红色线条,响应请求的是蓝色线条。整个流程反映了SpringMVC在实际情况中的运行过程。
开发步骤
需求:客户端发起请求,服务器端接收请求,执行逻辑并进行视图跳转
①导入SpringMVC坐标
②配置SpringMVC核心控制器DispatcherServlet
③创建Controller类和视图页面
④使用注解配置Controller类中业务方法的映射地址
⑤配置SpringMVC核心文件spring-mvc.xml
⑥客户端发起请求测试
十二、SpringMVC的组件解析
SpringMVC的执行流程


SpringMVC注解解析

@RequestMapping("/user")
public class UserController {

    // 请求地址 http://localhost:8080/user/quick
    @RequestMapping("/quick")
    public String save() {
        System.out.println("Controller save running...");
        return "/success.jsp";
    }
}
在上述的UserController类中,使用了两个RequestMapping注解,得到访问的地址
@RequestMapping(value = "/quick", method = RequestMethod.GET)
当值有多个的时候,value不能省略,如果仅有一个参数的时候,value可以省略不写,默认参数缺省值就是value
@Controller()
@RequestMapping("/user")
public class UserController {

    // 请求地址 http://localhost:8080/user/quick
    @RequestMapping(value = "/quick", method = RequestMethod.GET,
    params = {"username"})
    // 写了这个params参数之后,想要访问需要加上?username=xxx
    // 最终访问地址是:http://localhost:8080/user/quick?username=xxx
    public String save() {
        System.out.println("Controller save running...");
        return "/success.jsp";
    }
}
关于RequestMapping可以设置的参数,上述的例子的运行结果如下所示:

在输入正常的params约束条件之后,按照正确的参数进行访问,即可以出现相对应的结果。

关于组件扫描,也有三种不同的方式
<!--Controller的组件扫描-->
<!--<context:component-scan base-package="com.itheima.controller"/>-->

<!--Controller组件扫描的两种方式-->
<context:component-scan base-package="com.itheima">
    <context:include-filter type="annotation" expression="org.springframework.stereotype.Controller"/>
</context:component-scan>
在spring-mvc.xml文件中开启组件扫描,我们首先需要设定命名空间。
组件扫描有指定包的扫描方法,也可以整个包下的所有子包以及各自的子类全部扫描,还可以设置两种不同的扫描范畴。
<!--Controller的组件扫描-->
<!--<context:component-scan base-package="com.itheima.controller"/>-->

<!--Controller组件扫描的两种方式,只扫描Controller-->
<context:component-scan base-package="com.itheima">
    <context:include-filter type="annotation" expression="org.springframework.stereotype.Controller"/>
</context:component-scan>

<!--组件扫描,扫描除Controller之外的其他包-->
<context:component-scan base-package="com.itheima">
    <context:exclude-filter type="annotation" expression="org.springframework.stereotype.Controller"/>
</context:component-scan>
根据注释,我们分别扫描的对应的包如上所示。
SpringMVC的XML配置解析
在这种情况下,我们要想访问jsp文件夹下的success.jsp文件,需要如右边的代码一样配置。然而在有多个jsp文件的情况下,这样写会出现多个重复,我们需要配置一下内部资源视图解析器,达到代码复用率高的目的。

我们在spring-mvc.xml文件中添加内部资源视图解析器
<!--配置内部资源视图解析器-->
<bean id="viewResolver" class="org.springframework.web.servlet.view.InternalResourceViewResolver">
    <!--   return "/jsp/success.jsp"   -->
    <property name="prefix" value="/jsp/"/>
    <property name="suffix" value=".jsp"/>
</bean>
在经过这样的配置之后,就可以直接在方法中返回success即可
public String save() {
    System.out.println("Controller save running...");
    return "success";
}
这样配置好内部资源视图解析器之后就可以直接返回文件的名称

知识要点
SpringMVC 的相关组件
- 前端控制器:DispatcherServlet
- 处理器映射器:HandlerMapping
- 处理器适配器:HandlerAdapter
- 处理器:Handler
- 视图解析器:ViewResolver
- 视图:View
SpringMVC的注解和配置
-
请求映射注解:@RequestMapping
-
视图解析器配置:
REDIRECT_URL_PREFIX = "redirect:"
FORWARD_URL_PREFIX = "forward:"
prefix="";
suffix="";
十三、SpringMVC的数据响应
数据响应方式
-
页面跳转
- 直接返回字符串
- 通过ModelAndView对象返回
-
回写数据
- 直接返回字符串
- 返回对象或集合
页面跳转
返回字符串形式

通过ModelAndView对象返回①
使用ModelAndView对象返回的话,需要设置两个对象,一个是Model,一个是View
①创建新的方法,设置一个ModelAndView为返回值的方法
@RequestMapping(value = "/quick2")
// 最终访问地址是:http://localhost:8080/user/quick2
public ModelAndView save2() {
    ModelAndView modelAndView = new ModelAndView();
    /*
    * Model : 作用封装数据
    * View : 作用展示数据
    * */
    // 往View中添加对象数据
    modelAndView.addObject("username", "itcast");

    // 设置 View,值需要设置为jsp的文件名
    modelAndView.setViewName("success-demo");
    return modelAndView;
}
②在设置对应的jsp文件中编辑好返回的对象数据,用表达式作为返回数据
<html>
<head>
    <title>Title</title>
</head>
<body>
    <h1>Success! ${username}</h1>
</body>
</html>
③重新启动Tomcat服务,最终产生的结果如下所示

通过ModelAndView返回②
一、第二种方式,直接在参数列表设置参数
@RequestMapping(value = "/quick3")
// 最终访问地址是:http://localhost:8080/user/quick3
public ModelAndView save3(ModelAndView modelAndView) {
    modelAndView.addObject("username", "itheima");
    modelAndView.setViewName("success-demo");
    return modelAndView;
}
运行结果如下所示:

二、第三种方式,我们将ModelAndView分开设置,不直接创建ModelAndView对象,而是利用Model返回封装的数据,利用String返回视图
@RequestMapping(value = "/quick4")
// 最终访问地址是:http://localhost:8080/user/quick4
public String save4(Model model) {
    model.addAttribute("username", "博学谷");
    return "success-demo";
}
运行结果如下所示:

通过ModelAndView返回③
我们还可以利用HttpServletRequest类调取对象,设置对象数据
@RequestMapping(value = "/quick5")
// 最终访问地址是:http://localhost:8080/user/quick5
public String save5(HttpServletRequest request) {
    // 这种方式是利用Tomcat中的类完成的,脱离了Spring三大框架
    // 在使用时调用了多个部分的内容,所以不常用
    // 开发中我们应该遵从只从尽可能少的地方调取API的目的
    request.setAttribute("username", "雨下一整晚Real");
    return "success-demo";
}
最终运行结果如下所示:

回写数据
直接回写字符串

这个案例中我们直接使用HttpServletResponse进行字符串对象的返回
@RequestMapping(value = "/quick6")
// 最终访问地址是:http://localhost:8080/user/quick6
public void save6(HttpServletResponse response) throws IOException {
    response.getWriter().print("Hello itcast!");
}
运行结果如下所示:

第二种方式就是添加注解,@ResponseBody,告知SpringMVC框架不直接跳转视图,而是进行数据响应
@RequestMapping(value = "/quick7")
@ResponseBody
// 告知SpringMVC框架不进行视图跳转 直接进行数据响应
// 最终访问地址是:http://localhost:8080/user/quick7
public String save7()  {
    return "Hello itheima!";
}
这样设置后,运行结果如下:

直接回写json格式字符串
回写json格式的字符串有两种方式
①直接回写
直接返回json格式的字符串;在写json格式的字符串的时候写转义符即可
@RequestMapping(value = "/quick8")
@ResponseBody
// 最终访问地址是:http://localhost:8080/user/quick8
public String save8()  {
    return "{\"username\":\"zhangsan\" , \"age\": 18}";
}
在实际编写的时候@ResponseBody还是不能去掉,因为本质上还是一个字符串,去掉的话会返回一个名字为返回值的视图,运行结果如下:

②利用json转换工具进行转换实例后返回
一、导入相关的依赖包
在pom.xml文件中导入相关的依赖
<dependency>
    <groupId>com.fasterxml.jackson.core</groupId>
    <artifactId>jackson-core</artifactId>
    <version>2.9.0</version>
</dependency>
<dependency>
    <groupId>org.wso2.orbit.com.fasterxml.jackson.core</groupId>
    <artifactId>jackson-databind</artifactId>
    <version>2.9.0</version>
</dependency>
<dependency>
    <groupId>com.fasterxml.jackson.core</groupId>
    <artifactId>jackson-annotations</artifactId>
    <version>2.9.0</version>
</dependency>
二、创建对应的对象类
public class User {

    private String username;
    private int age;

    public String getUsername() {
        return username;
    }

    public void setUsername(String username) {
        this.username = username;
    }

    public int getAge() {
        return age;
    }

    public void setAge(int age) {
        this.age = age;
    }
}
三、编写实例,返回json格式的字符串
@RequestMapping(value = "/quick9")
@ResponseBody
// 最终访问地址是:http://localhost:8080/user/quick9
public String save9() throws JsonProcessingException {
    User user = new User();
    user.setUsername("lisi");
    user.setAge(20);
    // 利用json格式转换工具将对象转换成json格式的字符串后返回
    ObjectMapper objectMapper = new ObjectMapper();
    String json = objectMapper.writeValueAsString(user);
    return json;
}
利用ObjectMapper中的方法对user对象实例进行json格式字符串的转换
返回对象或集合①
我们这一步的目的是直接配置处理器映射转换器,告诉转换器直接将对象转换成json格式的字符串
①配置处理器映射器
适配器在spring-webmvc框架中存在

<!--配置处理器映射器-->
<bean class="org.springframework.web.servlet.mvc.method.annotation.RequestMappingHandlerAdapter">
    <property name="messageConverters">
        <list>
            <bean class="org.springframework.http.converter.json.MappingJackson2HttpMessageConverter"/>
        </list>
    </property>
</bean>
②在主类中进行调用配置
@RequestMapping(value = "/quick10")
@ResponseBody
// 期待SpringMVC自动将user转换成json格式的字符串
// 最终访问地址是:http://localhost:8080/user/quick10
public User save10() {
    User user = new User();
    user.setUsername("wangwu");
    user.setAge(19);
    return user;
}

返回对象或集合②

<!--配置MVC注解驱动-->
<mvc:annotation-driven/>
知识要点
① 页面跳转
- 直接返回字符串
- 通过 ModelAndView 对象返回
② 回写数据
- 直接返回字符串
- 返回对象或集合
十四、SpringMVC的请求
获得请求参数

获得基本类型参数

按照步骤编写下面的方法,之后访问
@RequestMapping(value = "/quick11")
@ResponseBody
// 最终访问地址是:http://localhost:8080/user/quick11
public void save11(String username, int age) {
    System.out.println(username);
    System.out.println(age);
}
在浏览器中输入相关的参数

此时浏览器内部不打印任何信息,但是在控制台会输出相关的信息

获取POJO类型参数

①首先在User类中添加toString方法
@Override
public String toString() {
    return "User{" +
            "username='" + username + '\'' +
            ", age=" + age +
            '}';
}
②在Controller类中添加新的方法,直接利用对象实例进行数据的操作
@RequestMapping(value = "/quick12")
@ResponseBody
// 最终访问地址是:http://localhost:8080/user/quick12
public void save12(User user) {
    System.out.println(user);
}
③运行Tomcat服务器,获得最终结果


获取数组类型参数
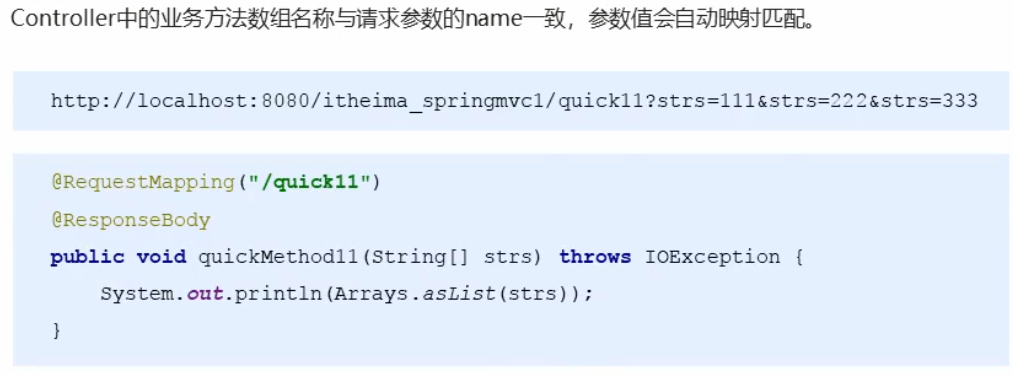
①在Controller中创建新的方法,使用Strs作为方法的参数使用
@RequestMapping(value = "/quick13")
@ResponseBody
// 最终访问地址是:http://localhost:8080/user/quick13
public void save13(String[] strs) {
    System.out.println(Arrays.asList(strs));
}
②在使用的时候请求访问正确的URL地址

③查看运行效果

获得集合类型参数①
①创建集合对象VO类
public class VO {

    private List<User> userList;

    public List<User> getUserList() {
        return userList;
    }

    public void setUserList(List<User> userList) {
        this.userList = userList;
    }
}
②在Controller类中编写新的方法
@RequestMapping(value = "/quick14")
@ResponseBody
public void save14(VO vo) {
    System.out.println(vo);
}
③新建一个表单form.jsp文件,请求方式改成post
<%@ page contentType="text/html;charset=UTF-8" language="java" %>
<html>
<head>
    <title>Title</title>
</head>
<body>
    <form action="${pageContext.request.contextPath}/user/quick14" method="post">
        <%--表明是第一个user对象的username age--%>
        <input type="text" name="userList[0].username"><br/>
        <input type="text" name="userList[0].age"><br/>
        <%--表明是第二个user对象的username age--%>
        <input type="text" name="userList[1].username"><br/>
        <input type="text" name="userList[1].age"><br/>
        <input type="submit" value="提交">
    </form>
</body>
</html>
④重新提交运行,结果如下:


获得集合类型参数②
①编写新的jsp文件,ajax.jsp
导入新的jQuery包,放到指定文件夹之后在xml配置文件中进行配置
<!--开放资源的访问-->
<mvc:resources mapping="/js/**" location="/js/"/>
<html>
<head>
    <title>Title</title>
    <script src="${pageContext.request.contextPath}/js/jquery-3.3.1.js"></script>
    <script>
        var userList = new Array();
        userList.push({username:"zhangsan", age:"18"});
        userList.push({username:"lisi", age:"20"});

        $.ajax({
            type:"POST",
            url:"${pageContext.request.contextPath}/user/quick15",
            data:JSON.stringify(userList),
            contentType:'application/json;charset=UTF-8'
        });
    </script>
</head>
<body>

</body>
</html>
②编写新的方法
@RequestMapping(value = "/quick15")
@ResponseBody
public void save15(@RequestBody List<User> userList) {
    System.out.println(userList);
}
重新启动运行即可
静态资源访问的开启
两种方式开启静态资源的访问
①自主配置
<!--开放对哪些资源的访问-->
<mvc:resources mapping="/js/**" location="/js/"/>
这种方式就是表示开放对哪些资源的访问,将哪些文件夹的访问权限开放,表示允许访问哪些范围内的资源。
②使用默认值
<!--表示交由 Spring 框架寻找静态资源,但是没有找到的话则交由原始容器寻找,
也就是交由 Tomcat 寻找-->
<mvc:default-servlet-handler/>
这种方式就是使用默认的方法访问静态资源,不需要手动配置访问范围,只需要交由专门的框架来访问
请求数据乱码问题

①在web.xml文件中配置全局过滤的filter
<!--配置全局过滤的 filter -->
<filter>
    <filter-name>CharacterEncodingFilter</filter-name>
    <filter-class>org.springframework.web.filter.CharacterEncodingFilter</filter-class>
    <init-param>
        <param-name>encoding</param-name>
        <param-value>UTF-8</param-value>
    </init-param>
</filter>
<filter-mapping>
    <filter-name>CharacterEncodingFilter</filter-name>
    <url-pattern>/*</url-pattern>
</filter-mapping>
②使用form.jsp文件验证结果


参数绑定注解@RequestParam
我们在进行基本数据的获取时,使用URL为localhost:8080/itheima_spring_mvc_war_exploded/user/quick16?username=zhangsan能够正确获取到相对应的数据,但是如果URL中的参数更换名字,则不能获取到正确的参数,只会变成null
因此我们需要进行参数的绑定
①编写相应的方法,进行参数绑定注解
@RequestMapping(value = "/quick16")
@ResponseBody
// 最终访问地址是:http://localhost:8080/user/quick16
public void save16(@RequestParam("name") String username) {
    System.out.println(username);
}
②按照原本的设定,访问地址后面应该加上?username=xxx才能获取到目的数据,但是我们在使用参数绑定注解之后,我们使用name=xxx也能获取到目的数据,完成最终的数据获取


③@RequestParam的其他参数
一、required参数
表示参数是否是必须的,默认值是true,也就是说URL中不存在参数的时候,访问会报错400。如果设置为false时,访问时不带参数则不会报错,后果只是访问到的参数值是null
public void save16(@RequestParam(value = "name", required = false) String username) {
    System.out.println(username);
}
访问的结果如下所示


二、defaultValue参数
表示在没有进行参数value值设置,直接进行访问的时候,默认给与参数的默认值,这个时候即便设置了required参数为ture,也不会发生报错
public void save16(@RequestParam(value = "name", required = ture, defaultValue = "itcast") String username) {
    System.out.println(username);
}
访问结果如下所示


获取Restful风格的参数


①使用时,首先编写新的方法
@RequestMapping(value = "/quick17/{username}")
@ResponseBody
// 最终访问地址是:http://localhost:8080/user/quick17/username
public void save17(@PathVariable(value = "username", required = true) String username) {
    System.out.println(username);
}
②使用{username}占位符,并且使用@PathVariable注解完成对参数的绑定
输入目标URL:http://localhost:8080/itheima_spring_mvc_war_exploded/user/quick17/zhangsan


自定义类型转换器

我们首先来尝试一下日期格式的数据的获取
①编写新的方法,获取到Date格式的数据
@RequestMapping(value = "/quick18")
@ResponseBody
public void save18(Date date) {
    System.out.println(date);
}
②在地址栏输入相关的参数进行访问


这种格式的访问方法是正确的,可以在控制台看到正确的数据显示。
但是因为日期格式每个国家地区访问习惯不一样,如果访问的时候写的数据格式是以下这种格式,则会报错400

这个时候就需要我们使用类型转换器来达到不同格式的数据的访问了,编写步骤如下所示:
①建立新的类,用于编写转换器
public class DateConverter implements Converter<String, Date> {
    @Override
    public Date convert(String dateStr) {
        // 将日期字符串转换成真正的日期对象
        SimpleDateFormat format = new SimpleDateFormat("yyyy-MM-dd");
        Date date = null;
        try {
            date = format.parse(dateStr);
        } catch (ParseException e) {
            e.printStackTrace();
        }
        return date;
    }
}
②在spring-mvc.xml配置文件中声明转换器
<!--声明配置转换器-->
<bean id="conversionService" class="org.springframework.context.support.ConversionServiceFactoryBean">
    <property name="converters">
        <list>
            <bean class="com.itheima.converter.DateConverter"/>
        </list>
    </property>
</bean>
③在mvc:annotation-drive中引用转换器,声明转换器之后需要告诉MVC框架,所以我们在配置注解驱动中添加新的参数
<!--配置MVC注解驱动-->
<mvc:annotation-driven conversion-service="conversionService"/>
这样设置之后,我们就可以正常按照指定格式访问date数据了
运行结果如下所示


获取Servlet相关API
@RequestMapping(value = "/quick19")
@ResponseBody
public void save19(HttpServletRequest request, HttpServletResponse response, HttpSession session) {
    System.out.println(request);
    System.out.println(response);
    System.out.println(session);
}
运行过程及结果如下所示:


获取请求头

我们先请求一个URL,然后在该URL中并不给予相关的方法参数,我们通过开发人员工具可以获取相关的Headers

我们的目的就是获取里面的Headers信息
①编写新的方法
@RequestMapping(value = "/quick20")
@ResponseBody
public void save20(@RequestHeader(value = "User-Agent", required = false) String user_agent) {
    System.out.println(user_agent);
}
②利用注解@RequestHeader,获取到Header中的相关参数
运行访问页面,结果如下:localhost:8080/itheima_ spring_ mvc war exploded/user/quick20

控制台输出的结果为Mozilla/5.0 (Windows NT 10.0; Win64; x64) AppleWebKit/537.36 (KHTML, like Gecko) Chrome/90.0.4430.72 Safari/537.36 Edg/90.0.818.42,与页面开发工具中查询的结果一致

在quick20页面中,我们看到有cookie值。要想获取Cookie中的值,我们要利用@CookieValue这一注解
①编写新的方法@CookieValue
@RequestMapping(value = "/quick21")
@ResponseBody
public void save21(@CookieValue(value = "JSESSIONID") String jSessionId) {
    System.out.println(jSessionId);
}
②运行,看控制台输出的结果


文件上传


实际操作:编写新的文件upload.jsp
<%@ page contentType="text/html;charset=UTF-8" language="java" %>
<html>
<head>
    <title>Title</title>
</head>
<body>
    <form action="${pageContext.request.contextPath}/user/quick22" method="post" enctype="multipart/form-data">
        名称<input type="text" name="username"><br/>
        文件<input type="file" name="upload"><br/>
        <input type="submit" value="提交">
    </form>
</body>
</html>
运行结果如下所示
单文件上传步骤
①导入fileupload和io坐标
<dependency>
    <groupId>commons-fileupload</groupId>
    <artifactId>commons-fileupload</artifactId>
    <version>1.4</version>
</dependency>
<dependency>
    <groupId>commons-io</groupId>
    <artifactId>commons-io</artifactId>
    <version>2.7</version>
</dependency>
②配置文件上传解析器
在spring-mvc.xml文件中配置文件上传解析器,编码如下:
<!--配置文件上传解析器-->
<bean id="multipartResolver" class="org.springframework.web.multipart.commons.CommonsMultipartResolver">
    <!--配置默认编码方式-->
    <property name="defaultEncoding" value="UTF-8"/>
    <!--配置最大上传文件的大小-->
    <property name="maxUploadSize" value="500000"/>
    <!--配置最大单个上传文件的大小-->
    <property name="maxUploadSizePerFile" value="500000"/>
</bean>
③编写文件上传代码
@RequestMapping(value = "/quick22")
@ResponseBody
public void save22(String username, MultipartFile upload) {
    System.out.println(username);
    System.out.println(upload);
}
文件上传
单文件上传
@RequestMapping(value = "/quick22")
@ResponseBody
public void save22(String username, MultipartFile upload) throws IOException {
    System.out.println(username);
    System.out.println(upload);

    // 获得上传文件的名称
    String originalFilename = upload.getOriginalFilename();
    upload.transferTo(new File("D:\\upload\\" + originalFilename));

}
步骤:获取文件上传的名称,利用getOriginalFilename方法,之后使用转换方法,将文件上传到指定目录下,结果可以在指定路径下找到相关的文件。路径名写两斜杠是转义字符。
多文件上传
在表单中添加新的文件上传的表单,之后再在方法的参数列表中新加一个参数
<form action="${pageContext.request.contextPath}/user/quick22" method="post" enctype="multipart/form-data">
    名称<input type="text" name="username"><br/>
    文件<input type="file" name="upload"><br/>
    文件<input type="file" name="upload2"><br/>
    <input type="submit" value="提交">
</form>
其中name属性名需要跟方法内的参数列表中的名字保持一致。
@RequestMapping(value = "/quick22")
@ResponseBody
public void save22(String username, MultipartFile upload, MultipartFile upload2) throws IOException {
    System.out.println(username);
    System.out.println(upload);

    // 获得上传文件的名称
    String originalFilename = upload.getOriginalFilename();
    upload.transferTo(new File("D:\\upload\\" + originalFilename));

    // 获得上传文件的名称
    String originalFilename2 = upload2.getOriginalFilename();
    upload2.transferTo(new File("D:\\upload\\" + originalFilename2));

}
最终的方法编写与之前保持一致,同样的添加相关的步骤即可。
运行结果如下所示:

多文件上传
①创建新的表单元素,将多个文件上传的表单名字修改成一样的名字
<form action="${pageContext.request.contextPath}/user/quick23" method="post" enctype="multipart/form-data">
    名称<input type="text" name="username"><br/>
    文件<input type="file" name="upload"><br/>
    文件<input type="file" name="upload"><br/>
<input type="submit" value="提交">
②编写新的quick23方法,利用数组的形式,将文件的文件名存到数组中,让后实现文件的逐一上传
@RequestMapping(value = "/quick23")
@ResponseBody
public void save23(String username, MultipartFile[] upload) throws IOException {
    System.out.println(username);
    System.out.println(upload);

    for (MultipartFile multipartFile : upload) {
        String originalFilename = multipartFile.getOriginalFilename();
        multipartFile.transferTo(new File("D:\\upload\\" + originalFilename));
    }
}
运行效果实际和上述的方法一致
十五、SpringMVC拦截器
拦截器

拦截器和过滤器的区别

拦截器的实现
实现之前的项目准备
配置相关的页面以及方法
web.xml配置文件中配置如下
<?xml version="1.0" encoding="UTF-8"?>
<web-app xmlns="http://xmlns.jcp.org/xml/ns/javaee"
         xmlns:xsi="http://www.w3.org/2001/XMLSchema-instance"
         xsi:schemaLocation="http://xmlns.jcp.org/xml/ns/javaee http://xmlns.jcp.org/xml/ns/javaee/web-app_4_0.xsd"
         version="4.0">

    <!--配置SpringMVC的前端控制器-->
    <servlet>
        <servlet-name>DispatcherServlet</servlet-name>
        <servlet-class>org.springframework.web.servlet.DispatcherServlet</servlet-class>
        <init-param>
            <param-name>contextConfigLocation</param-name>
            <param-value>classpath:spring-mvc.xml</param-value>
        </init-param>
        <load-on-startup>1</load-on-startup>
    </servlet>
    <servlet-mapping>
        <servlet-name>DispatcherServlet</servlet-name>
        <url-pattern>/</url-pattern><!--缺省值-->
    </servlet-mapping>

</web-app>
spring-mvc.xml文件配置如下:
<?xml version="1.0" encoding="UTF-8"?>
<beans xmlns="http://www.springframework.org/schema/beans"
       xmlns:xsi="http://www.w3.org/2001/XMLSchema-instance"
       xmlns:context="http://www.springframework.org/schema/context" xmlns:mvc="http://www.springframework.org/schema/mvc"
       xsi:schemaLocation="http://www.springframework.org/schema/beans
       http://www.springframework.org/schema/beans/spring-beans.xsd
       http://www.springframework.org/schema/mvc
       http://www.springframework.org/schema/mvc/spring-mvc.xsd
       http://www.springframework.org/schema/context
       http://www.springframework.org/schema/context/spring-context.xsd">

    <!--配置内部资源视图解析器-->
    <bean id="viewResolver" class="org.springframework.web.servlet.view.InternalResourceViewResolver">
        <property name="prefix" value="/jsp/"/>
        <property name="suffix" value=".jsp"/>
    </bean>

    <!--开放对哪些资源的访问-->
    <mvc:default-servlet-handler/>

    <!--Controller的组件扫描-->
    <context:component-scan base-package="com.itheima.controller"/>

    <!--配置MVC注解驱动-->
    <mvc:annotation-driven/>

    <!--配置拦截器-->
    <mvc:interceptors>
        <mvc:interceptor>
            <!--对哪些资源执行拦截操作-->
            <mvc:mapping path="/**"/>
            <bean class="com.itheima.interceptor.MyInterceptor1"/>
        </mvc:interceptor>
    </mvc:interceptors>

</beans>
页面核心代码如下:
<body>
    <h2>Hello World! ${name}</h2>
</body>
之后我们编写测试方法
@Controller
public class TargetController {
    @RequestMapping("/target")
    public ModelAndView show() {
        System.out.println("target running...");
        ModelAndView modelAndView = new ModelAndView();
        modelAndView.addObject("name", "itcast");
        modelAndView.setViewName("Hello");
        return modelAndView;
    }
}
最终在没有拦截器的情况下,运行结果如下所示:

①创建拦截器类实现HandlerInterceptor接口
创建新的类com.itheima.interceptor.MyInterceptor1,要求实现接口
public class MyInterceptor1 implements HandlerInterceptor {
    @Override
    // 在目标方法执行之前执行
    public boolean preHandle(HttpServletRequest request, HttpServletResponse response, Object handler) throws Exception {
        System.out.println("preHandle...");
        return false;
    }

    @Override
    // 在目标方法执行之后,视图对象返回之前执行
    public void postHandle(HttpServletRequest request, HttpServletResponse response, Object handler, ModelAndView modelAndView) throws Exception {
        System.out.println("postHandle...");
    }

    @Override
    // 在整个流程都执行完毕之后
    public void afterCompletion(HttpServletRequest request, HttpServletResponse response, Object handler, Exception ex) throws Exception {
        System.out.println("afterCompletion...");
    }
}
②配置拦截器
在spring-mvc.xml文件中配置拦截器
<!--配置拦截器-->
<mvc:interceptors>
    <mvc:interceptor>
        <!--对哪些资源执行拦截操作-->
        <mvc:mapping path="/**"/>
        <bean class="com.itheima.interceptor.MyInterceptor1"/>
    </mvc:interceptor>
</mvc:interceptors>
/**表示对所有的资源都进行拦截。我们可以预测到,这样进行配置之后,我们将不能访问到一切资源
③测试拦截器的拦截效果

页面中的所有元素都消失了,表示无法访问到目标方法,拦截器生效
拦截器拦截的目标方法,是由SpringMVC框架实现的
过滤器过滤的是访问的资源,是由Servlet中的规范

控制台中打印出来preHandle,其他都无法打印
@Override
// 在目标方法执行之前执行
public boolean preHandle(HttpServletRequest request, HttpServletResponse response, Object handler) throws Exception {
    System.out.println("preHandle...");
    return false;
}
这是因为这个方法,默认返回的布尔值是false,这代表的是目标方法被拦截。既然目标方法被拦截,那么之后的两个方法均不会执行(因为目标方法没有执行,按照那两个方法的实现逻辑,本就不应该被执行)
我们可以尝试将返回值更改成true,此时运行效果如下所示:

那么这个时候可以看到拦截器并没有成功拦截。打印台输出的信息表示:
目标方法被正常执行

拦截器的运用
preHandle
@Override
// 在目标方法执行之前执行
public boolean preHandle(HttpServletRequest request, HttpServletResponse response, Object handler) throws Exception {
    System.out.println("preHandle...");
    String param = request.getParameter("param");
    if ("yes".equals(param)) {
        return true;
    } else {
        request.getRequestDispatcher("Error").forward(request, response);
        return false; // 拦截器是否生效 false 表示生效 正常拦截
    }
}
这样可以在拦截器生效之后直接跳转到指定的页面,Error页面
只有在添加了?Param=yes参数之后,才能正常访问到目标方法,进入目标页面
postHandle
@Override
// 在目标方法执行之后,视图对象返回之前执行
public void postHandle(HttpServletRequest request, HttpServletResponse response, Object handler, ModelAndView modelAndView) throws Exception {
    System.out.println("postHandle...");
    modelAndView.addObject("name", "itheima");
}
编写好之后,该方法会在运行时将视图中的对象的name属性值改成itheima。运行结果如下所示

afterCompletion
@Override
// 在整个流程都执行完毕之后
public void afterCompletion(HttpServletRequest request, HttpServletResponse response, Object handler, Exception ex) throws Exception {
    System.out.println("afterCompletion...");
}
该方法是在目标方法以及上述的两个方法均执行完毕之后,才运行的方法
多个拦截器的运行顺序
我们创建多个拦截器,并添加配置,运行结果如下所示:
preHandle…
preHandle222…
target running…
postHandle222…
postHandle…
afterCompletion222…
afterCompletion…
该运行顺序是由配置中的编写顺序决定的
<!--配置拦截器-->
<mvc:interceptors>
    <mvc:interceptor>
        <!--对哪些资源执行拦截操作-->
        <mvc:mapping path="/**"/>
        <bean class="com.itheima.interceptor.MyInterceptor1"/>
    </mvc:interceptor>
    <mvc:interceptor>
        <!--对哪些资源执行拦截操作-->
        <mvc:mapping path="/**"/>
        <bean class="com.itheima.interceptor.MyInterceptor2"/>
    </mvc:interceptor>
</mvc:interceptors>
如果这个顺序调换,那么运行顺序二者也会调换。
拦截器方法说明

其中,第一个方法起着决定性作用,决定后面的方法能不能运行。
测试案例—用户登录
参看后面的练习项目
十六、SpringMVC异常处理机制
异常处理思路

异常处理两种方式
①使用SpringMVC提供的简单异常处理器SimpleMappingExceptionResolver
②实现Spring的异常处理接口HandlerExceptionResolver自定义自己的异常处理器
简单异常处理器SimpleMappingExceptionResolver
SpringMVC已经定义好该类型转换器,在使用时可以根据项目情况进行相应异常与视图的映射配置

使用步骤:在spring-mvc.xml文件中配置简单映射异常处理器
我们可以根据不同的异常,指定页面跳转到不同的结果。
<!--配置异常处理器-->
<bean class="org.springframework.web.servlet.handler.SimpleMappingExceptionResolver">
    <property name="defaultErrorView" value="error"/>
    <property name="exceptionMappings">
        <map>
            <entry key="java.lang.ClassCastException" value="error1"/>
            <entry key="com.itheima.exception.MyException" value="error2"/>
        </map>
    </property>
</bean>
自定义异常处理器
①创建异常处理器实现HandleExceptionResolver
创建com.itheima.resolver.MyExceptionResolver类,实现HandlerExceptionResolver
public class MyExceptionResolver implements HandlerExceptionResolver {

    /*
    * 参数:Exception 异常对象
    * 返回值ModelAndView:跳转到的错误视图信息
    * */
    @Override
    public ModelAndView resolveException(javax.servlet.http.HttpServletRequest httpServletRequest, javax.servlet.http.HttpServletResponse httpServletResponse, Object o, Exception e) {
        ModelAndView modelAndView = new ModelAndView();

        if (e instanceof MyException) {
            modelAndView.addObject("info", "自定义异常");
        } else if (e instanceof ClassCastException){
            modelAndView.addObject("info", "类型转换异常");
        }
        modelAndView.setViewName("error");
        return modelAndView;
    }
}
②配置异常处理器
在spring-mvc.xml文件中配置刚刚定义好的异常处理器
<!--自定义异常处理器-->
<bean class="com.itheima.resolver.MyExceptionResolver"/>
③编写异常页面
编写异常界面error.jsp页面,调用视图中的info数据
<%@ page contentType="text/html;charset=UTF-8" language="java" %>
<html>
<head>
    <title>Title</title>
</head>
<body>
    <H2>通用的错误界面</H2>
    <H2>${info}</H2>
</body>
</html>
④测试异常跳转
编写完成之后运行,会根据不同的异常,跳转显示不同的info信息值。
知识要点
异常处理方式
- 配置简单异常处理器 SimpleMappingExceptionResolve
- 自定义异常处理器
自定义异常处理步骤
- ①创建异常处理器类实现 HandlerExceptionResolver
- ②配置异常处理器
- ③编写异常页面
- ④测试异常跳转
练习:Spring环境的搭建

①创建工程itheima_spring_test
②导入静态页面

③导入需要的坐标
在pom.xml中导入需要的坐标
<dependencies>
    <dependency>
        <groupId>mysql</groupId>
        <artifactId>mysql-connector-java</artifactId>
        <version>5.1.32</version>
    </dependency>
    <dependency>
        <groupId>c3p0</groupId>
        <artifactId>c3p0</artifactId>
        <version>0.9.1.2</version>
    </dependency>
    <dependency>
        <groupId>com.alibaba</groupId>
        <artifactId>druid</artifactId>
        <version>1.1.10</version>
    </dependency>
    <dependency>
        <groupId>junit</groupId>
        <artifactId>junit</artifactId>
        <version>4.12</version>
        <scope>test</scope>
    </dependency>
    <dependency>
        <groupId>org.springframework</groupId>
        <artifactId>spring-context</artifactId>
        <version>5.0.5.RELEASE</version>
    </dependency>
    <dependency>
        <groupId>org.springframework</groupId>
        <artifactId>spring-test</artifactId>
        <version>5.0.5.RELEASE</version>
    </dependency>
    <dependency>
        <groupId>org.springframework</groupId>
        <artifactId>spring-web</artifactId>
        <version>5.0.5.RELEASE</version>
    </dependency>
    <dependency>
        <groupId>org.springframework</groupId>
        <artifactId>spring-webmvc</artifactId>
        <version>5.0.5.RELEASE</version>
    </dependency>
    <dependency>
        <groupId>javax.servlet</groupId>
        <artifactId>javax.servlet-api</artifactId>
        <version>3.0.1</version>
        <scope>provided</scope>
    </dependency>
    <dependency>
        <groupId>javax.servlet.jsp</groupId>
        <artifactId>javax.servlet.jsp-api</artifactId>
        <version>2.2.1</version>
        <scope>provided</scope>
    </dependency>
    <dependency>
        <groupId>com.fasterxml.jackson.core</groupId>
        <artifactId>jackson-core</artifactId>
        <version>2.9.0</version>
    </dependency>
    <dependency>
        <groupId>com.fasterxml.jackson.core</groupId>
        <artifactId>jackson-databind</artifactId>
        <version>2.9.0</version>
    </dependency>
    <dependency>
        <groupId>com.fasterxml.jackson.core</groupId>
        <artifactId>jackson-annotations</artifactId>
        <version>2.9.0</version>
    </dependency>
    <dependency>
        <groupId>commons-fileupload</groupId>
        <artifactId>commons-fileupload</artifactId>
        <version>1.3.1</version>
    </dependency>
    <dependency>
        <groupId>commons-io</groupId>
        <artifactId>commons-io</artifactId>
        <version>2.3</version>
    </dependency>
    <dependency>
        <groupId>commons-logging</groupId>
        <artifactId>commons-logging</artifactId>
        <version>1.2</version>
    </dependency>
    <dependency>
        <groupId>org.slf4j</groupId>
        <artifactId>slf4j-log4j12</artifactId>
        <version>1.7.7</version>
    </dependency>
    <dependency>
        <groupId>log4j</groupId>
        <artifactId>log4j</artifactId>
        <version>1.2.17</version>
    </dependency>
    <dependency>
        <groupId>org.springframework</groupId>
        <artifactId>spring-jdbc</artifactId>
        <version>5.0.5.RELEASE</version>
    </dependency>
    <dependency>
        <groupId>org.springframework</groupId>
        <artifactId>spring-tx</artifactId>
        <version>5.0.5.RELEASE</version>
    </dependency>
    <dependency>
        <groupId>jstl</groupId>
        <artifactId>jstl</artifactId>
        <version>1.2</version>
    </dependency>
</dependencies>
④创建包结构(controller、service、dao、domain、utils)
创建四层结构

⑤导入数据库脚本(test.sql文件)
导入数据库脚本,执行脚本,创建新的数据库

⑥创建POJO类(User.java和Role.java)
创建新的实体层domain层,创建对应的两个实体类Role和User
⑦创建配置文件(applicationContext.xml、spring-mvc.xml、jdbc.properties、log4j.properties)
这一步骤涉及到三大框架的整合使用。
对于log4j.properties文件,我们直接寻找到相关的文件,导入即可。
### direct log messages to stdout ###
log4j.appender.stdout=org.apache.log4j.ConsoleAppender
log4j.appender.stdout.Target=System.out
log4j.appender.stdout.layout=org.apache.log4j.PatternLayout
log4j.appender.stdout.layout.ConversionPattern=%d{ABSOLUTE} %5p %c{1}:%L - %m%n

### direct messages to file mylog.log ###
log4j.appender.file=org.apache.log4j.FileAppender
log4j.appender.file.File=c:/mylog.log
log4j.appender.file.layout=org.apache.log4j.PatternLayout
log4j.appender.file.layout.ConversionPattern=%d{ABSOLUTE} %5p %c{1}:%L - %m%n

### set log levels - for more verbose logging change 'info' to 'debug' ###

log4j.rootLogger=info, stdout
对于jdbc.properties文件,我们根据数据库中的相关数据,配置好jdbc使用时需要的数据,配置即可。
jdbc.driver=com.mysql.jdbc.Driver
jdbc.url=jdbc.mysql://localhost:3306/test
jdbc.username=root
jdbc.password=123456
一、在创建这些配置文件的时候,我们的目的是将三大框架的结构进行整合。
明白使用步骤,我们首先在创建项目时候生成的web.xml文件中继续必要的配置
<?xml version="1.0" encoding="UTF-8"?>
<web-app xmlns="http://xmlns.jcp.org/xml/ns/javaee"
         xmlns:xsi="http://www.w3.org/2001/XMLSchema-instance"
         xsi:schemaLocation="http://xmlns.jcp.org/xml/ns/javaee http://xmlns.jcp.org/xml/ns/javaee/web-app_4_0.xsd"
         version="4.0">

    <!--Spring 层面的配置文件-->
    <!--全局的初始化参数-->
    <context-param>
        <param-name>contextConfigLocation</param-name>
        <param-value>classpath:applicationContext.xml</param-value>
    </context-param>
    <!--配置 Spring 的监听器-->
    <listener>
        <listener-class>org.springframework.web.context.ContextLoaderListener</listener-class>
    </listener>

    <!--SpringMVC 层面的配置文件-->
    <!--SpringMVC的前端控制器-->
    <servlet>
        <servlet-name>DispatcherServlet</servlet-name>
        <servlet-class>org.springframework.web.servlet.DispatcherServlet</servlet-class>
        <init-param>
            <param-name>contextConfigLocation</param-name>
            <param-value>classpath:spring-mvc.xml</param-value>
        </init-param>
        <load-on-startup>2</load-on-startup>
    </servlet>
    <servlet-mapping>
        <servlet-name>DispatcherServlet</servlet-name>
        <url-pattern>/</url-pattern>
    </servlet-mapping>

</web-app>
对于web.xm文件中,我们要配置框架的使用,我们要先对Spring框架和SpringMVC框架进行配置,之后才能正常使用
二、配置Spring框架的配置文件applicationContext.xml文件
<?xml version="1.0" encoding="UTF-8"?>
<beans xmlns="http://www.springframework.org/schema/beans"
       xmlns:context="http://www.springframework.org/schema/context"
       xmlns:xsi="http://www.w3.org/2001/XMLSchema-instance"
       xsi:schemaLocation="
       http://www.springframework.org/schema/beans http://www.springframework.org/schema/beans/spring-beans.xsd
       http://www.springframework.org/schema/context http://www.springframework.org/schema/context/spring-context.xsd
">

    <!--1. 加载 jdbc.properties 配置文件-->
    <context:property-placeholder location="classpath:jdbc.properties"/>

    <!--2. 配置数据源-->
    <bean id="dataSource" class="com.mchange.v2.c3p0.ComboPooledDataSource">
        <property name="driverClass" value="${jdbc.driver}"/>
        <property name="jdbcUrl" value="${jdbc.url}"/>
        <property name="user" value="${jdbc.username}"/>
        <property name="password" value="${jdbc.password}"/>
    </bean>

    <!--3. 配置 jdbcTemplate 对象-->
    <bean id="jdbcTemplate" class="org.springframework.jdbc.core.JdbcTemplate">
        <property name="dataSource" ref="dataSource"/>
    </bean>

</beans>
三、配置SpringMVC框架必要的配置文件spring-mvc.xml文件
<?xml version="1.0" encoding="UTF-8"?>
<beans xmlns="http://www.springframework.org/schema/beans"
       xmlns:mvc="http://www.springframework.org/schema/mvc"
       xmlns:xsi="http://www.w3.org/2001/XMLSchema-instance"
       xsi:schemaLocation="
       http://www.springframework.org/schema/beans http://www.springframework.org/schema/beans/spring-beans.xsd
       http://www.springframework.org/schema/mvc http://www.springframework.org/schema/mvc/spring-mvc.xsd">

    <!--1. MVC注解驱动-->
    <mvc:annotation-driven/>

    <!--2. 内部资源视图解析器-->
    <bean class="org.springframework.web.servlet.view.InternalResourceViewResolver">
        <property name="prefix" value="/pages/"/>
        <property name="suffix" value=".jsp"/>
    </bean>

    <!--3. 静态资源的访问权限开放-->
    <mvc:default-servlet-handler/>

</beans>
至此为止,关于环境的搭建暂时结束。
练习:用户和角色的关系
上述项目中,用户和角色的关系属于多对多的关系,一个用户可以拥有多个角色,一个角色也可以对应多个用户。

练习:角色列表的操作
步骤如下:
①点击角色管理菜单发送请求到服务器端(修改角色管理菜单的url地址)
②创建RoleController和showList()方法
③创建RoleService和showList()方法
④创建RoleDao和findAlI()方法
⑤使用JdbcTemplate完成查询操作
⑥将查询数据存储到Model中
⑦转发到role-list.jsp页面进行展示
操作:
①修改URL地址
<li><a
   href="${pageContext.request.contextPath}/role/findAll.do">角色管理</a></li>

<li class="active">全部角色</li>
②创建RoleController和showList方法
@RequestMapping("/role")
@Controller
public class RoleController {

    @Autowired
    private RoleService roleService;
    public void setRoleService(RoleService roleService) {
        this.roleService = roleService;
    }

    @RequestMapping("/list")
    public ModelAndView list() {
        ModelAndView modelAndView = new ModelAndView();
        List<Role> roleList = roleService.list();
        // 设置模型
        modelAndView.addObject("roleList", roleList);
        // 设置视图
        modelAndView.setViewName("role-list");
        return modelAndView;
    }
}
③创建RoleService和showList方法
public class RoleServiceImpl implements RoleService {

    private RoleDao roleDao;
    public void setRoleDao(RoleDao roleDao) {
        this.roleDao = roleDao;
    }

    @Override
    public List<Role> list() {
        List<Role> roleList = roleDao.findAll();
        return roleList;
    }
}
④创建RoleDao和findAll方法
public class RoleDaoImpl implements RoleDao {

    private JdbcTemplate jdbcTemplate;
    public void setJdbcTemplate(JdbcTemplate jdbcTemplate) {
        this.jdbcTemplate = jdbcTemplate;
    }

    @Override
    public List<Role> findAll() {
        List<Role> roleList = jdbcTemplate.query("select * from sys_role", new BeanPropertyRowMapper<Role>(Role.class));
        return roleList;
    }
}
⑤使用JdbcTemplate完成查询操作
利用第四步中的方法,完成查询操作
⑥将查询数据存储到Model中
<c:forEach items="${roleList}" var="role">
<tr>
   <td><input name="ids" type="checkbox"></td>
   <td>${role.id}</td>
   <td>${role.roleName}</td>
   <td>${role.roleDesc}</td>
   <td class="text-center">
      <a href="#" class="btn bg-olive btn-xs">删除</a>
   </td>
</tr>
</c:forEach>
⑦转发到role-list.jsp文件页面进行展示
运行整个项目即可。


 199
199


 被折叠的 条评论
为什么被折叠?
被折叠的 条评论
为什么被折叠?
 到【灌水乐园】发言


